
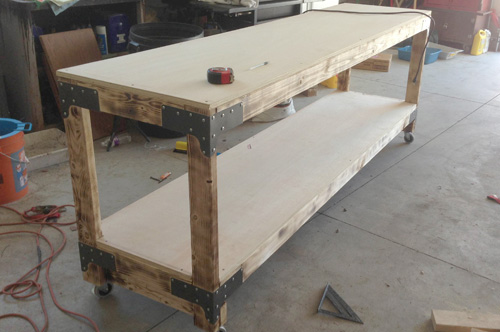
This weekend we built the first of four heavy duty workbenches for the OPC workshop! This project was very simple, and the design works not only for a workbench (as we’re using it), but also for sturdy storage shelves in a basement or garage. We built a two-shelf bench, but this design can be easily modified for three or four-shelf models.

Our goal for each workbench is an inexpensive, free-standing, movable table that can support a lot of weight (400+ lbs. total), with no perceptible deflection along the entire 8′ length of the upper shelf. We intend to use the lower shelf for tool storage (where deflection issues are less important), and the upper shelf for a combination of storage and work space (where deflection issues are more important).
All of the materials for this table came from our local Home Depot, and we spent a little over $120 total. After getting everything to the shop, it took about three hours to cut the wood and assemble the parts.

Design Overview: The general plan for this workbench is to create a reinforced frame of 2×4’s with a lower and upper plywood shelf. This might not sound very original, but I’d challenge you to find a sturdier design at this price point. The directions we provide build a workbench with a shelf measuring 2′ wide x 8′ long x 40″ tall. We strongly suggest keeping the width and length the same, because then you’ll need only one sheet of plywood, and you’ll minimize the number of cuts.
Materials List
Here’s the shopping list. All the materials can be found at your local home improvement center.
- (1) sheet of 3/4″ sanded plywood
- (9) 2×4’s
- (8) Simpson rigid tie connectors (see below)
- (200 count) #8 x 1-1/4″ screws
- (4 count) 3″ screws (see below)
- (2) 6′ flat, iron bar (see below)
- (1) tube of heavy-duty construction adhesive
- (4) 3″ locking casters (150 lb.+ rating per caster recommended)
Plywood: We chose cabinet grade 3/4″ plywood for the surface. Remember, 3/4″ plywood is actually 23/32″ thick, and that’s how it’s listed in the store. Cabinet grade plywood provides a relatively smooth surface that will be mostly free of splinters. At 3/4″ thick, it will easily absorb deflection over a 12″ wide span. Look for a sheet of plywood with no damage or marring.


We also decided to let Home Depot rip the sheet using their panel saw rather than cutting it ourselves. In our area, both Lowe’s and Home Depot will cut a sheet of plywood twice per sheet, free of charge.

Simpson Ties: Simpson ties are usually found in the metal building brackets rack. These rigid tie connectors are used to secure two wood members (forming a 90° corner) to a vertical post. If that sounds confusing, just imagine three 2×4’s intersecting to form a corner.


Screws: Make sure the screws you select have a large, flat head that will sit tightly against the Simpson ties without going through the pre-drilled holes. These Simpson ties are designed for #8 screws, which were sold in a rack right next to the ties.
Flat Iron Bar: The flat, iron bar is a thick strap measuring approximately 6′ long x 1″ wide. We used two bars on the top shelf to improve the horizontal rigidity of our workbench. It can be found with other pieces of angle iron at most home improvement centers.
Tools
- Drill/driver
- Impact driver (if not available, a drill/driver will suffice)
- Metal drill bit (for drilling the reinforcing strap. If no straps are used, this isn’t required)
- Miter saw (preferable for cutting 2x4s, although a hand saw or circular saw would also work)
- Jigsaw (or a hand saw)
Step 1: Cut the Lumber to Length
Like I mentioned, we had a Home Depot associate rip the plywood sheet in half lengthwise, creating two 2′ x 8′ pieces. Almost all of the remaining cuts involve trimming 2×4’s to the appropriate length.
Here are the 2×4 lengths you’ll need:
- (5) 93″ for the lengthwise supports
- (4) 17″ for the width-wise supports
- (4) 36″ for the legs
- (2) 24″ for the caster supports

Tip (Updated 1/15/2012): We’ve begun building workbenches for specific tools (like our miter saw), and we have adjusted the leg height so that the top of miter saw cutting surface perfectly matches our other workbenches. This is beneficial because now any of our workbenches can act as an infeed or outfeed support. For this an other workbench ideas, check out our four workbench mod suggestions.

Step 2: Add Reinforcing Iron Supports
Our biggest complaint with many DIY workbenches is their limited vertical rigidity. Most other workbenches will sag in the middle, because it’s difficult to support an 8′ span without some deflection. Furthermore, adding extra width-wise members does not increase vertical support over the entire length. To address this problem, we used the flat, iron bars to reinforce two of the lengthwise 2×4’s.

Using a metal drill bit, we drilled five pilot holes through the iron.

Next, we put down a bead of Liquid Nails adhesive.

We followed that up with five screws, keeping the iron flush with the edge.

Step 3: Build the Workbench Frame
It’s time to start assembling the frame, and we began with the workbench top (rather than the shelf). Placing a Simpson tie at each corner, we used an impact driver to put in the screws. If you find the 2×4’s are bowed, put them in crown-side up (meaning, arched down). It’s helpful to use a scrap piece of 2×4 to ensure that adjacent pieces line up at the same height.

You can see in the picture below that the table legs come all the way up even with the top of the adjacent 2×4 supports. This is important. If they are not aligned, your dimensions will be wrong, and the corners will be weaker.

We secured another lengthwise support down the middle of the workbench (12″ on center). We put two 3″ screws on each end to hold it in place.

Step 4: Build the Shelf Frame
We constructed the shelf in a very similar fashion using Simpson ties at all four corners. We flipped the table upside-down to slide the ties on, and then positioned them 7″ up the leg. The location is flexible, but they all should be kept consistent. One difference between the lower shelf and upper shelf is that we didn’t use the iron or the extra support member on the lower shelf. This shelf will be plenty strong, and we weren’t concerned with a little bit of deflection here.


Use the remaining lengthwise and width-wise supports to build the shelf frame.
Step 5: Cut the Shelf Corners
The plywood shelf needs to have notches cut from each corner to account for the table legs. Grab a scrap piece of 2×4 and trace the outline, being careful to orient it correctly. Use a jigsaw to cut them out.


Step 6: Screw Down the Plywood
Slide the shelf in place and put screws around the perimeter every 20″ or so. Countersink the screws below the surface to prevent things getting snagged on them. Do the same for the workbench top, and remember to put screws in the middle support as well. You may find that you’ll need to wrack the frame a bit to keep everything square and all the edges lined up.

Tip: We’ve incorporated some reader feedback and found that creating torsion boxes further improves the rigidity of the top shelf. This is an easy addition because all it involves is gluing and screwing another piece of plywood to the underside of the top shelf. To see more pictures and information, check out our update with four workbench modifications.

Step 7: Caster Supports and Casters
We wanted to install casters so that our workbench could move about the shop as necessary. We found 3″, locking casters that were rated for 110 lbs each (440 lbs combined). Screwing them into the end-grain of the table legs doesn’t provide the best hold so we added a cross member between the two legs.


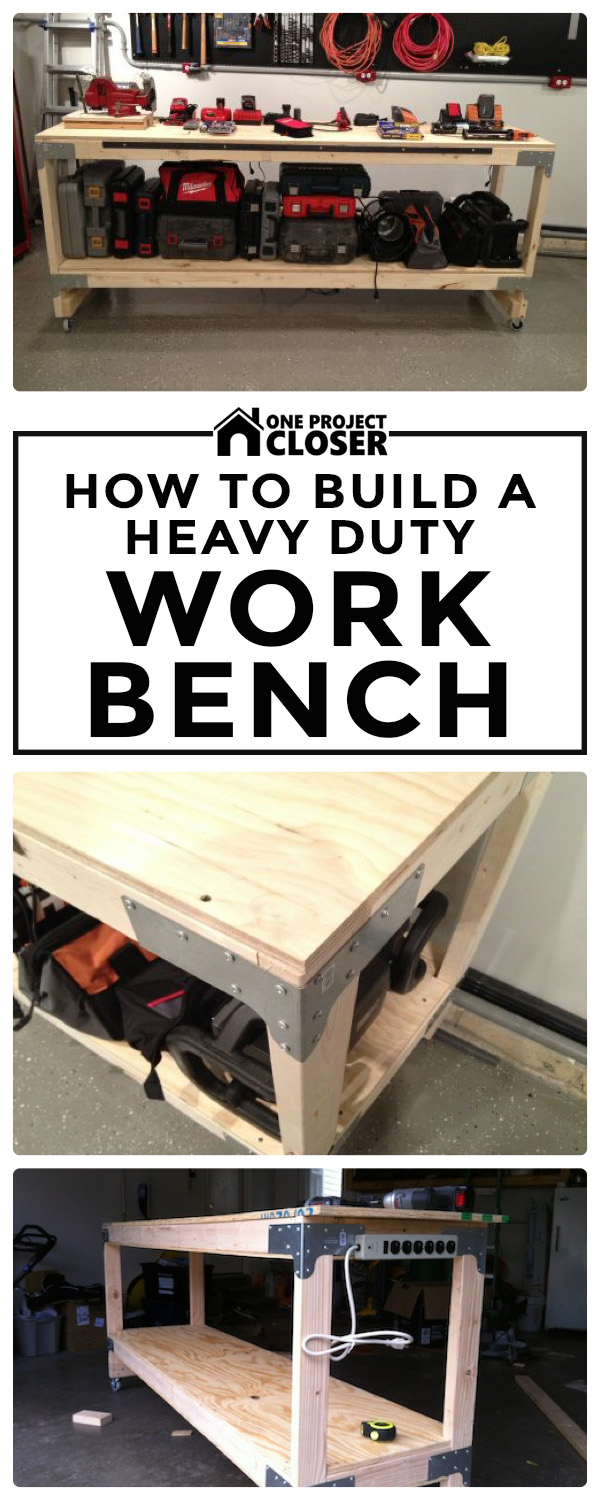
The Finished Product
We’re really pleased with the finished product; the workbench top feels very solid. Even with a couple of hundred pounds on the surface, we didn’t notice any sagging. It’ll be a great surface for future projects, and the shelf is already getting loaded up.


For additional ideas about building shelves, check out our other article describing how we built shed storage shelves.
Reader Workbenches
We’ve had a significant number of readers let us know that they’ve built workbenches from our design, and they all love ’em! If anyone else has built (or is planning on building) one of these workbenches, we hope you’ll send in pictures so that we can feature them here.
From Todd B.
I just finished and this workbench is awesome. It is super sturdy and rugged. Thanks for the idea! This thing will last forever.


From Ryan M.


From Mark S.
This is probably one of many but I really enjoyed the design you created.
I needed a custom size for my motorcycle shed to allow for a lift between the workbenches. I decided to go with 4×4 supports so used the Simpson Strong-ties to fit that, then I had a local powder coating shop color them gloss black. I also used the Simpson post base (that comes in black already) so I could anchor the bench to the floor if I wanted.

From Kyle D.
I built the bench from the design from above. I love it. Very strong and mobile. Perfect fit for my garage.


From Matt D.
I love the wheels, great to be able to move it to the middle of the garage when using it for big projects and put it aside when not in use.

From Jared
“Used your plans with a little modification to build my workbench. Added a 12 plug strip to the underside, and gave the brackets a coat of paint before starting.”
Pin for later
Enjoyed this tutorial but want to reference it for later? Pin this image and share with with your friends also. THANK YOU!

That is awesome. Making a workbench is on my to-do list. I don’t have as big a space for a bench that big, so I think I’m going to use this tutorial and half it. Thank you!
Tom
Tom, I think this is the first time I’ve seen you comment (or at least, the first time I remember seeing your Gravatar!). Welcome to OPC! Have you created a project rewards account yet?
Very nice job, but I do have two suggestions to help you improve the rigidity more… The first is to not only screw the plywood down, but to glue it. The second is to place a 3/8 or 1/2 sheet under the frame (also glued & screwed) You have now basically created a box beam which can handle quite a bit more of a load
If you are worried about replacing the 3/4 sheet if it ever gets damaged, using the above you could easily use a 5/8 sheet instead (the combination should easilhandlede the loads) & simply screw a piece of luan, melamine, etc… to the top of that as a disposable piece
We debated gluing the plywood as well, especially because we already had the Liquid Nails handy. We opted not to because I thought it might be a little overkill. When we build the next one, I’ll glue the plywood too.
I hadn’t considered the additional plywood underneath. Good tip for the readers.
I like the idea of a disposable piece on top. That’s something we’ll have to consider. Thanks for the great suggestions!
Sean, love the box beam addition to the instructions. We have another 3 tables to build. We’ll have to give this a try on one of them and compare the deflection of the tables!
With so many to build you can customize them for uses. You can box beam one (or torsion box), have one with a thicker top for bench dog holes and a wood working vice, put a piece of stainless on one for easy cleanup of messy items, and have things like a metal vice, bench grinder, and drill press mounted to the first one you made. If you have a portable table saw you could make one of your benches the same height so you could use it for outfeed support (and cover it with melamine).
I wish I had the space for 4 benches. Too bad we need the garage for cars in the winter.
Sean, we’ll definitely write more about this, but today we built another table and made the top shelf the torsion box/box beam and…. WOW – unbelievable how solid it is. I got my 250lb. self on the top of the shelf and started jumping and ethan could not detect any deflection on the surface. Great tip. We’ll be updating this article to reflect these additional instructions.
My pleasure, now you can make the check payable to….
Nah, just kidding you & besides I can’t take full credit for it anyways – I think I heard about it first from Norm Abrahms & you will also see that same principle is helps what makes SIPS panels so strong, etc… But yeah it is quite amazing how much stronger it makes it & glad I could help
I am interested in building this bench in my Hobby space. can you explain what a box beam is please, maybe a picture?
Very nice. May I suggest attaching some type of power strip underneath it?
Icarus, I think that’s definitely coming to the design… For one, with all the battery chargers on this table, we simply don’t have enough plugs. For two, if you use the table for a table saw or mitre saw, it’s nice to have the permanent plug there. Good tip!
I have a similar bench but with a few additions and changes. The first is that I doubled up the top sheet of plywood. It works a lot better to mount things to it. Bench dog holes are stiffer. Vice is a lot more solid. I used cheaper A/C plywood and just sanded the top. The second thing is that I added a very short lip on the back of the top to keep things from sliding off the back of the bench. Mine isn’t on wheels though and is mounted against a wall. The lip also makes it easier to sweep the top. The third thing I did was to not make the bottom shelf come all the way out to the front edge. It is set back about 6 inches. That makes for a really comfortable foot rest when I have a stool up at the bench. The forth thing is that I built a couple of drawers the are mounted under the top to hold boxes of screws and nails. I love the addition of the flat bar stock.
The great thing about workbenches is that they can customized for a person’s needs. They are a great first project for any aspiring DIY’er.
I think we need to have a “Send in your workbench” photo contest so we can get all these ideas into one place. I really like Sean’s suggestion above for the replaceable luan. What thickness plywood did you install? Two sheets of 3/4″?
1/2 and 5/8.
Looks nice and solid with the Simpson hangers and the extra iron bar. not having the space for a 8′ work bench in my garage, I only have a 4′ one.
Since I have a foundation in the way, I put my shelf right at that level, so I could keep the bench right up against the wall. The rear legs are shorter and sit on top of the foundation, the front legs go all the way to the floor.
I know exactly what you mean about the shelf on the foundation ledge. We considered doing something like that until we settled on the mobile versions of the tables… Did you also fasten the bench to the studs on the wall?
Yep, since the legs aren’t really tied together front to back, I really needed the wall to add rigidity, it also let me get it perfectly level.
Very nice work!
I used the same Simpson plates in my 4′ build, and they’ve held up well after a few years. Instead of going with a plywood top, I opted for Ikea countertop material. For my next self-built table, I’ll likely go with bamboo. Or maybe 2/3 bamboo, 1/3 easily replaceable/repairable material.
That is a nice looking workbench. I also have this on my to-do list. I was thinking about using a Kreg jig to join everything together (but that may not be quite as heavy-duty). Have you ever thought about staining the top and adding polyurethane to it. Might be worth it if you are going to have it around for a while.
We did consider staining the top, but I think we’re going to opt for the replaceable luan surface that Sean recommended. And possibly one table with a thicker surface for bench dog holes like Jeff recommends.
While we’re big fans of the kreg jig, I think it’s a better solution for finished carpentry than this application. The simpson plates are going to give you a lot more strength and rigidity in the joint, which is important since the plates are what prevents the entire shelf from racking (in other words, the simpson plates act as diagonal braces on the end of the wood. If you didn’t have them you’d also need some diagonal bracing to prevent your rectangular table from turning into a parallelogram )
A rectangle IS a parallelogram. But I think we all know what you mean. I have built a few work benches that were just never solid enough because I tried to just use what I had on hand. It’s nice to know the principle behind these braces and that they function to strengthen the same way a diagonal bracing beam would. Thanks for all the valuable tips!
Nice clean bench / Ethan nap station gents! I like the Simpson Strong Ties too, they’re not only solid but also give a nice industrial look to the corners. Having the mobility with the casters is handy too. Slick!
this is a very nice and simple design of sturdy bench. one suggestion i have is adding a reciever hitch on the bottom side of table, then weld a square tubing that fits the receiver and a piece of plate to the tubing, then mount your vice on the plate. What you have now is a removable vice that can moved out of the way quickly when needed. The same idea can be applied to your miter saw. Mount the reciever hitch on the side (short side) to where the table of the saw and the table itself are leveled, so now you have a an 8ft long leveled surface to put your boards on and cut and the miter saw could be removable also . Now you dont have to be bend over on the floor, as pictured, making sure your board is leveled etc. Hope this helps. ill try to find the links of where i saw this idea.
I totally get what you’re saying here and like the idea. Seems like it might be a little complex though to get your table saw supported by a welded tube? Right now, we’re likely going to build to smaller, mobile mini-table-units that will be tailored to our table saw and mitre saw. The goal will be to make these mini-tables a height at which the table saw or mitre saw surface are aligned to our larger tables’ surfaces. Then we can use the larger tables as infeed or outfeed (or both) as it makes sense.
Love this project, but I have a few questions: With your emphasis on eliminating deflection, why not simply have added two more width-wise supports, top and bottom, right in the center of the bench, a third pair of vertical posts (joined to the center supports at each end), and one more pair of casters (one under each center post)? It would cost a bit more money, but (as long as your shop floor is relatively flat) I believe it’d almost guarantee no deflection of the bench top, and furthermore, would enhance the rigidity of the overall infrastructure. Also, why aren’t there any 45-degree braces at each post top and bottom? I know the Simpson ties are very strong, but braces would take that much more horizontal load off the joints when wheeling the benches around. That’s it…nice job, guys!
Hey John, We thought about adding a third vertical post but decided against it for the better storage and, like you point out, because our way is cheaper. Making triangles (with the angled braces) is a great way to support the bench, but these Simpson ties really eliminate the need. And again, it keeps the bottom shelf very open for storage.
Great to see you commenting, and I hope you’ll chime in again!
John, one more thing: we are planning to run an update, but after we glued and screwed a piece of plywood to both the top and bottom, the top shelf is now incredibly rigid. It almost blows my mind, actually. I got my 250 lb. self onto the top shelf and jumped and Ethan could not see deflection. The suggestion for the additional plywood underneath came from Sean @ SLS (see above comments) – and for essentially an additional 20 bucks and just 3/8″ of space consumed, seems like the best answer so far. We’re going to do some rigidity tests between our two benches in the near future just to see how they both perform.
Ethan & Fred,
Thanks very much for your responses. I’m looking forward to any future updates you do on your work bench building efforts. And be forewarned: I have no shortage of need for workbenches (which is a roundabout way of saying that I need more benches!). I’m going to build one based on your original design, and try out a few of my own variations on it, as well. So we’ll see who deflects the least — in other words, the friendly competition is on! 😀
~John
Sounds good! We’re looking forward to some great pictures or a video!
Great project…I am prepariing to build at least one bench for my shop….how did you decide on the 40 inch height?
Thanks . Any input is appreciated
Sam
Sam,
We actually went for a comfortable work height that maximized storage location under the top shelf.
In our shop, we mounted receptacles sideways at around 44 inches high, with pegboard starting right above those at about 47 inches. 40″ put the surface just below the receptacles and maximized the height below.
Both Ethan and I are pretty tall, so 40″ is pretty manageable for us. I would suggest building the bench with your use in mind. (i.e., if you’re mostly going to stand it front of it, build for that. If you plan to put a stool in front of it, build for that). Note that one suggestion above is to recess the bottom shelf if you plan to sit in front of it so you’ll have good knee room.
Thanks. I am glad I found your site….looking forward to more good info and projects!
Hope you and yours have a safe New Year holiday.
Sam
Hey Sam, I see Fred got you an answer before I did. Hope to see you around the site again!
Great stuff! Quick question where did you source your caster wheels?
Thanks!
Jonathan
Hey Jonathan, The wheels are available at Home Depot and Lowe’s. Thanks for stopping by and we hope to see you around again!
Thanks for the detailed article and followup…only, it’s making my decision on what to build harder, rather than easier!
I’ll be replacing my existing workbench with this plan very soon! Thanks for the great tutorial! I’ll send you pics when I get it done.
Looking forward to your pictures!
If I had the garage space, the money, and the time…… My Dad always talks about being buried in a wooden casket. This might be a nice platform to wheel it in and out of the church! A wooden casket build might be something you could feature!
Great write up on a fairly common problem – where to work on all of my DIY projects??? This seems to be a straightforward answer. I’m headed to Home Depot tonight to grab the Simpson ties and put this together for myself! I think that I will be putting a setback in where the bottom shelf is so I can fit my stools under it though. A submit your own workbench picture is a great idea! Keep the good stuff coming!
I like this simple design a lot. I already built a workbench that is more like a piece of furniture and it was a good challenge. I did want to point one thing out though. The “Reinforcing Iron Supports” are not doing much for you in the location you put them. If you are going to add them (which I don’t think you need them honestly), put them on the bottom side of the 2×4 stretcher since that is the side that is in tension. The steel bar is MUCH stronger in tension than in compression as it is placed in your picture. This comes from an understanding of bending stress in a uniform member. The engineer in me felt the need to provide that PSA. Otherwise, the whole design follows the KISS principle and I fully plan to build one like what you have done for your compound miter saw. Excellent write up.
Hi Travis, Thanks for the comment.
Maybe I’m thinking about it wrong (and you can better explain it to me)- the steel bar bends from side-to-side but not up-and-down. Since we’re trying to improve the up-and-down rigidity, doesn’t it make sense to place the steel bar where we have it?
Glad you like the workbench, and I hope to see you around OPC again!
Ethan, when you push down on the top, the sides bend down as you stated. The bottom of the beam stretches and the top compresses. All materials are stronger in compression than tension so what needs additional strengthening is the side of the beam in tension. Now the steel flat bar is very strong when being pulled but if you were to push the ends towards each other, the bar would just buckle. So you put the steel strap loaded in its strongest direction on the weakest side of the beam – where everything is in tension. By fastening the bar to the side, you are constraining it from the weak side-to-side deflection. I hope this helps explain but you would be much better served to put your strip on the bottom side.
I think the confusion here is what Travis means by “bottom”. I don’t hink he’s referring to the underside (the 1-/12″ edge) of the 2×4. I think he means the “lower” edge of the 3-1/2″ side, rather that the upper edge right up by the top.
In other words, instead of:
**********************************************************
[[[[[[[[[[[[[HERE]]]]]]]]]]]]]]
**********************************************************
…I think he means:
**********************************************************
[[[[[[[[[[[[[HERE]]]]]]]]]]]]]]
**********************************************************
Or I could just be wrong. 🙂
well that didn’t display correctly. Let’s try again:
********************
NOT HERE
*
*
********************
********************
*
*
HERE
********************
Fred, you understood correctly the location I was referring to except that either the underside (the 1-/12″ edge) of the 2×4 OR the lower†edge of the 3-1/2″ side would be fine to add support. Great pictures BTW. It’s funny, I tried explaining bending stresses (tension and compression) and how the neutral axis works to my wife last night and her eyes just glazed over. So I’m sorry if I glazed anybody’s eyes in the previous discussion. I’m an engineer, I need diagrams to explain things much like an Italian (and others) need their hands to talk.
This is the project that brought me to this site, coming from Art of Manliness. I like the design a lot, but I have to build a shed/workshop first. Once upon a time in a workshop lost to antiquity I had a 10ft work bench made of 2x6x10’s. Sag was not a problem, because I had legs in the middle of the table as well. Also I have to say that a 4×8 sheet of stainless screwed down on the top would go a long way to preserving your table top. I taught metal working (nothing you’d be looking to do on this site) but I had more students pressing a chuck of metal or wood down on the top, and then trying to run a drill bit through it. Of course then they would get the safety lecture, and the lecture on using the proper tool to accomplish the task. Thanks for this design, and I will be using it very soon.
Hi Felix, Welcome to OPC and thanks for leaving a comment! We thought about putting some legs in the middle, but ultimately decided to keep the space as open as possible. The stainless sounds like a great idea especially for our bench top grinder. Any ideas about where it’s available?
I hope to see you around OPC again.
Most metal fabrication shops are also retailers of steel. Here in Sacramento we have a place called blue collar supply. We used to have S&K Steel, but the owner decided the retired life was much better.
Awesome project. I’ve just finished a miniature (3′) one for my miter saw and I’m about to build a second one with the remaining plywood, but I’ve got a problem. Even with the locking casters locked, it’s easy to make the table move about 2″ in any direction. Is this the expected outcome, or have I just used the wrong casters? This will drive me crazy, since I regularly break out the tenon saw for fine work.
Lachlan, is this because the casters are flipping around?
Yes, I think flipping correctly describes the problem. It’s really hard to think of terminology to accurately describe the problem. The wheel itself is locked, but the bearing that lets it pivot is free. So the wheel can pivot (like when you turn the steering wheel in a parked car). Unlike a car, the wheel isn’t centered under the steering pivot, so the pivoting causes the workbench to move.
I’ve just tried making sure that all the wheels are pointing outwards at 90 degrees to each-other, which ought to reduce the range of motion available. This approximately halves the movement, but it’s still noticeable.
For anyone who has the same issue, just replace the two casters at the sawing end with two wheels. In theory, a set of locking wheels would be better than the non-locking ones I used, but they wouldn’t really affect the axis I’m interested in, so I’m happy with the cheaper option.
I may have to ‘borrow’ some of this for my next work bench with very few modifications. Quick question/suggestion, when installing the table top beams (or supports as i think they were referred to as) I would recommend IMHO that the steel reinforcement would be better suited on the tension side of the beam, in other words on the bottom of the beam nor nearest the bottom vs the top as you have shown in the photo.
Placing the steel at the bottom allows the steel to work in tension where it is much more rigid than the wood (E_steel >> E_wood) (think singly reinforced concrete beams). If splintering was not an issue i would think installing 1.5″ wide strip on the bottom 2x side of the 2×4 would be most optimal. Since wood does splinter i would maybe have turned your beams upside down but left the steel attached to the 4x side.
The simpson ties are a great idea. I’ve been looking for some plans to rebuild my basement workbench, this looks awesome!
-Jason
What height do you guys use for your tabletops (for the bench, miter, etc)? 36 seems to work for me, but just wondering if you have another preference.
Hi Poiboybf,
Mine are about 48″ (eyeballed), but I’m crazily tall. When I built a 2′ by 3′ second one of these workbenches just for my mitre saw, I made the legs shorter so that the saw’s deck is exactly the same height as my other workbench tops. Now I don’t need to use in-feed supports, because I have an 8′ table to hold the wood on.
So just pick a height that feels good for you, then feel free to modify it to suit what you use the table for. You can always unscrew the legs and put on a new set.
This would also make a great craft table or cutting table for a seamstress Ethan. We often use Simpson Ties when building things. They’re awesome.
Hope you had a great vacation in Jamaica! A ” re-run” on an article is fine. Did you bring home a souvenir U Bolt?
First time to the article but by now it’s fitting to ask: how has the top held up? Have you made any other workbenches with the above suggested materials?
I’m new to the construction game so something like this is perfect to build some confidence in my skills with a very practical project. I’m moving in 6 months or so but this will be started shortly thereafter
Hey Trebor,
The benches have held up great, and I have no complaints. Altogether we have four workbenches that follow this basic design, and I’m really pleased with them.
Great pictures! I’ve been thinking about something to do for my dad for his birthday, and this might be just the project! Although he’ll probably want to help build it with me.
Unfortunately I have no more room for an additional bench since I built one attached to the wall, but I will be building a movable work island using the Simpson hardware. make the process so much more simple.
I really like the work bench project. I have been looking for plans for a heavy duty work bench and now found one. I will be doing this soon. The equipment I repair will fit well on this work station.
Great project.
I am currently researching for my upcoming workbench, which I will plan to build during the coming months (right after we redid our drainage (don’t know if that is the correct word in english?) around the cellar walls) and this article will come in handy.
The main features I have been looking for (which is also how I found this article by Googling) is a big, sturdy and mobile workbench.
A couple of things I am concerned with though in regards to having casters/wheels on the workbench, is first if the casters/wheels will hold the weight of everything (and not loosen from the screw joints) and also how to get the workbench completely still when locking the wheels.
It seems some other people here have had problems with the workbench moving even though the casters have been locked.
How is your workbench in regards to these matters?
Hi mArBLe,
Welcome to OPC. I hope you’ll stop back again. Feel free to email me pics of your workbench. I’d love to add them to the article!
The casters are rated for the weight so there’s no problem there. That additional cross-member was added to ensure a good mounting surface, and we haven’t had any problems with the joints loosening. There is a slight movement even when the casters are locked. It’s almost undetectable with the larger workbenches. If you need something that will remain completely still, you might just slip a block underneath. It’s not an elegant solution, but it’s easy.
I built this bench a few months back, and it’s the best thing I’ve done for my shop. On nice days I can pull it out and put it on the driveway and work outside. I still need to add a power strip. I’m also thinking of adding a mini-vacuum set up to the under side of the table with some on board hose storage. When I get to this, I’ll shoot you some pics.
I also like how this bench uses the Simpson connectors. Makes the pieces easy to replace if one of them becomes damaged or sags.
I just built this bench a few weeks ago but opted to leave the casters off. This thing is rock solid. I’ve since passed it along to some friends of mine. Good stuff.
Glad to hear you like it so much! Send in some pictures, and I’ll add ’em to the article.
I really like this design and I’m planning to make one much like this for my very first workbench. One question: Is this bench top sturdy enough to mount a vice & have some dog holes in it? I’m interested in getting started in woodworking and I think a good vice with bench dogs is just about a prerequisite for a woodworking workbench.
Oh yeah….if this bench is NOT suited for the vice/dogs, any suggestions for modifications that would make it so?
The one problems is that the “top” is not a solid piece of wood. It’s more of a box beam structure and that wouldn’t work well for bench dogs. Maybe if you put a solid piece overtop it would work…
Ethan and Fred
Thank you for posting this, I have been thinking of making a workbench for some time and your guys design is really nice and the Simpson ties are a great idea. I first saw it on The Art of Manliness.com and went to your website from there. I just have one question where did you guys get the flat iron bar for support?
Thank you
Andrew
Hey Andrew,
Glad you found us! The flat iron is available at HD and probably Lowe’s too. It’s usually right next to the angle iron. Send in some pics when you finish your workbench.
I’m new here and I found the article for the workbench at the Art of Manliness web site. I built this bench last weekend and was amazed at how easy it was. Thank you guys! I made a few modifications for my particular situation. I’ll try to remember to send in photos. One thing I wanted to comment on is the bars of flat iron. You will want to paint those or coat them with oil or grease or petroleum jelly to keep them from rusting depending on your local environment.
Hey BrianV,
I’m glad you found us! Please do email me pics of your workbench, and I’m glad it was so easy. Thanks for the tip about the flat iron. I haven’t noticed any problems here yet. I hope to see you around OPC.
I’m thinking of putting this bench together using 4×4 legs instead of the 2×4’s. Is there any reason I should avoid the use of the larger cuts? Also, if I use 4×4’s do I still need the caster supports to avoid using the end-grain of the wood? Thanks.
just purchased the materials today, will build tomorrow and share the results! looks great, thanks for the idea!
Just finished the build, fantastic workbench! Very pleased!
I am new to the site and was looking over this awesome workbench post that we are going to try to put together. I was wondering if you ever have a price breakdown of what an entire project costs (not including tools) so we could see if it would be too expensive to start undertaking beforehand? Thanks so much! Kadra
this is a great build… i might halve the length, but i like this design a lot
Id like to see more about how these Vises are detachable and mounted to a separate sheet
A recent episode of This Old House featured the Cambridge House’s owner building a workbench in his basement. As an alternative to the torsion box, they used a solid core interior door. Interesting idea, provided you’re okay with the dimensions!
I didn’t realize until after I was done I had put the legs in backwards. I looked at the balance of your plan after the fact. I made a 4×4 for the casters, but it’s not as strong as yours. I did add a 2×4 between the short ends of the legs to add strength. It’s not going anywhere, but I wish I had looked at your plans beforehand. I guess I dived into it too quickly.
I ended up building two 24″ by 48″. I don’t have the legnth concern, and they’ll be perfect for cutting (i.e.saw horses). Cost $230 bucks (bang!) and I’m not even using glue. I have more storage space underneath, because I don’t need more than a 20″ height for the shelves.
They’re going to be great. Nice plan by the original designer.
Well in this case, we were the original designers 🙂 The idea generally came from some shelves I saw a while ago that used Simpson Ties – they really make this project come together and are the key ingredient.
I thouhgt I posted this yesterday but I see I did not….This is a good article. I will build it. I also looked at it in the Art of Manliness and have seen a few differences I would like to understand:
1. This one has 93 inch boards for the length and the Art has 90 inch; is the difference the overhang?
2. Does the bottom 3/4″ plywood piece and both 3/8″ plywood pieces need to be cut down in the Art article?
3. Would using a support board under the shelf be useful?
Many thanks…Bob
Bob, I answered this comment over on this post:
http://www.oneprojectcloser.com/four-workbench-projects-based-mostly-on-your-feedback/
Fred,
Really like this heavy duty workbench, planning to build it in the next month or so.
Can you advise how i would attach a vise to this bench. I think the vise i am referring to is called a “metal workers” vise.
Since the top part of the bench is a torsion box and hollow on the inside how would i bolt on the vise?
thanks
Bruce there are a few ways to doing it – one is if you know the exact locations (i.e. predrill the holes) you can actually add in PVC pipe to act as a filler / sleeve with maybe another piece of ply or two to help keep them in place
The easiest method though would be to glue in a 4x in the area that the vise will go
Either which way I would urge using some caution on the loads you will be applying to it
Thanks Sean,
I will not be applying any major loads. I just want to have a vice to hold “stuff” in place while i work on it.
I might look at adding a tail vice also
thanks again
Finally made the workbench after finding your site 5 or 6 months ago. Part for part, cut for cut, and I actually got a blister putting in all those screws! It is solid and will serve me well for years. Thank you for putting this out there to be found…
Yeah I have a blister on my hand as well but it was well worth it.
I just built a variation of this bench. I an also interested in mounting a vise. By mounting a “4x”, does Sean mean cutting a piece out of the bottom of the torsion box and gluing a piece of 4×4 wood post to the bottom of the bench surface? If so, I assume you would then drill the mounting holes through the bench surface and the 4×4? How would this affect the rigidity of the rest of the bench surface?
I keep coming back to this article again and again as I am thinking through what I want in my workbench… this is really, really well done. If I didn’t make it as long, are the metal braces still necessary?
Just built this thing and man is this thing strong. The only problem is that it is a little high for shorter people like myself and I would probably suggest cutting the legs around 33-34″ I am 5’5.
Also with wood prices through the roof it ended up costing close to $200.00
Love this workbench! Now I just need to build a workshop to put it in!
Awesome bench. Built it last weekend. I skipped the metal braces and did the glued and screwed torsion box mod with 3/4″ plywood on top and 3/8″ on the bottom. This thing is sturdy as can be. Like others have said it costs ~$200 now.
FYI: Home Depot carries the Simpson ties. Lowes is phasing them out to carry some other brand.
What kind of screws did you use to attach the plywood?
If you have 17″ width wise support butted up to the legs with 4″ each, that equals 25″… Is that right or is my math just off? Is there supposed to be 1″ extra? I’m sure I’m missing something easy, just doesn’t add up to fit a 24″ top and shelf depth.
the 4×4 are not 4×4, actual size is 3 1/2 in. add 3 1/2 + 3 1/2 which = to 7″. 7″ + 17″ = to 24″
Very fun build. Took me around 12 hours to complete /w painting, cutting, screwing.
[IMG]http://i.imgur.com/jn9bkzr.jpg[/IMG]
great build. i am thinking to do a build like this only problem is living in Australia i cant find the right size wood to match the brackets
I am going with the original design. but if you really wanted to save money you could scrap the wheels and also the bottom brackets. Could use the 2 long support beams on the bottom as well as the side support beams and place the plywood on top of that. Just nail those beams to the frame. That would save you 4 brackets @ $8.00 and 4 wheels @ $7.00 ($60.00).. again. Just an idea to save money. For the average homeowner, the bench should not sag.. Especially if you don’t really care if the bottom sags a bit.
Really interested in making this bench, but I’m wondering the best way to get an overhang for clamping on at least 3 sides. And also to recess the bottom shelf.
I wouldn’t call this a workbench…It’s essentially a two-shelf storage cart on casters.
Not a very versatile design if you can’t modify the dimensions.
I built a real, working, rock-solid, rigid, flat and square, non-racking, workman’s workbench with a quick-release vise I got off craigslst using home depot Doug fir 2 x 4s for a total price of $75 for the lumber plus Two bottles of tite bond wood glue and hand tools. Built it over a month. Rock-solid and will last me a lifetime. It’s a flexible design and ooks great too.
Nice tutorial! I built a similar workbench a few years back. Wish I would have thought of using the Simpson ties. They definitely add a lot of rigidity without having to cut a bunch of angle braces on the miter saw.
Just finished this project. Extremely pleased. Sanded and stained top plywood and applied 3 coats of poly, sanding between each one. Very slick and I feel more durable. One question, I noticed you went with the gray rubber castors. Any concern that the rubber might develop flat spot after sitting in one spot for a while?? I went with the black hard rubber castors just in case. I considered going with all metal castors, but thought that might be overkill. Thanks for the great plans for a workbench! Really enjoyed the build.
Gregg
Great write-up here and on Art of Manliness.
Questions…
1. The workbench on AoM didn’t use the metal reinforcement bars. Have you found them unnecessary after implementing the torsion box design?
2. If I do use the metal reinforcement bars is there any downside to mounting them to the inside of the 2×4 where they will be hidden from view inside the torsion box vs on the outside edges as in your OPC site workbenches?
Thanks!
Thanks for this design! I used it for the bench I built today, without the casters and using an 88″ 2×4 longitudinal support instead of the 93″ one you used. Pics here: http://imgur.com/a/y08nE
Great article. I started making this bench and ran into some problems. Unfortunately I’m working alone but managed to keep everything as level as possible. After building the frame I placed the plywood top on and it wouldn’t sit flush on the sides and corners. Leveling one side of the plywood makes the other end uneven and I can’t get it flush.
I measured the frame and the table top and they are the same dimensions so I’m a little stumped. Any help or advice would be appreciated!
Have you checked diagonal measurements of the frame and plywood? They can have the same length and width and still not be square.
In Step 2, where you say “…limited vertical rigidity…” I think you mean “… limited horizontal rigidity…”.
I built something similar, but added a quarter inch of hardboard on top with some small brass screws. The hardboard is very smooth and inexpensive, and with the screws, when I eventually beat the heck out of it, I can easily replace it. The screws are brass just in case I get crazy with a chisel (or whatever), so that I ruin the screw instead of the chisel.
Great build! I’m about to start the same thing, but have one question. In one of the user submitted pics he shows a removable vise block. Any details on that?
I like the idea of interchanging bench top mounted tools (miter box, vise, etc). For example, how is the block mounted to the bench top?
Thx
Thanks very much for the inspiration. I added double locking 5″ wheels, too. It took me 5 hours. (novice) The home improvement store ripped my sheets 1/2″ wrong. Double check their work or mark it out for them. http://imgur.com/9W9EBGw
Awesome tutorial, will definitely be adding this project to my summer to-do list. Thanks Ethan!
Followed step by step and built the 8 ft bench. Love it. Made 2 more 4 foot benches to match just for kicks. On the 4 ft benches, put hinges on the top covers so i can store small stuff. Painted all the brackets red to match my craftsman tool boxes. Only issue i have is lumber is more than twice the price here in Hawaii. Price of paradise i guess. Aloha. And mahalo for the inspiration. Jonas.
I built a similar configuration way back in the late 80’s minus the casters. I used a 2 inch x 8 foot x 3 foot solid core door for the top. (came from an executive office in a bank) It weighed over 200 pounds. No chance of it sagging.
Some observations/comments/suggestions for your project…
1. On preventing/solving deflection of the top…make beams of 2 2×6’s with 1/2 inch plywood sandwiched between for sides and center support of top. Works for doors and windows…nowhere near the weight on the your project.
2. Use 3/16 or 1/4 inch hardboard on top. Easily replaced.
3. Use 4×4 posts for corners. I jointed and glued 2 2×4 spruce and then planed/sanded them. Left them natural.
4. Like suggestion of undermounted drawers. Nice if they were push/pull so they could be accessed from both sides.
5. Doors on bottom storage area would prevent dust, etc. Makes the unit heavier, but sounds like your casters would handle it.
6. Slide out units in the storage area for better access.
7. Power strips on at least 3 sides.
8. Your chargers for power tools could be mounted on pull out slides under the top. Out of the way but readily available. Doesn’t use up valuable horizontal space on the top.
Do you have a photo gallery of your final product and responders’ projects?
Thanks.
P.M.
Hi,
The simpsons ties are now discontinued – any alternatives?
I really want to get this done, please help!
Thanks!
You can see a new version on the Simpson website RTC2Z which is a replacement for the 2 older versions. I ordered mine off of Amazon.
http://www.strongtie.com/products/connectors/RTC2.asp
Excellent build. Fantastic and simple. I was waiting for something like this and perhaps I will shamelessly copy your design of the workbench.
I am building the heavy duty bench and would like to see the plans for the miter saw bench and the other two benches you built. Where can I find those? Thank you.
Great looking bench, nice project for next weekend. After reading the instructions for above the first photo on Step 3 I’m confused by the last sentence, “It’s helpful to use a scrap piece of 2×4 to ensure that adjacent pieces line up at the same height.”.
I looked at the photo and don’t see any scrap 2x4s. I understand this is an alignment guide but where is it used?
Thanks!
Jeff
Thanks for sharing your experiences. I’m doing some research on woodworking. I want to improve my woodworking skills to do some interesting things like you. So your post is quite helpful.
PS: I like your workshop. I can see a lot of woodworking tools.
An excellent article. thank you for sharing useful information. thanks to you that I was able to finish his job. thank you very much.
I’m a rookie so maybe I’m missing something but I’m not seeing how I could easily attach a bench vise. I could leave the bottom piece of plywood off to bolt the vise on but then it would be a real pain to flip it over and put the bottom piece of plywood on the top of the table. Any insight here?
I`m going to leave a 2 inch overhang at the front of my work surface (18mm ply) then mount the vise on a separate piece of the same material. I can then place the vice on the work surface when needed and use G-clamps to hold it steady. I may even fit something at the back edge of the mount plate so it can attach at the back of the work surface also.
I don`t plan to anything heavy weight so my vise is just an extra pair of hands.
This also means I can sit the vise anywhere along the length of the bench that I need!
Finished one of these in 2014 and finally getting around to building a smaller one for my miter saw. Just wanted to comment that I am a fairly small lady and had no trouble constructing this, thanks to the best equipment purchase ever – the drill driver! So much easier to get all those screws in!
One caution for short people like me –The only problem I ran into when building the first workbench was in placing the lower shelf. Since I am only 5’2″, I lowered the worktop height down to 30″. But after getting all the lower supports in place, it was impossible to get the bottom shelf angled in. Just not enough clearance from the underside of the top. Had to disassemble some of the bottom supports, put in the shelf and reinstall. But it all worked out in the end!
FYI: As mentioned above, The Simpson ties have been discontinued but Lowe’s has the exact same ones only made by a company called USP. The model is TTC24-TZ. I had a real tough time driving all over town (looking for Simpson corner ties) before I finally spotted these at Lowe’s. Fun project though.
Just made the bench and love it. Changed the corners to 4×4 and did the torsion box on top and bottom. Cost of materials still at $200 even but it came out great!
http://imgur.com/a/3dOjB
Super work Phillip! When you used 4×4 corners, did you have to use different Simpson ties?
You can get a “Simpson Strong Tie WBSK Workbench and Shelving Hardware Kit” that has the connectors and screws for 1 bench on Amazon. If you need more connectors they also have a “Simpson RTC22Z, 2X Rigid Tie Connector (20 Pack)”.
Hi guys. I am danish and I would like to build this workbench. Could somebody translate to centimeters for me?
Two 2′ x 8′ pieces.
2×4 lengths
(5) 93″ for the lengthwise supports
(4) 17″ for the width-wise supports
(4) 36″ for the legs
(2) 24″ for the caster supports
1) sheet of 3/4″ sanded plywood
(9) 2×4’s
(8) Simpson rigid tie connectors (see below)
(200 count) #8 x 1-1/4″ screws
(4 count) 3″ screws (see below)
(2) 6′ flat, iron bar (see below)
(4) 3″ locking casters (150 lb.+ rating per caster recommended)
Best regards. Mike.
Just built this bench. Turned out great! It’s a bit tall. May have to take an inch or so off the uprights, but I think I’ll leave it for now. I’m tall, so I’ll be the only one in the family that can use it. 🙂 Next I need to sand and stain it. This is my 1st big project and it was a success.
Thanks for posting this project!
Patrick
That’s an awesome work “station” (at least, that’s what I would call it 🙂 My space is very limited (half the garage) and it would be great to have something like that to use and store my power tools on so I don’t have to keep pulling them out and putting them away every time I want to make something.
I just one of these tables today. Super sturdy. Thanks for the design,
Mike
I decided to build a smaller bench for my metal vise and shop grinding wheel. I used 4×4 legs legs and 2x6s for rest of frame.i don’t have lots os space , and so made my bench half the recommended size. I also used Simpson screws since they seem to be stronger than some other screws. (Obviously I also had to use the Simpson metal corners made for 4×4 legs which I found at my big box store. ) One tip is that by cleaning these brackets in white vinegar and spray painting them black you get more of a professional look.
Hello,
I was wondering if you had pictures of this? i was considering beefing up there plans with 4×4’s and 2×6’s but i havent seen any of those strong ties in that configuration. i would bee making two benches 7′ long and thought i could increase the strength with 2×6’s
I made a number of modifications, and so far, I’ve built one 2′ x 4′ bench: the top is a fine fiberboard material, 1/2″ thick, with a 3″ overhang on all sides, for clamping. Rather than screw the top down, I attached eight 1″ x 2″ x 8″ cleats to the underside of the top, to hold it in place. Rather than use the steel bar, I added a 3rd width support. All screws were #8 X 1.5″ washer-head Torx (almost guarantees you won’t round-out, like you can with Phillips).
I also built a smaller, 2′ x 27″ miter saw stand, and plan to build another 2′ x 4′ bench.
Here’s a tip: On both of my completed structures, I found that neither one was perfectly square, and with the wheels on, they both teetered on two diag. wheels. What I did to correct it was this: I loosened up *all* of the screws by 1-2 turns; just enough to let the Strong-Ties move. I then compared the two diagonal measurements on each structure, and used a long pipe-clamp to bring each one into square. I then loosely placed the top on, weighted it with four 20-lb cat litter jugs on top, and went around and tightened-up all of the screws. Low and behold, both structures were square, and sit flat on all four wheels, ready to attach the tops!
Thanks for a great article!
I see a miter saw table pictured above, but I can’t find plans for it? I am going to build two of these benches but I love the idea of the matched height saw table
Do you have this? i searched and couldn’t find it
What are the dimensions for the plywood?
I just used these plans to build my workbench last night. It was very easy and I love how the brackets help really pull everything together nice and square. It is super sturdy. I used a slightly thinner plywood and used 2 stringers under the top surface and one under the lower shelf. I love it and I can fit so much stuff on the lower shelf. If I build another one I might make it slightly shorter. Thanks so much for these great plans. I’d also love to share a picture of mine as well.
What Simpson corner tie did you use? What model number?
Thanks
Steve
Good call on chooseing splinter free plywood, since you’d be shuffling around heavy tools its the surface! Looks super sturdy too, i think i have found my new project, thanks!
I will be definitely making this soon. I like the fact that you included a method for those of us who do not own a Kreg jig. One question though. I am interested in using 4×4 legs and the thickest plywood available. It will be outside in the semi closed garage. Given the humidity in south Florida (less than 8 miles from the ocean) what tips can you give me?
Doesn’t look like anyone answered you. and I just found this site.
I’m sure you’ve built it already. I’m curious what you wound up using for your plywood. I would have looked into Marine grade plywood for outdoor ocean air environment.
Hi Folks – thanks for the backlink. I love your site. Great job overall!
[…] from oneprojectcloser.com […]
Hello! I would like to make this workbench very soon but I need to get the iron supports for the 2×8’s. I know this sounds like a ridiculous question but can you tell me if they have a specific item name? I went to Home Depot and showed the guy a picture of your images but he said he wasn’t aware if they sold these iron bars.
I’m hoping to start this project next Saturday and any help would be greatly appreciated. Thank you!
Sorry, I meant supports for the 2x4x8’s! 🙂
You can buy the iron bars at Home Depot (SKU #366641) but you cannot buy the Simpson rigid tie connectors as shown in the picture are not available at Home Depot anymore (they only a smaller version). However you can find them at Lowes.
I built two of these benches(similar) for my shop three years ago but this plan seems slightly different (no metal strap and plywood underneath both shelves. I was wondering if the old instructions are available. Do you have links to your other plans?
thanks
Alan
I love this. I wonder if I can use the metal brackets to build a sturdy freestanding wood backdrop that can hold shelves. If so. Would I use the same brackets for 2x4x7? Thanks
I plan to build this bench over the weekend, thank you for the great post! I have one question, I plan to take the box beam approach for extra rigidity, with this in mind do you feel the iron bars are still important or does the )glued and screwed) box beam provide sufficient strength?
I’m not against doing the iron just seems much easier to be all wood if it isn’t necessary.
just read the idea for the torsion box. It would be a great way to put in a fake outlet and create a place to store valuables. hmmmm. So many ideas and uses for a hidden storage area. I’ll post pics once i’m done!
Love that hidden storage idea.
Looking forward to getting this built today. Thanks for the awesome write-up and photos. Can’t wait to have my boys mock-up some future benches with some of our 14 billion Legos we have. Take Care. E.
We had a really nice heavy duty workbench my husband built, but we made a bad decision and left it when we moved. We really like your plans, we’re going to built it, really like the roller idea. thank you, Jane
What type of screws did you use for this? I can’t find any near the connectors…
Is there any way you can provide step by step instructions and a cut list? I’m not handy at all and I’m trying to learn with a basic project that I need to do. You do a very good job of laying it out, but more specifics would be great for a real novice like me!
The metal strap is great to reduce deflection however it would be more effective at the bottom face of the 2×4 rather than the top face.
If I understood their directions, they mounted it on the horizontal inside face of the 2×4 but you’re proposing mounting it on the bottom face, and the strap would be horizontal instead of vertical.
This would actually have less support since the strap is much easier to bend ‘horizontally’ vs ‘vertically’.
This is a great design; however I did make a few changes. I made your design into a 6×2 frame and then I went to the Habitat for Humanity ReStore and got a 2×2 cabinet w/ 4 drawers to make the 8×2 workbench . I also made the bottom shelf 4×2 and boxed out the last 2 ft with an opening in the front to slide my shop vac into.
How great is this of you to share this project and the specifics of what is needed to build it!. I am a ‘go ahead and try it’ kind of guy and am retired (almost will try anything). I already have a 14 ft workbench in my garage and my wife would rather not have another table in the place since we also park our car there. My question, if you know, is how I can capitalize on the room underneath the existing workbench. It was built this way when we moved in a LONG time ago. It is currently supported by six 45 degree 2×4 beams. Do you know of a way I can take out the beams and yet support the existing workbench? A parallel metal bar,?? 4×4 parallel pieces of wood?? I want to make sure the workbench doesn’t sag and bind under the weight of whatever I choose to put on it. I hope it’s okay to ask this type of question. More importantly, I hope someone can help me know what to do.
Great Project! Thank you for the details and materials list. I built mine as a permanent fixture, so substituted the back 4 tie connectors with joist hangers, affixed the back directly to the wall using two 2x4x98†at 40†for the top plate and 6â€â€ for the bottom plate. This allowed mr to max the bottom shelf space height. My width wide supports were 19â€, and legs 40†(I used an extra 93†length wide support for the bottom shelf as well as the top shelf for extra Bench Table Top support) I used 3/16†panel board 4’x8’ tipped in half for both bench tops. It’s like a peg board with out the holes. Given the added middle supports on both top and bottom, and it’s not on casters this bench top worked perfect, and it’s a lot less expensive. This also allowed me to build it at 40â€. Peg boards used to trim out the wall above. Added a 5000 lumens 4’ shop light from a Harbor Freight for $30 & it lasts 30,000 hours! This is a solid work & storage bench.
Next up. I’m going to build a miter saw table on one end, at approx. 36†to allow level area to extend from my saw table height right onto the shop bench for easy cuts. Crown molding will be a breeze now!
I love this easy to follow design. I could not build the 8 foot version so I built a 6 foot version and added a tool caddy with charging station. I just love it and now the neighbours want to do something similar. Thank you, wish I could post pics for you but there is no option.
With the addition of another plywood sheet for a torsion box, has anyone seen if that removes the need for the iron plate reinforcement?
I’ll be building one this weekend, so if no one answers I’ll give it a shot and let you know what happens 🙂
Dyco builds heavy-duty workbenches. You can see more detail on the specifications website.
https://stainely.com/
Instead of Simpson rigid tie connectors, can we use 4×4 lumber so that it can be side portion can be directly screwed to it ? I know that is relatively heavier. Just wanted to know the pros and cons of it.
old style Simpson rigid tie connectors no longer avail and the new style has a lot fewer support screws, and does not look strong enough, please offer modifications on u r 8 foot table design, please comment of these facts and offer other modifications, thanks…
please reply asap, i want to build this work bench, but heed new advice, thanks…
Would this be capable of holding +400 lbs? I want to build a movable island to put my 40 gallon breeder aquarium on.
Thanks in advance!
[…] these free plans to build a customized heavy duty workbench by oneprojectcloser that will keep all of your tools in one location and provide you with ample work […]
[…] not only enhances workspace organization but also offers a reliable surface for all your projects. Simpson Strong-Tie supports will provide additional stability and longevity to your workbench. Your workbench will be the heart […]
[…] the right tools and materials ensures a sturdy workbench. It will handle your carpentry projects for years to […]
[…] Read more here […]
[…] Get Instructions Here […]
Your work bench is great I am going to build it the only thing I am going to change is the 2†wide steel it is a good idea but from a compression point of view it would be much stronger at the bottom of the 2×4. One example II can give you I don’t know it you have ever poured any foundations they don’t put the rebar at the top it goes at the bottom a couple inches off the ground. The reason for this is down compression much more resistance on the bottom. Your bench looks great. Thanks Jim