

Out with the crib, in with the big girl bed. I’m not gonna lie, I was pretty sad saying goodbye to the crib. But I held it together with my excitement over painting my first big piece of furniture with Annie Sloan Chalk Paint. I did a chalk paint experiment last week on a vase in my dining room, comparing homemade chalk paint with Annie Sloan. I was glad for the practice run and excited to give Lucy a new big girl bed, so the tears stayed away for the most part.
Lucy’s “Before” Room
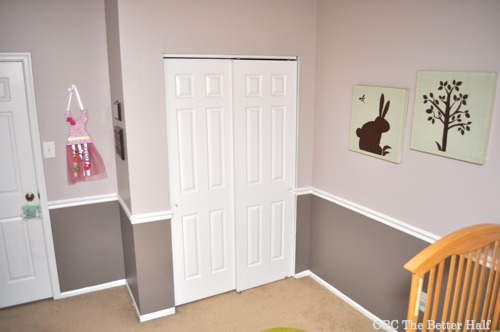
This past weekend was The Great Furniture Swap! My old boss who lent us the crib and dresser came to pick it up Saturday morning. Here was the room before the swap.
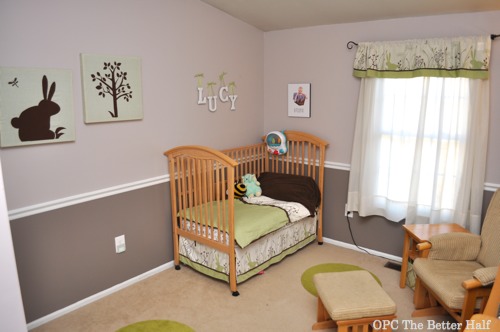

These were my first DIY wall decor I ever attempted, 4 years ago before Izzie was born. They have always been my favorite part of the room and I have yet to part with them. lol. BTW, check out the post and the comments – you will never guess who was a fan!!

Keepin’ it in the family: The “Before” Day Bed
Saturday afternoon (just a bit after the crib was picked up), my sister, Erin and her family brought Lucy a day bed that one of their daughters was done using. Unfortunately, it came disassembled, so I only have the picture my sister texted to me when she offered the bed. BTW, her house doesn’t normally look like this – this picture was taken as they were changing up the kids’ rooms and beds…oh, it’s a 10-year-old girl’s room. lol.

Apart from a few boogers, pieces of old gum, and small dings, the solid wood bed was in great condition.
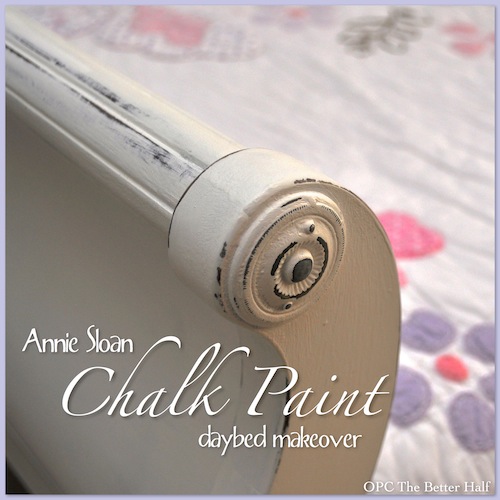
Annie Sloan Chalk Paint
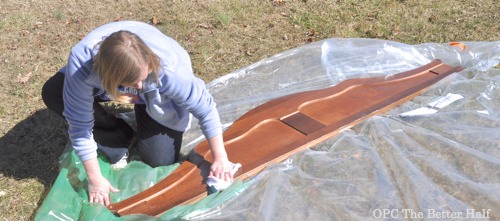
I had bought Annie Sloan Chalk Paint, pure white, a month or two ago in anticipation for this project. So once the kids were playing nicely outside on our uncharacteristically warm day (seriously, it was 60 and sunny), Erin and I got to work painting. Work is probably too strong a word… sun + painting + wine + sister time = best day ever!
Due to the afore-mentioned boogers and gum, we wiped the bed down with mild soapy water and a rag to get off any goo. There were a couple of gum spots that wouldn’t come off, so we lightly sanded those. Erin was kind enough to let me take pix of her – isn’t she pretty?
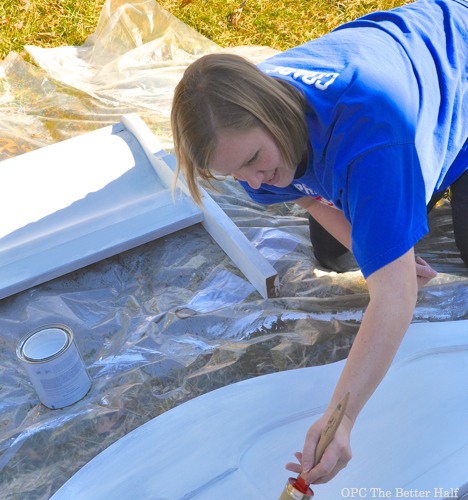
After the pieces dried and I gave a paint a flip and shake, we worked together on each piece, one at a time. From all I had heard, it was supposed to be a one coat process. We didn’t want to coat it too thick partially because it was drying so fast and we didn’t want things to look uneven.
In all, it took about 3 coats to cover the dark stain and some spots still look thin. I decided not to worry too much about it since I was planning on distressing it all anyway and we were running low on paint.
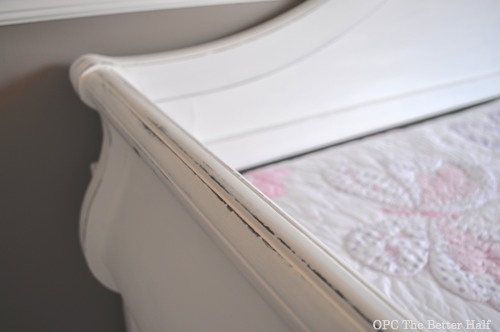
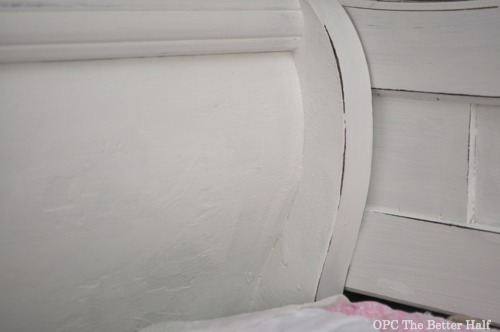
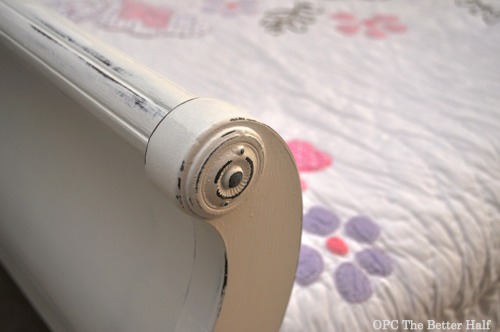
I let the pieces dry over night inside, and then the next morning, I grabbed my sanding block to distress it. I chose to sand the high points of the furniture and lightly sand other spots just to even it out. I love the effect of it!
We then assembled the bed, and I waxed it using Annie Sloan Soft Wax, Clear. Man does that stuff stink – I was so glad to have a pretty day to work with the windows open!
Chipping Chalk Paint: Our Solution
As we were painting, we ran into a bit of trouble. With only one “arm” of the day bed, each of the 3 rounded parts began to flake as the paint dried. We tried to paint over it and the flaking/chipping got worse.

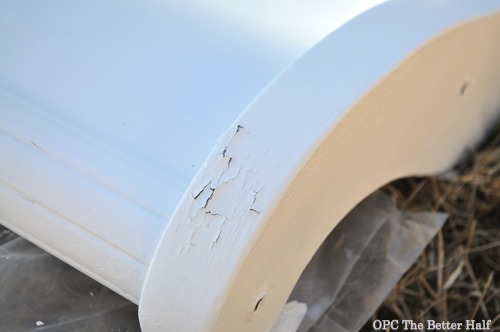
We sanded it down, and painted it again, and that worked in the two of the three sections. On the third section, it was like the infection had spread and it just looked worse.
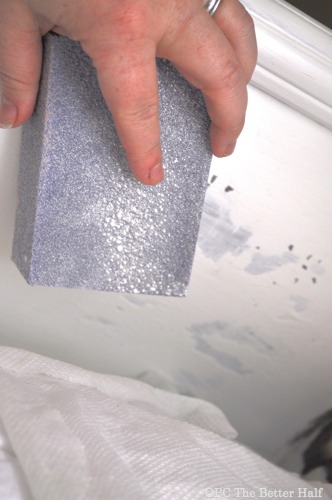
Because I wasn’t sure how to approach it next, I just waxed over it all! haha. This morning when I checked on things, the chipping had stopped and the wax seemed to help.
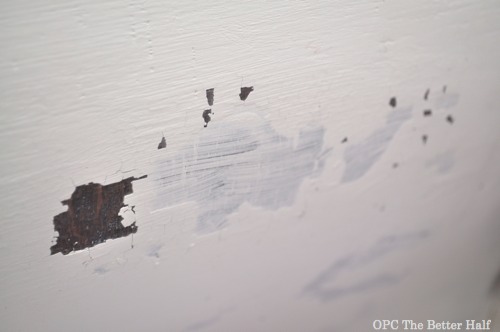
I lightly sanded the area to smooth out the difference between the wood and the chipped paint, then coated it a couple more times with the Annie Sloan Chalk Paint. After it dried, I sanded again to even it out some more, and then finally waxed it again. It’s still not entirely smooth, but it works…
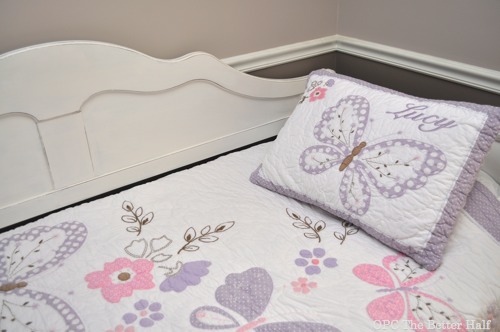
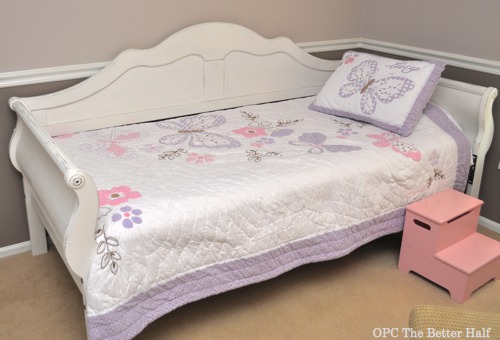
The “After” Day Bed
Ahhhh, what a big difference! Lucy is in love with her new big girl bed. Izzie loves it too – although she suggested it would look even better with glitter. haha

How do you like the new Pottery Barn quilt and sham I got? I LOVE LOVE LOVE it!
Lucy also wanted to show off with her new big girl bed.
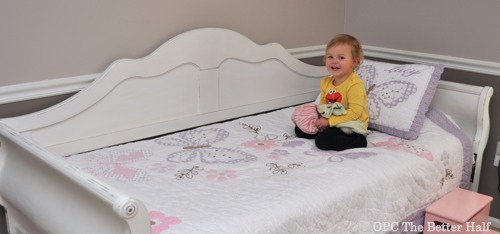
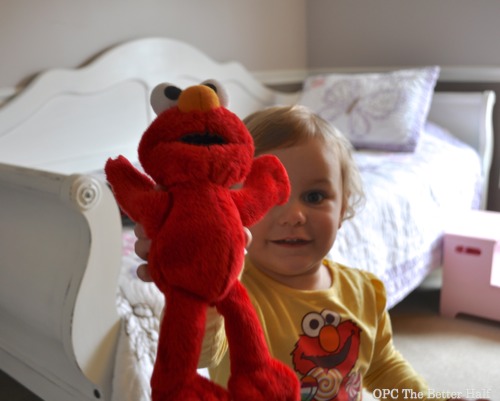
It doesn’t really relate, but she also wanted to show you Elmo. Can you tell she loves Elmo?!?
Minus the flaking/chipping problem, I was very pleased. I had hoped it would take less paint and less coats, but I am eager to see how it will compare to the homemade version when I do a side by side comparison in the coming weeks. So stay tuned for that and more updates to Lucy’s big girl room!
Thanks for following along on my daybed redesign using Annie Sloan Chalk Paint!


it’s beautiful! bummer that it began chipping on you. Hopefully it will continue to hold up now that you’ve waxed it. I love the new spread and sham too. It is very much a big girl room now.
It seems like its going to be fin now that its waxed. I actually quite impressed with the wax! 🙂
I love the look for a little girls room!! I have used ASCP for a few years. I think the problem you had is a build up of oils or dirt. The oils can come from almost anything….hands…foods spilled…the way it was cleaned in the years before you painted it etc. The best way I have found to get something ready for ASCP is to wipe it down with 1 part white vinegar to 1 part water. If I got the piece from somewhere I do not know (auction..yard sale..craigslist) I often wash it first with a mix of dawn and warm water then follow with a wipe down of vinegar and water. Let it dry a few hours after washing before painting. Any wet areas left on your piece may not take the ASCP so never rush the drying time.
GREAT tips, Carol! Thanks so much. I will update the post to include your amazing wisdom so others can benefit too. 🙂
I’ve used “Liquid Sandpaper”, which you just rub on. It may be a mixture that I could cheaply replicate, but it is definately not a vinegar mix. I might try that next time. At least we would be cutting out some sort of chemicals.
It is quite pretty. She looks so happy.
(John and Sherry from YHL loved your baby room project! High praise) 😉
Thanks – she is a cutie!!!
It turned out gorgeous, Jocie! She sure loves her bed. 🙂
Thanks, Megan – she LOVES it! 🙂
What a transformation! You did a great job 🙂 Thanks for sharing. I have always wanted to try chalk paint.
I love this bed! LOVE LOVE LOVE! you did a great job with fixing the Chalk paint issues. I have had problems with it too and it does not seem as forgiving as I would like … oh well!
I here ya, Jacque! thanks for your advice and support! 🙂
Very nicely done! How did you get Lucy on her pillow? You got some good advice from Carol that might help with the next project.
Pottery Barn does embroidery on shams for $7 (i think). so pretty cheap…
I love it! I’ve seen chalk paint on tv, and thought it looked really fun to work with. Lucy is so blessed to have a mommy and aunty who worked so hard to make her room so special! It’s really beautiful!
Thanks, Trisha! you’re such a sweetie!
What an adorable room Jocie. I can see why Lucy is so happy.
What a GORGEOUS bed!
You were super smart to wax it and then paint over it! I could have just set myself down and shed some tears…. ha!
LOVE it…
I love the scrolly details on the bed and your distressing … and I think it ended up looking loved and lived in 🙂 Can’t wait to see the rest of the room!
Actually, boogers and gum as a decorative technique can add a sophisticated flair to any piece of furniture. FWIW, I actually think the chipped paint looks cool and adds to the distressed look, although I understand why you couldn’t just let it be seeing as it’s for a child’s bed.
Beautiful redo! What a pretty big girl bed, she and Elmo look pretty darn happy 🙂
xo, Tanya
Looks like Lucy loves it! It looks great.
Maybe some glitter next time? 😉
Beautiful bed! And so many other cute elements in the room too 🙂
Thanks so much, Steph and thanks for stopping by!
You did such a great job, Jocie! I am in total love on how you scratched the specific places to show off the real character it has! Very classy!
Wow, it’s beautiful! What a sweet room altogether!
Speaking to your needing 3 coats … while most of the ASCP colors easily cover fully with only a coat and a half, there are a couple of colors that seem a bit “thinner” and Pure White is among those. So try not to judge the entire line based on just this one color. ASCP in Graphite is also, in my experience, a bit trickier than most other colors–it usually needs an extra coat–but it remains one of my favorite colors, so I still use it quite a bit. The paints really do perform as well as the hype (and I am in no way associated with ASCP, I just use them often). Thanks for the post!
L.Phillips, could you please explain your comment “…while most of the ASCP colors easily cover fully with only a coat and a half”. I’ve painted many things and I’m just not sure what you mean by a half coat unless you mean you are just touching up here and there where it’s thin?
Sure. 🙂 You basically have the right idea. Normally, the first coat covers almost completely, usually with just a spot here or there that needs a touch up. Because most of the projects I use ASCP for are intended to look vintage, the thin spots actually work for me and enhance the look. However if I want a smooth finish, I’ll do a second coat that is thinned quite a bit with water and then sand with a very fine sandpaper and it smoothes out beautifully. So… to answer more directly … my definition of “a coat and a half” is 1.) One full coat plus a touch up here and there, or 2.) One full coat and one coat thinned with water.
I have GOT to try this paint! It is all anyone is talking about on the blogs, and I can see why– it looks fantastic! What an adorable bed and an even more adorable little occupant! I found you at Hookin Up with HoH! Thanks for sharing!
~Abby =)
What a big improvement on the bed! It had a great shape before, but the white paint lets the details show.
I love this transformation. So expensive looking!! I know you put in a lot of time. Thank You. I know our readers will love it, too! We have a weekly Thursday (today:) link up party at allthingswithpurpose.com. We would love to see this post there along with the post on dying your jeans!! We are also your newest FB like 🙂
Thanks so much for linking to Make the Scene Monday @ Alderberry Hill. You are being featured later today!
I hope you are having a wonderful weekend, and join me this evening for Make the Scene Monday #67!
I’ve totally had the same problem with spray paint – the chipping is quite frustrating. I learned that it only happened in a place with oils, even from my own hands! Primer and then not touching the furniture piece except with gloves or a cloth solved my problem. Hope the next project works out even better – this one looks great 🙂
Jocie, the bed is beautiful . . . know that the little daughter is really enjoying it. Sorry that you had the problem with the paint chipping. I have used Krud Kutter to clean many pieces of furniture before painting, and have never had a problem with the paint chipping . . . have used both Annie Sloan and my own home mixed chalk paint. The Krud Kutter does a great job of cleaning old furniture and dries very quickly . . . you can begin painting almost immediately. Hope that this helps with future projects.
adorable!! what size quilt did you get for this twin size daybed?