
Welcome to our latest Pro-Follow update as contractor Steve Wartman and his crew remodel an unfinished basement. If you’re just joining us, the guys have framed the walls, run duct work, and had the electric rough-in completed. You can read all about the progress so far at these links:
- Day 1: Framing the walls
- Day 2: Vapor barrier and ductwork
- Day 3: Electric Rough-in
Today’s article will focus on insulating the walls, band-boards and ceiling.
Quick Note on Plumbing
I didn’t spend time with the plumber as he was only re-routing a few supply lines to keep them out of the way and ensure shut-off valves remained accessible. Since the homeowners aren’t adding a bathroom or wet-bar, the work was quickly done. Check out the plumbing rough-in for the other Pro-Follow basement remodel if you’d like to learn more about this step of the remodel.
Basement Insulation
When you finish your basement, adding insulation is an important step as an estimated 1/3 of heating costs can result from an uninsulated basement (Timusk, 1981). In addition to many building codes now requiring basement insulation, it’s a must-have for homeowners striving for improved energy efficiency. The difficulty is insulating a basement without ignoring moisture concerns, and the confusion about vapor barriers (which I address in Day 2) only compounds the problem.
Steve’s approach to insulating a basement here in Maryland starts with water infiltration. This is an older house, and it’s reasonable to expect 15+ year old construction to have completely settled. That’s important because otherwise new cracks and weep-holes may yet appear in the foundation providing an entrance for water. As it is, Steve and his crew can inspect the walls and use a waterproof sealer to fill existing gaps (before framing the walls).

While the homeowners already condition the air in the basement and have indicated no problems, concrete block walls are never completely moisture-free. The goal becomes ensuring the wall assembly can dry to the interior since walls below grade can’t effectively dry to the outside, and that’s the reason Steve opted not to install a vapor barrier. Then moisture can be removed by ventilation or dehumidification.
Step 10a: Insulate Walls
Steve and his crew insulated the walls with R-13 fiberglass batts installed in the stud cavities and secured with staples.
Pro-Tip: Most of Maryland is required to have at least R-38 ceilings, U-0.35 doors and windows, R-13 walls, R-19 floors and R-10 foundations. Find out the requirements for your state by viewing the state specific research PDF.
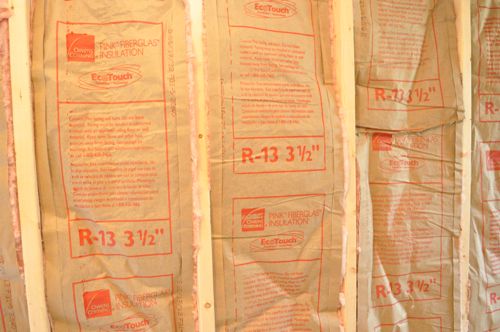

The guys wore protective masks to prevent breathing in the fibers while they worked.

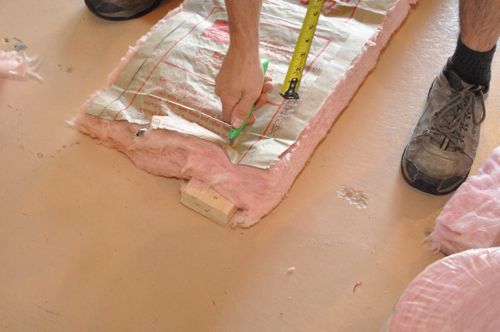
When necessary, they’d cut the insulation with a utility knife.
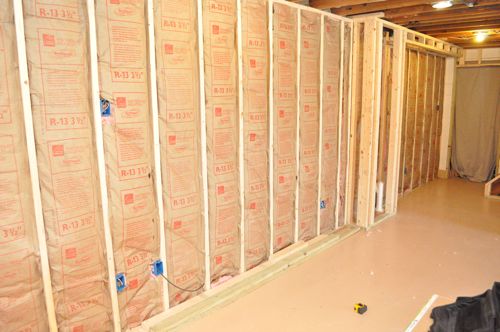
Steve’s crew cut around outlets, pushing the insulation behind the box.

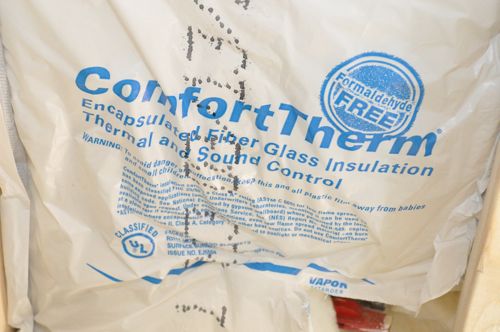
The area around the clothes washer and dryer will not be completely covered with drywall to provide easy access to the appliance hookups. For this area, they used an encapsulated insulation to avoid that “insulation smell” from off-gasing formaldehyde used to bind the glass fibers together.
Step 10b: Insulate Band-Boards
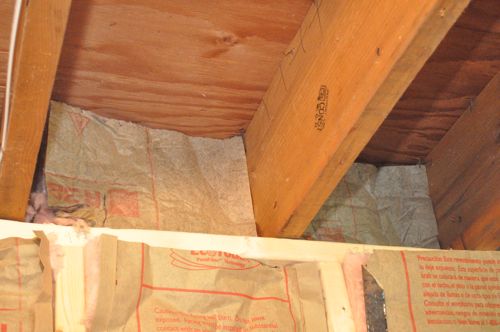
To insulate the band-boards, Steve’s crew used R-38 fiberglass batts. Band-boards need a higher R-value insulation because that is where several framing components (top plate, rim joist, subfloor) meet providing more opportunity for air infiltration. Band-boards also lose a lot of heat due to convection (heat transfer via air movement). Finally, unlike most of the walls, the band-boards do not benefit from the insulating effects of being below grade.
Step 10c: Insulate Ceiling
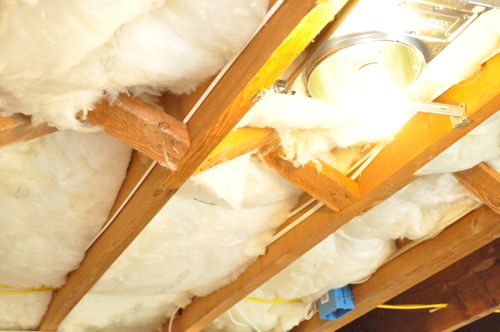
Lastly, the guys installed unfaced, R-19 insulation between all the floor joists for sound control.
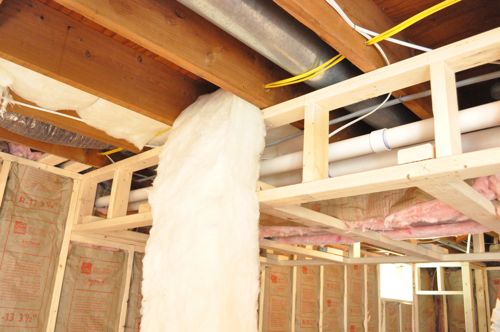
The insulation was held in place with these insulation supports that bend in between the joists.


Since the electrician installed IC (insulation contact) rated recessed lights, Steve’s crew could run insulation right up against the outer shell.
Our next Pro-Follow update will focus on hanging and finishing drywall. Stay tuned!


very cool post. What would you say is the breakdown of cost for this particular part of the project?
I have very few pricing references, but for say, closed cell foam, you’d be looking at about $3.00-$4.00/sq. foot of wall space, but you’d be getting R-21 and a completely air tight seal. My gut tells me this is a good bit cheaper.
The kraft face is stapled to the side of the studs? Doesn’t that compress the insulation a little? If looking for vapor permeability to the interior why not just use unfaced batts?
It’s important to staple to the sides of the stud because otherwise you won’t have a surface for the drywall adhesive. You’re right about the kraft faced insulation acting as a bit of a vapor retarder. I’ll see what Steve has to say.
I didn’t know much about drywall adhesive when you posted this response but now I’ve learned that using adhesive can reduce fasteners by up to 66%. That’s a lot less to screw and mud over. Apparently it also almost eliminates fastener pops.
He used the kraft faced because unfaced insulation would eventually start falling down and compressing within the wall.
You could feasibly put small slits every so often in the Kraft face to allow moisture to get out more easily. That way you also have the benefit of the facing holding the insulation in the wall without it settling.
Why unfaced for the ceilings?
I’d imagine because the kraft faced insulation is about double the price, and it’s not necessary for the ceiling.
Was Spray foam not an option or why was it not used? Any reasons? I was thinking of getting the basement spray foamed insulated.
Spray foam (specifically closed cell) is a great option for basements if you’re willing to pay for it. The cost is significantly more than other insulation choices.
My guess is that it was too expensive. Spray foam is a great way to go in a basement if you have the cash. You can save a little by using the flash and batt method. A thin layer of closed cell foam for vapor barrier and to move the due point inside the foam and then batt insulation between the stud bays. If you didn’t have stud walls up against the block already you could use panels of closed cell foam (pink or blue with r-5 per inch) tight up against the block and then set the stud wall on top of it. Then batts in the stud bays. Todd has a good article at HCI about it.
http://www.homeconstructionimprovement.com/insulating-basement-walls/
That’s one of Todd’s best articles. I’ve been thinking we need a complete tutorial on how to insulate your basement – covering all the angles. There are just a lot of options and factors to consider. One thing I think is a good add, is that if you are going to do closed cell foam or the rigid foam board technique, I think you should apply a portland cement-based sealer to the block first. Otherwise, you could be trapping water between the block and the foam, which I would think could eventually condensate and pool at the floor (in the foam board technique… not sure what happens when you’ve got closed cell there).
Wanted to add one more thought: if I were doing this, I likely would use the closed cell foam in the band board/rim joist joints (where all of the connections take place) as a sealer prior to inserting the R-19. You can eliminate air flow by doing that, and it’s one of the better perks. I know why contractors don’t do it (time and money), but if I were doing it myself, I’d probably use rigid foam board with “Great Stuff” canned foam going in at the edges.
Yup, I’m with you on the band/rim. Rigid foam sealed with canned foam is definitely the way to go for a DIY solution. It can be quite time consuming to cut every piece to fit tight but excellent air sealing and cheap.