
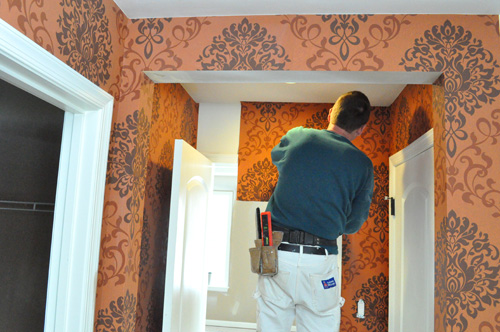
You all met Larry last week in our article about Painting Like a Pro, and I mentioned that Larry and his company also hang wall coverings. For today’s Pro-Follow I was back on a job site with Larry and his business partner Jim as they wallpapered two bathrooms in a model home. Larry explained that the demand for wallpaper fluctuates, and right now he’s seeing business pick up. Homeowners and designers are using more wallpaper and often as an accent wall.
Materials
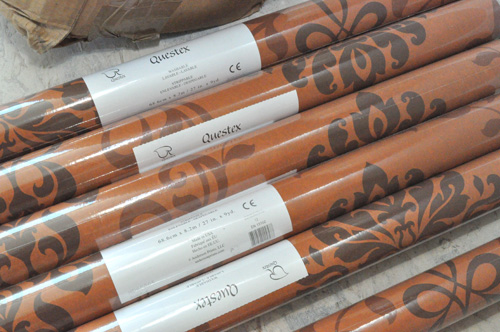
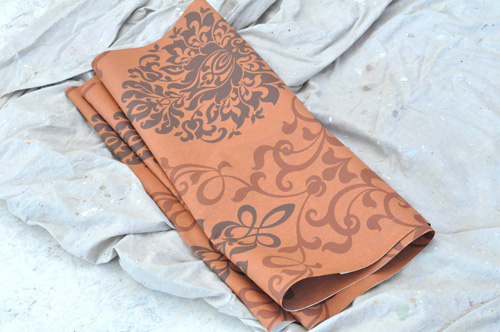
Modern wallpaper is actually vinyl laminated to a fiber or paper backing. The quality of wallpaper can vary drastically with good paper being thicker and less likely to tear. Also, some papers will show creases if you fold them over. For today’s Pro-Follow the guys are using Questex brand paper, and they said it’s a decent quality paper.
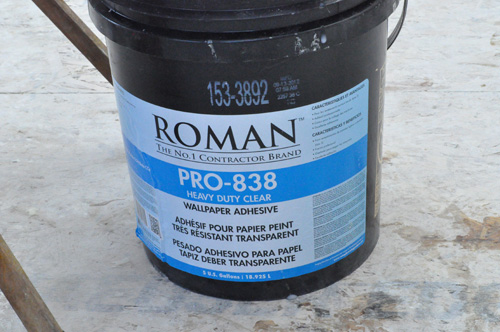
Like the wallpaper, there is a variety of adhesives available with pros and cons. For instance, clay adhesive is tough to spread and clean, and it’s also expensive. However, clay adhesive provides excellent tacking, and it incorporates less moisture which can make wallpaper expand. Larry and Jim are using Roman Pro-838 commercial pre-mixed vinyl adhesive, and with this paper it gives about 10 – 15 minutes of open (work) time.
Tools
- Adhesive roller (paint roller)
- Level
- Breakaway-razor knife
- Long shears
- Drywall knife
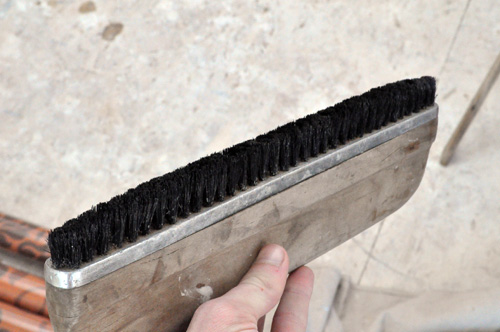
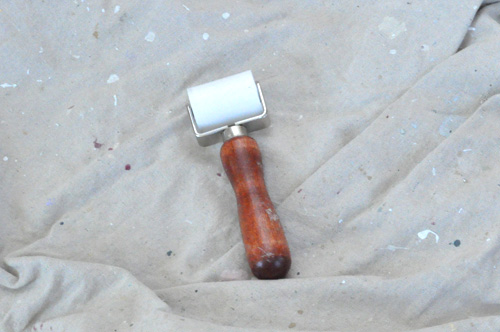
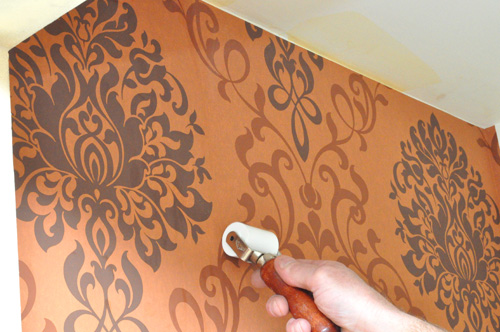
- Wallpaper brush (pictured)
- Seam roller (pictured)
- Sponge
Pattern Matching
Most wallpapers feature a pattern, and Larry emphasized the importance of understanding the pattern repeat before starting. There are three common pattern repeats, and here are a few details about each:
- No match / random match
Like the name implies, paper with no match or random match is easy to hang because you don’t need to worry about aligning a pattern. The paper was created to look good regardless of how adjacent pieces of paper are oriented. - Straight across match
This pattern requires that each piece of wallpaper start at the same point along the ceiling line. The guys are installing wallpaper with a straight across match today. - Drop match
This is the most difficult pattern match because the pattern starts over after two (or more) pieces of wallpaper. Pieces need to be hung in order and aligned vertically and horizontally. Also, this style requires more rolls of paper because it creates more waste.
Pro-Tip: Professional installers usually examine the wall paper pattern and determine a good-looking top along the ceiling line or central focal point depending on the pattern.
Pro-Tip: Geometric shapes and stripes are more difficult to hang because they can accentuate out-of-level walls, ceilings and corners.
Wall Prep
Wallpaper can be hung over a variety of surfaces including old wallpaper. Wall prep is very important for a successful job, and new drywall or patched drywall should be primed. Existing paper should be inspected for peeling or blistering, and if that’s the case, the paper should be removed or sealed and a liner applied.
Pro-Tip: When hanging paper over an existing vinyl wallpaper, use a vinyl-over-vinyl adhesive.
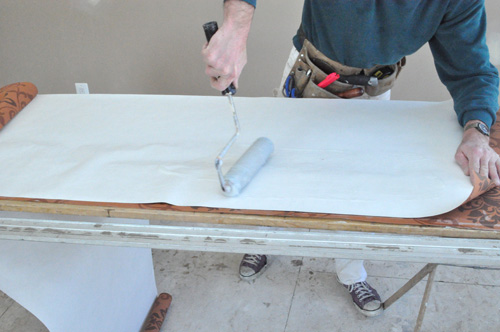
Step 1: Apply Adhesive
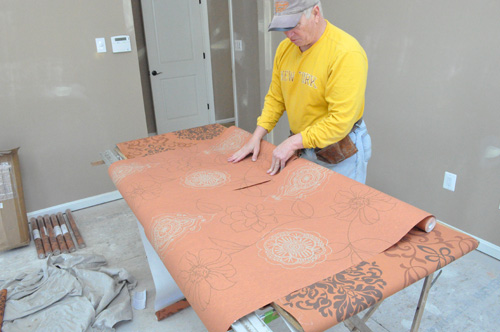
For this project, the guys are using an un-pasted wall covering (not pre-pasted) so they used a paint roller to apply a thin, even coat of adhesive. Larry and Jim took special care to cover all the seams.
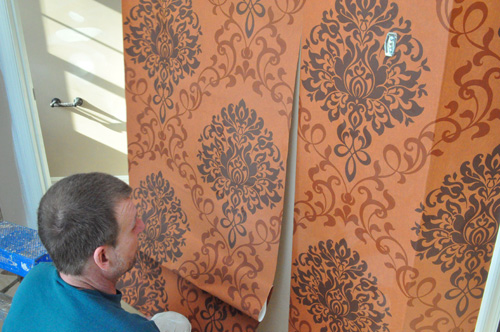
Most manufacturers require booking the paper to allow moisture to permeate and the wallpaper to expand. Larry and Jim booked each section of wallpaper for about 5 minutes per manufacturer recommendation.
Pro-Talk: Booking wallpaper means folding the paper over so the glued faces are touching (glue-on-glue), folding the paper over again several times and letting it sit.
Pro-Tip: Jim and Larry identified the top of each section by folding over the corner.
To book the paper, the guys have applied adhesive and folded the paper by thirds. Next, they folded the paper over again several times and set it aside for about 5 minutes. Some papers (not today’s) will show creases so it’s important to be careful when folding the paper.
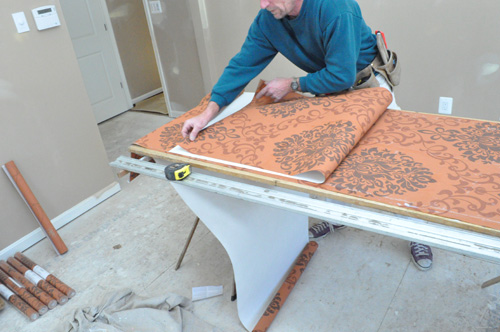
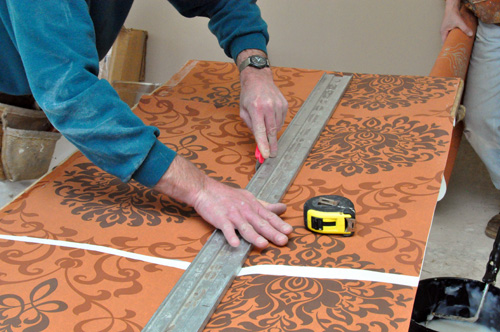
Step 2: Cut to Size
If necessary, the guys would setup a straight-edge and use a utility knife to cut the width of the wallpaper. The height of the wallpaper is cut after hanging.
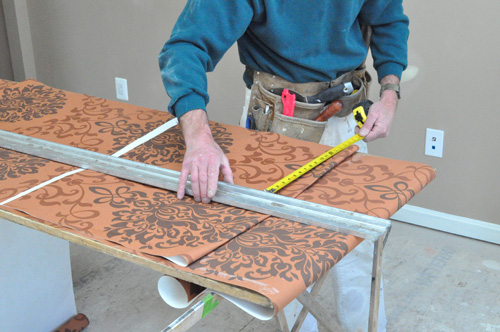
Pro-Tip: Since walls and corners are rarely square, the guys usually added 1/8″ extra to their measurements.
Step 3: Hang the Paper
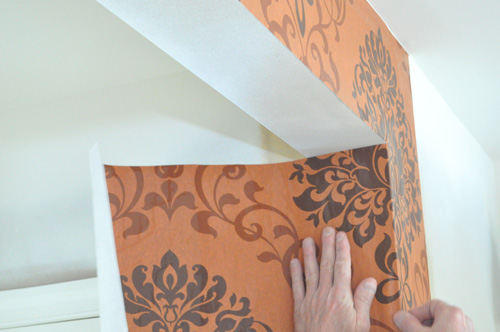
Before hanging, the guys used a level to set up plumb lines to use as guides. When papering a room, the beginning and end point are usually the same, and Jim and Larry like to position that in an inconspicuous location like behind the entry door.
To hang the paper, the guys would start by grabbing a section of booked wallpaper and partially unfolding it to reveal the glue surface.
Pro-Tip: A common DIYer mistake is to start hanging in a corner assuming that the corner is plumb.
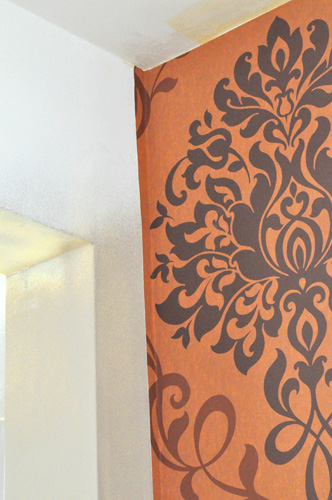
Pro-Tip: Notice the tiny relief-cut at the top of the paper enabling it to turn the corner. These are also useful going around trim and other fixtures.
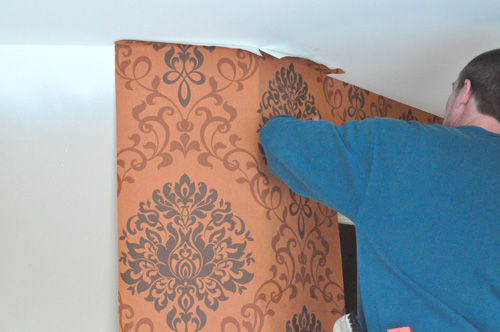
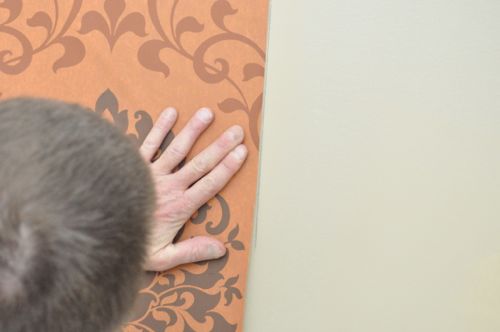
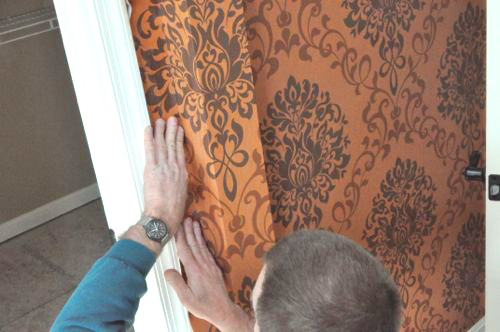
Aligning the paper with their guide and starting at the edge, they would press the paper against the wall. Working from top to bottom, they would unfold the rest of the paper and get the seam in place.
Step 4: Align Pattern
Carefully so as to not stretch the paper, Jim and Larry would shift the paper to align the pattern.
Step 5: Roll Seams
Next, they would use a seam roller to seal the seam.
Pro-Tip: If you press to hard, seam rollers can leave depressions in the paper.
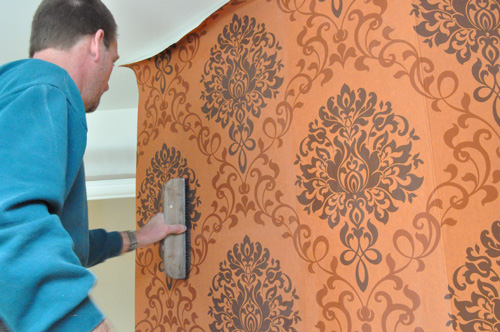
Step 6: Brush Bubbles
After that, the guys would brush the paper toward the exposed edge and eliminate any bubbles.
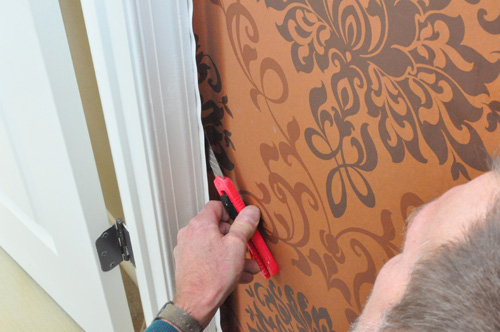
Step 7: Make Cutouts
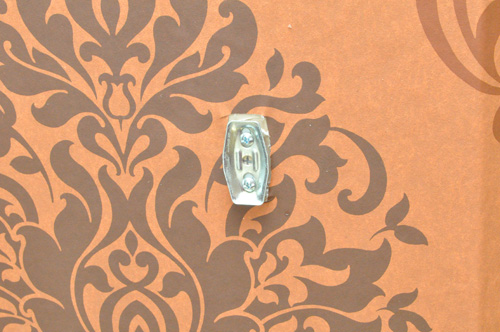
At this point, the guys would make any necessary cutouts for things like towel bar brackets or light switches.
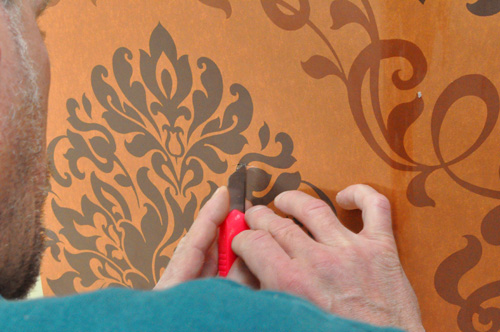
The guys also trimmed around door and window casing, and having an extendable knife was very handy.
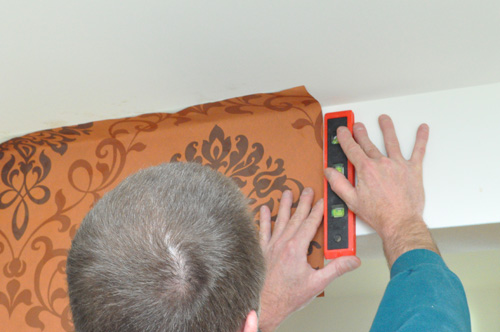
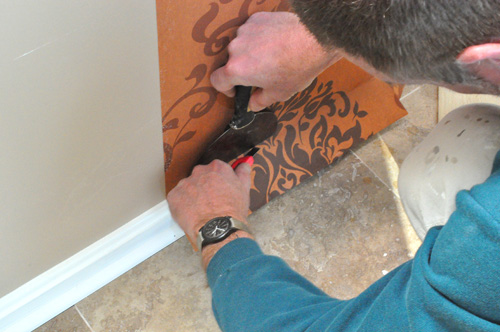
Step 8: Edge Top and Bottom
Using a drywall knife, the guys pressed the paper snug, created a score line and trimmed the top and bottom to length.
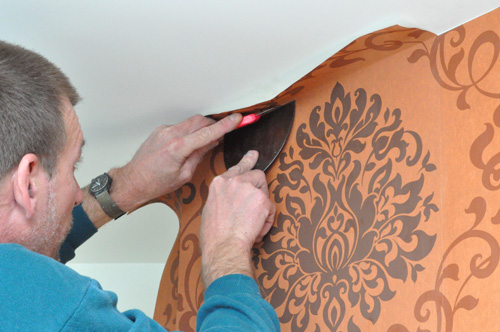
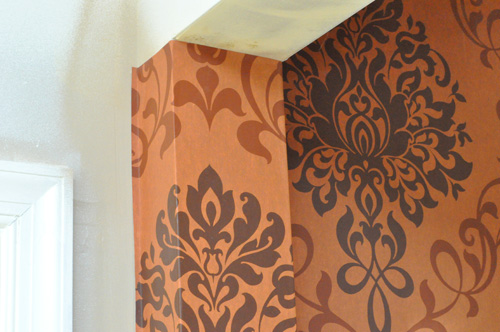
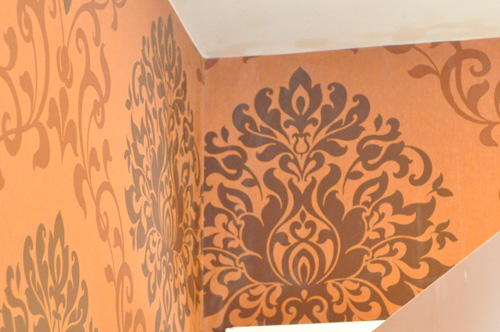
From the picture below, you can see how the guys decided to start the pattern along the ceiling with that large flower.
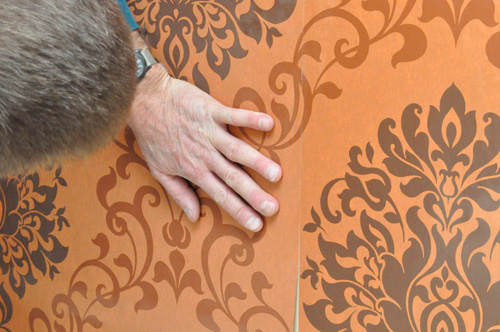
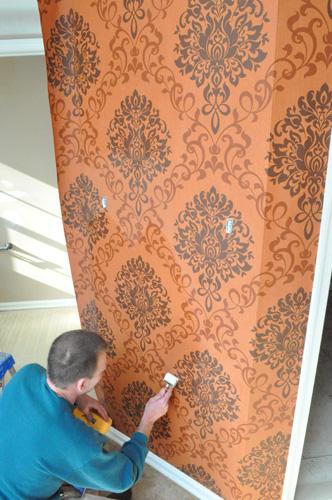
Step 9: Sponge Clean and Re-check
After the paper was in place, the guys used a damp sponge to clean away any adhesive and to ensure the paper was fully adhered to the wall.
Pro-Tip: Using your hand to smooth the paper can actually smudge the pattern on cheaper paper.
Pro-Tip: Leftover adhesive on the face of the wallpaper can cause the pattern to flake.
Corners
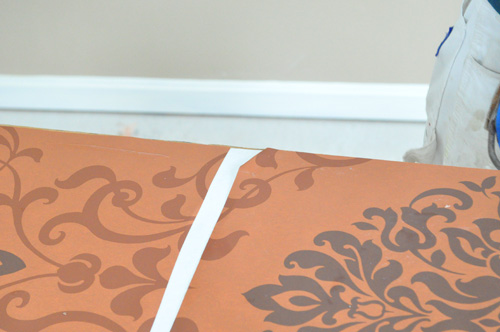
Wrap-and-Overlap Seams
On modern wallpaper, joints are created by butting two adjacent pieces of wallpaper next to each other. The only exception to this rule is in the corners where (sometimes) a wrap-and-overlap seam is used. Wrap-and-overlap seams prevent the wallpaper from pulling away from the corner, and they also help correct for out-of-square corners.
Pro-Tip: Rounding the corner (no seam) is another common DIYer mistake that Larry and Jim see.
Inside Corners
On an inside corner, Larry and Jim hang the first piece so that it just turns the corner.
The next piece of wallpaper overlaps the first, and the guys work to match up the pattern as best they can.
Outside Corners
For outside corners, if the corner is not very out-of-square, the guys will simply round the corner. Otherwise, the process is similar to an inside corner except that the seam is placed farther from the corner to better prevent it from getting snagged.
Breakpoint
As previously mentioned, the starting point is also often the ending point when papering a room, and that was true for this bathroom. Invariably, this results in a breakpoint where the pattern is disrupted. The guys planned this behind and above the entry door to be as inconspicuous as possible.
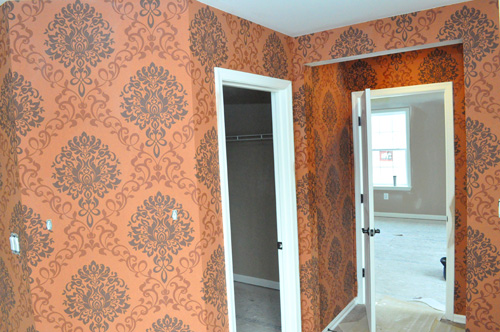
Finished
It was very cool to see these guys in action, and the finished product looks great.

Did they disclose how much this small room cost or a unit price (per sq ft)?
I believe (don’t hold me to this) that they typically charge about $15 per roll. I’m not sure if that includes materials cost though.
That looks great!
I agree. Usually I’m not a fan of wallpaper, but that looks really good!
I’ve taken down enough wallpaper to be wary, but I was really impressed with the finished look here.
I have heard that bathroom wall paper is risky because with humidity changes it can start to peel quickly. Untrue?
I also wouldn’t put up paper unless I was planning to be in a house for the LONG term. Fashion-wise, it seems like a polarizing topic, and I’d think that when trying to sell a house, wallpaper that doesn’t agree with buyer preference might be one more mark against a place. My personal feeling is that wallpaper can be done well if used sparingly, but I know my wife doesn’t feel that way.
I had a similar question, and the guys said that all bathrooms (painted or papered) need proper ventilation. With a good fan in place, there should be no problem. Another trick they shared is running a small bead of caulk where the paper meets the shower to help prevent moisture from getting underneath.
I can appreciate the beauty of the room, but can also safely say this is info that I will NEVER need. 🙂 I have spent countless hours removing and scraping off old wallpaper and then patching the walls so they can be painted to ever install wallpaper.
I know where you’re coming from. Although I can see how wallpaper might be really nice instead of trying to stencil something.
What you said about the start/end point, I was in a bathroom in someone’s house where there was no pattern break, and all 4 walls were papered, I was impressed!
the only issue with the break being above and behind the entry door (esp. in a bathroom) might be line of sight from the toilet, but I am sure they accounted for that so you wouldn’t see the break when you’re sitting there staring at the walls 🙂
Haha! Jim said the perfect (non)break can happen when you get lucky. He joked the last time that happened to him, the O’s won the world series. I thought this was in a good spot because it’s tough to see those two walls at the same time because of the bathroom layout.
is there any paper or adhesive that is supposed to make wallpaper easier to remove?
They said good paper is easier to remove because it’ll tear less. However, I’m not sure that any paper is as easy as I’d like it.
I like the idea of an accent wall.
Why do some wallpapers come off really easily and others are a total bear to tear off?
I hear ya, Reuben. The wallpaper in our bathroom came off easily, as did the backsplash wp in the kitchen. However, the wallpaper in the upstairs hallway and bedroom was a total stinker to remove.
Had no idea about the concept of booking, very interesting.
Just from the comments here you can tell that wallpaper is a somewhat polarizing topic. This particular paper isn’t the most neutral color/design I’ve ever seen but I’ve also seen a lot worse!
I guess I’m lazier than all of you. I chose to paint over the wallpaper when painting my in-laws’ home instead of removing it. But, I knew the paper was adhered to bare drywall and would cause a lot of damage to remove. I thoroughly washed every square inch and then re-glued any loose seam. I also repaired any bubbling by cutting an “X” on the bubble and then gluing it down again. If the seam was not quite flush I would spackle and sand it so it wouldn’t show after painting. I did 2 baths, the kitchen, and dining room this way and the results were great. I used Kilz Original oil-based primer in the bathrooms b/c of the moisture and there aren’t fans at all! In the kitchen and dining rooms I used Kilz 2 Latex. I don’t think I’ll ever remove the wallpaper I encounter. I’ll just paint over it!
Awesome. I always wondered whether that could be done. How long ago did you paint over the wallpaper? How does it look today? any bubbling or peeling?
It has only been about a year and a half, maybe close to two, but we haven’t had any problems with bubbling or peeling. I did make sure I glued down anything that looked like it was bubbling/peeling or even looked like it wanted to! It was a quality hang job to begin with, and was done about 30 years ago, so I figured if it hadn’t bubbled or peeled by this point it wasn’t going to!
I am immensely impressed with this. that is awesome. i am interested how it will hold up for another 5-10 years….!
This has nothing to do with wallpaper but can’t figure how to email you directly. Need some tips on replacing the pull out shower faucet…..thanks Mike
At the very top of the article is his name and a link to email him
I love the look this gives, but I’m also hesitant about that inevitable day when it all has to come down.
Maybe you can do a pro follow when they have to take down wallpaper. I’d love to see any tips they might have.
I’ve helped remove wallpaper before and I have one word for that experience…AGONY. Can you paint over wallpaper?
It really turned out wonderful… maybe I still need to call in the pros though:)
Did you guy’s discuss the breathability of the paper? I know i have had many jobs where I go into Hotels (often very nice ones) and they always have sever mold (I know the nasty M word) behind the vinyl paper. IMHO it is from the moisture movement within the wall cavity, from the warm humid exterior which travels through gypsum/wall board and cannot get through the wall paper, thus condensing when the AC is on. Just wondering what the take is in the residential world and from an installer?
Thanks!
When we moved into our home, one large wall in the family room had a full-wall wallpaper “mural” of an outdoor scene. ( Previous owner’s grandchildren told us of the agony they endured standing in front of it every year for family pictures !) My wife took it down and painted the wall, but the wall shows surface defects. I’m thinking that painting over it might have been less labor-intensive, and more aesthetic. Anyone remember the velvety wallpaper of the 70’s? Probably would be quite a challenge to paint those.
You made a great point about pattern matching and how you either have a no match or exact match. My husband and I are looking for a commercial vinyl wallpaper installation service that can help with the wallpaper we are putting in our bedrooms. We will keep these tips in mind as we search for a professional that can help us best.