

Thank you for joining us at One Project Closer for this tutorial on How to Make a Howler from Harry Potter…and stay tuned because it really howls! This post may contain affiliate links. Thank you for supporting our family while also keeping content free to you!
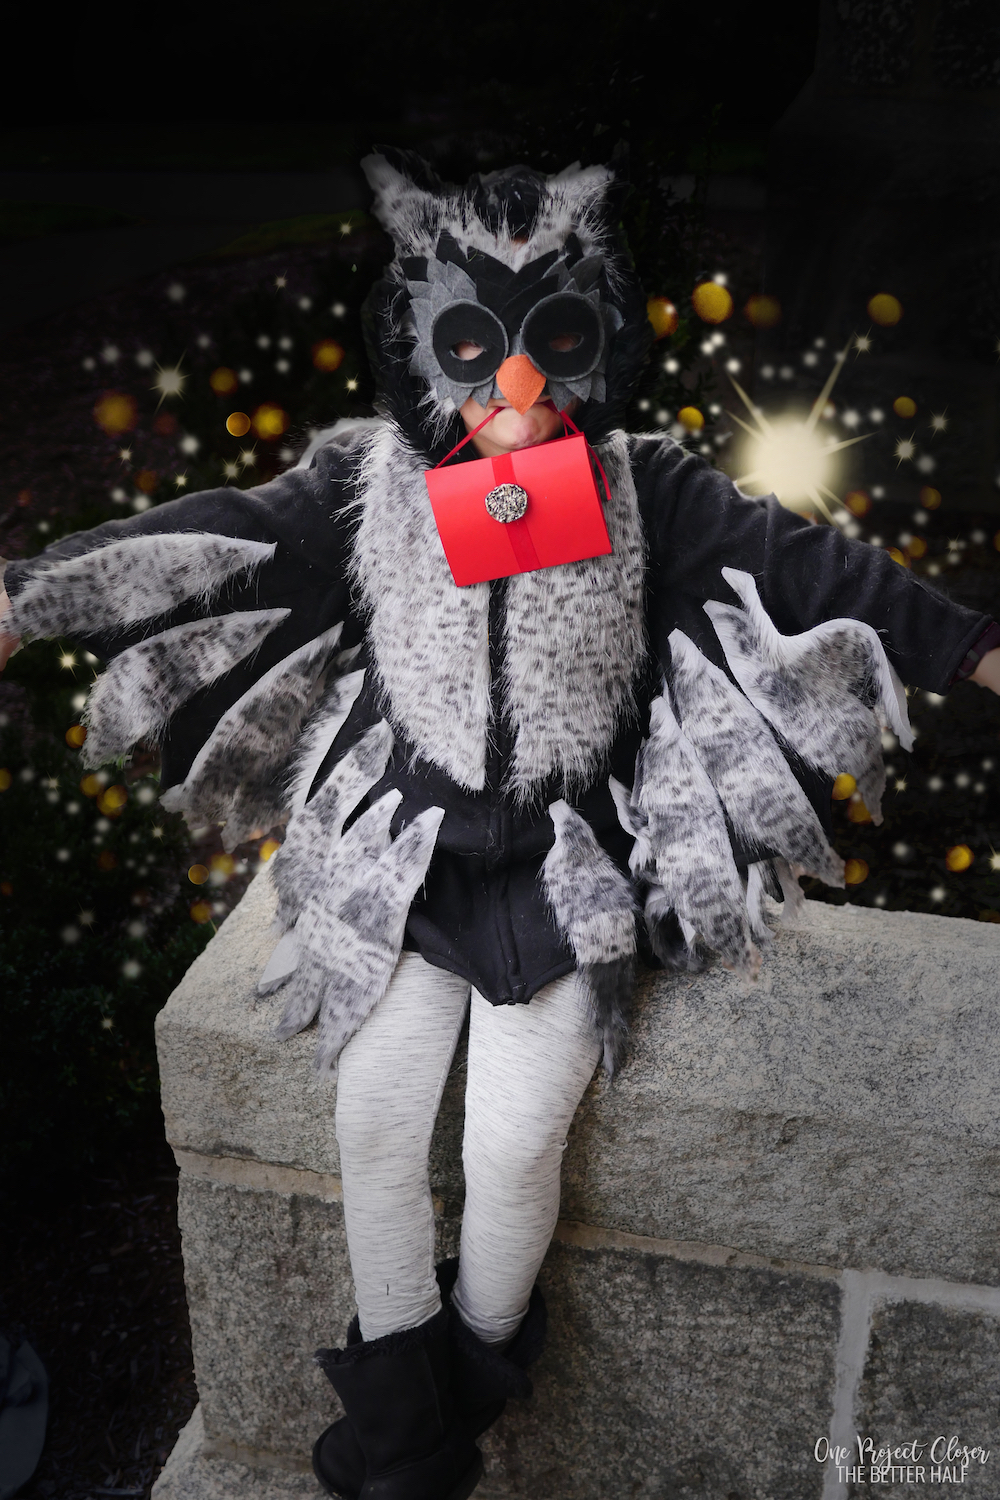
I recognize I’m THAT mom. I really do enjoy crafting the heck out of my kids costumes, even though I end up spending way more money (and time) than if I had just gone and bought a costume at Target. This year, our girls are low key obsessed with Harry Potter. As a family, we read the third book out loud over the summer and it was such fun. It was no surprise when we starting talking about Halloween costumes that Isabella, my nine year-old redhead, decided to be Ginny Weasley. Lucy, my seven year-old who never goes for the traditional, decided to be Errol, the Weasley’s owl.
While crafting Lucy’s high maintenance costume, I literally said “you will wear this or I will never buy you another costume. EVER.” It was rough. But we realized that the accessories would get Lu excited about the costume – so I decided to make her a Howler. Honestly, it’s everything.
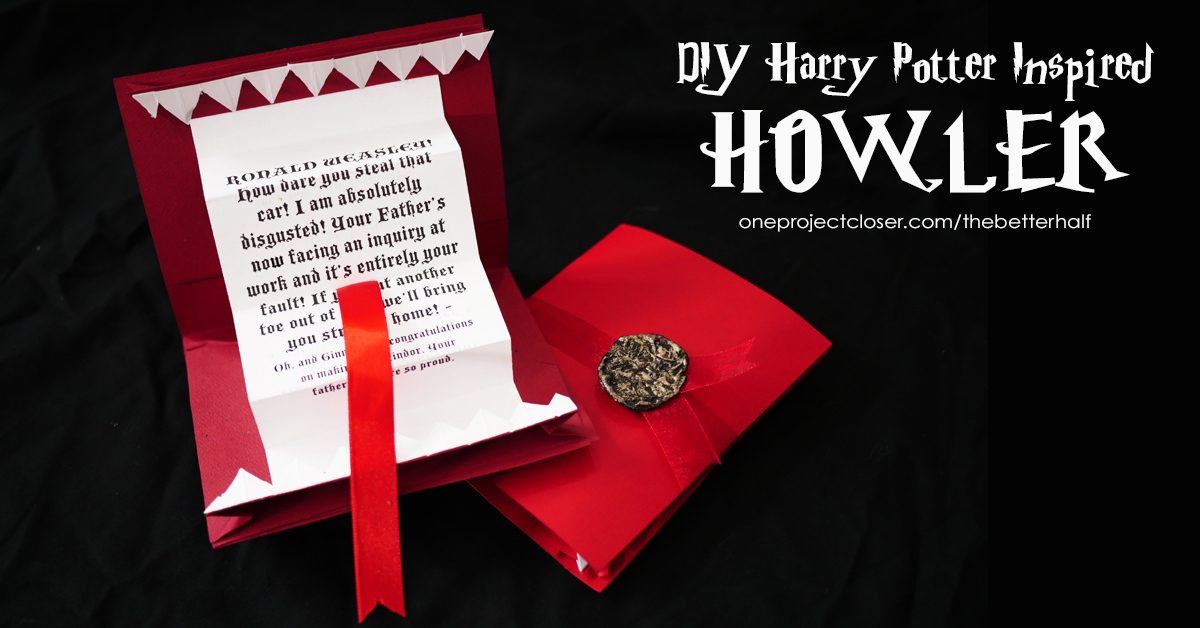
If you don’t remember the plot, Errol delivers a Howler (letter that screams) to Ron Weasley from Mrs. Weasley after Harry and Ron steal the family flying car.
There are lots of great tutorials out there on how to make a Howler that’s oragami, but I couldn’t figure out how to make it actually howl, which is really the whole point of a Howler. So our howler looks more like a traditional card than the howler from Harry Potter but its still epic and amazing. And it wasn’t too expensive or difficult to make.
Ron Weasley’s Howler
Make Time: 10 minutes
Cost: $5 – 10
Difficulty Level: Easy – Moderate
Materials Needed:
- Red cardstock
- White Cardstock (with Free Printable)
- [amazon_textlink asin=’B000XAHF7S’ text=’Permanent tape’ template=’ProductLink’ store=’opcwp-20′ marketplace=’US’ link_id=’db7a74f0-d2d6-11e8-bd0e-1b2ea7744430′]
- [amazon_textlink asin=’B077GF2GGS’ text=’Recordable Card’ template=’ProductLink’ store=’opcwp-20′ marketplace=’US’ link_id=’c53a0c64-d2d6-11e8-a235-374a71e70c25′]
- [amazon_textlink asin=’B00168A18Q’ text=’Velcro Dots’ template=’ProductLink’ store=’opcwp-20′ marketplace=’US’ link_id=’3840ea2f-d2d7-11e8-8f39-8de3cc758ef3′]
- Red Satin Ribbon
- Red Sheer Ribbon
- Scissors
Here’s the full video tutorial, but read below for tips, tricks and more details on the tutorial.

- Print this ^^^^^ on white cardstock and cut.
-
Cut Red Cardstock to:
• 8.5×5.5″ (folded in half)
• 6×5.5
• (2) 1.5×5.5″
-
Use Recordable greeting card to record Howler! Remove old card exterior and trim to fit inside new card. Affix to red cardstock 8.5 x 5.5″ at crease. Crease 6 x 5.5″ red cardstock to place overtop the electronics of the recordable message.Use permanent tape runner for easy application and for staying power!
-
Using Ron Weasley printed howler piece, fold in half so the message is not seen. Then accordion fold the two sides about 2/3. Then fold again.
- At center of the fold, cut a one inch slit and tape red satin ribbon inside.
-
Taking the accordion folded message, tape one side to inside of red card, about 3/4 inch down. Tape other side of white paper and fold the red card on itself so the message is taped to open properly. Just watch the video – it will make more sense. LOL
- Take pieces of printable on cardstock. Use the two long one inch pieces and fold accordion style. Cut one end of the accordion to a point (to form teeth). Fold in half lengthwise so that accordion points pop outward.
- Take Red cardsctock pieces (2) 1.5×5.5″ and fold in half lengthwise. Then fold ends in on themselves. Affix to top and bottom ends of the inside of the card so the folds face to the outside.
- Affix accordion teeth to red folds so they pop out.
- OPTIONAL: Put card to the side. Put giant glob of hot glue on paper. Take a Harry Potter pin and spray with cooking oil. Press pin into the hot glue and remove. Once dry, paint with black acrylic paint. When mostly dry, use dauber to paint the high points with gold paint.
- Close card and wrap satin ribbon around the outside. Glue on end on the side closest to the fold and place a Velcro Dit on top.
- Wrap ribbon around the card and glue down. Glue Ron Weasley’s address on the side with no ends.
- At the other loose end, glue the other velcro dot and faux wax seal.
- DA-TA!
Pin for Later
Love this tutorial on how to make a howler from Harry Potter but don’t want to make it at this very moment? #becausekids Don’t worry, pin it for later and share it with your friends too!


Jocie Hagan
One Project Closer
Come say hi on Facebook, Instagram, & Pinterest!
Want to learn to hand letter and make amazing, personal decor for your home?
Learn now with Busy Girl’s Guide to Hand Lettering!
**Use the code HAPPY5OFF to get $5 off the course price**

Hi Jocie! I am trying to download the printable that goes with your Harry Potter inspired Howler. However, it doesn’t seem to be working. Any help is really appreciated! Thanks!
Hello Joice,
I am trying to download the printable that goes with your Harry Potter howler. It does not link, can you activate the link?