
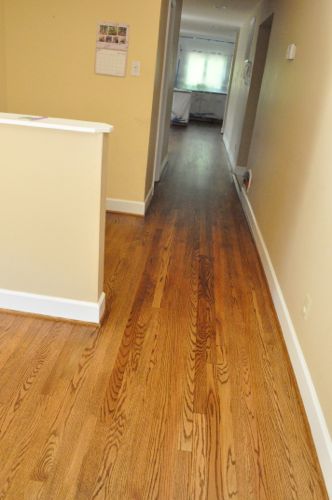
Welcome back to our latest Pro-Follow series focused on how to refinish hardwood floors. Refinishing a hardwood floor is a great way to bring new life to a floor that is showing too much wear and tear or if the finish is no longer protecting the floor. It’s also a necessary part of extending an existing hardwood floor like we showcase here.
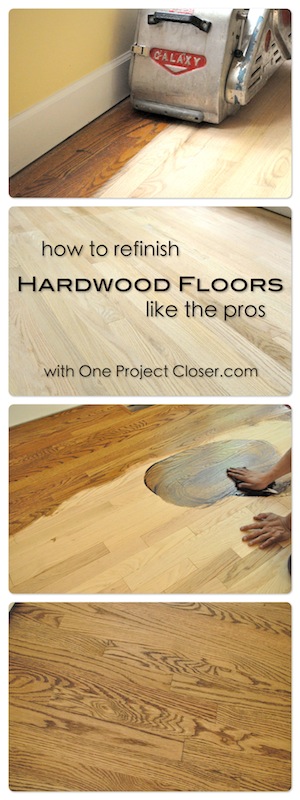
All of our Pro-Follow articles are the result of shadowing expert, professional contractors on actual job sites. There’s no better way to learn about home improvement than straight from the guys working in the field with decades of experience under their tool belt. For this Pro-Follow, I’ve partnered with Danny Riter, owner of Signature Hardwood Floors, Inc. In this article Danny shares the tips and tricks to successfully refinish a hardwood floor. The process includes removing the old stain and finish, proper sanding progression, sanding edges and corners, applying stain, and sealing the floor to protect its beauty for years to come.
If you’re considering new hardwood floors or refinishing an existing floor and you live in the greater Baltimore area, give Danny a call. He and his crew will work with you to provide a beautiful, long-lasting flooring solution. This article is a great example of the knowledge and attention to detail Danny brings to every job. Check out his website for more details.

Tools & Materials
These are the tools and materials that Danny and his crew used for this project. If you’re taking this project on yourself, you can rent the bigger tools at your local DIY center. Links to the manufacturer product pages can be found at the end of this article in the Related Content section.
- Drum Sander
- Floor Edger
- Buffer
- Hand Scraper
- Nail Set
- Vacuum
- Floor Coater and Trim Pads
- Terry Cloth Towels
- Wood Filler
- Stain
- Shellac
- Polyurethane
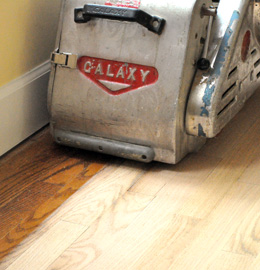
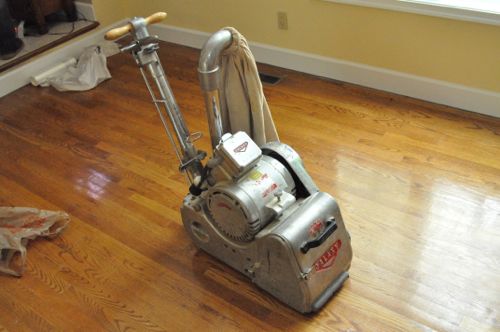
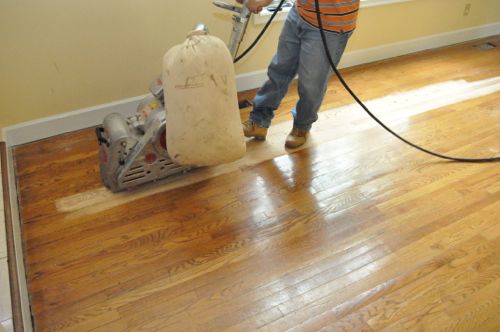
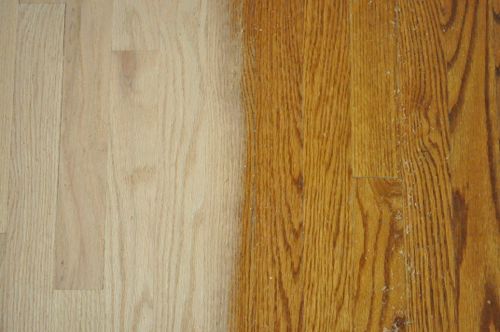
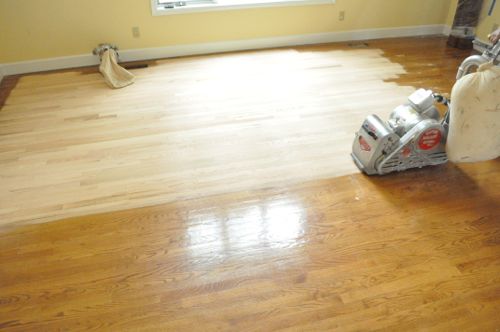
Step 1: Drum Sand Floor
To remove the majority of the existing finish and stain, Danny’s crew used an 8″ drum sander. They started off with a 36 grit sanding belt.
Pro-Tip: Some floors may only have a thin layer of hardwood material, and these floors cannot be refinished.
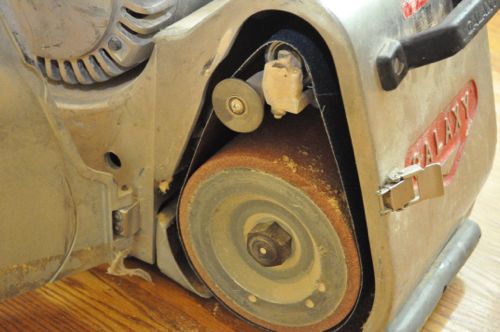
The sander is a pretty simple machine. The handle enable the operator to maneuver the sander, and the lever engages the sanding belt against the floor. The bag can swivel to either side, and it captured a fair amount of dust.
Pro-Tip: Always sand in the direction of the boards.
Pro-Tip: Always put the sander in motion before engaging the belt against the floor to prevent uneven sanding.
For the most part, two or three overlapping passes was enough to completely remove the old polyurethane and stain. Occasionally the guys found a low spot and had to hit it again. Danny’s crew would sand 3/4 of a room facing one direction, then sand the rest of the room facing the opposite direction.
Pro-Tip: Each sanding belt covered approximately 250 sq ft. before the guys swapped it out.
The belt sander can only get so close to walls, corners and other tight spaces. The guys were very careful not to bump the sander and thereby damage the floor. They also avoided going over the floor vent openings with the drum sander.
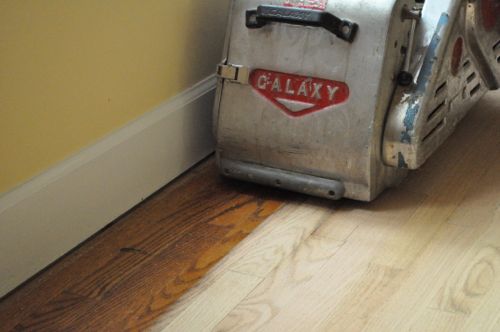
The result was about a 5″ perimeter around most rooms and the hallway. The drum sander was too large for a few of the closets so the guys couldn’t use it there either.
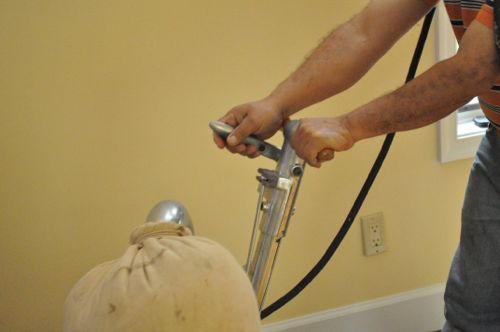
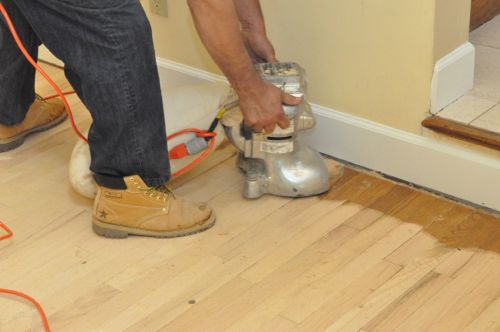
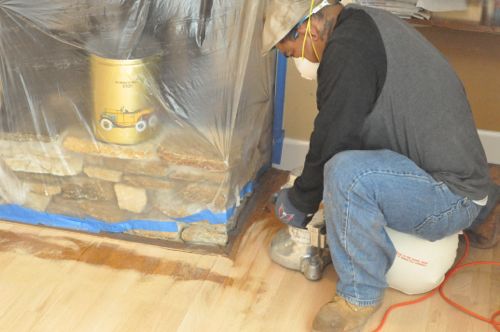
Step 2: Sand with Floor Edger
Next, Danny’s crew used a pair of floor edgers which enabled them to get right up against the walls and into areas with limited space.
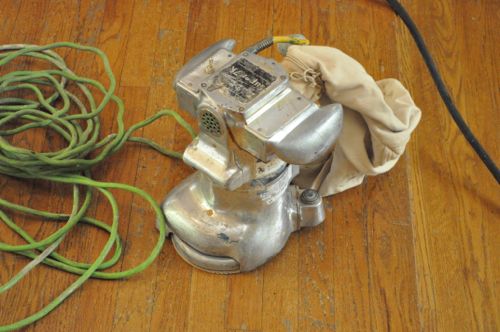
Like with the drum sander, they used 36 grit sanding discs.
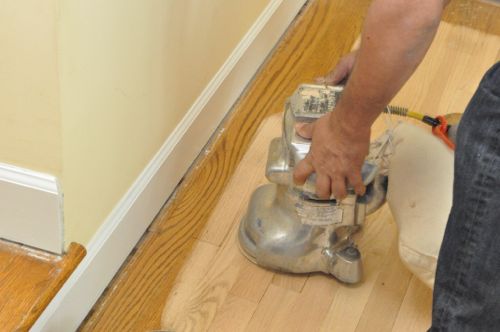
Pro-Tip: The guys double-stacked the sanding discs so that when the first one wore out, they could just rip it off and get right back to work.
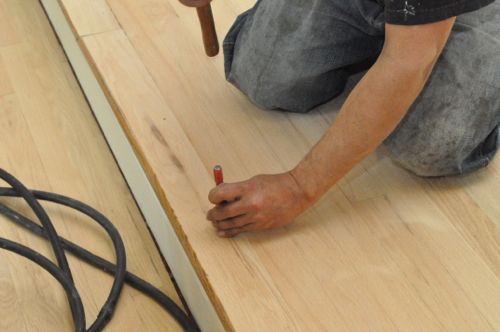
Step 3: Set Nails
Danny’s crew checked the floor for nails and used a nail set to sink them below the surface of the wood.
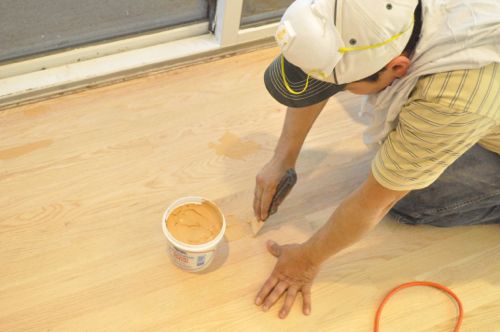
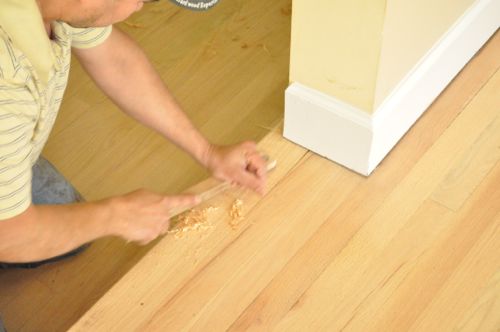
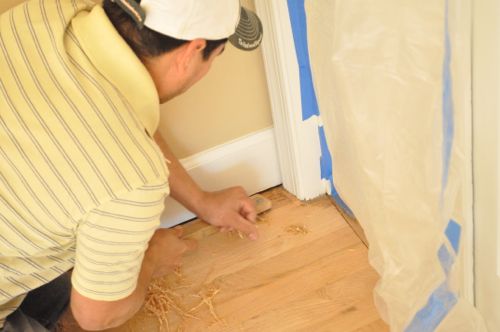
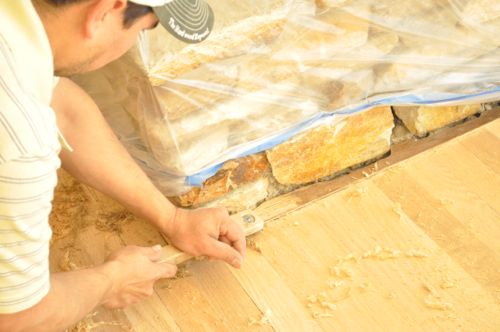
Step 4: Putty holes and Cracks
After sanding, the guys used Woodwise wood filler to fill nail holes and any noticeable cracks.
Step 5: Vacuum and Repeat
While the wood filler dried, the guys gave the floor a quick vacuum.
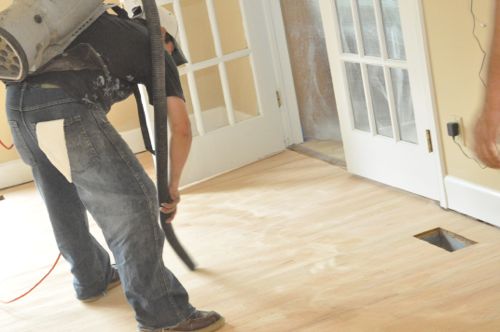
Next, they repeated the process (drum sander and floor edger) with 80 grit sanding belts and discs.
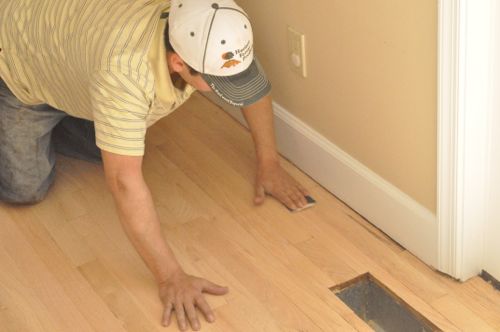
Step 6: Hand Scrape
The floor edgers move in a circular motion, and although it’s difficult to see before staining, they leave swirl marks in the floor. To remove those and get in even tighter into corners, the guys used scrapers to remove a thin layer of wood.
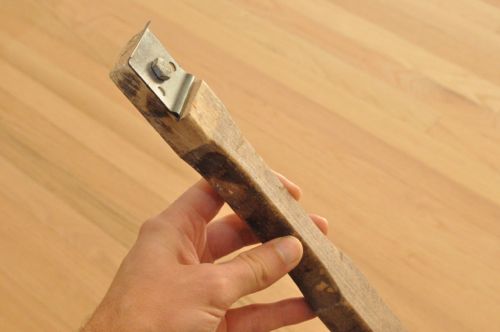
Pro-Tip: Use a file to hone the scraper edge periodically for best results.
The scrapers were also great on stair-nosing and transition strips.
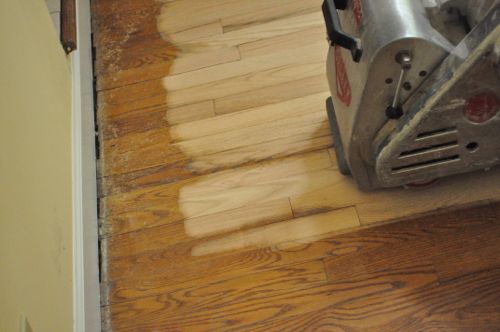
Step 7: Lightly Sand
After scraping, Danny’s crew did some light sanding with 180 grit sandpaper to ensure a nice, smooth surface. They followed this up with more vacuuming.
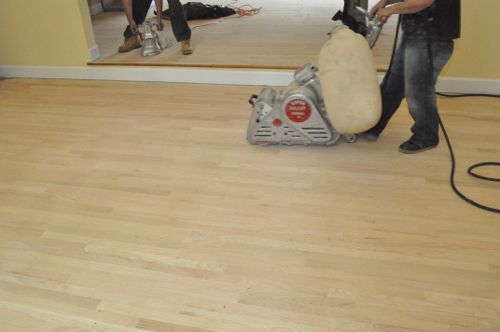
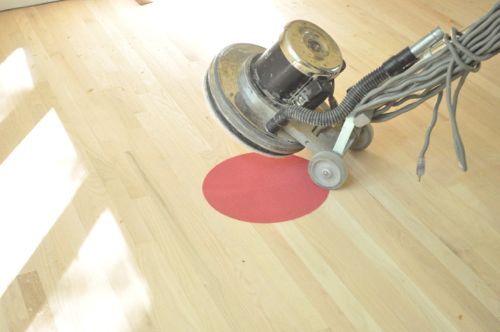
Step 8: Buff Floors
Next, the guys broke out a floor buffer and a 120 grit buffer pad. They quickly went over all the floors, getting as close to walls and corners as possible.
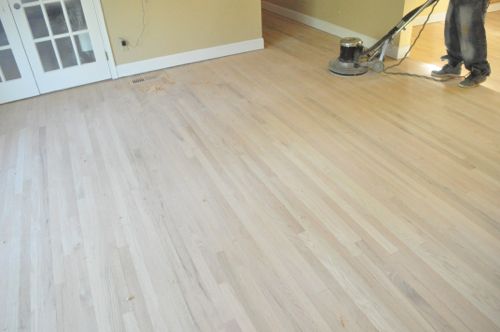
Step 9: Vacuum Clean
As you can imagine, all this sanding can create a significant amount of dust. Fortunately, most of their sanders have a vacuum hookup or a dust bag. Even so, the guys carefully vacuumed and dusted all the surfaces (not just the floor) to eliminate as much dust as possible. Otherwise, the dust can settle in the stain or poly and flaw the finish.
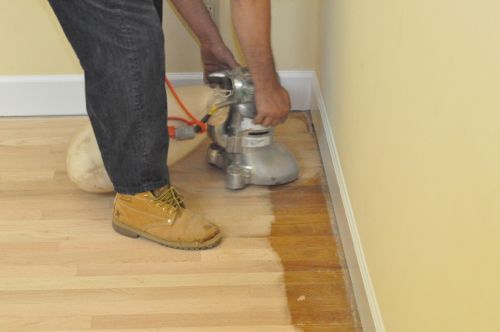
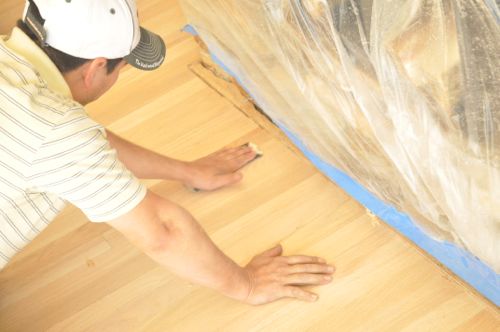
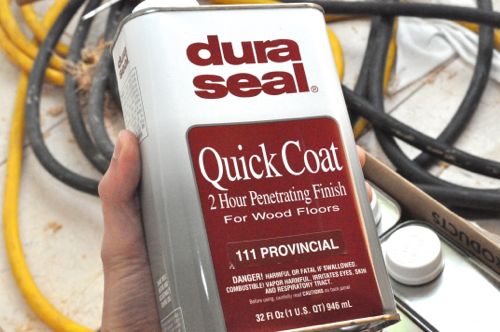
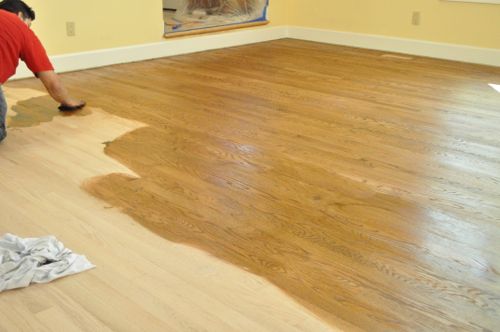
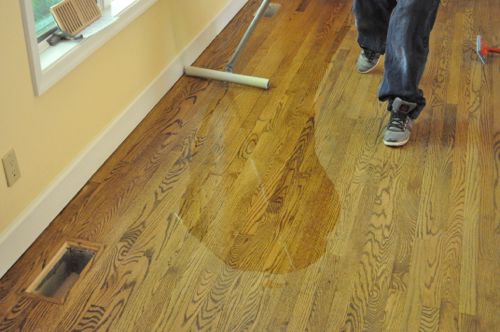
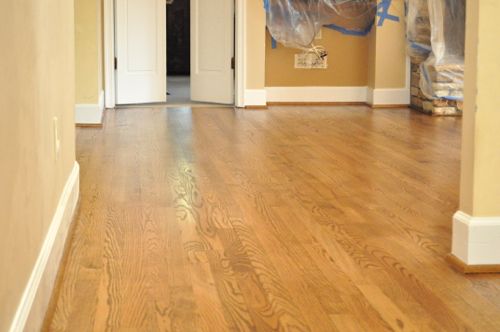
Step 10: Apply Stain
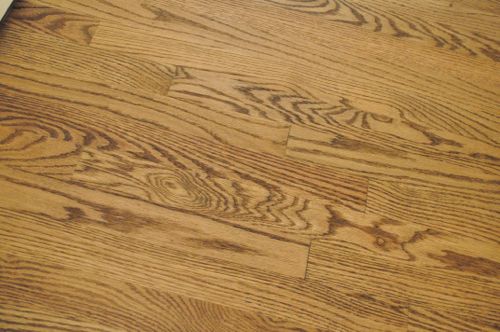
The guys applied DuraSeal Quick Coat, and the stain is called Provincial. It’s a medium brown. Some of the pictures make it look a little yellow, but that’s not the case.
Pro-Tip: Thoroughly shake the container to mix up the stain.
Danny’s crew used Terry cloth towels to apply the stain.
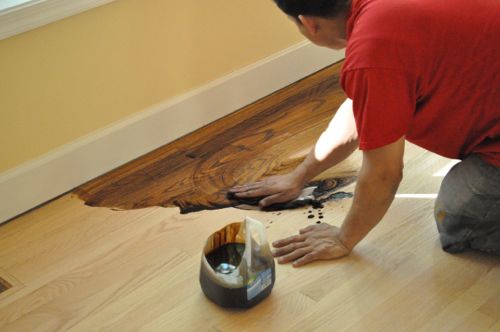
The stain only needs about 5 minutes to penetrate. After that, the guys wiped up the excess stain, wiping in the direction of the wood grain.
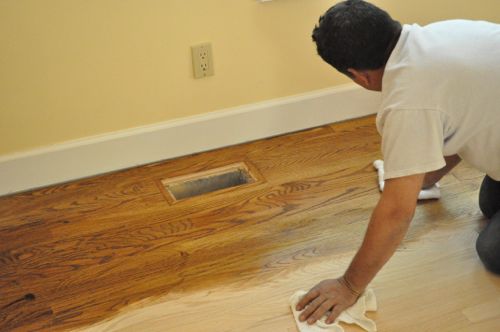
The guys worked in long, thin strips and quickly stained the wood floor.
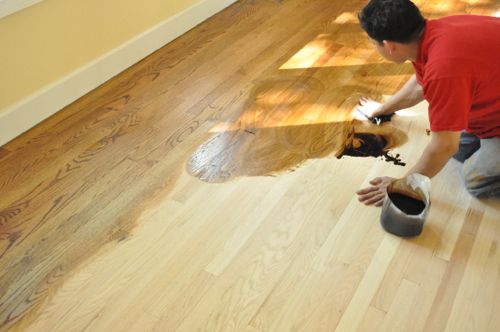
At this point, any imperfections from sanding would be much more visible, and this would be the time to fix them. Danny and his crew didn’t find any problems.
The stain was dry in about 2-3 hours.
Step 11: Apply Shellac
The guys applied a coating of shellac using floor coaters for the big open areas and trim pads for around the perimeter.

The shellac provides a seal coat that will dry hard and bond with the polyurethane.
Again, the guys worked in thin, long section, taking care to apply the shellac evenly.
The shellac is dry after about 45 minutes.
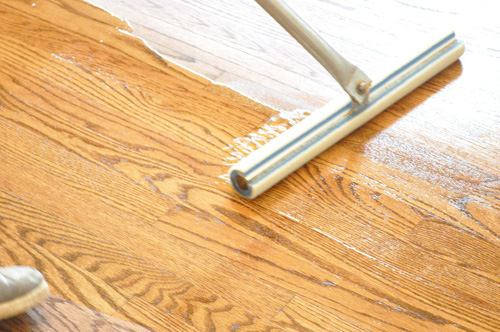
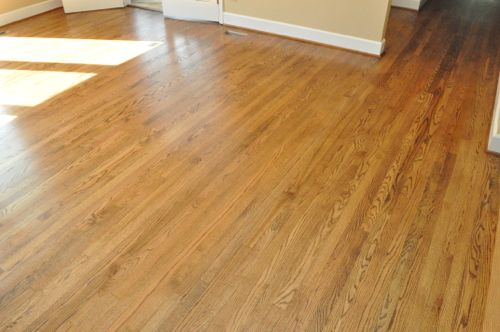
Step 12: Apply Polyurethane
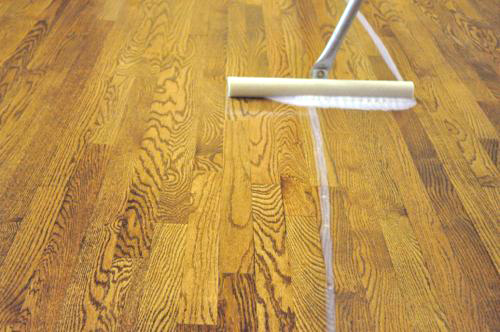
Next, Danny’s crew applied Bona Mega polyurethane with a satin finish.
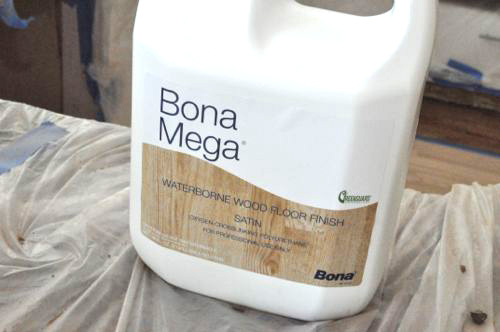
The polyurethane goes on much like the shellac, using the floor coater and trim pads. The guys applied two coats of Bona Mega, with about 3 hours of dry time in-between. This picture shows how they worked to maintain a wet edge and “snowplowed” the poly across the floor.
Step 13: Install Shoe Molding
After the poly was dry, the guys installed shoe molding to replace the molding that had been removed at the beginning of this job. The molding was stained and sealed just like the floor before it was installed.
Step 14: Apply Polyurethane Again
Before this last coat of poly, the guys used a screening disc and the floor buffer to abrade the floor for the smoothest results.
Pro-Talk: Screening discs are mesh screens with abrasive particles bonded to it, and they act much like sandpaper.
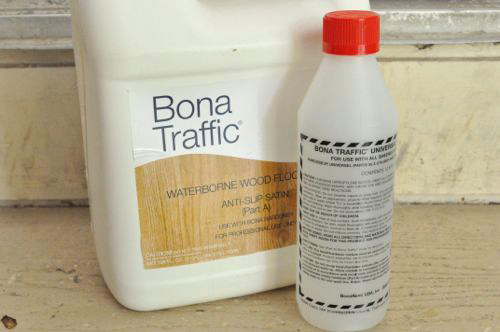
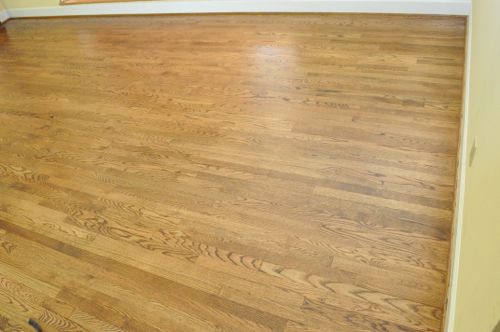
Danny’s crew applied one more coat of polyurethane, and this time they used Bona Traffic with an anti-slip component. Like the name implies, Bona Traffic is designed for high-traffic areas to provide an even more durable finish. It’s a two-part product, and once the hardener is added there’s a four hour work window. Bona Traffic is applied just like Bona Mega.
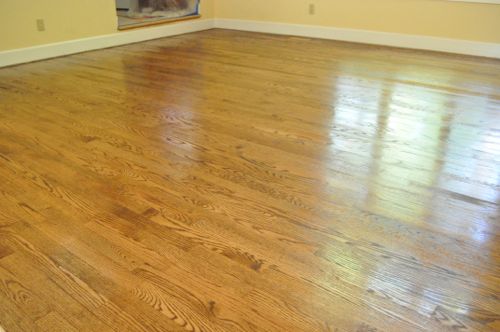
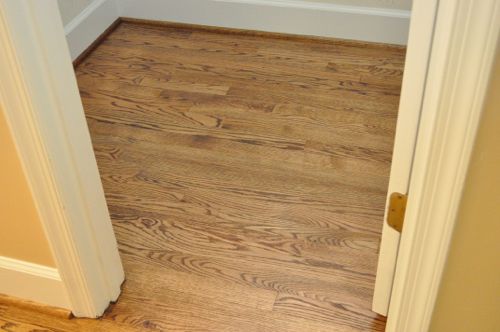
Finished
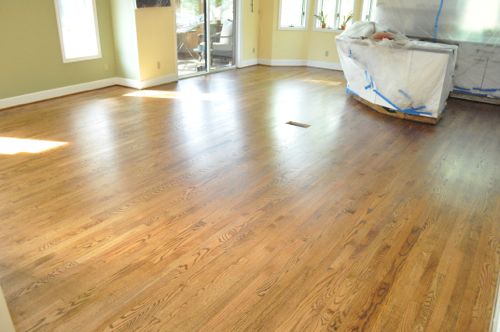
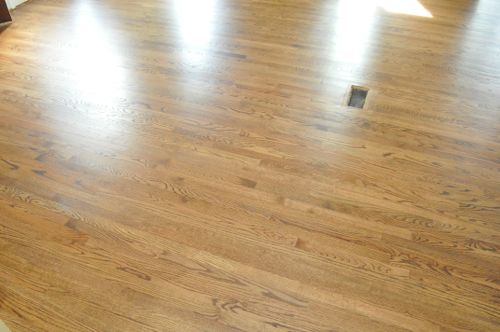
With the last coat of polyurethane applied, the floor is finished. It’ll take 7 days to reach full cure, and until that time the floor is susceptible to scuffing. Even so, the floor is ready for light foot traffic after about 24 hours.
Pro-Tip: Area rugs can slow the curing process and should not be replaced until after 7 days.
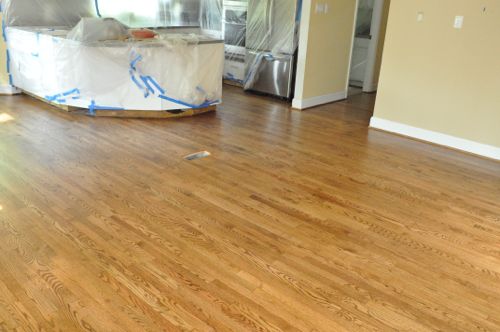
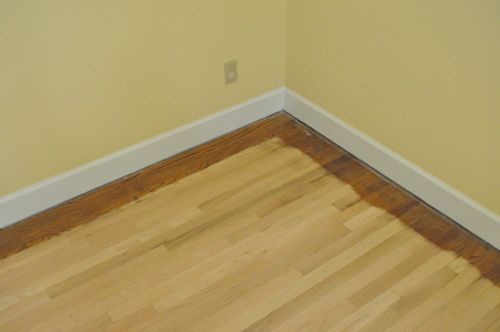
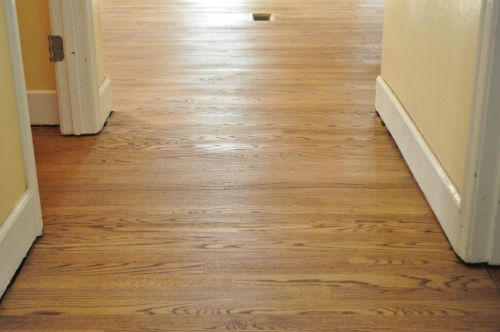
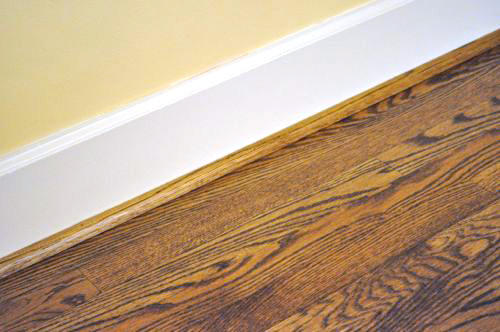
This is where the old and new floor meet, and even up close it’s very difficult to notice any transition.
Pro-Tip: Homeowners should change their furnace filter after refinishing is completed.
Interested in laying your own hardwood floor? Check out our Project Guide for Installing Hardwood Flooring to learn how.
If you’ve enjoyed this guide on how to refinish hardwood floors, give it a +1 and share it on Facebook! Thanks.

Oh great, more fuel for the paint vs stained shoe moulding debate (https://www.oneprojectcloser.com/painting-vs-staining-quarter-round-shoe-molding-trim/). 🙂
In all seriousness though, another great guide and follow. I suspect this article will garner comments for years to come. What were the homeowners doing during all the cure times when they couldn’t walk on the floors? Did they have to stay out of their house for any length of time? What are the off-gases and fumes like when the stain, shellac, and poly are applied in such large quantities?
Haha! I thought about that too but decided not to comment on it. There’s plenty of fuel on that fire already.
I was really pleased with how this came together, and I hope to identify more Pro-Follows with Danny. Maybe something about repairing a damaged floor…
The homeowners actually camped in the backyard and lived in the basement. I think they enjoyed the excuse to break out the tent. The off-gasses were potent during application but they didn’t last long.
eh, it really is a personal choice (I like white, its part of the molding, not the floor).
I think all the poly was water based, so I would guess that it wasnt so bad.
I’m one of those who added fuel to that. I just always seen the shoe molding being stained here. I never really paid much attention to other people’s choices. Its like people who have something to say over if the TP hangs under or over on the roll.
I wonder if it’s ever been an argument between a couple before lol.
Nice stain choice and hey I’m on your side for the staining of the Shoe molding don’t worry it looks nice 🙂
You wonder about which one being an argument between a couple? We’ve actually had discussions about both conundrums!!
Any chance we could get an order of magnitude cost comparison between:
a.) Buying sandpaper, buffer pads, stain, poly, and applicators and renting the specific tools (from HD or similar) or
b.) Having pros come in and do the job?
This seems like yet another job that probably should be left to the pros since I imagine it would be all but impossible to do the job for a lower cost. Plus, the results would likely be much better when left to folks like Danny.
I’ll see what I can find out. Contractors often don’t like to publish prices because it makes bidding a job more difficult. They’re juggling customer expectations, specifics about the job, staying competitive while still making a profit, etc.
However, I can do some estimating for taking on this job myself…
Excellent Pro Follow! I’ve wondered what the entire process would involve. It seems to me that those instructions would move the project along nicely. Thanks for doing a great job with all the details.
Really nice guide. It helps to be able to see the process in order to better make a decision about whether to go it alone or hire someone. Great pics. Still interested in whether the blending of woods is at all noticeable at this point. Maybe I missed that line. Thanks so much!
I’ve never understood the difference between all the products. What’s the difference between shellac and polyurethane? What’s the purpose of the shellac? What if you skip that step? How about oil and water based polys? What’s the difference?
The seal/stain is oil based and the poly is water based. Water based finishes can’t bind with oil based underlayers. Shellac is an all purpose finish that doesn’t have that problem. It’s actually made by dissolving a natural wax made by bugs with denatured achohol. The shellac can bind to the oil based seal/stain and the water based poly can bind to it, so it buffers between the two layers (oil based then water based) to allow everything to bond. The other good thing about shellac is that it dries very fast. You only need time for the denatured alcohol to evaporate. During that time, though, the off gasses can be very overpowering.
Very nice result! I think it looks great.
Are there any machines/tools to apply stain? Seems odd that of all the parts of the process, that is the only one done by hand.
This looks great! Thanks so much for sharing! We really need to refinish the floors in our dining room!
Why do you use both shellac and polyurethane ?
I caught up with Danny and learned that the shellac is used as a sealer. When you apply a water base poly on a stain without sealing, the stain sometimes pulls / drags stain. This can cause lighter areas. This doesn’t always happen, but it’s possible. The shellac prevents that from happening.
Also, we are going to be moving walls around and are trying to save some of our original hardwood flooring to fill in any gaps where walls are getting removed. Any tips on how to remove it without destroying it?
Would you recommend non-pros to tape the trim before stain? I imagine if you went slow enough you would probably not bump into it, but I could see myself doing that quite a bit…???
The best guide. Very thorough and helpful. Thanks for sharing this.
I hope Danny got paid handsomely for selling himself out and his fellow flooring contractors. Why would any true professional want to tell inexperienced, never done before people how to do his trade so they don’t have to hire him??? I could pick the tutorial apart technically but I will not. Like to see any Joe off the street get a Galaxy Belt Sander (not a drum). Also like to see a lay person pulling finish on. I’m at a loss as to why Danny would do this. Must be money. If not than only one other reason. Could be the fluoride.
I recently was refinishing a table in my kitchen. It was a rainy day and I decided to lay down lots of blankets in my kitchen and go for it …. In the end I ended up wrecking my kitchen floor when I noticed sold of the furniture remover has acid in it and I had gotten little spots of it on my floor which I ended up making even bigger when trying to fix them . Not sure if my flooring is Pergo or laminate or how to find out . I do daycare and have asked all my daycare dads if they know what it is but they are just as clueless and tell me it’s either laminate or Pergo . I have brought pictures into Home Depot hoping they could help me . When I bought the house there was no left overs . Any ideas on how I could fix this ?:(
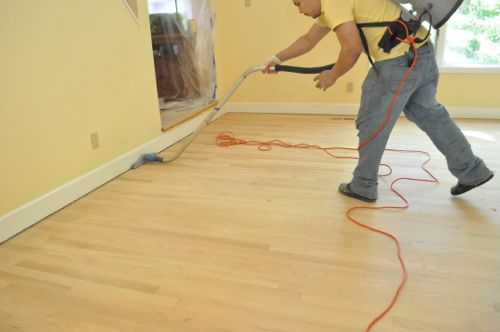
Many homeowners that refinish their own flooring use a shop vac which sometimes can leave marks on the floor with the wheels especially on a heavily used vacuum. I like the backpack vacuum with a horse hair brush. It has a little stiffness to get up the dust yet will not mark up the freshly sanded floor. I have seen dirty wheels on a shop vac marking up the floor. Don’t use a home vac either because the filters will be clogged in no time.
I don’t think you supposed supposed to use Shllac over the stain.
Please advise me if I’m wrong
Thanks+
i am in the middle of re finishing my hardwood floors my concern is that after the second coat of stain was put down the dried product feels tacky its wierd it was done 48hrs ago and the tacky feeling is still there was i suppose to do a super fine sand like 120 between coats ? i need answers as quickly as possible…please someone help me …afraid to seal with the poly if the stain is going to remain this way
the color came out beautiful by the way !!! but need help so please if anyone out there has the answer please send to me asap………………..thank you so very very very much
oops maqrybeth again just realized not on pintrest im on oneprojectcloser.com lol thanks for any help you all can give me
Excellent advice. Too many people purchase a hardwood floor and don’t look after it properly
Great tutorial and very detailed. You take it so easy that I want to try doing it with my dining floor myself.
I just came across your link and was very much impressed to see this lovely hardwood flooring refinishing tips.Thanks for such a nice content.keep on posting the same.
I think this is the most comprehensive guide on hardwood finishing I found online. Thank you
Great and very informative article! Made me realize I never want to finish my own floors! So much details and work, great job Danny and great article Ethan!
Thanks for this informative tutorial. The room looks great. By the way, I think you might need advice to get the right tools for your home improvement project. Check out and recommend to your reader https://www.thefinestrooms.com/tools-guide-for-diy-and-home-improvement/
Thanks for your post! I am wondering how the Bona products are holding up? I have heard mixed reviews about this product!
Thanks!
Great article!All the pictures are very descriptive and informative.