
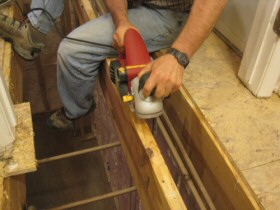
 Up first in hardwood flooring week is tackling a particularly challenging section of our subfloor that couldn’t be leveled using our asphalt shingle subfloor leveling method. If you want background on the entire leveling project, I suggest reading the shingle-method post first. It gives information on the subfloor situation covered in this article, and the steps required to level a subfloor without taking up the existing subflooring material.
In some cases, it is necessary (or at least beneficial) to address an uneven subfloor issue at the joist level. In our case, this occurred in a particularly uneven spot near our garage entry door. The problem: one of the joists close to the end joist of the house had a very significant crown in it. Between it and the end joist (just 12 inches away), there was a 5/8 inch drop! The joist on the other side of the crowned joist was properly level (meaning it was in plane with the end joist). Essentially, a hump on the floor was created by the excessively crowning joist.
To address this unique area of the floor, we decided to remove the existing 5/8-inch OSB, plane the joist using a standard handheld planer, and install new OSB over the joists. This process was fairly simple and straightforward–the details are below.
This article is part of our series on installing hardwood flooring. Click that link for an index of all the articles in this series.
Safety Issues
Before getting into the process, it’s worth noting that whenever you plane a joist you reduce its weight-bearing capacity. Accordingly, it may be unsafe in any given situation (especially if you plane too much). In our situation, this joist was very close to the neighboring joists on both sides and we felt comfortable planing. Before tackling something like this in your own home, you should discuss and obtain approval on the project from a structural engineer.
Also note that you could encounter electricity, plumbing, ductwork, alarm wires, telephone wires, and more when doing this project. There are also other safety hazards–such as the gaping hole left by the subfloor being removed mid-process. We can’t anticipate the problems or safety issues you might encounter in their own home, so make sure to contact a professional if you aren’t qualified to perform this job. As with every article on our site, use this information at your own risk!
Tools and Materials Used
- Circular Saw
- Chalk Line
- Drill Driver with 1/32″ bit.
- Planer (or sander, although planers are better for this).
- Screwgun (we like this Senco Screwgun)
- New Subfloor Material that Matches Existing Subflooring
- Subfloor Screws
- Construction Adhesive (Liquid Nails for Subfloors works)
Steps to Level a Subfloor At the Joists
Step 1: Locate the centers of the joists on either side of the offending joist and mark these on the floor using chalk line. Identifying the exact location of joist centers can be difficult. We used a 1/32 inch drill bit poking through the subfloor at 1/4″ increments until we found both sides of the joist, then we marked in the middle. We did this on both sides of the floor and then snapped a chalk line between them. This process is much easier if you know the approximate location of the joists (we can see them from our basement).
(Update: Note that it is better if you can go further out than one joist on each side of the offending joist, as span-rated plywood or OSB is rated so when it spans multiple joists. In our case, existing walls prevented this from being accomplished easily, and we were planning to lay 3/8″ plywood on top, and 3/4″ hardwoods on top of that – so we weren’t concerned).
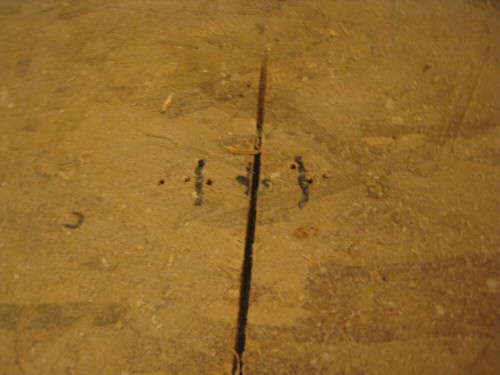
Step 2: Set the blade on your circular saw to the subfloor depth (no more!) and cut along the chalk lines on the centers of the joists on either side of the offending joist. The goal is to remove the subfloor back to the centers so that installing new subflooring material is simple. If you are able to preserve the existing subfloor, you may be able to re-use it (we didn’t). Note that at some point you will have to cut 90 degrees to the parallel chalk lines. We got as close to the walls as practical in our situation.
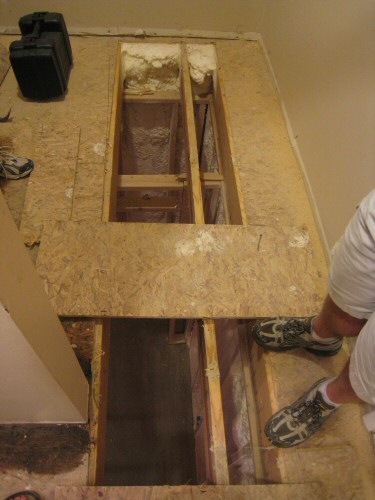
You can see in the picture below that the subfloor has been removed back to the centers of the joist on either side of the crowning joist (you can also see some of the spray foam insulation in the rim joist in the basement through the hole). The single joist completely exposed will be planed.
Step 3: Identify a method to determine what constitutes “level.” We decided to use a piece of the hardwood we are installing which registered as flat against our 4 foot level. We were able to cut this wood to fit between the joists and drag it along the surface.
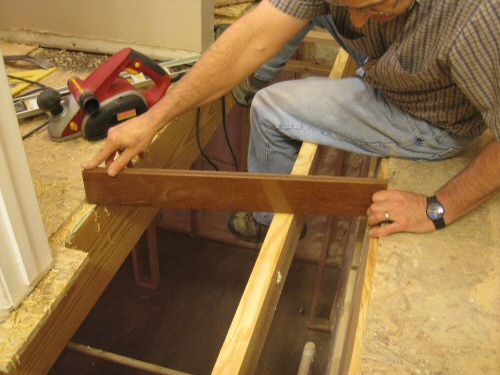
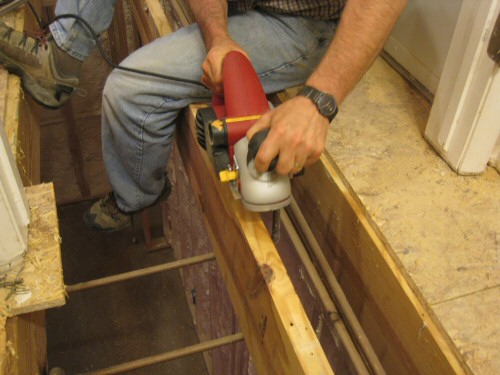
Step 5: Plane the joist until level with the neighboring joists. The key in this step is to not over-plane. If you do, you’ll have the exact opposite problem on your hands. Plane slowly and regularly check the joist height relative to the neighboring joists.
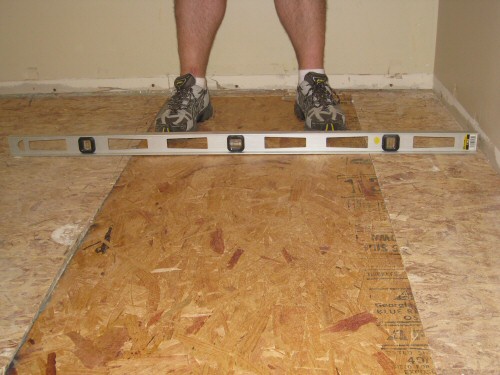
Step 6: Cut and dry-fit the subfloor material (OSB or plywood at the same width as the existing subfloor). We also checked the floor for level to make sure our work was good. You must make precise cuts on the subfloor material since it will be resting only on half of the neighboring joists.
(Update: note that plywood and OSB span ratings are based on the wood being run across the joists as opposed to parallel to the grain. In our situation we laid the subfloor parallel to the joists which creates a weaker subfloor. However, we are laying 3/8″ plywood on top of this OSB, and 3/4″ hardwoods on top of that for a very high strength floor. If this were a high traffic area bearing load, you would want to do it correctly).
Step 7: Lay a bead of construction adhesive on the joists, place the new subfloor piece, and fasten the new subfloor to all joists using 1.5 or 2 inch subfloor screws. Our Senco Screwgun made this step a snap, but you could do it with a drill driver and subfloor screws.
What do you think? Have you tried this method in your own home? Let us know in the comments.


Fred,
Great post! Couple of things I’d point out and maybe do differently if it were my house.
1. In a situation like you have it would be better to remove sub-floor over several joists. Span rated OSB (or plywood) is typically rated for continuous span over several joists. Spanning over several joists is must stronger than spanning basically over one joist.
2. Span rated OSB (or plywood) is typically applied perpendicular to the joists, again for span rating (load rating).
3. Not sure if this room is also getting your layer of additional plywood, if so that will help a bit.
4. I would use sub-floor adhesive as well as the screws to help prevent floor squeaks.
Todd, great additions – I’ll incorporate them.
Question on #1: Since we’re hitting the centers of joists on both sides, is that not considered spanning 3 joists?
On #2 – this is a great insight and one I didn’t realize – makes sense though the way the grain of the plywood and OSB is positioned – worth a post all to itself in fact.
On #3 – this room is getting the 3/8″ plywood, and 3/4″ tongue and groove on top of that – plus this particular section of floor is a hallway that never has more than two people standing on it, so I think we’re safe there.
On #4 – No Doubt – I’ll add this in (we forgot to do this as it was 10:30pm at night when this piece finished up!)
Most “continuous” span assumptions in engineering assumes several “spans”. Some might argue that you have 2 spans but it’s a pretty loose argument.
The fact that you’re installing additional plywood followed by 3/4″ floor certainly helps. My bigger fear is from squeaks and movement. Over time it’s also possible that 5/8″ plywood running parallel instead of perpendicular could sag but again, probably not that big of a deal.
At least you weren’t afraid to tear it apart and fix it correctly!
I wish I had done this before putting down my hardwood floors. I’d seen the asphalt shingle approach mentioned by a builder on another site, so I tried that first. I’ll have to remove the flooring and re-install it, since I was a bit careless in making sure the floor was flat. That was about 8 years ago when I barely knew anything about these types of projects 🙁
I am buying an old farm house. The living room has several floor joist that are crowning up from the house settling and moisture. What is the best way to fix a floor that is crowning over several floor joists? the problem area is about 16′ by 10′
I have a similar situation. Installing 3/4 hardwood on all of the lower level. All is flat except dining room. The house is about 20 yrs old and built with 4×6 beams 24 OC with 2×6 subfloor and 3/4 plywood on top. The room is 12 x 16. Can I remove the plywood and plane the 2X6 to compensate for the crown in the 4×6 beam and then reinstall the 3/4 plywood?
Any suggestions on how to get a straight cut through plywood with a circular saw? Also, is there a minimum gap allowed between sheets of plywood/osb or should they basically be touching?
Thanks!