
Cement board replaces the old plaster and lathe underlayment for tile. It’s a lot easier to work with preformed cement board rather than laying a bed of mortar on the job site, and it still carries the same great qualities. Cement board is moisture and mold resistant, and it doesn’t deteriorate or warp in the presence of water. For these reasons, and because it bonds so well with mortar, cement board is the preferred underlayment for tile.

I’ve been working with Jim and Rich from Diamond Tile here in Maryland to produce this series of articles. Jim and Rich have been installing tile for nearly three decades, and they are very knowledgable. It’s been great to learn the tricks of the trade from them.
Tools & Materials
- Cement board – usually 1/2″
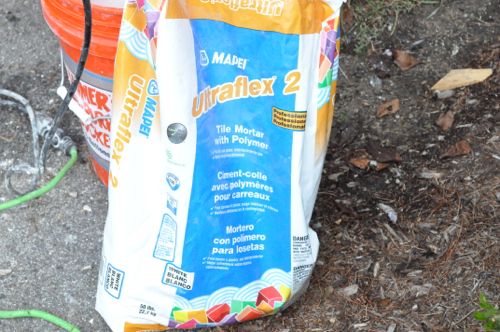
- Mapei Ultraflex 2 – a polymer modified thinset
- 1/4″ square-notched trowel
- Galvanized roofing nails or cement board screws
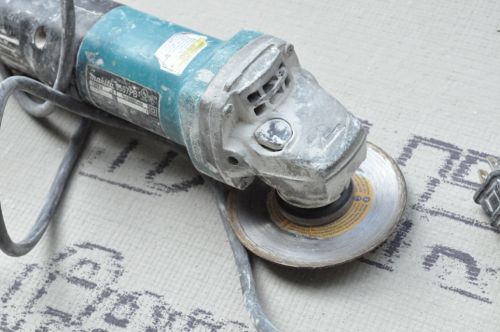
- Grinder with diamond blade
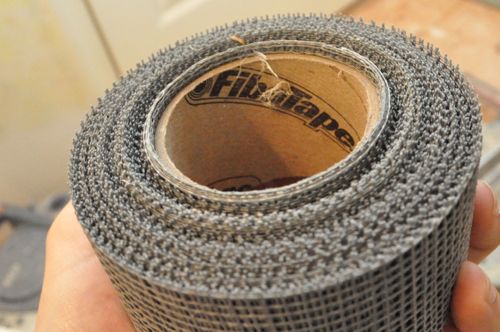
- Alkali-resistent mesh tape

Step 1: Plan Layout
There are a few requirements to keep in mind when installing cement board so Jim and Rich always plan the layout a bit. They staggered joints so that four corners never meet, and panels were offset about 8″ from the subfloor joints. Also, the guys maintained a 1/4″ gap around the perimeter walls.
Pro-Tip: Cement board features a smooth side and a textured side, and the textured side provides a better surface for bonding tile.
Step 2: Clean Subfloor
Jim and Rich always clean the subfloor with a foxtail brush. As they cleaned, they inspected the subfloor looking for signs of damage especially around toilet flanges. If the OSB or plywood was flaking, they cut away any loose pieces.
Step 3: Dry Fit
The guys dry fit each piece of cement board before installing, and they placed cut edges around the perimeter, butting factory edges together. Each panel had about 1/16″ gap between adjacent pieces. To cut panels to size or create cutouts for pipes, toilet flanges, etc., the guys used a grinder with a diamond blade. However, a circular saw, jig saw or even a utility knife can be used as well.
Pro-Tip:Â Cutting cement board with power tools creates a lot of silica dust so make cuts outside if possible.

 Step 4: Mix Mortar
Rich mixed up a 5 gallon bucket of mortar. As usual, he let the mortar slake before re-mixing and taking it inside.

Step 5: Spread Mortar
It’s a common mistake to install cement board and skip over laying a bed of mortar. Jim used a 1/4″ square-notched trowel to comb out the mortar, and he spread just enough to lay one row of cement board at a time.

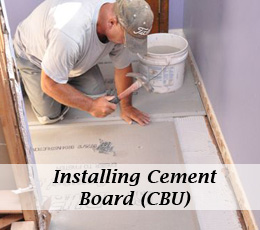
Step 6: Fasten Cement Board
With the mortar in place, the cement board goes down overtop, and it’s fine to immediately walk on it. Rich hammers galvanized roofing nails every 6″ around the perimeter of the panel and throughout the field. The nails ensure good adhesion between the cement board and the mortar. However, the mortar is what holds the cement board in place long-term.


Step 7: Tape Joints
Lastly, the guys use an alkali-resistent mesh tape and mortar to cover all the joints. This locks all the cement panels together, and they act as one, large sheet.

For cutting circular holes for small pipe I use a dull twist bit in my drill and drill holes a 1/4″ apart around the perimeter and then just punch it out with a hammer. You could a hole saw for cement products but I have a number of old dull bits. Old dull spade bits work well too.
That’s a good idea! Would a drywall handsaw (jabsaw) work as well? I have installed drywall before, but never put down a similar product on the floor.
You have a picture of screws, yet you used nails on the cement board. Which do you prefer and why? I found that when I used the screws, and maybe it is because I don’t have enough strength in my arms, that some of them would not go all the way down into the board and I would end up stripping the screws. If the nails work, I think I would prefer to use them.
Hey Ida,
It can be either. Some people prefer screws because they have better long-term holding power. Jim and Rich always use nails. As I point out in the article, the mortar bonds to the cement board and subfloor so the nails or screws are really just temporary anchors.
AWESOME! I think next time I’m going to try nails. Much less cussing, I think!!!
an impact driver would help as well, then you don’t have to rely on pressure, and the chance for stripping is much less.
also, Bosch makes some nice Phillips bits that have little ridges on them to better grab the screw.
Ida, While roofing nails will work, remember that you’re dealing with strong alkali in the backerboard and the mortar. The treated screws are more corrosion-resistant long term.
In my limited experience with cement board, this really surprises me. I would think it would break when walked on. But apparently it doesn’t!
With the thinset underneath, the cement board is fully supported (as is the tile) so there’s no weak spots that walking on would damage. Jim and Rich have found that Durock edges crumble more easily so I’d expect they’d be more careful with the edges until everything was laid.
How would this compare with ditra?
This is something I’d like to know as well! My husband and I are first time tile layers. I’m doing the research on it- ditra has a sound reputation around the web. However, the cement board way seems simple enough.
I have seen numerous tile backer boards used on the internet. Products like Wonderboard, Hardieboard, Durock and DensShield. I have read and seen numerous youtube videos stating to use this tile board verses another. Very confusing. My opinion is this: all of these products claim to be moisture and mold resistant and a very good substraight. Hardieboard claims to have a higher tensile strength than most comparable fiberboards. DensShield is the only backer board that has a waterproof surface, but this is a gypsum product and I worry about long term durability. Durock is heavy cement board but has been around for years. What is you opinion on these various products?
I doing a old basement bathroom. the area is 3′ x 7′ that I am fixing. There is a 3″ drop on one end to 1/8″ on the other end. Can I use cement board built up on the low end before I use self leveling cement.
Is it at all possible to properly install a large format ceramic or porcelain tile without removing the existing 2 1/4′ select grade red oak floors (basically use the existing hardwood floor as a subfloor)? This is a 7 story cement construction building.
I’m hoping you give advise. We are laying luxury vinyl wood plank flooring in out basement. We do have Seperate rooms. One larger thand the other. Starting with smaller room. Right now there are old tiles from the 40’s down in most places. My hubby ripped some up. My question is how do we create a flat surface to lay the floors. Ito our first home. This was budgeted as dyi and it must be. It’s been 3 months and my hubby is overwhelmed. Nothing is getting done. I know it can be done. I thought self leveling concrete from beginning. But is that best way? He needs to hear from someone other than me. 3 months! Going nuts ! Holding up getting the house together. It’s become the Bain of our existence. It should be happy a day exciting time.