
Even a perfectly level subfloor won’t guarantee a beautiful, long-lasting tile floor. Stresses between the concrete or wood subfloor can still cause tiles to crack and delaminate and for grout joints to crumble. For example, wood expands and contracts with seasonal changes. The tile assembly needs to be able to handle that which is why it’s important to incorporate an uncoupling membrane that allows for in-plane movement.
What is DITRA?
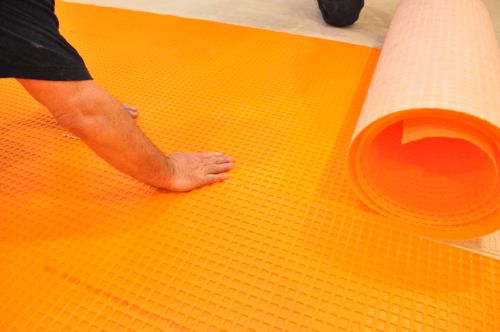
Schluter DITRA underlayment is an uncoupling membrane that allows the tile floor to move (in-plane) relative to the substrate, eliminating the major causes for cracked and delaminated tile. DITRA is composed of a polyethylene (plastic) grid of square cavities, each with angled, dovetail cut-backs, and an anchoring mesh laminated to the backside. It comes in long rolls (i.e. 1 m x 30 m), and it’s lightweight and easy to cut.

DITRA is approved for use with ceramic, porcelain, and natural stone tile. It can be installed over a variety of substrates including plywood, OSB, existing vinyl, structural planks, and concrete. For this project, the DITRA is being installed over radiant-heating element embedded in self-leveling mortar.
DITRA is a versatile product and can do more than just provide an uncoupling membrane. DITRA can be used as a waterproofing membrane for vapor and moisture management, and to support / distribute heavy loads. Check out the installation handbook for even more information and certifications.

This article was produced with the help of Jim and Rich from Diamond Tile located here in Baltimore, Maryland. Jim and Rich are professional tile contractors with decades of experience. They’ve used DITRA extensively on many jobs and highly recommend it, especially over cracked concrete.
Note: Schluter and Bostik generously donated the DITRA and the Ditra-Set Mortar for this project, enabling the development of this Pro-Follow guide.
Tools & Materials
Here are the tools and materials needed to complete this phase of the project. Look for more details in the Related Content section at the end of this article.
- Schluter DITRA or DITRA-XL
- Ditra-Set Mortar
The type of thin-set mortar (modified vs. unmodified) used to install DITRA depends on the substrate. For instance, to install DITRA over plywood, a modified thinset mortar should be used. However, over concrete Schluter recommends an unmodified thinset mortar like the Ditra-Set shown here.

- Foxtail brush
- Utility knife
- Chalk line
- 1/8″ notched trowel
- Flat trowel
- Grout float
- Buckets (for mortar)
- Corded drill & mixing paddle
How to Install DITRA
At this point, the subfloor has been flashed (flattened) to eliminate any high or low places, and Jim and Rich are ready to install the DITRA.
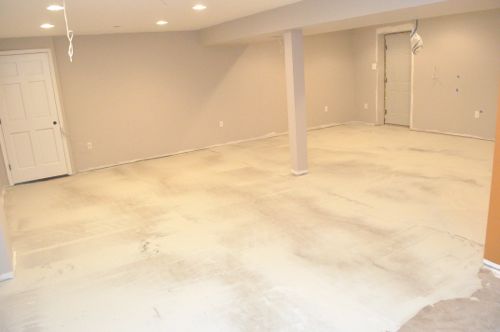
Step 1: Check and Clean Floor
The guys got started by sweeping the floor with foxtail brushes to ensure a clean surface. They also scraped away excess mortar that oozed underneath the drywall.
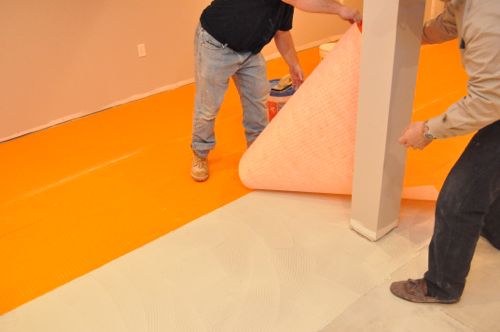
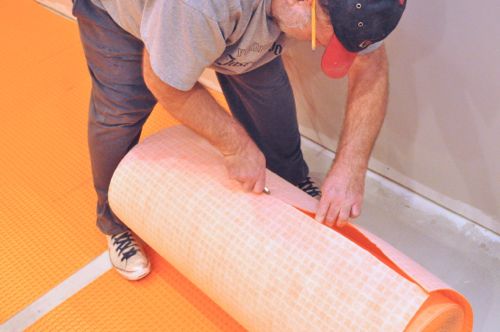
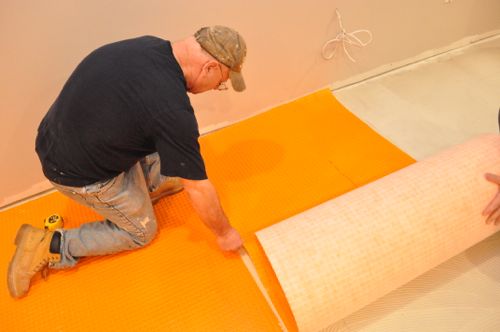
Step 2: Layout DITRA
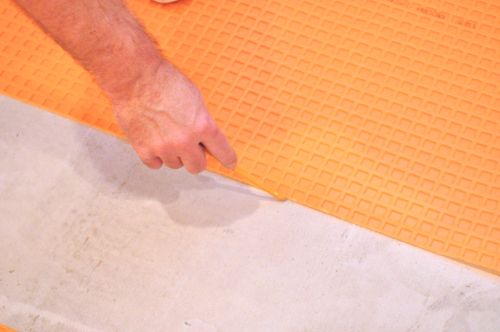
Jim and Rich unrolled sections of DITRA, cutting it to length with a utility knife. They laid it out keeping about 1/2″ margin around the perimeter.
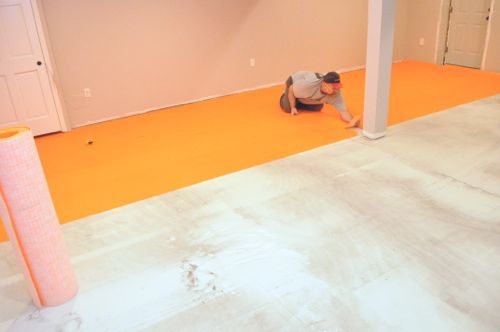
Pro-Tip: Precutting and laying out all the DITRA gives it a chance to flatten out.
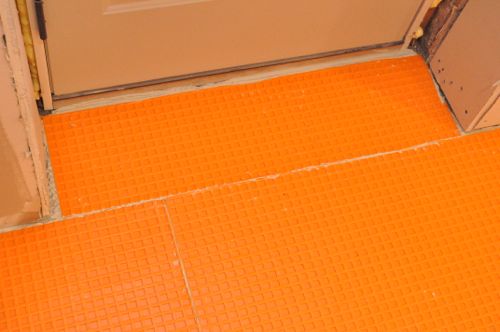
The guys also cut around the support posts, door jambs and threshold.
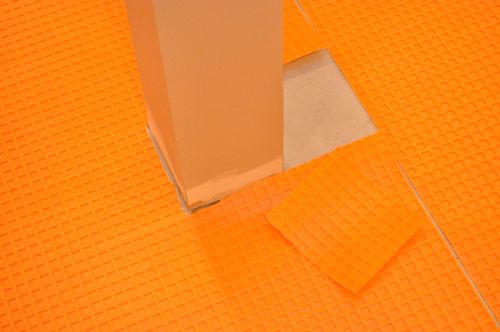
Part of the beauty of DITRA is that it’s easy to cut, and there’s no minimum size requirement.
Pro-Tip: It’s easier to cut DITRA from the backside.
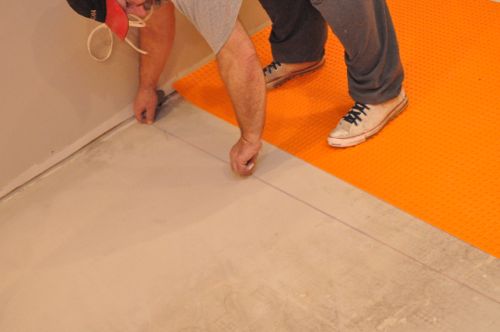
Step 3: Mark Spread Lines
After the guys had laid out the DITRA, they used pencils and chalk to mark spread lines along each joint.
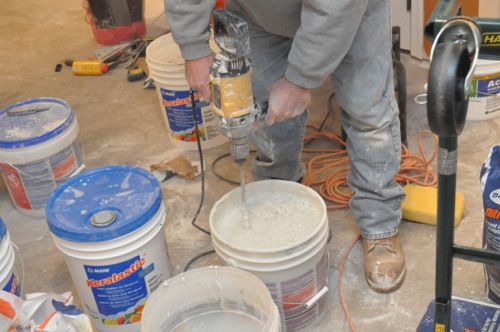
Step 4: Mix Ditra-Set
Rich mixed the Ditra-Set with water using a mixing paddle, and he let it slake for 15 minutes before remixing. Schluter recommends mixing the thinset to a “fairly fluid consistency (but still able to hold a notch).”
Pro-Talk: Slaking is the process of leaving the thinset undisturbed to allow the water to completely penetrate the dry ingredients.
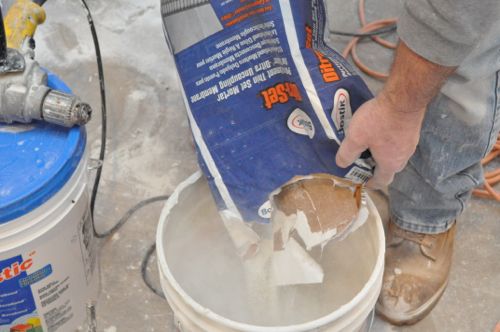
Open time for Ditra-Set is about 20-30 min so the guys only mixed what they could use in that timeframe.

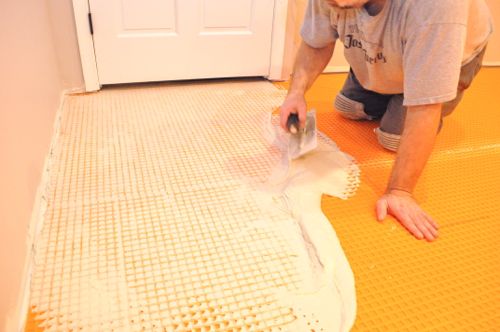
Step 5: Spread Ditra-Set
Using the spread lines, Jim troweled the Ditra-Set over half a section. Jim and Rich advise against spreading too much Ditra-Set at one time to prevent it from drying too quickly and because it’s easier to keep the DITRA lined up.
Pro-Tip: Ensure the Ditra-Set is spread evenly to avoid lumps.
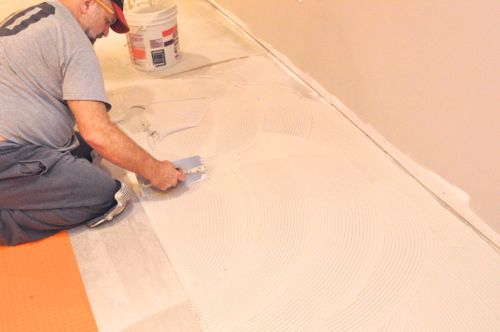
Pro-Tip: A small v-notch trowel is also acceptable.
Pro-Tip: Expect to use one 50 lb. bag of mortar per 150 – 200 sq. ft. of substrate.
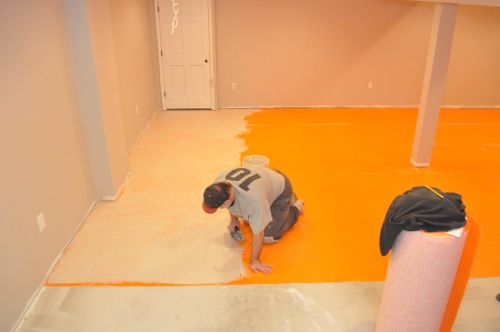
Step 6: Unroll DITRA
Next, the guys would unroll the DITRA over the Ditra-Set. Adjacent pieces of DITRA were butted against each other, and Jim and Rich were careful to avoid overlap (thereby creating a height difference).
Step 7: Embed DITRA
After the DITRA was in place, Rich used a grout float to firmly press the DITRA into the mortar, and the guys paid special attention to the edges. The goal was to make full contact between the fleece matting and the mortar.
Pro-Tip: Rich always began working the grout float in the middle of a section to stretch and press wrinkles outward.
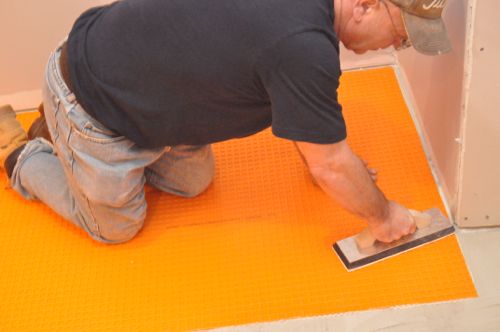
Pro-Tip: The guys say that the most likely mistake when installing DITRA is failing to fully seat the matting in the mortar.
Pro-Tip: DITRA can be walked on immediately after; there’s no need to wait for the mortar to cure.
Step 8: Mix More Ditra-Set
After the DITRA was laid out, the guys mixed more Ditra-Set, and again, they let the mortar slake for about 15 minutes.
What about using a latex-modified thinset?
Schluter does not recommend using a latex-modified thinset for the next steps because it cures differently than unmodified thinset. Modified thinset must air-dry, and that can be a lengthy time-period because the mortar is sandwiched between impervious materials (the DITRA and the tile). Subsequently, drying takes place only through the tile joints. Unmodified thinset is a mixture of Portland cement which actually requires moisture to form a strong bond and achieves final set usually within 24 hours.
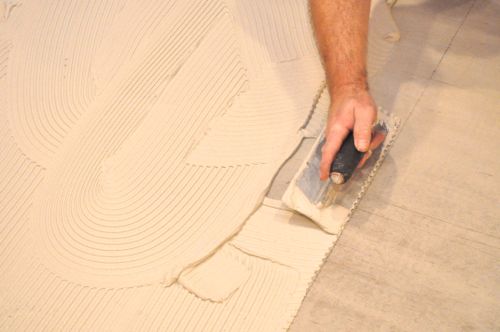
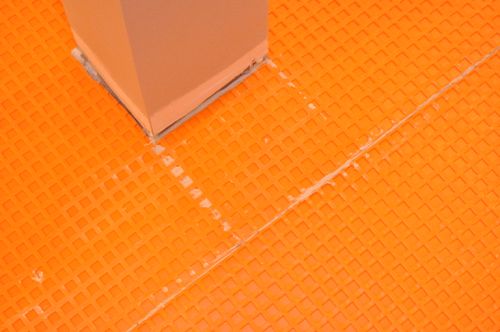
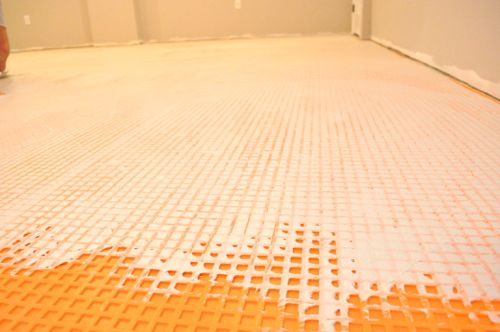
Step 9: Fill DITRA Cavities
Using a flat trowel, Jim and Rich filled all the cut-back cavities with Ditra-Set. They worked carefully to completely fill all the space and avoid leaving ridges on the surface.
Schluter advises that at this point it’s perfectly acceptable to begin laying tile with an unmodified thinset. However, Jim and Rich opted to fill the cavities, let it dry, and begin laying tile another day. They do this because it’s difficult to snap chalk lines over DITRA even though it takes longer to complete the job.
If they had begun laying tile, Jim and Rich would have filled a small section of cut-back cavities and then combed additional mortar over the DITRA. Next, they would have set the tile in the typical manner.

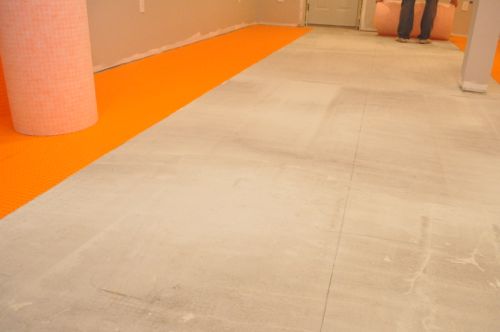
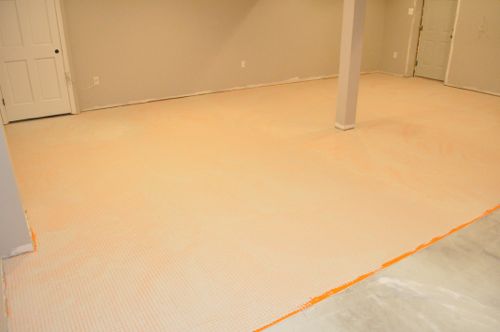
Finished
Here’s a look at half the basement covered in DITRA. After about 24 hours, it’ll be ready for tile, and meanwhile Jim and Rich are getting started on the over half.

I’m continuously impressed with the level of work I see from Jim and Rich. It’s so nice to see professionals taking their time to do things right. I can’t wait to see the finished product.
Very nice work there. I am confused as to how you’re allowed to walk on DITRA that hasn’t set up yet. Wouldn’t this create a bunch of footprint sized indents (valleys), thereby defeating the flat surface? Or maybe I am just splitting hairs and those indents are not a big deal. Or maybe I am wrong altogether and DITRA set is magical and does not conform to the laws of physics like gravity and displacement (the most likely explanation).
Ditto. Does this get worked out in the “fill the voids” process whereby you basically re-float the surface and still have the ditra layer you’re after?
A person’s foot doesn’t have enough psi to compress or crush the molded plastic. The thinset is also so thin (and absorbed by the fleece layer) that it isn’t displaced by foot traffic either.
Also important to use a damp sponge to wipe down the plywood before you put down the ditra mat. this insures the plywood is clean and because you have pre moistened the plywood it wont pull moisture from the thin-set too quickly which can weaken its ability to set up firm without crumbling.
I think I learn something new with each article I read, no exception here. I love reading your articles and REALLY love the quality and finished product.
DITRA is really cool. I think what I like about it the most is the innovation in it. I think it probably took them a good while to figure out how to deal with the sheer stress in large tile floors, and this solution is very unique… It basically decouples the mortar bed on the slab from the mortar bed with the tile, and it does it by using the geometric dove-tail shape to hold the top mortar bed in place.
I have walked the floor a few times and you can see why the product works. The area between the cut-out squares is actually flexible, but the squares themselves are rock-solid. The result is that the tile is actually bonded only to the squares and not to the DITRA between the squares as much, but that ends up being OK.
Does Schluter recommend filling of voids before laying tile? Any problems with thinset applied over filled voids? i.e. tiles adhering to the pre-filled voids? Looks like a lot easier application, but just wondering. Also, what size trowel is recommended for laying the Ditra. What size trowel is recommended for laying tile over Ditra?
Thanks- John
John,
I believe the answer to that is NO. You normally don’t want to do it in stages because the point of those ‘waffles’ is to create a means of locking the tile to the ditra.
When you prefill the voids and then allow the mortar to dry…you have created a breakpoint between old and future mortar. This is no different than when a foundation is poured in horizontal sections and allowed to set before another layer is put on top…you get leaks because it is not a cohesive whole.
I personally wouldn’t prefill the ditra waffling as done in this project. I feel it weakens the system.
That said, the most important part of the whole thing is the ditra itself, specifically it’s uncoupling from subfloor, substrate, etc. So the homeowner in the example here should be fine.
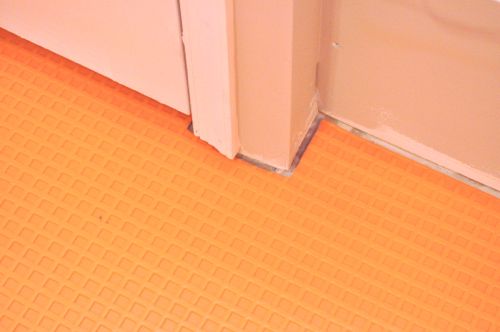
My husband is trying for the first time to install a tile floor. He is using the Ditra underlayment, and it is being placed over a concrete floor. What is the purpose of the 1/2″ margin around the perimeter? Can the Ditra be placed flushed to the wall, or is the 1/2″ margin required?
Please advise. Thanks, Sheila
the space is left for expansion and contraction. So yes, be sure and leave a little space for this to happen.
Is it ok to use detra when transitioning from plywood to slab? I am doing a remodel/addition and will end up with basement, crawlspace and slab all with continuous tile. If so what needs to be done at the transitions?
can Ditra be used over exterior expansion joints?
Noticed that the guys doing the demo opted for leaving the matting to dry and then tiled the next day. One reason was that they couldn’t use the chalk line on the ditra mat. They could have just used hair spray over the chalk line and it would stay put.
Just keep a bit of distance from the chalk line so you don’t blow it away with the hair spray.
What if I can see a lot of the orange after the application of that top coat? Does it need to be uniformly covered like in the pic?
It does not have to be uniformly covered. In fact, you don’t even have to top coat before you lay tile – you can put the thinset on in one step. We just prefer this method, as do our tile installers.
I just put a ditra underlayment on my daughter’s concrete basement floor. It is totally false that you can walk on it or tile immediately because the next day she called me and told me that there were big dips and unevenness because of where we walked on the ditra and squished the mortar with our walking on it. Now we don’t know what to do with those gullies and dips. I need to get this project completed. I was thinking of mortaring cement board (extra expense) on top of the ditra. ugh
This is because you used too much thinset to bond the ditra to the floor substrate. If you had correctly used a ditra trowel or one of the stipulated options at the correct angle your mortar bed beneath the ditra should be just over 1mm. There would have been no problem accomodating dips of less than a mm with the tile bed had you followed the instructions.
I just used Ditra for a living room tile job… the base thinset (on concrete) dried like a champ, but when tiling, the pre-mix mortar the client wanted to use has taken over a week to dry. I just pulled up a tile and it was still very wet after 5 days.
It sounds like you used modified pre-mix thinset under the tyle. There is no place for the water to evaporate and will not dry.
nice! instructions! i copied above url to give reply for a forum question
Can you lay ditra over painted plywood
can i use Schluter under warm wire,? or over,? or as a leveling in between, for marble, and Red Guard between marble and float, to ensure transition point of a repair not to harm the warm wire,?? ya
Can ditra be (or is it recommended to be) installed over cement board?