
Editors Note: We produced this video on How to Install Spray Foam Insulation a few years ago, and although we didn’t realize it at the time, this spray foam installation represents our very first Pro-Follow. If you enjoy seeing and learning from professional contractors, become an email or RSS subscriber and never miss a Pro-Follow update.
We love sharing unique experiences with our readers, and I’m excited to bring you today’s article! Fred and I had the pleasure of filming Hottle Energy Solutions as they insulated Fred’s basement with spray foam. We worked hard to put out a really comprehensive, high-quality video that will address many different aspects of spray foam installation. If you enjoy the video, please consider linking to this article to spread the word.
There are several different options for insulating your basement and ultimately Fred & Kim chose spray foam. Spray foam is a great choice because it expands to fill tough-to-access space creating a more complete seal than fiberglass insulation. Closed cell foam also has very high R-values, acts as a moisture/vapor barrier and is mold resistant.

This video (9:50) contains a lot of information. We were able to interview the contractor, learn about his equipment, discuss safety concerns, and address some popular spray foam questions. Here are some of the highlights:
- When to have spray foam installed (0:57)
- The difference between open and closed cell foam (1:58)
- The equipment a contractor uses to install the foam (2:35)
- Preparing for spray foam (3:43)
- Pros / Cons of do-it-yourself kits (4:15)
- Necessary safety gear (5:34)
- Health concerns with spray foam (6:13 & 8:27)
- Open cell foam installation (6:32)
- Closed cell foam installation (7:40)
- Final verdict (8:51)
Installing Spray Foam Insulation
I think there are a couple of key points to emphasize from the video.
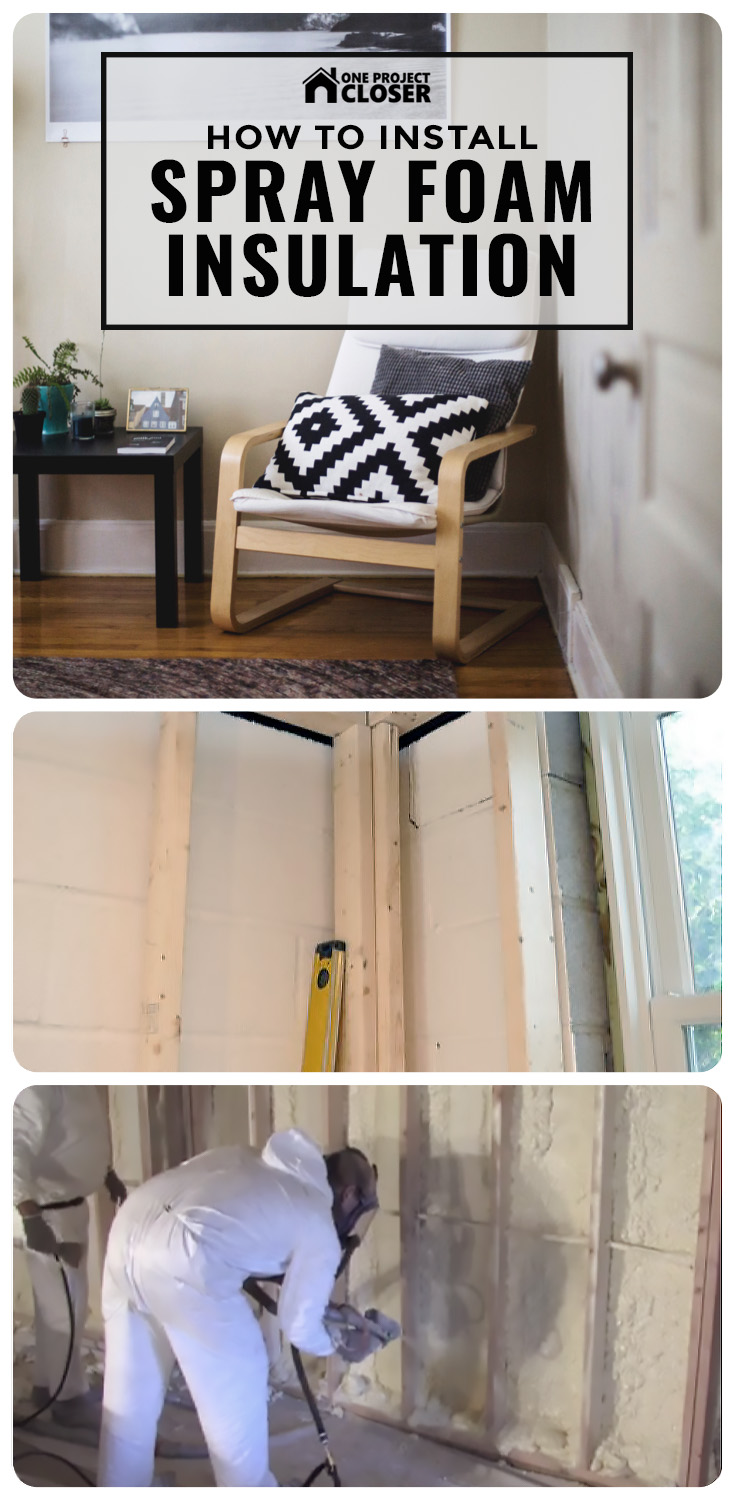
Frame Off the Wall
Fred mentioned that the framing members were set about 4″ off the basement wall. This is important because that allows our installer to spray foam behind the 2 x 4’s ensuring a continuous barrier all throughout the basement.
Safety Equipment
It’s very important to have the right safety equipment if you purchase DIY spray foam kits. Our contractor had a Tyvek, disposable suit and hand and foot coverings. Make sure to purchase a respirator that includes organic and acid vapor cartridges.
Open Cell Foam
Open cell foam, a.k.a. low density foam, expands to over 100 times it’s liquid size. It’s called open cell because little pockets of air form providing the insulation value. It does not act as a moisture barrier which is an important consideration for basement walls below grade. It features an R-value of about 3.5 per inch. You’ll notice we insulated the band board / rim joist with open cell. Read that link for details about it.
Closed Cell Foam
Closed cell foam, a.k.a. medium density foam, expand to about 25 time its liquid size. Closed cell has such an advantage because it forms a complete envelope sealing out moisture, preventing mold and providing an R-value of 7.5 per inch!
What do you think? What’s your experience with spray foam? Did you like the video?

AWESOME video guys!! I have serious basement insulation envy!!! I’ll be sure to share that video with our readers.
I know it’s very dependent on location and contractor, but could you give us a rough estimate as to the price of spray foam insulation?
Also, how is the price determined? Is it by sq. ft. or other?
Great video Fred.
Tom: A friend of mine who works in the industry said that it ends up being around $1.75-$2.00/ft^2 per inch of thickness. That is in the upper midwest.
Shane – Yep, that sounds about right… You should expect to pay more for the first board foot than for the second, third, etc. (A board foot is 12″ x 12″ x 1″ deep). I would expect second and subsequent inches to be $1.25 or so… but it all depends on the size of the job, the difficulty of the installation area (e.g., crawlspace, basement, above grade), etc.
This is an excellent video for do it yourselfers. My only advice would be to make sure there is no problems with water intrusion through the basement walls. That will need to be addressed first prior to installing the foam.
Did you look seriously at some DIY foam kits? If so which ones?
I have very small and short crawl spaces where the house overhangs the basement foundation that I need to fill and the regular insulation isn’t doing its job. I was thinking that open cell foam will completely fill those in very quickly.
I really like the use of the video on this article. I have been researching and networking with some people about putting videos on my site, but haven’t finished building the site yet so we will see how that unfolds later.
Personally, I felt the video was a little long and could have been broken down into a couple of segments (just my opinion, certainly not trying to criticize you guys!) but I haven’t read any “expert” opinions about that topic.
Tom – I looked pretty seriously at DIY kits before going with pro installation… I was looking particularly at closed cell spray foam and quite honestly, I just google searched for a few companies (one was tiger foam). All of them looked pretty similar (2 propane-tank-sized, pressurized tanks, and disposable guns). Prices usually ran in the $1.25 / bd. ft. once you factor in shipping… a little more to get the protective gear and everything else… gets you to about $1.40/ bd. ft. if you do a large enough area.
Installation is slow because you don’t have a compressor blowing the agents – just pressurized gas in the tanks. I imagine it would have taken days to complete our basement, since the job took 8 hours with very fast application. For crawl-space areas, it may work since you don’t have much space…
We have an addition on the back of our house from the 1940s. It it uninsulated. I think that how it’s built is that on the first floor the wall from the outside in, it’s a layer of siding, plywood, studs, and then plywood on the inside. The first floor flooring from outside in is plywood, joists, floorboards. On the second floor, the wall is siding, plywood, studs, and floorboards as the interior wall. I’m not sure what the ceiling is, but there is a roof door that seems to center heat into the room in the summer.
I would think that what I could do is use a stud finder to find studs and joists and then drill holes in between, and then fill those spaces with foam, but then there’s no way to know how much foam will fit, and then I figure the walls, floor, and ceiling would then burst open. But I swear I’ve seen someone do this on some HGTV or DIY or This Old House show. Is this something a professional foam insulator should know how to do?
Mary – You can retro-spray foam into a cavity just the way you’re describing. Suggest contacting a pro, though… unless you’re up for a real challenge. The only potential barrier would be if there’s blocking anywhere in the walls — (e.g., a horizontal cross-member in the framing). This could prevent the foam from expanding down far enough. Are you sure the cavity is empty?
I’m a little behind on the game on this, but I just had to add that this video looks GREAT guys. Seriously well done – I know how much work goes into this level of production, especially when done DIY (so appropriate though!). 🙂
On a more serious note, I do have a question about my own house. I have a vaulted ceiling on the top floor of my house. The house is a modern townhouse, and there seems to basically be no insulation at all in the room. There are major temperature changes in the room, despite my best efforts to keep the room as sealed as possible. In the winter the room is freezing and the summer, it’s unbearably hot, despite 4 vents throughout the room feeding heating and cooling to the room. I’m wondering if there is little or no insulation between the ceiling and the roof, and likewise for the walls (part of the room is under a gable, leaving it exposed to the air and thus not attached to the other townhouses next door on either side).
What options do I have, if any, at such a height (the roof is 3 stories off the ground) in a retrofit situation?
Hi Chris,
My name is Patrick. I am the spray foam contractor that worked with Fred on his basement. Your house has many of the normal problems that track construction brings. Dont worry about the height from the ground to the roof. That is what they make extension ladders and “pump-up” runners for. I have a few suggestions as well as a few questions. I will start with the questions. Is your only problem on the upper floor with the vaulted ceilings or do you have temperature problems in other areas of the house? You said there is a part of the room under a gable, is this a bumpout? What location are your HVAC vents? This could have a dramatic impact their ability to heat and cool. They should be on the outside walls either on the floor or in the ceiling. Are you getting even air flow from the vents in that room? Now if you are satisfied with the HVAC function, you definitely have insulation issues. If you have an pictures of the room I can help you out much better than i can without. From what I know of your house, there are two options for insulating those areas (including the walls). You can go the less intrusive route and use a product such as “retro” or Tripolymer injection foam. These will work for your outside walls because they can install the foam from the outside which will create the air seal and thermal break against the outside of the house. The tricky part is the vaulted roof. You can use one of these products but you will not get the foam where it is needed (against the plywood sheeting of the roof). Insulation will sag to the drywall from above and will not give enough space to install the foam with the necessary R-value. If you feel like it is unbearable and worth the trouble I would remove the drywall ceiling and spray closed cell foam (at least 2″ to give the air seal and vapor seal). All of these options will give you the most comfortable room in the house and draft free. You should not pay more than 2.25-2.50 a square foot for 2″ of closed cell and add roughly $.75 per inch after that. And for open cell you should not pay more than 2.75-3.00 a square foot for 5 1/2 inches. I hope this helps. If you have any more questions or need more information please let me know. Fred and Ethan both have all of my information for you to contact me via email or phone. Good luck. Thanks
Patrick Riley
HES Spray Foam Insulators
Maryland
Does your company do work in Wolfeboro NH. Can you use fiberglass in the ceiling if you use close cell foam on the walls?
I recently had a second story master suite addition put on my older home. I wish I had thought to tell the contractor to use spray foam. After looking at your video, it seems far superior to the “batt” insulation we have. One problem- our pipes in the bathroom are freezing now that winter is here. It seems they didn’t insulate properly. The upstairs has a bit of an overhang past the original house. Is there a way to use spray insulation- maybe gain access through the soffit?
Thanks.
Like others, I am planning to finish my basement. I plan to to put one inch of XPS foam on the floor and then Home Advantage 23/32 CAT Enhanced OSB Sub-floor (from Homedepot) on top of it.
Then I plan to build a 2×4 stud wall with 1.5 inch gap between the concrete and the stud. I plan to get all my electrical work done before I get 2 inches of closed cell foam sprayed against the concrete.
Additionally I plan to use blown in fiberglass in the remaining cavities between the stud. I plan to put house wrap stapled to the studs and blow the fiberglass insulation from the top.
I want to keep my basement real warm. I was planning to do cellulose but then I read to not use cellulose where moisture could be an issue.
As of now my basment is pretty dry or visibly dry . Its a new construction less than 2 years old.
Can you advise me if I am going in the right direction? I live in Iowa
Tarq,
Glad to hear you are using spray foam. As far as your job goes you are headed in the right direction. However my suggestion would be not to use fiberglass blow in. I have seen the issues people have with it both in walls and attics. One issue that it does have is that it does not lay evenly and allows for gaps. Another issue is health. If you can avoid using fiberglass anywhere, DO IT!! Cellulose does not work in most basement applications. But on yours it would be good to use if you put 2″ of foam in first. I would go the extra mile because 1″ gives you an air barrier and 2″ gives you the moisture barrier. The closed cell will prevent any moisture transfer into the walls from the block. In reality you don’t have to use any more insulation beyond the foam if you don’t want to. You will be surprised at how well it insulates at 2″ thickness. If you only do the 1.5″ you will encounter the same potential problems with the fiberglass. Save the money on the blow in and use it for the foam. Also the tyvek wrap on the studs may bring an issue. If you ever get any moisture condensing behind it and the foam it can never get out. You are creating a vapor trap. Just some suggestions. Good luck with your project.
Patrick Riley
HES spray foam
New Market, MD
Thanks for your insight. Great suggestions.
Another question regarding the floors. can I put half an inch of xps and then the advantec OSB? Or do I have to stick with 1 inch foam.
Or what do u recommend for floors? I want the floors to be real warm. Most basement I have been have always cold floors even with carpet.
I am planning on putting carpet too.
Tariq,
Sorry for the delayed response. With your floors there will always be two important things to worry about. One is the R value to keep it warm and comfortable. The second is the vapor barrier. You do not want moisture penetrating the slab and into your house. A host of problems can develop for you. If you can achieve these things with something other than foam, go for it. Just make sure that you do your research and whats best for your application. Oh and please put down a heavy mil plastic before you pour concrete or put down OSB. It will save you!
Patrick
HES spray foam
New Market, MD
Can spray foam be applied to concrete basement walls without the 2X4 framing? Can you get even thickness from top to bottom? And will it stick?
Gordon, I’d suggest closed cell foam as it creates a vapor barrier- very important for concrete basement walls. The foam will adhere to just about anything (2×4’s not needed). The installer should tarp off anything you don’t want covered and verify the thickness.
I would be so afraid I’d fill up a room or burst something if I tried to do this myself. And the only part of the house that really needs it is the upstairs – I’m definitely not getting up on a ladder to blow it into my walls from the outside! I could maybe handle our basement though….
I’d like some feed back on using a hybrid approach to insulating a basement and main floor of a home. The approach would do the following:
1) Spray 2 1/2 inches of closed cell foam into the band board
2) Spray 1/2 inch of closed cell foam between the studs
3) Install on top of the 1/2 inch foam R-19 insulation on the 2×6 studs and R-13 on top of the 1/2 inch foam in the 2×4 studs are.
Thanks in advance for your helpo
@Tom, You’d need to create some kind of moisture barrier- 2″ of closed cell foam would provide that. R-19 (fiberglass batt?) would absorb any moisture that got through creating a mold and mildew problem.
I have a small utility closet (water heater, water softener, and furnace) in my garage. The utility closet has no insulation in it whatsoever. One year our water softener froze. I was thinking of using the closed-cell foam to provide insullation to the closet to avoid freezing again. Would this be wise? Are there any considerations to remember when using the spray foam near those appliances?
Thanks in advance.
Audrey,
It would definitely help you out to insulate that room and seal it off from air and moisture. The only issues to consider are open combustion. Most local codes will require Ýou to put a fire barrier on the foam (drywall, plywood, or fire retardent paint) that gives it a 15 minute burn rating. If you have a furnace that is 90 percent efficient or better there is nothing to worry about here. Same as the water heater. The way to determine that easily is if you have a white pvc flue pipe. If it is metal then there is open combustion in the room and will have to fire rate. There is a way around it that will give you the same end result if you don’t want to drywall or paint. Applying one inch of closed cell foam to seal the air off and placing fiberglass batts (not kraft faced as this will generate the same fire issue) on top of that to add the R value would work out great. Doing this will stop the freezing and extend the life and efficiency of your equipment. Hope this helps.
Patrick
HES spray foam
MD
I manage a lumber yard in southern Ohio and have become very interested in what seems to be the most discussed topic of home building/remodeling these days; Insulation, proper type, application, and affordablility. I’m also about to start building my “dream home”, and want to make it as energy efficient and affordable as possible! Through my company, we have an installed insulation division that does everything from fiberglass, stabalized cellulose, and also closed cell spray foam. In my discussions w/ many different people, from our division to other installers, to contractors, & even reps from Owens Corning & Dow, there seems to be a wide range of suggestions and lot of unanswered questions on what type of insulation to use, where to use it & why. So here’s some questions that I would like to see addressed:
1. Basement floors – w/ slab poured, what is the proper method? Do you have to put plastic down b/f you put foamboard down? What would be the suggested thickness of the foamboard? Does the foamboard need to have grooves/channels on the bottom? How do you fasten foamboard to the floor, glue or tapcons, or both? I’m sure all seams need to be taped w/ tyvek tape or equivalent. Should you use spray foam (great stuff) where foam meets concrete or stud walls? When putting subfloor (advantech) over foamboard how do you fasten, glue & tapcons into slab?
2. Basement walls – obviously, closed cell is superior due to it’s sealing power & water resistance, but also very expensive at apx $1.40/sq’ per inch. What is suggested thickness? If 1″ is sprayed on walls, and therefore completely sealed off is it necessary to spray thicker? How important is the resistance (“R” value) to an area that is completely sealed off? How does 2″ of closed cell foam compare to using 2″ foamboard? How do you attach foamboard, glue & tapcons w/fender washers? Should concrete walls be painted/sealed w/ waterproofer? If so, what type, dryloc
I manage a lumber yard in southern Ohio and have become very interested in what seems to be the most discussed topic of home building/remodeling these days; Insulation, proper type, application, and affordablility. I’m also about to start building my “dream home”, and want to make it as energy efficient and affordable as possible! Through my company, we have an installed insulation division that does everything from fiberglass, stabalized cellulose, and also closed cell spray foam. In my discussions w/ many different people, from our division to other installers, to contractors, & even reps from Owens Corning & Dow, there seems to be a wide range of suggestions and lot of unanswered questions on what type of insulation to use, where to use it & why. So here’s some questions that I would like to see addressed:
1. Basement floors – w/ slab poured, what is the proper method? Do you have to put plastic down b/f you put foamboard down? What would be the suggested thickness of the foamboard? Does the foamboard need to have grooves/channels on the bottom? How do you fasten foamboard to the floor, glue or tapcons, or both? I’m sure all seams need to be taped w/ tyvek tape or equivalent. Should you use spray foam (great stuff) where foam meets concrete or stud walls? When putting subfloor (advantech) over foamboard how do you fasten, glue & tapcons into slab?
2. Basement walls – obviously, closed cell is superior due to it’s sealing power & water resistance, but also very expensive at apx $1.40/sq’ per inch. What is suggested thickness? If 1″ is sprayed on walls, and therefore completely sealed off is it necessary to spray thicker? How important is the resistance (“R” value) to an area that is completely sealed off? How does 2″ of closed cell foam compare to using 2″ foamboard? How do you attach foamboard, glue & tapcons w/fender washers? Should int concrete walls be painted/sealed w/ waterproofer? If so, what type, dryloc, etc.?
3. Basement exterior walls – what type of waterproof coating should be used? What thickness of foamboard is suggested? Is the hard plastic large sheets better than foamboard? Do you still need to waterproof w/ coating?
4. Exterior framed walls – again, closed cell seems to be superior in this scenario too b/c of the sealing power/water resistance & also structural value, rigidity. Again, how thick? If 1″ is sprayed & sealed therefore having no or little air flow, how important is the “R” value? What about stabilized cellulose, how does it compare? What about using 1″ of CCF & stabilized cellulose together? Which is better for sound proofing? Is it true that the R value of fiberglass is not achievable b/c it’s never installed properly & tested in closed controlled environment?
5. Ceilings Flat – cellulose would probably be best value, but what about using foam on the backside of drywall between ceiling joists & between rafters? Closed cell or open cell? I’ve been told not to use CCF on rafters in case of a water leak, which would make it hard to locate the leak? Again, what about sealing off all attic areas w/ foam? CCF or OCF? How would this affect ventilation, would it be necessary then if it is sealed off? What effect would that have on shingles & their warranties or metal roofs?
What my division has been doing is using 1″ closed cell foam (which also has a fire retardent in it, e84 I believe its called) on all rim joist/band boards & under bonus room floors, then using stabilized cellulose in ext walls & flat attic areas & fiberglass in all cathedral ceilings. This has been very effective for us w/o breaking customers savings accounts!
As you can see, there are a lot of questions to be answered, and I keep getting a different answer/suggestion from each person I talk to. Please let me know what you think! Hope you can help me, so I can help my customers!
Our business is in an old 1840’s house with thick pine floors. But there are cracks. Would open cell or closed cell insultation be the right choice for us to use under the floor. And of the two which would be the best choice
I’m looking to finished my basemant it was originally framed with 2×3 and finished with 1/8 plywood, I took the plywood off and see that the gap between the concrete wall and the framed wall is only 1/2″ , I’m interested in spray foam since electric and baseboard heat is already installed but I’m not sure if would be beneficial with out getting the 2″ between the concrete wall and and the 2×3, please help?
Frankie,
The choice for closed vs open depends on the space that is below the floor you are looking to spray. Is it conditioned? If not and if it is a basement area I would definitely go with closed cell to prevent the moisture transfer to the space above. If you are only looking for an air seal vs maximum R insulating value I would go with the open cell based on the price point. Closed cell will always be the better choice no matter what application because of its performance but that comes with added cost in most instances. The closed cell also adds to the structural intengrity of the substrate which may benefit you in an older home with aging wood. Hope this helps with your questions.
Patrick
HES spray foam
New Market MD
Cris,
Maximizing the insulation between the framing and concrete is a plus for your thermal break and moisture. If you can find a way to get more than the 1/2″ you have now I would do that. If not, make sure the foam is sprayed at an angle to expand around the back of the studs that are there to minimize the moisture penetration. Something that we have done in the past is cut the studs away from the wall with a circ saw to get at least one inch of space for the closed cell and that worked out great. The perm rating of closed cell is decent at 1″ thick. Good compromise. Good luck with your project.
Patrick Riley
HES speay foam
New Market MD
I have a few questions about foam and what would work in my basement. I plan on doing the concrete walls between studed cavativies and the rim-joist/ band joist with close-cell foam. I think in the video you show open cell being used on the rim-joist. Is close cell better or accepable? I plan on using 2″ on walls and then maybe 1 to 1.5 xps board and then a cerment stucco. Do I need any type of vappior bearer or is the foam good enough? I have sealed all cracks and leaks in basement walls but what happens if a leaks delvops after I am done and can’t notice them? Will the foam help control minor leaks? How important is it to leave the studs off the wall. I hate losing any space plus it would be much easier to build the wall with the studs agaisnt the wall. I think foam is the way to go but I want to be sure. Basement is semi finished with a few heat vents but not really heated if this makes any difference. Thanks for any help.
Daren,
Closed cell in the walls in definitely the way to go. We used open cell in the band boards to show a different product and approach to the project. Either one is acceptable considering it is above grade. Anything below grade should be done in closed cell. Studding the wall out 1 inch would be the best way to go. More is better but I understand your concerns for space. Leaving a gap behind the studs in crucial for both a thermal break and a vapor barrier. Moisture can be concuted through the studs and we all know that high moisture content in wood leads to trouble down the road. If you use closed cell foam, you will not need a vapor barrier after that. As far as thickness goes, I would use at least 2 inches below grade. Above grade the same but adding an inch wouldn’t hurt. Heating the space is a good idea. More importantly a return vent would be a good idea as well to keep the air circulating. It wont take much to heat the space once it is foamed. My basement is spray foamed and one 6 inch supply line has kept the space 3 degrees warmer than the rest of my house. It really works and would suggest nothing less.
Patrick Riley
HES spray foam insulation
HESFoam.com
New Market, MD
Thanks Pat, I am sold on the foam but have just a few more ?’s/ concerns.
I will leave 1-1.5″ behind studs but I have the basement already semi-remodeled. The previous rooms, a bath, a tool storage room and a bedroom are already done. The bath has the frame on the walls and is filled with 2″ closed cell foam board. The other [2] rooms I haven’t built the walls on the concrete yet but will do it correctly. This will leave breaks in the foam barrier where the studs meet the concrete walls. Is this a problem? Another problem area in putting foam in is behind the furance and hot water tank. I do not have enough clearence to build a wall. So will only partical foaming with breaks be bad and should be avioded?
Thanks for your time and help.
Daren
Daren,
Take what you can get in the basement. Remodeling those rooms would be costly and I would understand the reluctance to do anything with them. Having the studs against the concrete is not best but sometimes there is not much of a choice. If you do not have drywall on any of those problem walls the alternative would be to glue foam board to the studs and drywall over that after taping the foam seams. We have had situations like this before and it has worked out well. As for the furnace and water heater, How much space do you have behind? If you have enough to get some foam behind it by shooting at an angle I would do that. To avoid the foam laminating to the water heater and making a swap difficult wrap the back of the water heater in plastic and foam to that. This will allow for a clean break between it and the foam. The furnace may be more of a problem but you can try placing a 4 foot sheet of maximum thickness rigid board behind it and spraying to it to complete the seal. The more you can get to the better. I hope this helps. Let me know if you have any more questions.
Patrick Riley
HES spray foam insulation
New Market, MD
HESFoam.com
Although the spray foam video is a year and a half old, I just came across it. It was very informative. I hope you are still willing to entertain questions. I have received a quote to have my basement spray foamed with closed cell insulation and have a couple of questions I have not seen addressed in this thread. First, the block wall foundation in the video was sealed before the insulation was blown in. Is that necessary or recommended? I have a 70 + year old poured concrete foundation that has only been sealed with Dry Lok in places and that is pealing. My spray foam contractor says sealing the walls again before applying spray foam is not necessary. Second, I have two minor leaks in the walls that only leak a few times a year in heavy rains. I am being told that the spray foam would actually seal minor leaks such as these and I shouldn’t worry about them. Third, the spray foam is touted as a moisture barrier. We have significant odors in our basement. Can the foam also help reduce basement odors? Thank you for your time and assistance.
Hey John,
Hopefully Pat, the contractor, chimes in here but I wanted to offer my non-professional opinion.
1. I don’t think you need to seal the block walls as the closed cell foam will provide an air and moisture barrier. Plus, it will act as a thermal break so condensation shouldn’t be an issue. That should be enough that moisture will be directed outside the wall.
2. I’d suggest you (or the contractor) thoroughly clean the walls from the pealing Dry Lok, and definitely address the leaks! I’ve seen open cell foam act as a sponge for water, and that results in mold. I haven’t seen how closed cell responds, but I can’t imagine it’s beneficial to leave the leaks.
3. Without knowing the source of the odors, it’s tough to speculate on this. Closed cell will act as a moisture barrier and probably reduce the moisture in your basement. If that’s causing the odor, the insulation will probably help.
Again, I’m not a professional, and I hope Pat still keeps up on this thread. We allowed a reprint of this article here, and Sean may be able to better address your concerns.
What about cellular glass insulation?
I ‘ve heard that the material called FOAMGLAS is best there is for basement insulation, since it is inorganic and it has zero vapour permeability and zero water absorption.
Foamglas is a great option for ALL issues in this discussion. “Fan Response” hits on a few high points; Inorganic, vapour tight & zero water absorption. Add that it is mad oe 100% glass, non-combustable, a 90psi minimum, dimentionally stable and resistant to mold-fungi-rot-insects-vermin. Environmentally Sound / Sustainable / Top 10 New Green Product for 2010.
Yes I represent Foamglas Building in the market.
Thanks for the opportunity to say a few words…
John
To answer your questions I would agree with the contractor that you don’t need to reseal the walls before applicating. As long as the walls are not wet and extremely dirty the foam will laminate to the concrete and seal it off.
Moisture barrier yes it is. This will repel the water from reaching the interior space. As far as odors go if they are generated by a moisture issue in the basement it will help. However if you have moisture penetrating the slab that is another issue altogether. You would need to contact a basement specialist in that case.
Pat Riley
HesFoam
Patrick, I have two adjacent basement walls that have two coats of Dry Lok..I have studded out about an inch..Would it be advisable to put ridged foam boards on the studs and then dry wall over with green board??
Dave
Dry lok will help keep moisture out but not all of it. This being said there will be an air gap at the top of the wall if you put rigid board on the face then drywall. This will also allow for cold air to get into the space essentially defeating your hard work. Also it could shorten the life of your framing. My best suggestion would be to spend the extra time and rip the rigid board with a table saw and fit them in between the studs to achieve a good thermal break and added moisture barrier. If the space between the foam and studs is small enough you could caulk them or use one part foam cans. This will ensure a good air seal and maximize the performance. Don’t forget about the band boards. These areas are the king of all basement comfort killers. They leak air like crazy which is the largest cause for heat loss and moisture penetration.
Good luck with your project.
Thanks Patrick, the rigid board will be ripped…
Awesome video, guys!
Great video. I now know not to tackle this myself. I kinda prefer it that way anyways.
Fred you did a great job on camera asked the right questions and kinda looked like a news reporter with that microphone hah.
Hope to see more vids like this from OPC.
Good post. this will be book marked in the For Future Reference file
Way cool. I definitely want to get some spray foam in my attic, Hot Roof style! I’ve been eyeing those DIY kits, but I’m just not sure I’d be able to do a great job, and I’ve heard horror stories about the health impacts of accidentally breathing in airborne foam. This might be one for someone else to do…
Is it sad that I want to pay someone to spray foam my small little storage unit under the porch instead of doing it myself?
It is not sad to want to pay someone. It is not an easy experience. One thing to remember is that most companies charge a minimum to install small jobs. If you are under 400 sq ft it will be beneficial to do it yorself or to find more areas to spray to take advantage of the minimum charge.
Pat Riley
Hottel energy solutions
New market md
I have cinder block walls in my basement with high humidity during the summer from water vapor escape into the basement, leading to the typical musty basement smell. I do not have any water seepage – the blocks are dry to the touch. I intend to insulate with closed-cell foam. Closed cell foam is a water and a vapor barrier. How important is it to first apply SunnyDry (or equivalent) waterproof coating to the cinder block walls, before the closed-cell foam, as you describe in your video?
Thanks,
Will
do you know of someone in the Hanover, NH area who does spray foam insulation?
THanks!
Richard
Great tutorial! Spray foam not only helps insulate basements, but also reduces the need for foundation repair.