
Welcome back to our latest Pro-Follow update. Steve Wartman and his crew are three days into building a brand new composite deck. Our first installment in this series covered pouring deck footers and installing the ledger board. Our second installment focused on setting the posts, running support beams, and installing the joists. Today’s article covers adding the band board, blocking between joists, and building the stairs.
We’ll be publishing two more articles in this series before we cap it off with our final “How To”. Then we’ll be on to our next Pro Follow: a complete basement finishing project. If you enjoy reading how the Pros tackle projects, how about subscribing to our feed? You’ll get notified of the latest updates each day by email or RSS.
Step 5: Adding the Band Board
The crew got all the joists set in place and secured with joist hangers, including a double-joist in the middle. Since the deck is 24′ long, the band board will consist of two 2×8’s butted against each other, and the transition will take place at the double joist.
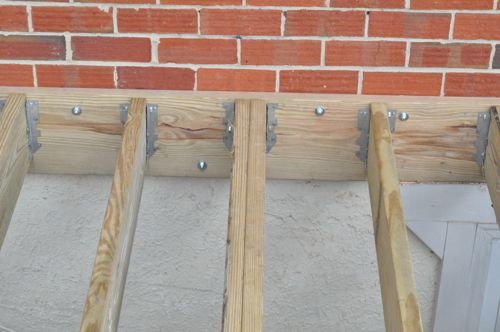
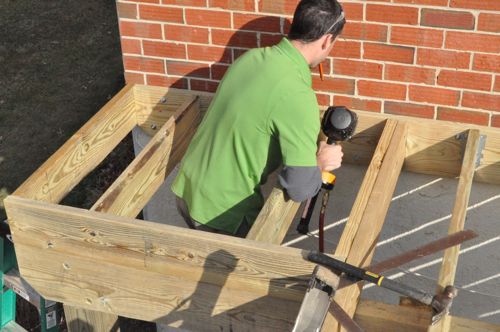
Using a string guide, the crew marks the ends of each joist and cuts away the excess with a circular saw.
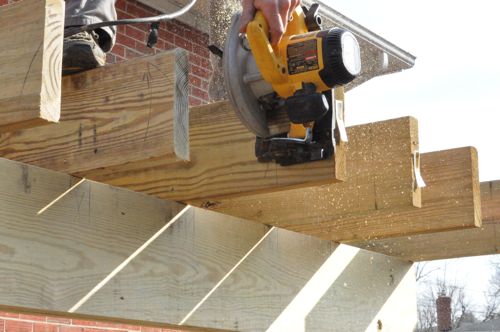
The band board is situated between the rim joists and secured with four nails per joist. Note that the last joist is just 1.5″ longer to remain flush with the band board. This will allow nailing from the side of the joist into the board.
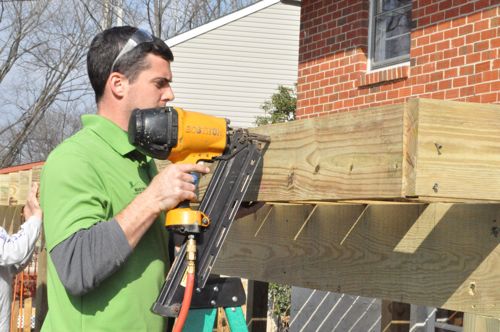
Terminology: A rim joist, or band board, is the final joist that caps the end of the row of joists that support a floor.
Step 6: Blocking Between the Joists
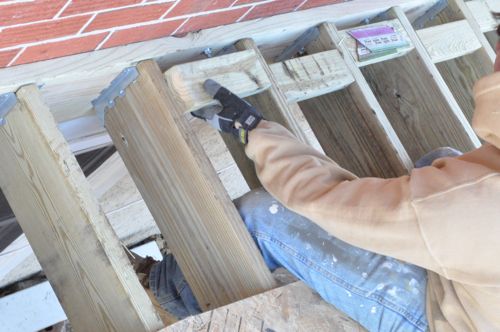
Blocking in between the joists provides a surface to mount the rail system. It’s also important for this deck because they plan to “picture frame” the perimeter to conceal the cut ends of the composite deck boards. To achieve this, the crew cut pieces of 2×4 to fit between joists and sistered a 2×4 along each rim joist.

Step 7: Building the Stairs
Building the stairs is not an overly difficult process; the key to success is making accurate cuts. In this short video, Steve shares how he calculated the stair stringer dimensions.
video recap: Steve describes how he started the process to build the stairs by first determining the total height of the stairs. Stair risers need to be between 7 and 7-3/4″ tall, and using 7-1/2″ translates into 12 risers. Likewise, stair treads need to be between 10 and 11-1/4″ wide. Since they will have 12 steps, the tread needs to be 10-1/2″ with a 3/4″ overhang. If this still seems confusing, Todd from Home Construction Improvement has a very simple Stair Stringer Calculator spreadsheet you can download for free.
Now that Steve has calculated the rise and run dimensions, it’s time to mark the stringer. Watch this short video for more information about marking the 2 x 12″.
I put together these diagrams to help visualize the stringers. You’ll notice that the very last step is 1″ shorter. That’s because there are no deck boards on the concrete, and shortening that riser keeps each step height consistent.
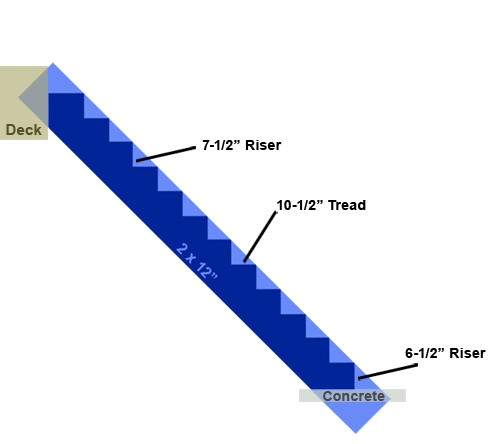
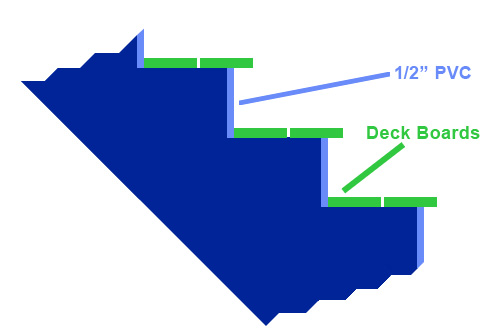
The stairs will measure 4′ across so to maintain the 12″ oc supports they will need a total of five stringers.

The two outside stringers are slightly longer so that the cross member sits in-between them. The inside stringers butt up against the cross-member, and this is important because it allows you to drive nails in two dimensions for a more secure hold.


Here are a couple pictures of the guys assembling the stairs.


In the diagram above you see mention of a concrete pad. While building the stairs, the guys also built a concrete form and poured a small concrete pad.
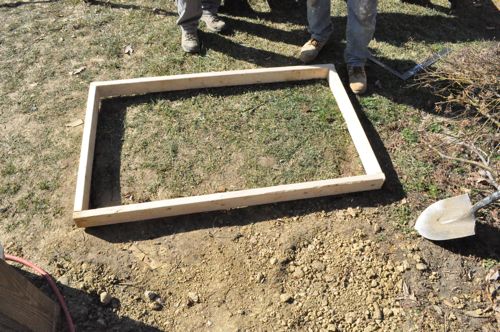
This pad has two “footers” where the stair rail posts will be attached.


Here are a couple shots showing the stair landing. It measures approximately 4 x 4′, and the joists and band board were installed just like the rest of the deck.
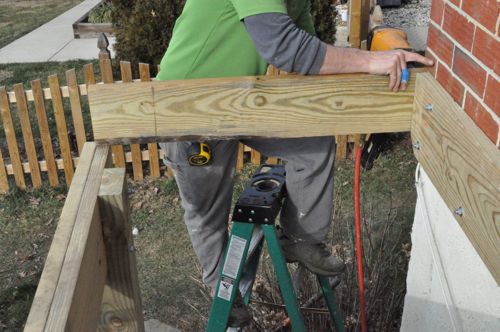
After the concrete cures, they move the stairs into place with the top of the stairs resting on the deck support beam.


Steve’s crew checks that the stringers are level and then nails them in place.


Our next Pro-Follow will address flashing the deck and laying the composite deck boards.


Great post. I know many hands make light work but what would be the minimum and maximum number of people that could/should work on a project like this?
These guys are able to accomplish a lot with just two people. Less than that would be almost impossible to move things (like stairs), and it would be very slow going.
Ethan is right, two people can knock out a deck. As long as you have both brains and brawn, well one that knows what they’re doing and the other is strong.
As far as maximum goes, as long as you have one person that’s in charge and can help the others stay busy (and safe) I see no issue with having 5 or 6 on the job. Just as long as they aren’t all rookies.
How big is the landing at the top of the stairs?
Hey Jeff. You reminded me that I completely left off the pictures of the landing. I’ve added them in, and, to answer your question, they measure about 4 x 4′.
how are the posts at the bottom of the railing secured to the “footers”?
Hey Joe, The plan is to block between the two innermost stringers and drive a couple red-heads into the concrete. They’ll notch the Trex for the posts and through bolt them in place.
Why a concrete pad instead of some other option for the bottom of the stairs? For that matter, what other options are there?
William, I think E might have missed this question so I’ll take a stab at it. You basically have two options for the bottom of the stairs: a pad, or footers and posts. You need something solid at the bottom so that the stairs don’t just sit on the ground (over time, it will erode, and the stairs will be off angle). Almost every deck around here I’ve seen either has a pad at the bottom, or the older ones sometimes do sit on the ground, and the ground has eroded as I’ve described.
This deck is coming along nicely. In the very few decks I built, I also block in the middle of the joists, just in case the joists try to twist. Also, how do you feel about using rabbet joints on the stairs instead of cutting the 2x12s all the way through?
John, I have seen blocking at the middle of joists, but I’m not sold on the cost/benefit trade in most cases. On the next installment of this (Day 4) there was some discussion about a diagonal stabilizer board to prevent racking. For each joist: on the one side they are in hangers and the top is covered with decking boards. On our deck, each joist is also toe-nailed into the beam. It would be pretty hard for a single board to twist very much. Possible, but hard.
That’s the sort of thing you’d see if a factory pre-cut the rabbets. These guys aren’t really setup for that in the field. It’s a fine alternative but you won’t see it very often (at least around here).
One other comment… I notice that one of your joists has a bark cut. While it’s not a structural or too much of an aesthetic issue in this case, I try to avoid that. When I can’t select my own lumber, I order extra so I can pick the best and return the rest.
Good tip here. Thanks! (And thanks for visiting. We have a few Johns stop by every now and then, but I think you might be new?)
Hmmm, too common a name. So I’ll go with my initials. I’m sort of a newbie. I began stalking you guys shortly after I read that you were dining with Tim Carter at BWI awhile back, and have enjoyed reading your e-mails ever since. I don’t jump into the conversation very often, but on nights like tonight I’m watching Mike Holmes (where I learned I could build anything in 48 minutes) and surfing during the commercials, so here I am.
Well, we’re glad to have you! I’ve got a lot of respect for Holmes. Hope to make it that big one day. He’s fantastic.
Wow this is a lot more difficult than I ever imagined. Especially being a raised deck. I would love to see a more simpler deck being built that is roughly two feet(or 1FT) above ground. I can imagine that would pose less challenges being its not far from the ground. The stairs would be a lot less challenging too.
Hi MissFitIt! So, the reality is that most of the complication of deck building is present whether you’r 2ft or 8 ft. off the ground. Much higher and things get more complex, but you basically always have to pour footers, fasten and flash a ledger board, etc. The only thing you get some reprieve on is the stairs. That said, working overhead (as in, with an 8 ft. deck) does require ladders, and therefore takes a lot more time… As such, it’s got a much higher expense.