
We’re following professional contractor Steve Wartman as he walks us through the process of building a deck. In the first installment of this series, we covered planning, digging, and pouring concrete footers, as well as securing the ledger board to the house. Today’s article covers setting two rows of posts, running support beams between the posts, and installing the joists.
Step 3: Deck Posts
Since we left off, the local building inspector came to the work site to inspect the footers. In this jurisdiction, this is the only required interim inspection. The inspection included checking that:
- there are a sufficient number of footers to properly support the deck
- the footers are spaced appropriately
- the footers are dug to the proper depth (30″), which is the depth required to be below the frost line in this region
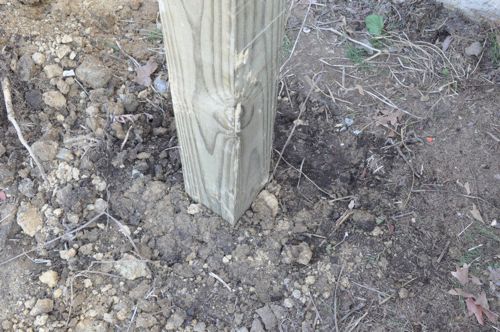
The inspection went very smoothly, and now Steve’s crew is ready to start on the posts. The crew is using pressure treated 6x6s for posts on this deck. These 6x6s are rated for “ground contact”, which, as you might expect, means they can be buried directly in the ground.
Tip: The size of posts required for a deck installation depends on the span being supported by the post, as well as the height of the deck. Steve’s crew prefers 6×6 posts for their sturdiness; however, 4x4s may be used in certain low-height installations. In certain very tall installations, cross-members may be required between the posts for added support and to prevent racking. In the final How To we produce from this deck build, we’ll provide several resources that can help you understand the support structure requirements based on a specific deck design.
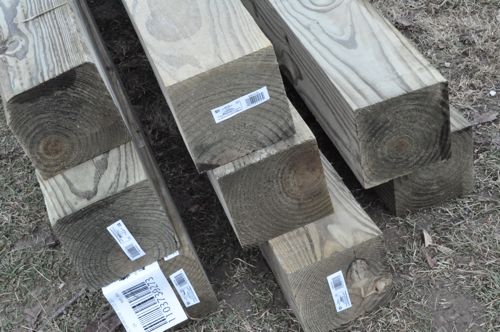
The challenges with installing deck posts include keeping each post:
- square with the house
- square with all other posts
- the right distance from the house
- notched at the proper height to support the beams & joists, ensuring a proper slope away from the house
The crew moved the first post into place and marked a line indicating the very top of the post. The reference point on the ledger board is where the floor joists will sit. (The post should be no taller than the joist.)
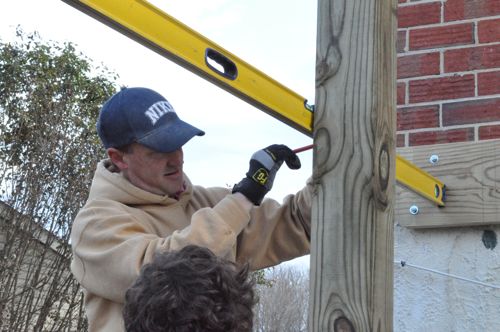
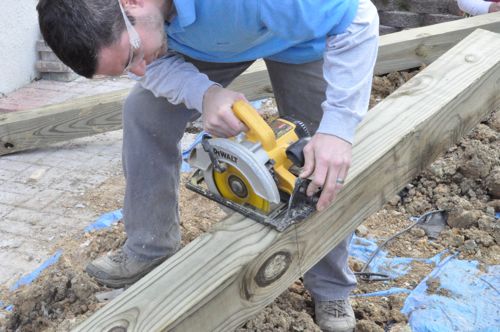
Using a circular saw, they cut the post to the proper height, based on the previous measurement.
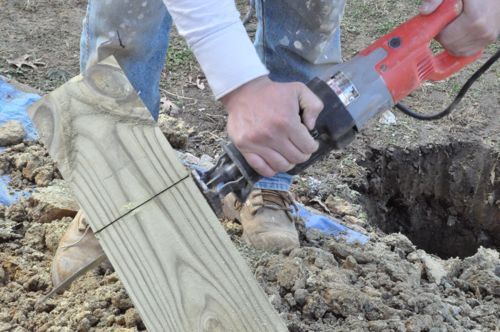
Using a reciprocating saw, the crew cut a notch for the support beam.
The support beams consists of two, 2×8 boards nailed (and later bolted) together. These boards sit side-by-side in this notch.
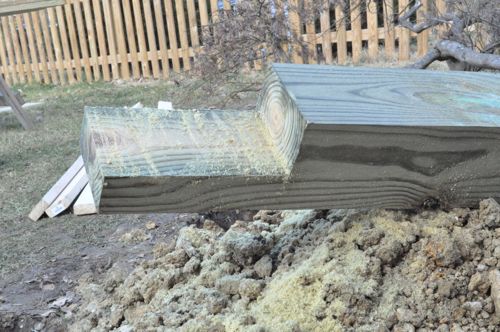
Tip: You may see support beams where the deck post is sandwiched between two pieces of 2x material. The method we describe here is better, because when the two boards are touching, they act as a single board. Furthermore, separating the 2x material requires additional blocking in between the joists to support bolting, and therefore, longer bolts.
Now that the post is cut to the appropriate dimensions, the crew moves it into place, and secures it with temporary boards. This is a somewhat tedious activity that requires several pairs of hands and repeated measurements.
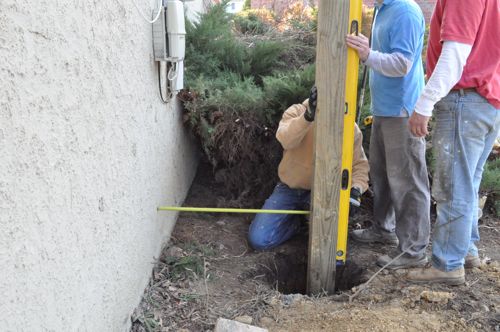
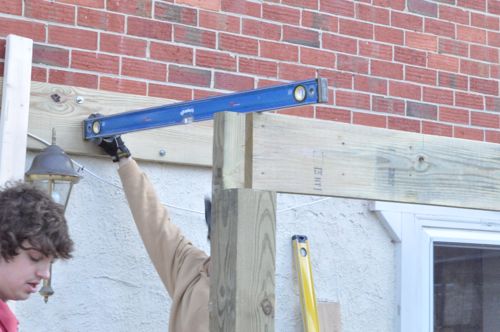
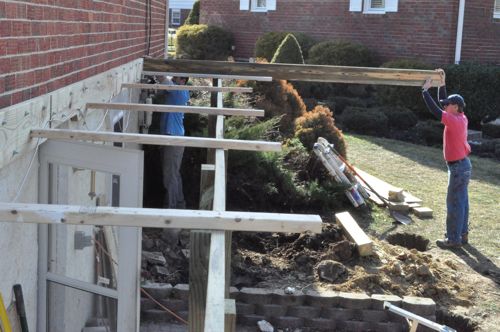
The crew repeats the process for the middle post, and, after it’s in place, adds one of the 2x10s that will be a part of the support beam. This allows them to double-check level and distance from the house across the entire gap, and make adjustments as needed to each post. Again, this process is tedious, but extremely important for the finished product.
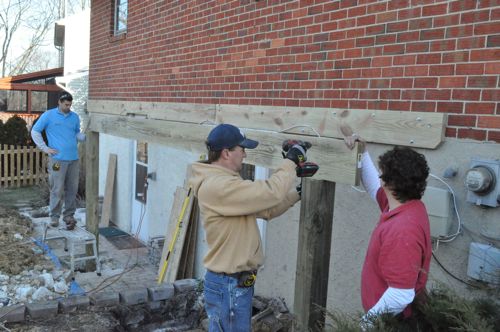
Again, the level is aligned just like a floor joist so that the top of the floor joist sits flush with the top of the ledger.
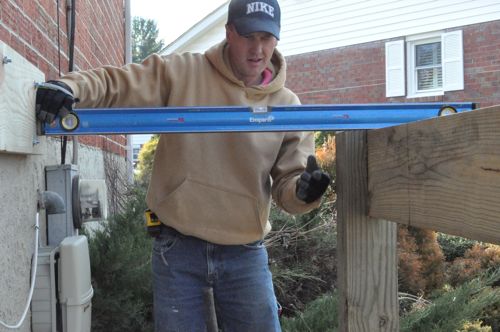
This process goes on for all five posts in the first row, which is the row closest to the house. The middle post is also where two support beams butt against each other. The transition is accomplished by equally dividing the space in the notch between the two beams.
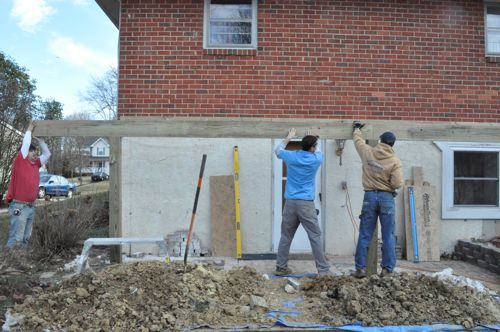
In this picture, you can see all the temporary boards that keep the posts and support beam in place.
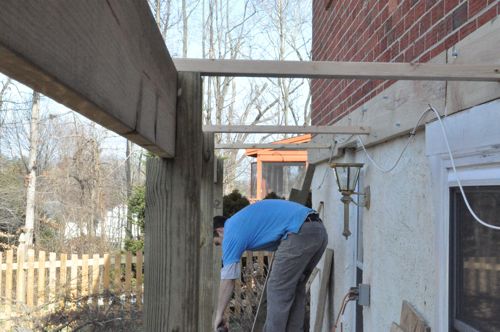
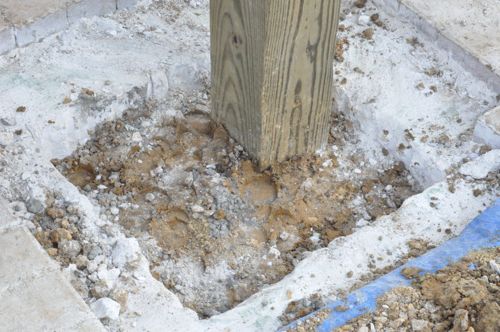
Once the crew is satisfied with the entire row, they back fill the dirt and tamp it down, ensuring not to move the post. Any movement requires additional measurements to ensure nothing has moved out of square with the house or the other posts, and that the post is still at the proper height.
The second row of posts goes in much the same fashion except for one thing. Since the crew has the ledger and first row finished, they can add a few joists and run a string guide to make it easier to setup the rest of the posts. It’s also important to note that they established a 3/8″ slope that will direct water away from the house.
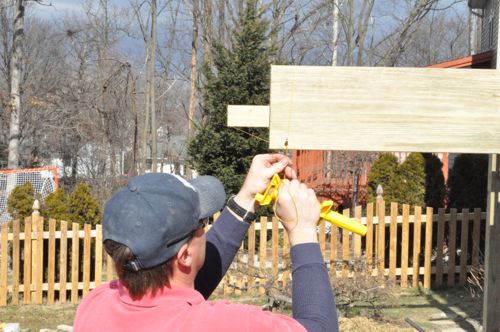
Once the crew set a few more posts, they ran a tape measure along the diagonals to make sure the deck was square.
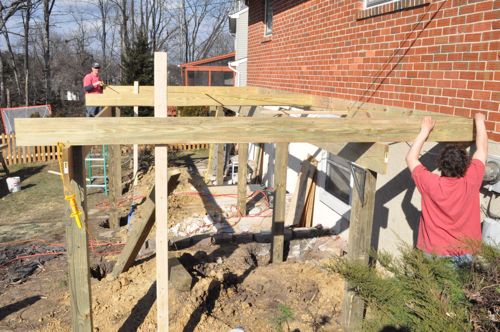
Here’s a picture of a crew member adding that second 2×10″ to form the support beam.
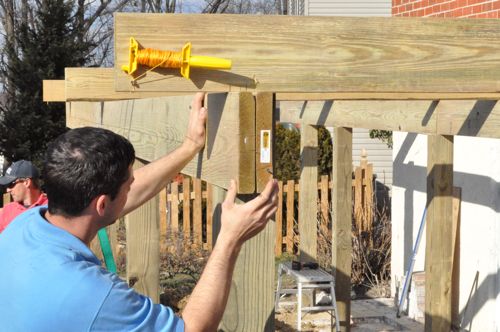
These two beam components were later secured with staggered carriage bolts through the post.
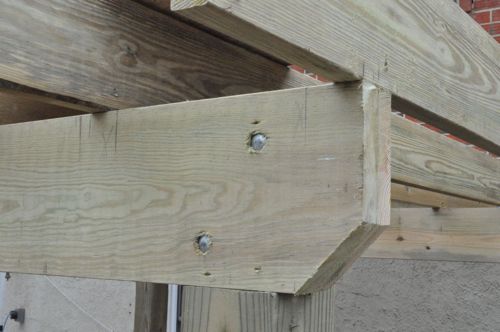
Step 4: Floor Joists
Since the ledger was already marked during Day 1, lining up the joists was not a difficult task.
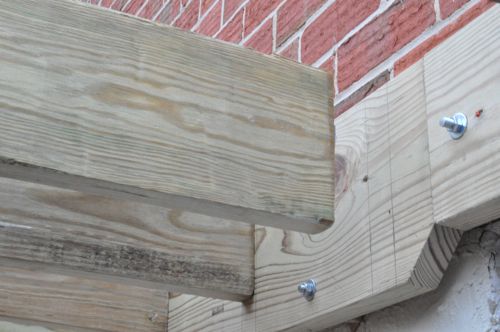
Here you can see the crew once again making sure the joist is square to the ledger. The importance of re-checking square measurements cannot be overstated in a deck build. If components start out of square, it will be hard to make the deck look good at the end.
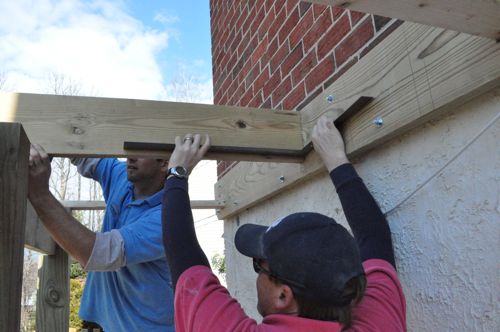
Tip: Joists should always be placed “crown up” in an installation. All joists must be oriented identically in this manner to ensure the deck won’t have waves between the joists. In our tutorial on How to Build a Shed, we provide a video on checking and marking dimension lumber to identify the crown.
The crew did break out a planer at one point because they found a few boards were thicker than the others.
Tip: Double-check board dimensions, because you may find some variation in your lumber package. Never assume that all joists are exactly the same dimensions.
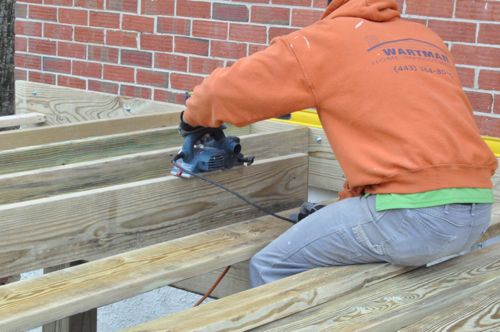
The crew toe nailed each joist in place with four nails, and then added a hanger tie.
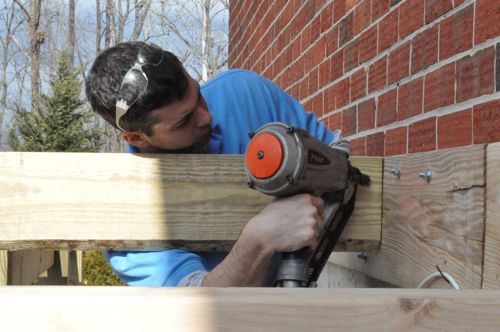
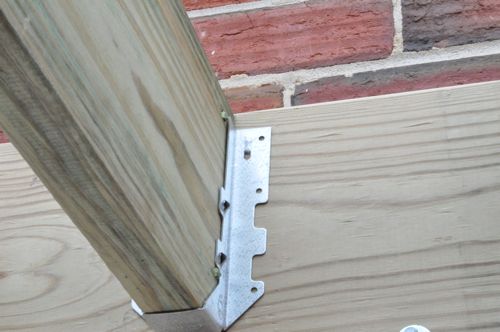
It was fun to see the crew use this palm nailer for fastening the hanger ties. It made driving the 10 nails into the hanger very quick–much quicker than could be achieved with a regular hammer, which is an acceptable (albeit much slower) alternative.
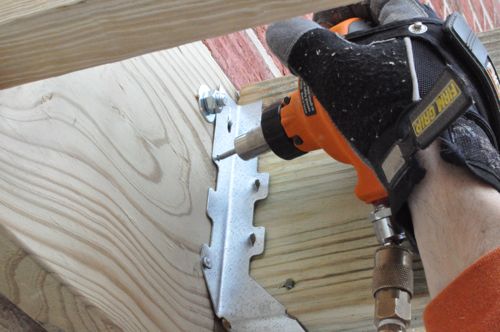
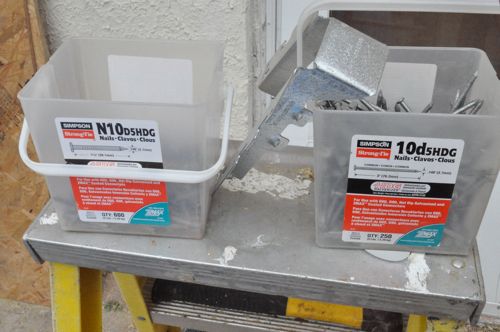
These are the nails used with the hanger ties. The shorter nails (N10) are for securing the hanger to the ledger, while the longer nails (10d) are for the angled slots. Using the correct nails for hanger ties is very important, as the strength of the hanger is dependent on using the appropriate hardware.
As you may remember from Day 1, the crew planned the joist spacing at 12″ oc since they’ll be installing a manufactured composite decking surface. For traditional 5/4 pressure treated wood surface deck, 16″ oc is more common. Joist spacing depends on both surface material as well as spanning distance between the posts.
Terminology Fact: The term “5/4 lumber” is shorthand for lumber that is nominally 1.25″ thick (or 5/4s of an inch). 5/4 lumber is actually finished to 1-1/16″. The type of 5/4 lumber used on decks has rounded edges and is known as “decking board”. Composite decking material is generally the same size as 5/4 lumber (or close to it).
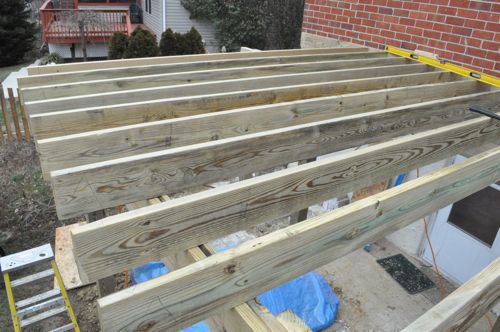
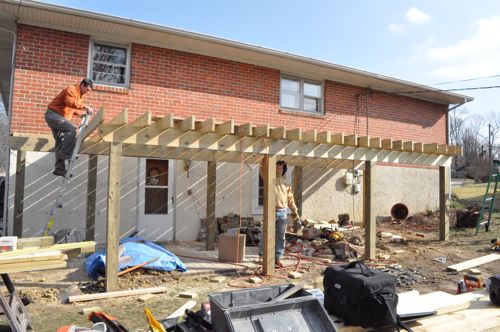
This deck is starting to really come together! In my next update, I’ll be sharing how the crew installed the band board, added blocking between the joists, and built the stairs.
As we get closer to completing this project, I’d love to have Steve field any questions you have. Feel free to ask them in the comments.


It’s coming together nicely. I think if I ever have a house that needs a deck, I’ll hire someone like Steve to do the piers and joists. That’s a lot of tedious work. I put my fence in myself, and that was enough checking and rechecking for my lifetime. 4×6 fenceposts and farm fencing are probably the limit of my desire to work with an auger and post hole diggers ever again.
I’m with you. It’s a lot of back and forth. Plus, it would probably take me all summer to finish 🙂
2 quick questions.
1.) Are they going to be adding a door from the house to the deck or will stairs be the only access?
2.) Do they have to put in a taller mast for the electrical service? In the last picture it looks like a person could just reach up from the finished deck and grab onto them.
Great questions Jeff. They will be adding a door from the house. That’s coming later when they start the in-law addition. The wires are very close to the deck now and you could actually touch them without meaning to! Either the wires will be moved or they’ll be buried.
Wires were an issue when my parents’ deck was built I believe the rule is that they must be at least 10 or 12 feet out of reach. Hopefully Steve can clarify the rule for us. This is something the building inspector will be looking for before he closes out the final inspection, I would think.
Is the 3/8″ slope from the house over the entire width of the deck or every so many feet?
It’s over the entire 12′ width of the deck.
How deep are the PT posts buried? (where they sit on the concrete) Never seen this method before. I’ve only seen the posts attached to the concrete piers. (which are usually flush, or close to it, with the ground) I’m curious about and chance of the posts sliding at some point.
Jake, the posts are buried, and that’s common in this area. Setting them on top of piers is also acceptable. There is little to no chance of the posts sliding, given then are tightly packed into place with dirt (speaking from experience-our deck is built this way and there has been no movement for 4 years). Some folks will argue that PT wood shouldn’t be buried (fears of rot) but that’s not a concern with good PT wood, unless you are living in a marsh. While difficult, should a single post go bad, it can actually be replaced by jacking the deck, digging it out, and removing it. Not something you’d want to have to do, but also not impossible.
By the way, for some reason when both Ethan and I edited this article, we were calling the “posts” incorrectly “piers” – not sure why neither of us caught it. It’s fixed now.
The contractor that installed our deck used the same method described in this post – hand dug holes, poured concrete footers, placed the vertical posts on the footer and filled in around the posts. We haven’t had any problems in nearly four years – the deck still looks as good as new.
Funny addition – the contractor mounded the dirt around the posts at least six inches higher than the ground. We wanted the ground to all be level, so we removed the mound and added grass seed. After the first heavy rain, we spent a couple minutes using a wet-vacuum to suck the four inches of water out of where the dirt settled around the posts. Guess the professionals knew what they were doing!
Wow this is coming together very nicely and I never knew how much work it was. Now I fear this lol I think it might be one for the pros. Though ours wouldn’t be an above ground deck its pretty low. But still tedious.
Definitely. still tedious at ground level. We’re going to be covering some important components soon (such as properly flashing the ledger board) that will be really important for any level installation.
Now that I think about it, did they treat the cut ends of the PT lumber before burying them? And while the blog entry says the wood was rated for “ground contact,” do you happen to know if it was .40 PCF for .60 PCF? For burying something that significant, that deep, and that much of a pain to do in the first place, I’d want it to be rated for underground use, and covered in tar or a similar waterproofing.
William, if you’re concerned, you have a few options – set the posts on piers (requires much more concrete, because you still have to dig below the frost line to prevent heaving), or I suppose you could try some type of protective tar treatment. My fear with any external treatment is that you run the risk of trapping water IN the post. I inspect our posts about twice a year and they seem to be holding up just fine… Of course, I can’t see the very bottom of them, but we have decent drainage in the back yard, so I doubt that rot is a significant problem at this point in their life. I know that a handful of deck builders will actually construct posts using 2x6s, rather than use a single PT 6×6. Theory is that the 2x6s have more complete chemical penetration (and they happen to be cheaper, I guess).
Hey William, They didn’t put the cut ends into the ground so there was no need for extra treatment. This is a pretty common method for setting posts, and Steve hasn’t had any problems in the past (including a 25+ yr old deck).
I wonder if a lot of what goes into putting in a deck like this is the same as building a front porch?
I’m just loving this series . . . such a brilliant idea and so many images to capture it all. rock on!