
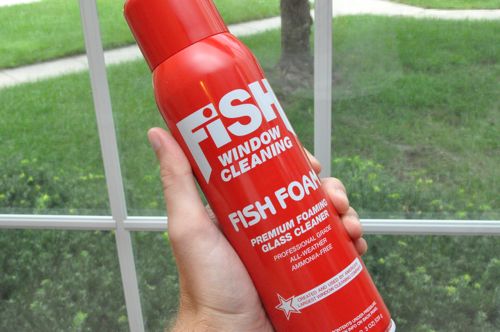
We get a lot of offers for product reviews, and some of the stranger ones are things like trash bags. We tend to try just about everything, but what can you really say about a trash bag? “Man, this thing really holds trash!” I was a little curious when we were offered some Fish Foam window cleaner. I know fish oil is supposed to have some health benefits, but I never thought Fish would make for a good window cleaner.
Need other great cleaning tips? Check out how to clean a microwave from Practically Fuctional.
Cleaning my Windows with Fish Foam
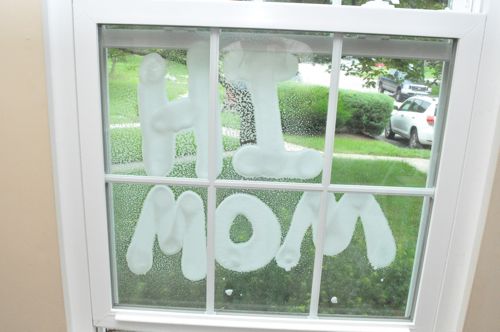
When I finally cracked open a can of Fish Foam, I started wandering around my house cleaning windows, mirrors, and other glass. I quickly realized that cleaning windows is boring, and I’m easily distracted. I began to attempt drawing or writing words with the foam. These pictures capture how I slowly shifted from cleaning windows to drawing pictures.




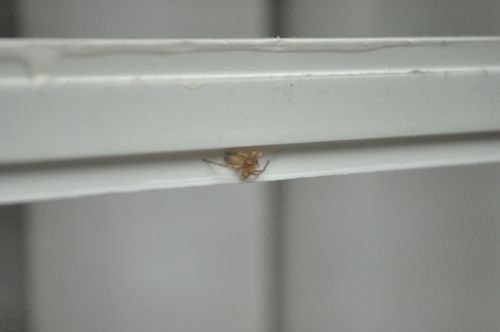
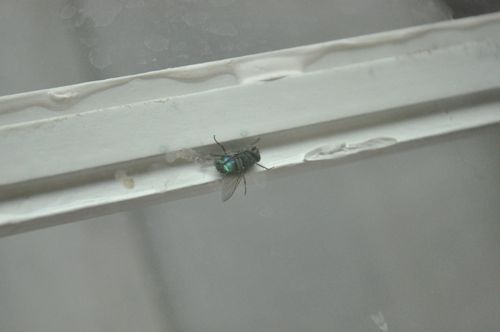
I even discovered that one of my sliding glass doors is a death trap for flies and spiders. Somehow they get caught under the grid.
Anyway, back to the window cleaner. I was curious how Fish Foam would stack up against a well recognized brand like Windex. So I cleaned half a window with the foam, and the other half with Windex.
Check out my dirty window.

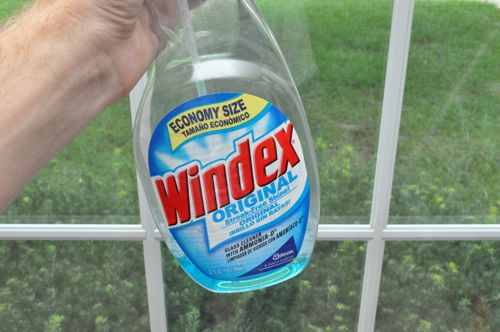
The result? They both cleaned the same. I did enjoy how the foam didn’t run or drip, and it doesn’t take very much to clean a big surface. I found Fish Foam to be a good cleaner for windows, mirrors and my storm door. Trying to find an even bigger challenge, I decided to test the foam on my shower doors- soap scum and all.
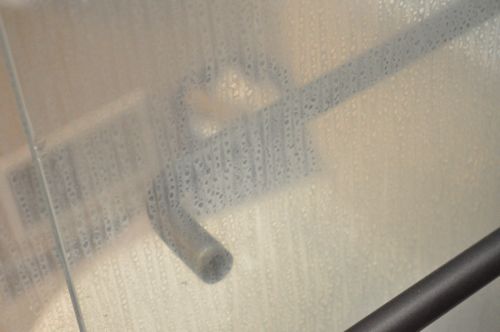
Following the instructions, I shook up the can, and spayed the doors (hoping for the promised “streak-free clean”). Here’s how they looked after.

Fail.
Cost
Since the Fish Foam seemed to work just as well as Windex, the real question is how they compare on price. A single 19-oz can of Fish Foam costs $3.95 or about $0.21 per oz. I found a 32 fl oz bottle of Windex at Walmart for $2.87 or $0.09 per fl oz. I’ll concede that Fish Foam is a “professional grade” product but at the end of the day, I wouldn’t buy it.
Oh. You should know that Fish Foam doesn’t actually have any fish in the product (so far as I can tell). Also, I didn’t use any animals to test this product, and none were harmed in the writing of this article.

Some for you, and some for me. Some for you, and some for me.
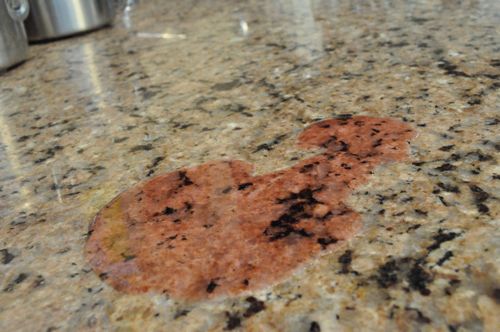
By “some” I mean red wine, and by “you” I mean my countertop. I just re-sealed my granite countertop, and I figure red wine is one of the best ways to test it out. Sealer is designed to prevent things (like red wine) from seeping into the stone’s pores, and if it’s working right, the red wine will completely wipe away even after sitting for a while.
Sealing your countertop is important for maintaining porous surfaces like granite, marble, slate and travertine. It’s also a good way to keep grout and masonry looking nice too. Most sealers wear off in 1 to 2 years, and you have to repeat the process. If you start to notice dark spots from sitting water, you know it’s time to reseal. I’ve also recently learned that acidic cleaners (like a water-vinegar solution) can degrade the sealer over time and possibly etch the surface of the countertop.

DuPont sent us two products from their Stone Care line– Granite and Marble Cleaner+Protector and Granite and Marble Sealer. The sealer boasts a 3- 5 year expected duration for internal surfaces. If that’s true, I’ll be impressed, because in my experience countertops need to be resealed after 2 years or less. The Cleaner+Protector product is designed for several surfaces and is “specifically formulated to help you properly care for your stone and grout.”
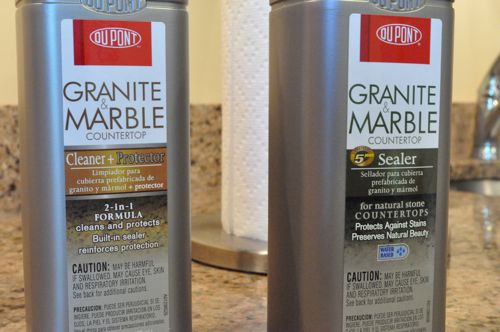
Sealers and cleaners are tough to get excited about, and they all seem to work the same. When I asked DuPont what made their products different from all the rest, they told me it was all about the active ingredients. DuPont claims they use more active ingredients than anybody else, and many of their competitors use cheap alternatives to the active ingredients which result in their products being less effective.
So I grabbed the sealer I’ve been using for the past 5 years and compared the ingredients to the DuPont sealer. They are indeed different but I can’t comment about the quantity or quality of the ingredients. Any organic chem. professors reading? If so, help us out.
I cleaned up my countertop and let it dry. Next I applied two coats of DuPont’s sealer and let it cure. Here are detailed instructions for sealing your countertop if you’re interested.


And now let’s see about that red wine. I setup a little test area with the camera on a tripod and kept all the lighting consistent. Next, I poured some red wine (such a waste) on the countertop and let it sit for 30 minutes.
Here’s the countertop after the cleaning and before the wine.
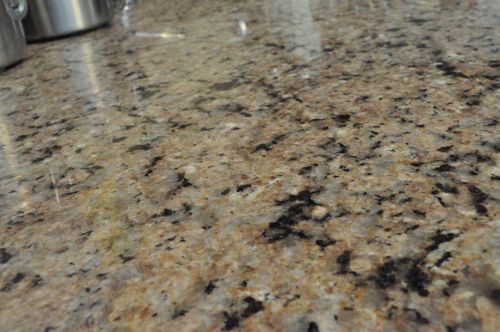
The initial pour….

and thirty minutes later. I guess my countertop isn’t 100% level.
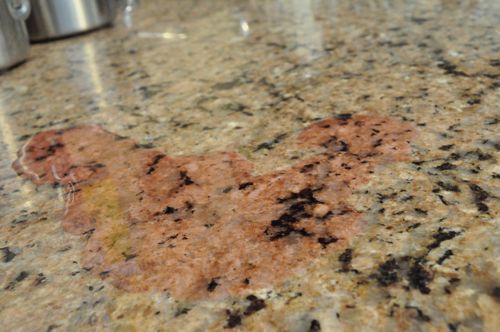
Finally, here’s the countertop after I wiped it clean with a paper towel- no cleaning product.
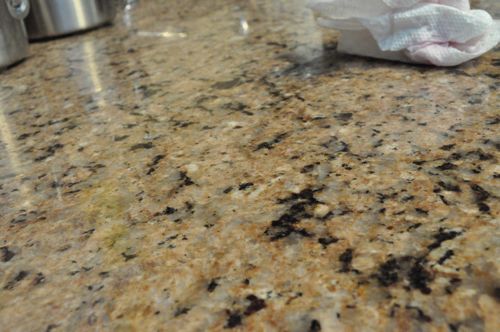
I looks pretty good to me, and I can’t find any discoloration. We’ll try this test again in six months and see how the DuPont’s holding up.
Have you ever stained your countertop? How’d you get the stain out? What’s your experience with sealing countertop?

The other day I shared how I replaced a missing shutter. Today, we focus on painting the aluminum covering overtop our bay window.
A few years ago, Jocie and I had all of our windows replaced, and the new ones have a white frame. They look great except when they’re sitting next to dingy, off-white aluminum (or need to be cleaned). Last week I went about repainting the overhang to match.


If you can’t tell, the paint is flaking in several place, some of the aluminum is bent, many of the nails have popped out a little and the whole thing is pretty dirty. Here are some close-ups of what I’m up against.

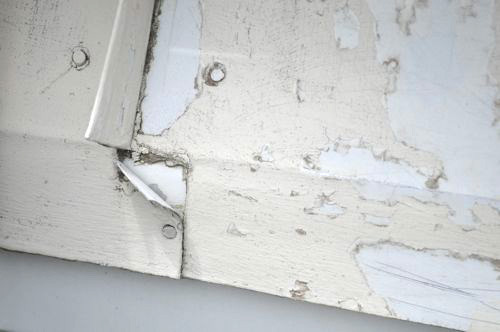
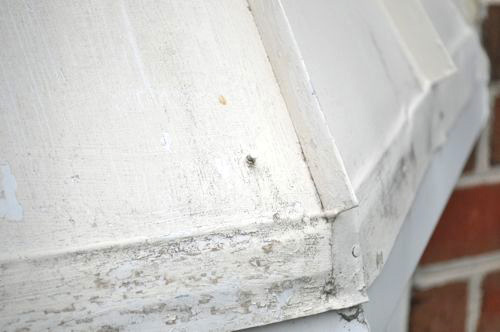
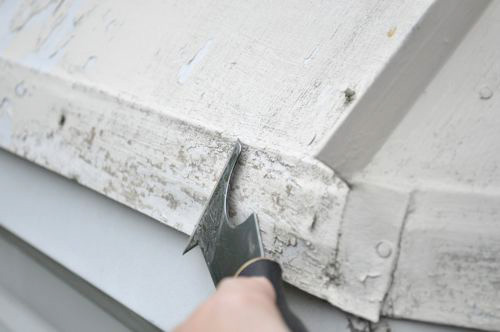
Half of this project is making the right preparations to paint. I’ve come to realize that most failed paint jobs are the result of poor prep. It’s important that everything is clean, caulked, scraped and sanded before you grab that paint brush. I started with my handy painters tool to scrape away all the flaking paint.
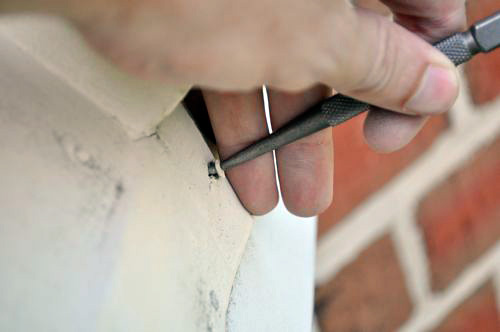
I mentioned that many of the nails had popped out a little. In reality, just about all the nails needed a little nudge back into place. I reseated all the nails with a nail set and used a rubber mallet to encourage some of the bent aluminum back to its original form.
Next up, I grabbed some course, 60 grit sandpaper and went to town. About five minutes into this, I retrieved my palm sander, and things went much quicker. The course sandpaper roughed up the surface and removed even more paint. This is important because it helps the new paint adhere better. I followed the course sandpaper with some fine, 160 grit sandpaper to smooth out any noticeable edges.

The next step was to ensure everything was clean and dry. I grabbed a garden hose and spare cloth to make sure all the dirt and dust were washed away. In the heat, everything dried pretty quickly. There aren’t any pictures of this step because it’s hard enough to manage a hose on top of a ladder without operating a camera too. Safety first people.
To waterproof and conceal the nail heads, I used some DAP 3.0. This stuff is great for sealing windows, doors and lots more. You can use it inside or outside, and it’ll adhere to almost everything including your hands. This caulk is paintable (very important for our paint project), and it’s mold and mildew resistant. I was generous with the caulk because nobody likes a leaky bay window.

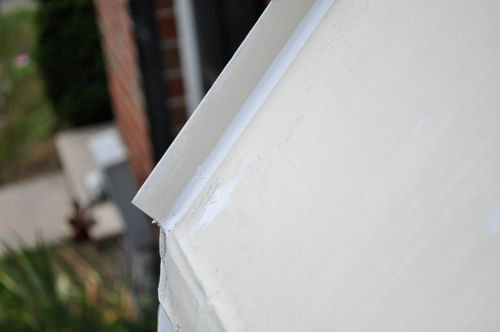
I purchased Valspar Duramax semi-gloss exterior paint for this project. The big incentive was that I could avoid having to prime anything as that would have added at least a few hours of drying time. Initially, I use a small roller to apply the paint, but that left a noticeable texture. Since I’d have to go over everything with a paint brush anyway, I ditched the roller. It was right about then that I remembered how much I hate painting. Why did I pick this project again?
The proof is in the pudding, and I’d say everything turned out well. The overhang looks fresh and clean, and you can’t even see most of the nail heads. Best of all, I won’t have to look at that eyesore every time I come home!


A couple days ago I shared a little experiment demonstrating how well Pro-Tect decking repels stains. We tried ketchup, mustard and an asphalt solution, and none of them left an appreciable mark. There was some good discussion, and Joe suggested using grease from a grill as a more realistic test. I love a good challenge, and here’s what I did.
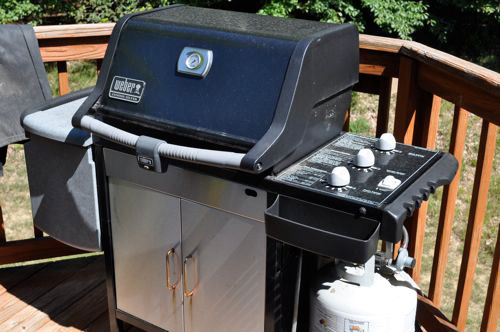
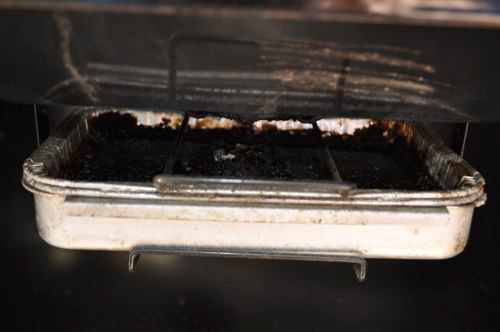
I have a Weber grill that has served me well for at least seven years. I don’t clean it as often as I should. Fortunately, that means there’s plenty of grease in the trap.
I spooned a couple globs of grease into a styrofoam cup and popped it in the microwave for a minute. When I pulled it out, the grease had melted a few holes in the bottom- nice. I quickly grabbed another styrofoam cup to salvage what was left.
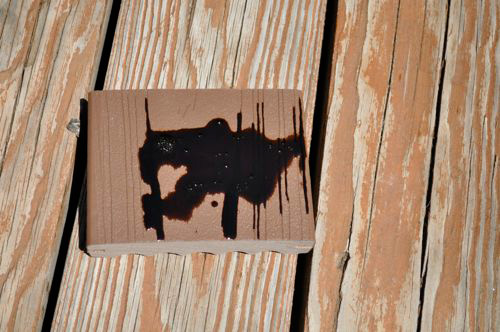
Back outside I poured the grease on a Pro-Tect sample. Fiberon had no idea I’d be getting so much mileage out of these small samples. As a side note, I was concerned that some animals might mess up my experiment by trying to eat it. Ever since I moved in I’ve been at war with the squirrels. I wouldn’t put it past them to try and eat boiling hot grease just to spite me. The squirrels are always watching.


I let everything sit outside for a few hours to let the grease dry and simulate a grease stain from a grill. The grease spread out and eventually solidified.
I made this short (1:30) video so that you could see exactly what happened as I tried to remove the grease. I used only the materials Fiberon provided including napkins, wipes and degreaser. I hope you enjoy the movie (and my Vanna hands)!
In the video I started by wiping everything down with a napkin. The grease smeared but most scrubbed away. I followed it up with the degreaser spray and the window wipes. You can see that all of the grease wiped clean. I think Pro-Tect decking stands up to grill grease even better than the asphalt solution. There was no discoloration, and the sample looked good as new.
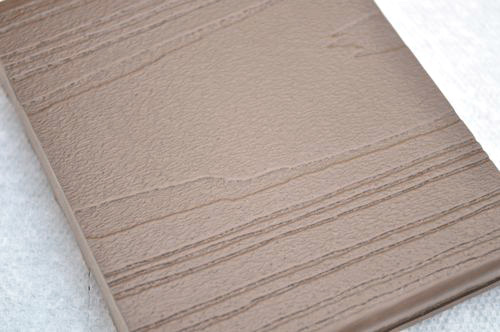
Does anyone have experience with grill grease on their composite decking? Does grease always wipe this clean or has Fiberon really produced a superior product?

Did anyone get the Under Armor reference? They’re based out of Baltimore, and I always feel the need to represent. Anyway, that’s not what this post is about.
From time to time, I’ll snap some photographs on my deck, and they always make me cringe. I’d estimate my deck is at least 15 years old, and the previous owners did not maintain it very well. Once the wood is splintered and warped, there really isn’t much you can do except re-board. If you’ve ever read Fred’s Behr Deck Weatherproofer Review or his How to Strip a Deck, you’ll understand why I’m looking at composite decking.

Fiberon is a composite decking manufacturer, and they were kind enough to send me a few samples of their newest product: Pro-Tect Decking. Pro-Tect is a capped stock material, which means the decking core is wrapped with a “non-organic surface.” The real benefit is that homeowners are required to perform almost no maintenance, and the boards should never stain, fade or warp.

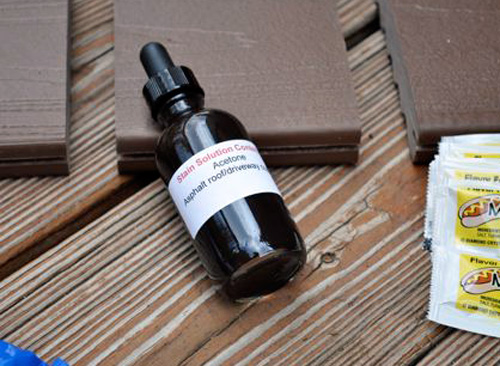
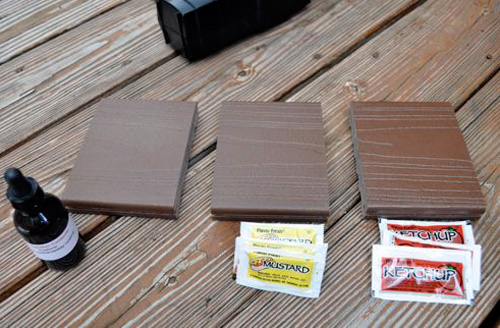
You can imagine my surprise to find some ketchup and mustard packets when I unpacked the samples. Fiberon had taken the liberty to include a test kit complete with ketchup, mustard, an asphalt stain solution, a degreaser and some wipes. It was time to suit up!

I put two globs of each “stainer” on separate sample pieces. The first glob would be wiped off relatively quickly while the second glob would sit for a while.
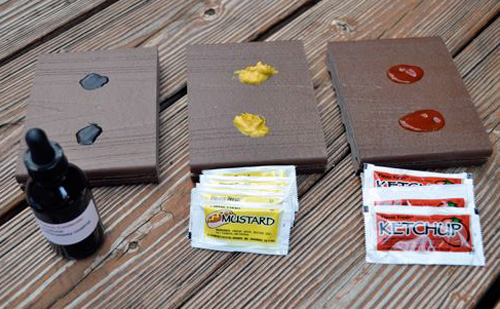
You can see the ketchup and mustard wiped clean very easily. The asphalt solution was very sticky and smeared. This was why they had included the degreaser.
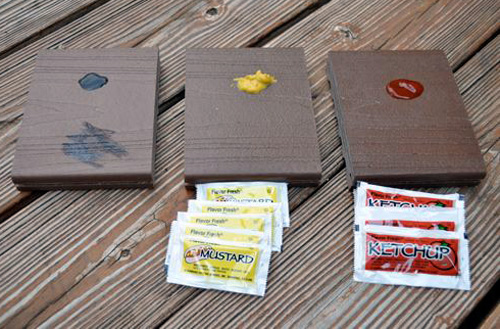
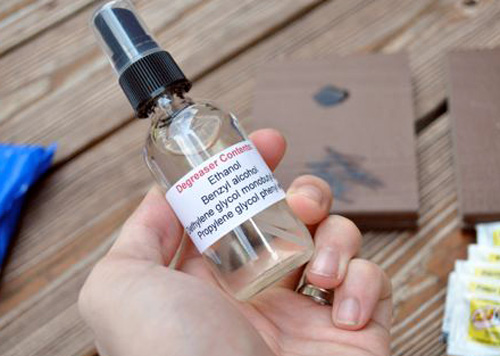
After a few squirts of the degreaser, the asphalt solution wiped away clean.
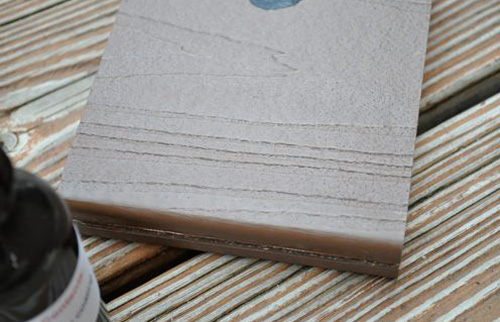
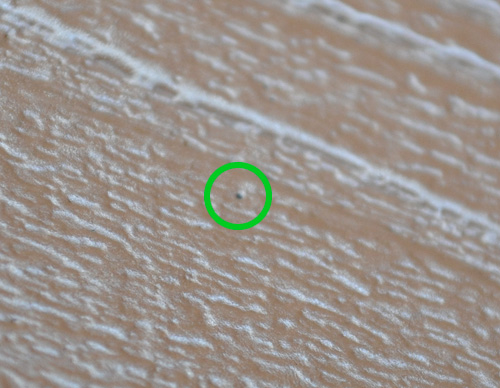
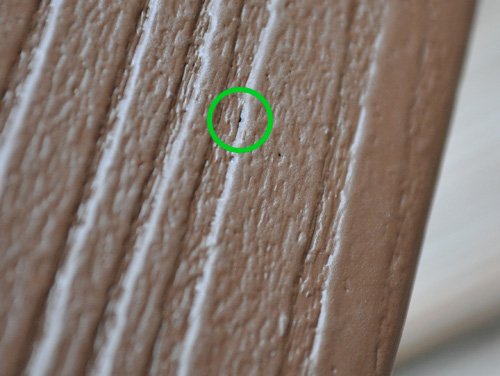
Or did it?! Composite decking often has a textured surface to resemble real wood. Unfortunately, that texture also provide tiny, little crevices where things like asphalt solution can hide. On very close inspection, you can see a speckle or two of stain.
If you’ve ever witnessed a product demonstration, you know they always feel a bit contrived. No manufacturer is going to embarrass themselves by failing their own test kit. I decided to grab my heat gun to mix things up a bit. Let’s see what happens when we zap these stains with 1000° F heat.
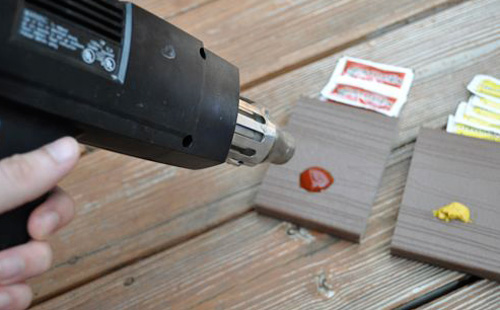
You can see the asphalt sort of bubbled and dried somewhat solid.
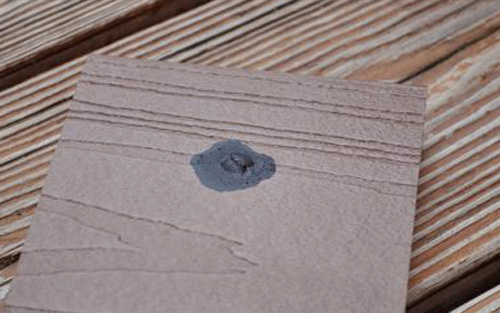
The ketchup and mustard wiped clean with ease. The asphalt wasn’t so compliant. After two rounds of degreaser and a fair amount of elbow grease, everything looked as good as new. Again, almost undetectable amounts remained in the tiny crevices of the surface.
Pro-Tect is definitely an impressive product however, we don’t have the funds to re-board our deck at the moment. I received a few bids from contractors, and, after recovering from the shock, respectfully declined. Does anyone else have experience with composite decking? How does it stand up to mold? Is cleaning mud and dirt an easy task?

Two days ago, I was inspired by an article on Young House Love where Sherry writes about tackling some weeds around her mailbox. It was a simple story about removing some weeds, putting down landscaping fabric, planting flowers and spreading mulch. After reading it, I thought to myself, “I have weeds and landscaping fabric. I should do this. Right now.”

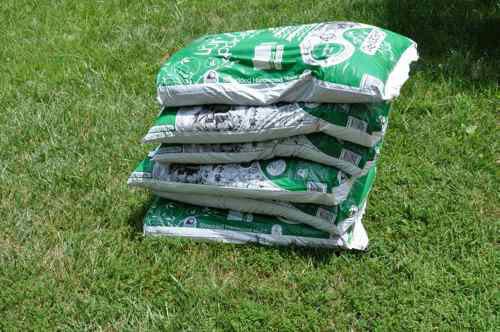
A quick trip to Home Depot and I had everything I needed:
- Mulch ✔
- Flowers ✔
- Landscaping fabric ✔
- Fabric achors ✔

Step 1: Weed and Turn Over the Dirt
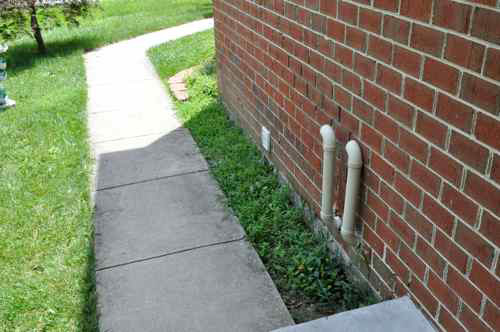
Weeding is one of my least favorite projects. I hate weeding more than painting, which is why it happens about once every two years. These weeds don’t look so bad because the neighbor kid was kind enough to mow them last week.
I was amazed at the diversity of weeds growing alongside my house. There was Crabgrass, White Clover, Bermuda Buttercup, Broadleaf Plantain and others I couldn’t identify. I used the cultivator to loosen the soil a few inches deep, and began the process of sifting through the dirt to remove all plant-life.
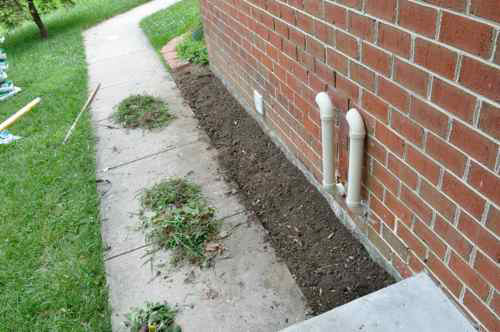
This approach was oddly satisfying because it didn’t involve any herbicide, and I’m confident that all (or most) of the weeds have no chance of coming back. You can see in the pictures, a lot of weeds died that day. The picture below shows what we in the biz call a tap root. The rest of the world also calls it a tap root, and I’m not actually in the business of pulling weeds.

This project didn’t go without some casualties. There was a lone perennial that still clung to life even with the brutal weeds closing in around it. Unfortunately, it would have been the odd man, out and so it was pulled with everything else.

Step 2: Install Landscaping Fabric and Anchor In Place
The landscaping fabric was DuPont Premium, and boasts 15 years of protection when properly installed! This “spun-bonded polypropylene” creates a barrier that allows water, air and nutrients to enter the ground while blocking weeds. I went about unrolling a section and cutting it to size leaving extra to tuck in the front and back. I placed the anchor pins every few feet to secure the fabric in place.
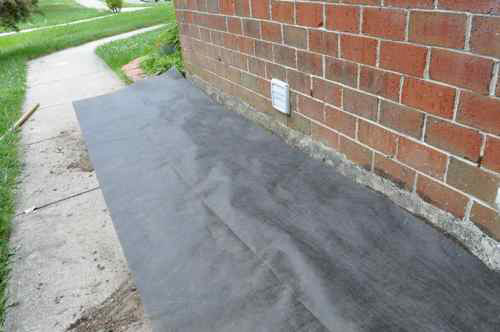
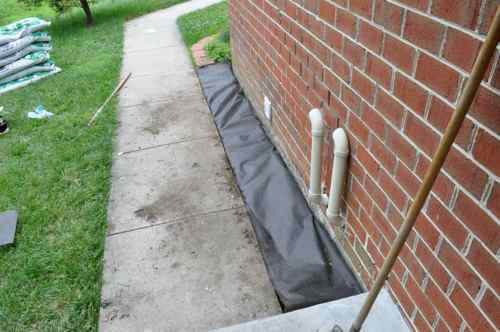
Step 3: Plant Flowers, Carefully Cutting the Fabric Barrier
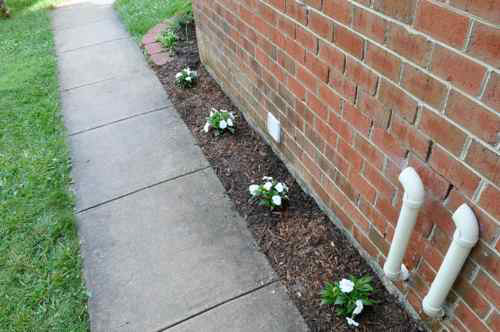
I purchased four, white New Guinea Impatiens. A cool side note- Home Depot includes a QR code that provides details about the flowers, light requirements, watering instructions and more. By scanning that with my phone, I learned that New Guinea Impatiens require 4-6 hours of sunlight and daily watering. Apparently, they also attract butterflies.

I spaced out the plants and cut X’s in the landscaping fabric, digging a hole for the flowers.

Step 4: Mulch the Garden for a Great Finished Look
The final step was spreading 2-3 inches of mulch throughout the flower bed. Mulch has the added benefit of trapping moisture and helping to control weeds. Plus, it makes flower beds look nice!

Step 5: Water Immediately
The cashier at Home Depot let me know that these flowers need a lot of water so my wife and I decided that could be a fun “chore” for Izzie. She’s actually very excited about watering the plants, and I hope that means they’ll stay alive longer!


Have you been inspired recently? What gardening projects have you tackled this year?

Dryers work by tumbling clothes and introducing heat while humid air is vented out an exhaust. Most of the lint produced in this process is captured in a lint trap, but small amounts pass through and can deposit in the dryer vent. Dryers are a highly utilized appliance and lint can quickly buildup over time.
As with just about every home appliance, dryers will function longer and more efficiently with the right preventative maintenance. The single most effective maintenance a homeowner can perform is routinely clearing away lint and obstructions. It’s a simple job but one that will ensure your dryer is safe and effective.

Clogged Dryer Vents
Dangers of Lint Buildup
Clogged vents will have a negative impact on how well your dryer performs. At a minimum, lint buildup will restrict air-flow causing the dryer to work harder for the same results. This in turn shortens the dryer lifespan. If your vent pipe is long or has lots of twists and turns, take extra precaution as lint will deposit faster.
If you think about it, lint is composed of small, dry fibers which can easily catch fire. Fires that start will spread quickly with catastrophic effects, and an alarming number of house fires are caused by blocked dryer vents. The U.S. Consumer Product Safety Commission (USCPSC) reported that in 1998 an estimated 15,600 house fires were linked to clothes dryers.
Dryers that utilize natural gas also exhaust carbon monoxide. If a dryer is malfunctioning, carbon monoxide can back up into your home, accumulating in lethal amounts.
Warning Signs
Here are some of the warning signs that indicate your dryer vent could use some attention:
- Dryer needs more time or extra cycles
- Clothes are not completely dry
- Dryer exterior is much hotter
- Poor air flow out of the vent during a cycle
How Often Should You Clean a Dryer Vent
Many sites suggest checking your dryer vent at least once a month and cleaning as necessary. Really, it depends on how much you use the dryer. If you have a large family and lots of laundry, you’ll need to clean the vent more often. I read one suggestion that you should perform maintenance every time you change the batteries in your smoke detector- twice a year.
Dryer Vent Monitors
There are devices available that will alert you of an obstructed dryer duct. Basically, you install a pressure sensor in a clean dryer duct and it monitors any change. As lint builds up, the pressure required to force air out of the vent increases tripping an alarm.

Cleaning Lint from the Dryer and Vent
Here are some steps to take to prevent fires and increase the efficiency of your clothes dryer:
- Clean the lint screen/filter before or after drying each load of clothes. If clothing is still damp at the end of a typical drying cycle or drying requires longer times than normal, this may be a sign that the lint screen or the exhaust duct is blocked.
- Clean the dryer vent and exhaust duct periodically. Check the outside dryer vent while the dryer is operating to make sure exhaust air is escaping. If it is not, the vent or the exhaust duct may be blocked. To remove a blockage in the exhaust path, it may be necessary to disconnect the exhaust duct from the dryer. Remember to reconnect the ducting to the dryer and outside vent before using the dryer again.
- Clean behind the dryer, where lint can build up. Have a qualified service person clean the interior of the dryer chassis periodically to minimize the amount of lint accumulation. Keep the area around the dryer clean and free of clutter.
- Replace plastic or foil, accordion-type ducting material with rigid or corrugated semi-rigid metal duct. Most manufacturers specify the use of a rigid or corrugated semi-rigid metal duct, which provides maximum airflow. The flexible plastic or foil type duct can more easily trap lint and is more susceptible to kinks or crushing, which can greatly reduce the airflow.
- Take special care when drying clothes that have been soiled with volatile chemicals such as gasoline, cooking oils, cleaning agents, or finishing oils and stains. If possible, wash the clothing more than once to minimize the amount of volatile chemicals on the clothes and, preferably, hang the clothes to dry. If using a dryer, use the lowest heat setting and a drying cycle that has a cool-down period at the end of the cycle. To prevent clothes from igniting after drying, do not leave the dried clothes in the dryer or piled in a laundry basket.
DIY / Professional Dryer Duct Cleaning
Some dryer maintenance cannot be completed by a homeowner and it’s important to get a qualified service technician involved. They will be able to asses the interior of the dryer and fully clean a dryer vent. If you’re looking for a professional to service a dryer vent or the dryer itself, it’s important to shop around. Gather at least three quotes and get everything in writing.
There are some very inexpensive, easy-to-use dryer vent cleaning kits available for homeowners. Gardus offers a 10-Piece dryer vent system that utilizes a drill driver to really scrub the ducts clean. It can reach up to 12′ and navigate turns.
What do you think? When was the last time you checked your dryer duct?
Excerpts used with permission from USCPSC website. Images courtesy of Monica Arellano-Ongpin and seishin17.

I love building fires in the winter. There’s something about that mesmerizing glow that I could watch for hours. Unfortunately, we haven’t really had a chance for any fires this year. In fact, the other day we had our first fire of the season, and it reminded me that I’m behind on some general maintenance. Every year you should run through this short checklist to make sure your fireplace is ready to go.

Cleaning / Chimney Sweep
Every year you should have a Certified Chimney Sweep out clean your chimney. This reduces the chance of a fire and carbon monoxide poisonings due to creosote buildup or an obstruction in the chimney. They can also check your chimney cap to ensure everything is in good condition. This is an important step even if you don’t build fires very often as animals or deterioration can make the chimney unsafe. Have you chimney cleaned during the off-season for cheaper prices- early spring to late summer.
What is Creosote Buildup?
Creosote is a byproduct of burning fuel in your fireplace. It clings to the inside of your chimney as a highly combustible, black or brown substance. It can be flaky, gummy or hardened. To reduce creosote buildup, there are a couple things to keep in mind:
- More efficient fires completely consume the fuel, burn hotter and result in less creosote.
- Seasoned wood has about half as much moisture as green wood resulting in an easier start, hotter fire and cleaner burn. Wood cut less than six months ago is considered green and the moisture will form creosote deposits.
- Condensation occurs more rapidly in colder chimneys (e.g. an exterior chimney), accelerating creosote buildup.
Creosote sweeping logs (CSL’s) can treat and reduce existing creosote but CSL’s do not replace a certified chimney sweep. A certified sweep will use brushes and sometimes chemical to removed buildup.
Inspect the Refractory Panels
Refractory panels reflect heat back into the room, protecting the firebox. If you observe any cracks large enough that you can insert a nickel, on-end, it’s time to have them replaced by a qualified professional. You should also replace any panels where the surface is worn away more than a ¼”.
Damper
The damper closes the flue and stops the flow of air. Check out your damper and make sure it isn’t obstructed and opens / closes properly.
What do you think? How do you keep your fireplace in shape?

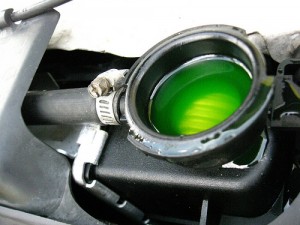 This past weekend I was able to tackle a bunch of car maintenance and, with some expert help (thanks Chris), troubleshoot several problems.
My ’98 Saturn SL was in worse shape than I realized. Chris and I changed the oil, oil filter, air filter and coolant. We replaced both radiator hoses, spark plugs and wires and the muffler strap. Chris diagnosed and repaired my EGR valve (what the heck is that?!) and why my backup lights quit working- a bad switch.
Changing the oil, oil filter, air filter and even replacing brake pads are not difficult projects if you have the right tools. It turns out draining and replacing coolant is pretty straightforward too.
Selecting Coolant
Coolant, also called antifreeze, regulates the temperature of your engine. It prevents freeze-ups, overheating and boilovers.
 I purchased Prestone 50/50 antifreeze. It’s pre-diluted and can be added to all different makes and models. I like the convenience and often the pre-diluted options utilize deionized water- water that is physically processed to remove impurities and charged particles. Check the label and look for deionized water.
If you make your own antifreeze-water mix, pickup some distilled water. It’s not quite as “pure” as deionized water but is far better than using tap water.
I choose the universal option but your manual will specify which type / color coolant is suggested for your automobile.
Draining the Antifreeze
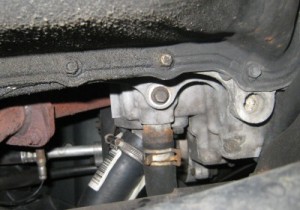
Draining the antifreeze is a simple process. Make sure you have a reservoir to catch several gallons of used antifreeze. Unscrew the reservoir cap so that it drains faster. Locate the antifreeze plug on the underside of your vehicle (green plug on second picture). Open the plug with pliers and let it drain.
This only removes about half the antifreeze. Next, you need to drain the engine block. Locate the appropriate plug and use a socket wrench to remove (center of third picture). Let the block drain completely.
Check your owners manual if you have a hard time locating these plugs.
Refilling the Antifreeze
Make sure you replace both plugs. Setup a funnel and begin replacing the antifreeze. Pour slowly to eliminate air bubbles and allow time for the coolant to fully permeate. Most antifreeze reservoirs have a fill line to indicate how much to add. I needed the better part of two gallons.
Once it looks full, start the vehicle and allow it to warm up. Keep the reservoir cap off. You may notice a few bubbles and the level dropping. Stop the vehicle and add coolant as needed.
What do you think? Any tips for changing coolant?
First image courtesy of Evelynishere

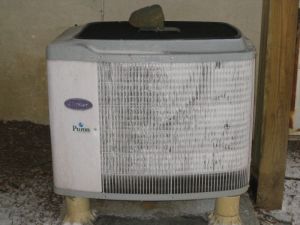
Last year, I wrote about fixing the ice-frozen outside compressor unit for our heat pump. This winter has been record-breaking for precipitation here in Maryland, however, so I found I needed to readdress the issue with our HVAC guy. What I learned? I can adjust the frequency of the compressor’s defrost cycle on my own to keep up with whatever Nature sends us.
With all the freezing rain and snow we’ve experienced this fall and winter, our compressor’s defroster just wasn’t keeping up. Turns out, it was set to run only every 90 minutes of running time. An energy-efficient setting, but not frequent enough for this year’s weather.
Mike showed me where to adjust the settings inside the removeable side-panel on the outside unit. Yours should look much the same.
We moved the white clip from the 90 minute setting to 50. If that turns out not to be frequent enough, we will move it to 30 minutes, but so far we seem to be doing fine with 50.
So depending on where you’re living, how cold it is, how much precipitation you’re getting in the cold weather, and where your outside unit sits (ours is under our deck – never directly in the sunlight!) you can adjust your defroster settings accordingly. For those living in the southern U.S., you should be fine with the 90 minute setting. Our friends in Canada and the northern U.S. states may need it to run every 30 minutes in the winter.
Note that the settings are how often the defroster kicks on during system run-time. So if your compressor runs for 10 minutes, turns off for a half an hour, then runs again for 15 minutes, that’s 25 minutes of run-time, even though 55 minutes have elapsed. Ours was going a few hours before it had run for the requisite 90 minutes to engage the defroster and that was too infrequent for our unit this winter.
Running the defroster does, of course, use extra energy, so you don’t want it to run more frequently than you need it. That’s why we dropped to every 50 minutes rather than jumping straight to a defrost cycle of every 30 minutes of run-time. Should we have a really mild winter again in the future (as we have most years in the past), I may move the setting back to 90 minutes. But for this year, it’s not worth the risk of damaging the unit (ice-chunks building up and causing damage to the spinning fan blades and subsequently to the motor) just to save a few cents in energy cost each week.
Hope this is helpful to someone else out there! It’s a quick and free first-resort solution for dealing with an iced-over unit that otherwise is in good working condition (and can help trouble-shoot before you call an HVAC repair person and pay for a visit).


