Today we’re sharing another reader story courtesy of Linn from The Home Project. Linn and her husband remodeled their entire kitchen, from the floors to the cabinets to the countertop. If you’d like to submit your home improvement story (and get rewarded for it), check out our ProjectPub program.
When my husband and I bought our small bungalow, the kitchen was one of the first things we wanted to take care of (right after refinishing the floors and painting the walls). It seemed the previous owners had not changed it one bit from when it was first installed. The countertop and backsplash were linoleum as was the floor, and it had a very green theme going. Fortunately the cabinets were solid wood, so we were able to reuse them.
Before:

After:

The kitchen is tiny, only about 90 square feet, so it was important to brighten the space up and make it more useful. One way we accomplished that was switching the position of the stove and the fridge. Previously, the fridge was sitting right next to the window and blocking quite a bit of light. Switching the two opened up the room quite a bit.
The first part of the kitchen remodel we tackled was refinishing the cabinets and drawers. We quickly realized the importance of doing a really good prep job and thoroughly sanding and priming all the pieces before painting. We chose a semi-gloss antique white paint for durability.
Before (mid-remodel):
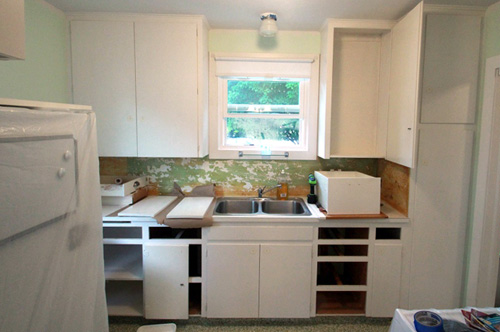
After:
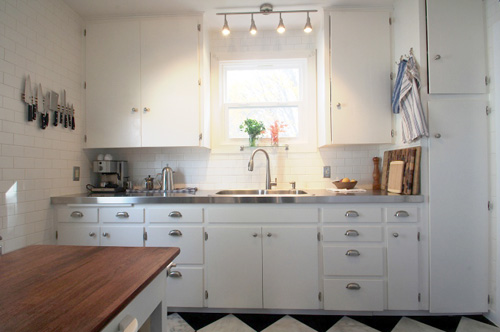
Second, we turned our attention to the countertop. After checking out various options, we decided to go with stainless steel counters. We checked out Home Depot and their quote was pretty high – $150 / square foot. Next, we checked out our local sheet metal place which gave us a much more reasonable quote – $400 for the whole counter (roughly $20 / square foot)! If we went this route, we did however have to first provide them with a plywood model of our counter. So we bought plywood, made a model to fit our counter perfectly and also cut out a hole for the sink. Then we brought the plywood to our sheet metal guy, and he fitted 20 gauge stainless steel on it. At this point, all we had to do was glue the stainless steel to the plywood and install it with Liquid Nails on top of our old laminate counters. This was pretty easy to do, and the result looks great! We also got a new stainless steel sink and faucet to go with our new counter.
Before:

After:

To make the kitchen feel bright and clean, we decided to tile all of the walls with subway tile, and we chose a black and white checkerboard floor to provide some contrast. At first, we were considering a classic vinyl floor, but after realizing we’d rather have natural materials in our kitchen, we instead decided to buy 12 inch honed marble and granite tile to create a diagonal checkerboard pattern ourselves.
We picked up some new appliances, hardware, lights etc… for the kitchen and we also refinished an old kitchen cart we already had to better fit the new decor.
After:
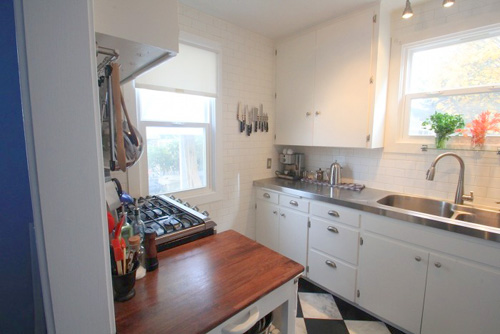
All in all, this kitchen took us about a month to transform and it cost just over $6000 (including appliances.) We basically did everything ourselves and had a good time doing it. We love our new kitchen, it’s now a great space for cooking, baking and having fun!
More nitty-gritty details and pictures can be found on The Home Project here.

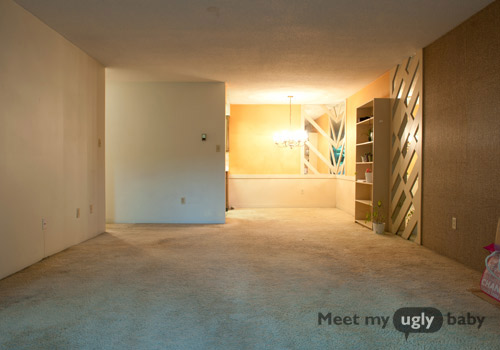
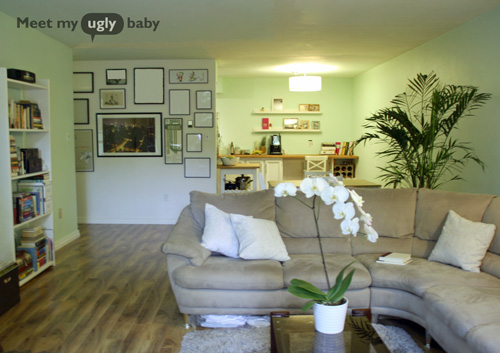
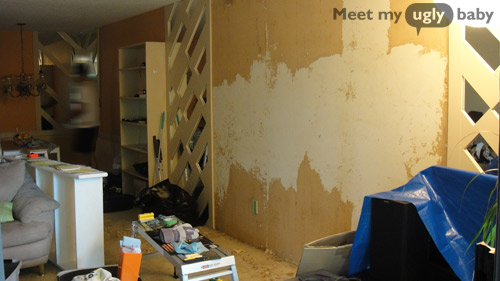
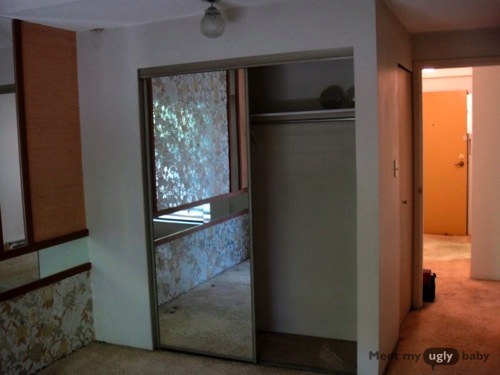
This week is our very last Before & After, and I’m pleased to share a fun poem from Lauren over at Meet My Ugly Baby. If you’ve never seen her site, it’s all about her hideous offspring. And by hideous I mean awesome, and by offspring I mean Vancouver renovation. Enjoy!

After this week, I’ll share a quick recap of all the B/A stories we’ve featured and open up the voting for about a week. After the votes are tallied, we’ll share the grand prize winner who will receive a $150 gift card to the home improvement store of their choice!
The Ugly Baby Poem
There once was a girl named Lauren,
To whom “dirty DIY” was totally foreign.
They live in Vancouver, it’s stupid expensive,
So they bought an apartment and launched an offensive.
To renovate and attack, in just over a year,
“House with a view” the goal was clear.
“Flip an apartment?” Where to begin?
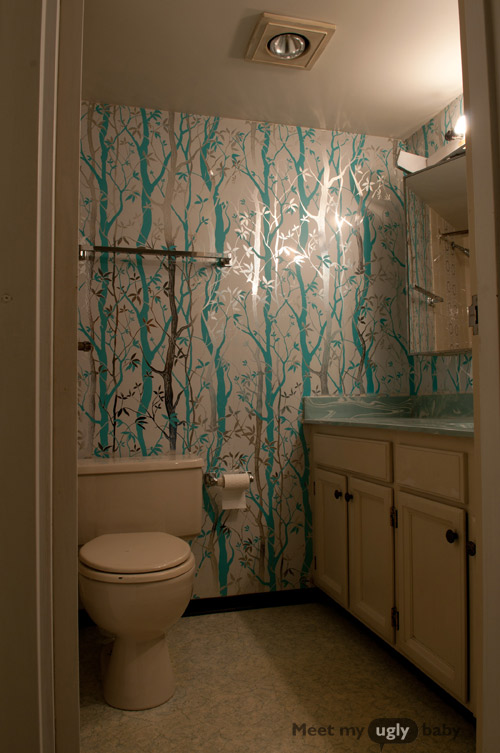
First the wallpaper: original sin.
The popcorn ceiling put up a fight,
As did the shag carpet – not a delight.Our bedroom was dirty, dark and dreary,
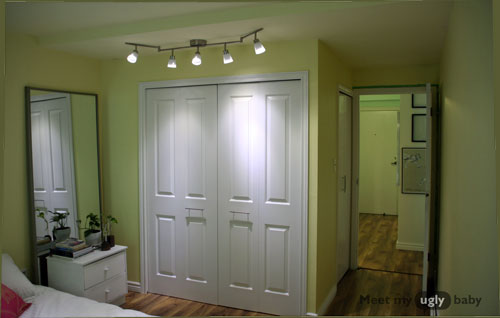
Yellow with white! Much more cheery.
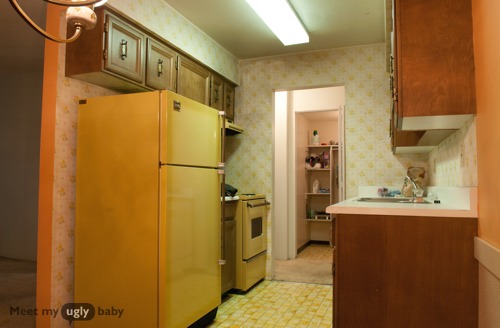
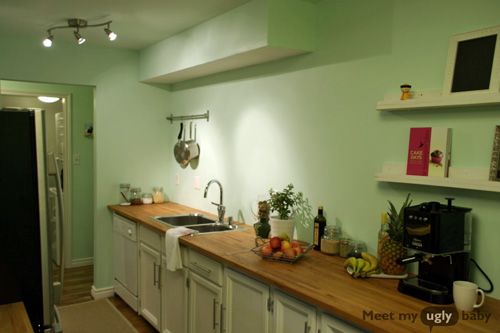
Next up, the kitchen, and Harvest Gold,
We repainted the cabinets, lo and behold.
We hope you like our year-in-review
Up next: our bathroom, DIYed with kung fu.
Thanks Lauren
This is a terrific recap showing a lot of hard work, and I think it’s first-rate!
Habitat for Humanity Factoid
I found an interesting article on OregonLive.com about how the tanking economy isn’t bad for all business. With builders looking to unload lots fast, Habitat for Humanity Portland branch was able to purchase enough land for 150 houses! That’ll keep them busy for up to 5 years. Read the article to learn more about how Habitat was able to seize a great opportunity.
Where’s Your Before and After Story?
We hope you’ll consider submitting a Before & After story. Email your pictures and a “how to” description to beforeandafter@oneprojectcloser.com to join in.
Help Us Spread the Word
Are you a blogger? If you’d like to support us, please write an article on your blog about the contest, and consider adding one of our buttons to your sidebar. You can find the buttons and more information on our main Before and After article.

With this week’s Before & After selected, there’s only two winners slots left! After that, we’ll provide a recap of all the winners and open up the voting. The grand prize winner takes home a $150 gift card to the home improvement store of their choice.

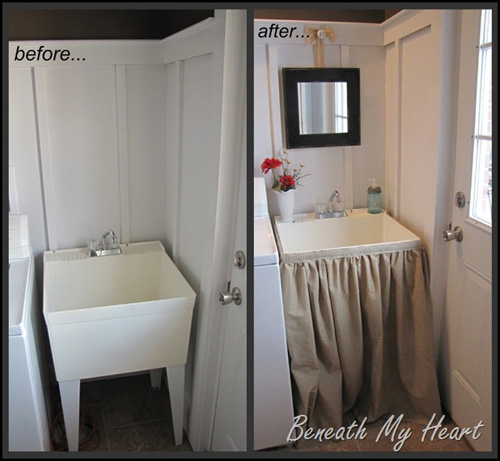
This weeks winner is no stranger to our Before & After series. Last year Traci from Beneath My Heart submitted a tremendous patio makeover and won the $150 gift card. This year she’s hoping for a repeat with a great mud room transformation. Let’s take a look.
The Classy Mud Room
Last December, we built a laundry/mud room in our garage. We were trying to sell our home at that time, and we thought a laundry/mud room would help the house to sell.
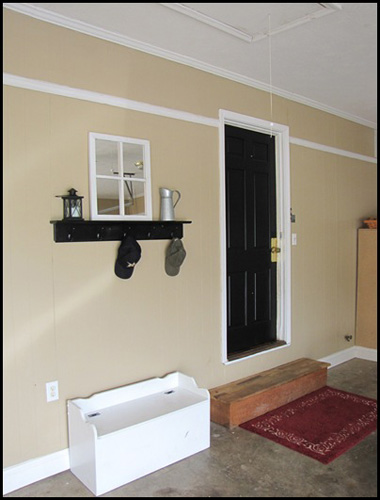
Here is a before picture of our garage:
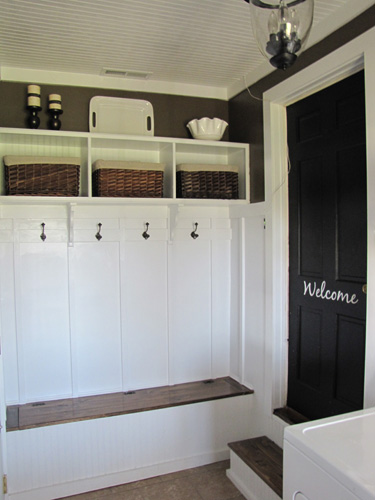
My very talented husband studded up some walls in the corner of our garage to create our new mud/laundry room…
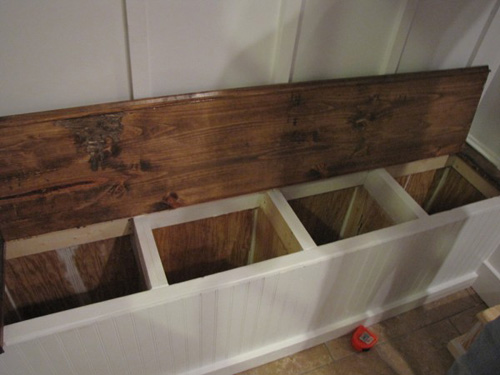
He did all the plumbing and wiring himself, and created this little storage bench exactly like I wanted to store the boys’ shoes…
Four separate storage spaces for four sweet little boys’ shoes. HERE is the video of how he made it.
Cy also installed the board and batten treatment in our laundry room. You can see how he did it HERE.
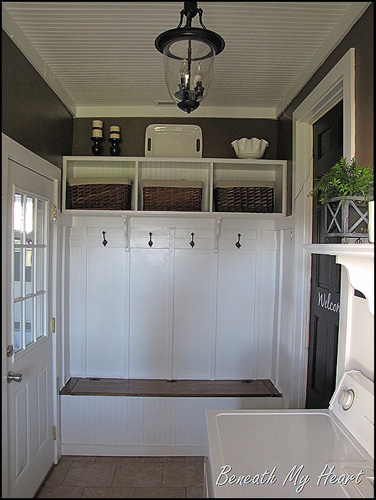
We were so thrilled with how it turned out, and I had a blast decorating it!
I completed some of my favorite DIY projects to decorate the room on a tiny budget.
One of my VERY favorite projects I have ever completed on my blog is this $3.00 Pottery Barn Style pendant light makeover.
I probably get more emails about this project than any other!
Some more DIY projects for the laundry/mud room included:
This velcro skirt for the mud sink.
This mirror makeover for above the mud sink.
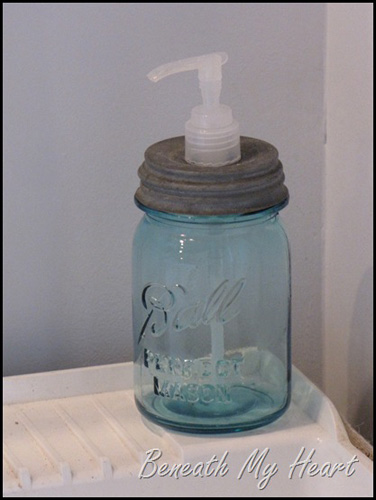
And this little blue mason jar soap dispenser.
I also made another Ballard Designs inspired shelf for my laundry room.
You can see the tutorial of how to make it HERE.
I was so proud of this room, because Cy and I worked so hard to complete it together. It was a lot of fun. And to be honest, I miss it like CRAZY!
But I have great plans for our future laundry/mudroom in our new home. However, it may be several years before I get to that project. 🙂
Thanks for letting me share our DIY laundry/mud room with you again!
Have a blessed day!
Traci
Thanks Traci!
Thanks Traci! I love all the different tutorials you share, especially the $3 pendant makeover. Nice work!
Habitat for Humanity Factoid
Habitat is an international organization building homes in America, Cambodia, Kenya, Mongolia and many, many, more places. Have you ever considered how different all these homes must be? After all, the home they build in New York would never be appropriate in El Salvador. To see what some of these homes look like, check out the Habitat Houses Around the World slideshow.
Where’s Your Before and After Story?
We hope you’ll consider submitting a Before & After story. Email your pictures and a “how to” description to beforeandafter@oneprojectcloser.com to join in.
Help Us Spread the Word
Are you a blogger? If you’d like to support us, please write an article on your blog about the contest, and consider adding one of our buttons to your sidebar. You can find the buttons and more information on our main Before and After article.

This’ll be the 7th winner of this year’s Before & After series, and I’m really impressed with the amazing transformations we’ve seen so far. I truly appreciate everyone who has taken the time to share their story with us. If you’d like to learn more about the series or find out how to participate, check out the link above.

Without further ado, it’s time to announce this week’s winner. Today we’re featuring a tremendous dining room remodel by Michael from Better D.I.Y. and it’s plain to see how much hard work he put into this project.
As this week’s winner, Michael will receive a $50 gift card, and we make a $100 donation to Habitat for Humanity in Michael’s honor.
The Formal Dining Room
So…my wife and I were lucky enough to sell our small 1950s cape. We also bought a 1992 colonial house. We closed on the old house and the new the same day (May 27th). This house that is new to us has some major outdated interior things. Wallpaper in every room, tan/almond everywhere (carpets, outlets, paint, baseboards, etc…).
We needed to buy a new house for our ever expanding family. We welcomed my 3rd child on April 1st. It took over a year to sell our house in this market, but we were lucky enough to get it sold!!
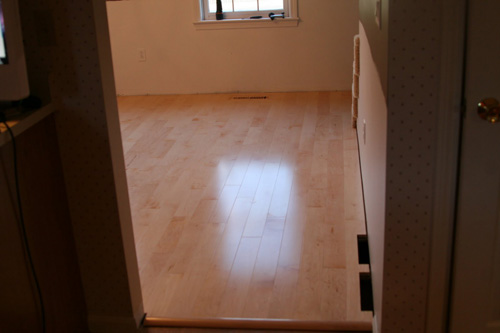
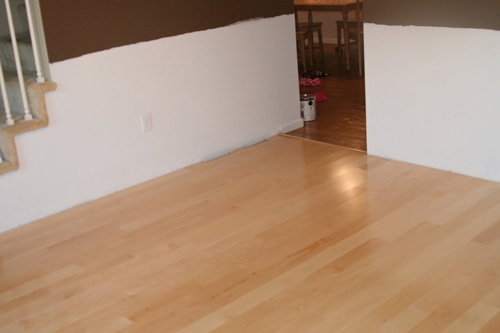
The first room we have updated is our formal Dining Room. About 3 weeks ago, I saw 170 sq. ft of 3/4″ x 4″ Maple Hardwood on Craiglist. I picked it up for about $3/sq. ft which is a great deal. They sell the same stuff at Lumber Liquidators for about $5/ sq. ft. The room is about 160 sq. ft., so I knew it would be tight and not much room for error, but I could always buy another box if needed as it is still available.
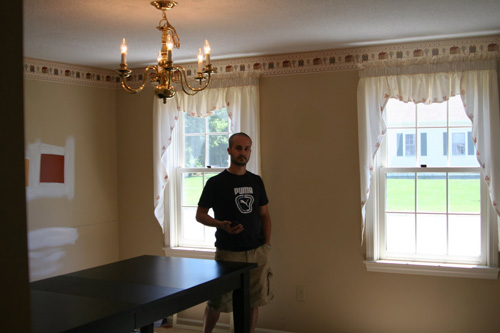
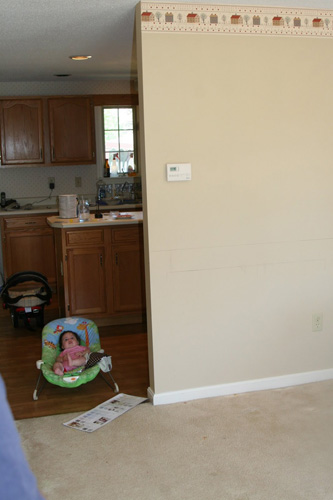
Before Pictures:
Lovely window treatments, wallpaper border and light.
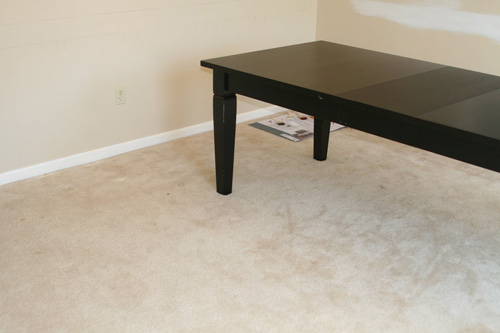
Beautiful carpet and a genius idea to have in your formal dining room.
Here is the newest addition “supervising”.
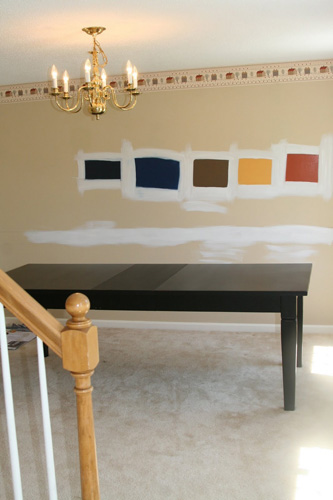
These were our color choices. We bought 5 samples and went from there.
During Pictures:
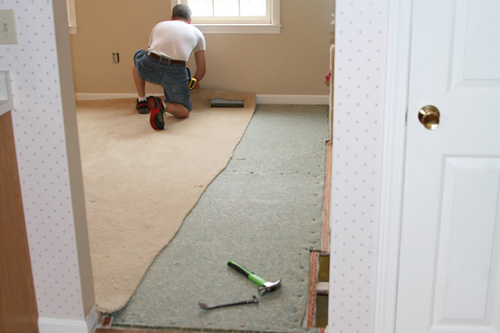
After removing wallpaper, I removed the carpet and then the baseboard. If you cut the carpet and pad into strips, the city will take it with our weekly trash pickup service. This is convenient and a great service!!
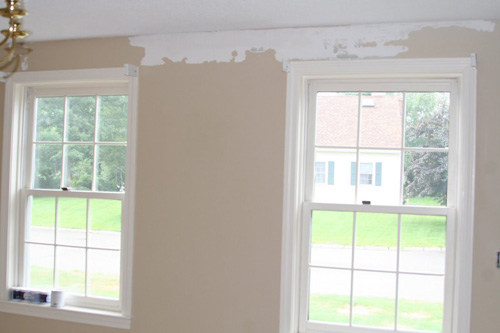
While removing the wallpaper, some of the paint came with it which made the surface uneven. I had to mud these areas out and sand them.
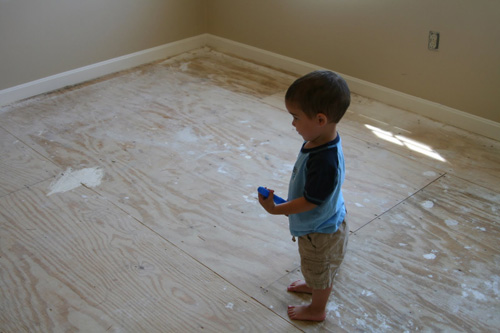
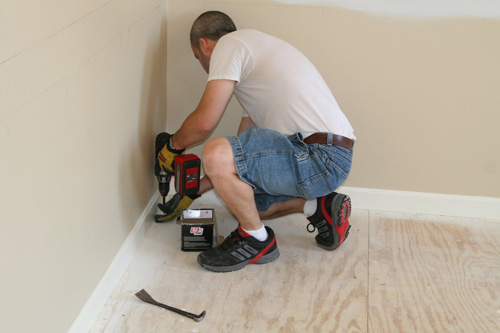
There is daddy’s little helper always under foot. I screwed down the sub floor so that we would never develop any squeaks. Nothing worse than a squeaky floor.
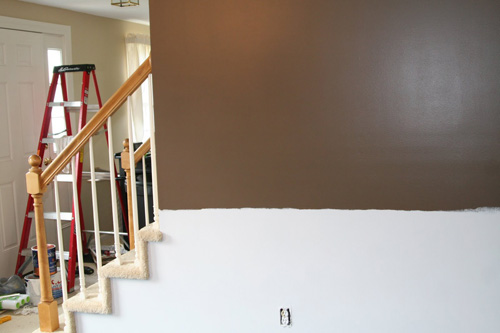
After painting:
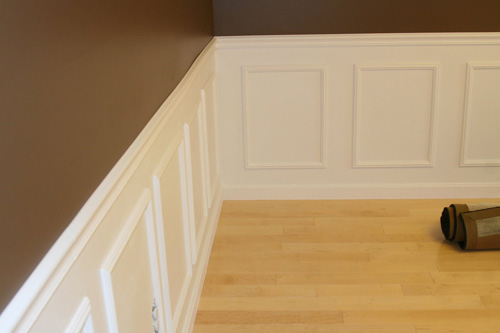
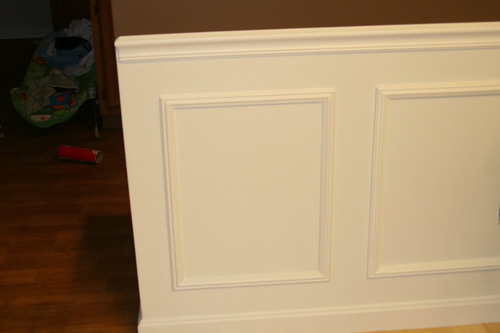
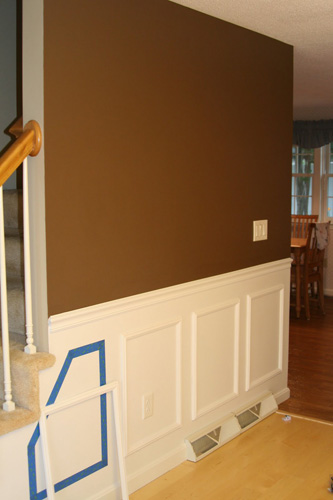
I have always wanted my formal dining room to look upscale, so going into this project, I knew that I wanted a chair rail and wainscoting using the wall frames. The nice thing is that Lowe’s sells pre-made wall frames. This saves me the time of creating a jig, cutting the frames, gluing them together and what not. Of course, it made it difficult to modify any of them like the one around the stairs.
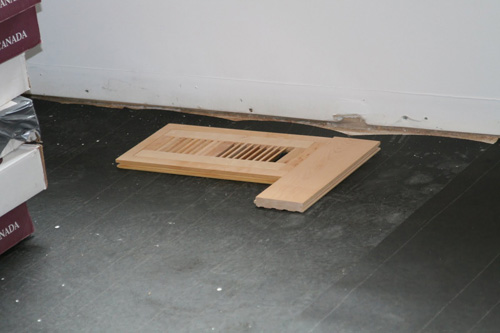
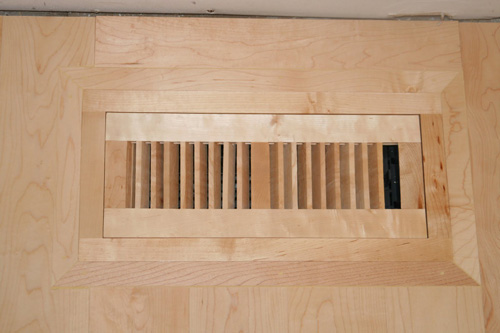
Flushmount vent:
The flushmount has a groove around the entire frame that the vent sits in. I like this one better than the big box ones because it still has the louver to open and close the vent as needed.
Post Flooring Installation:
I ran into some difficulty when I installed the flush mount registers. The register was about 1″ from the edge of the closest floor board. Since I wanted to use the groove of the register to hold it down, I decided to build a frame around it. I mitered the corners of my frame. I am very happy with the results.
I purchased the Skil Flooring Saw when we bought this house because I knew I would be replacing a lot of carpet in the future. This saw is amazing. The dust bag/collection is the worst part. It kicked up a lot of dust into the room, but the convenience of having the saw in the same room was priceless and worth the extra mess. It has the nice large no mar feet and is very light and easy to move around. I would recommend it as it is worth the money if you plan on doing a lot of flooring.
If you are doing 1 or 2 rooms, a standard mitre saw will be more useful as it will be usable for floor molding and chair rails and crown molding.
Frames/Chair Rail:
While browsing Sears one day, I saw an ingenious update to the age old miter saw. It is the Craftsman Miter Mate. I bought it and used it for this room. It was a time saver. It has a neat little angle finder. You use that angle finder and put it in the corner. Then you bring the 2 fences on the saw to the 2 angles. It is great because you rarely if ever find a perfectly square corner.
You can see in the last picture the angle I was talking about that doesn’t work with the pre-made picture frames. I used the blue tape to mark exactly what it would look like and used that as a template to cut up 2 different frames to make the angled one.
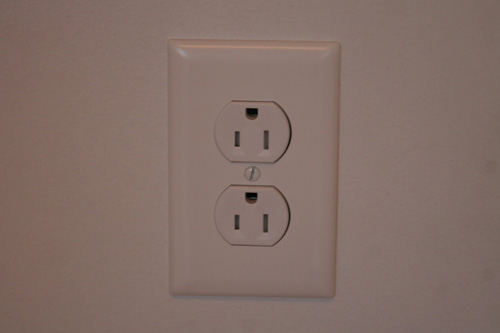
My son likes to stick things in outlets, so we are slowly replacing the outlets in every room with Tamper Resistant outlets. You can see in the picture that these are different (better) than the plastic nubs or other methods that provide resistance to tampering. There is a plastic piece inside of the hot and neutral prongs that requires an equal amount of pressure on both before it moves out of the way and allows you to
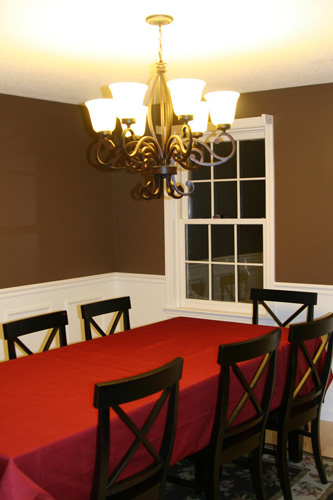
plug something in. These were also added to the NEC in 2008.After pictures:
These treatments were purchased at Target. They only had 1 set, which is why the other window is treatment-less. We will have the second set added after we find a Target with them.
We don’t have a wide angle lens on the camera, so it is difficult to capture the dramatic difference in the room. My wife and I are very happy with the outcome and are excited to see what the house will look like after each update.
Breakdown of cost:
- $500 – Hardwood Floors
- $120 – Paint, samples, brushes, rollers (Ceiling Paint, Brown Wall Paint, White Wall Paint)
- $50 – Miscellaneous (Caulking, nails, etc…)
- $260 – Wall Frames
- $120 – Chair Rail and Floor Molding
- $90 – Light Fixture
- $50 – Flush Mount Floor Registers
- $40 – T-Mold Transitional Molding between kitchen/entry and hardwood flooring.
- $100 – Tamper Resistant Outlets, Decora Light Switches, Faceplates.
- $150 – Window Treatments (including Rods and Curtains)
Total cost for Remodel of Dining Room – $1480
Thanks Michael!
I love the hardwood floors and getting them off Craigslist is awesome! I also like the box frames- something Jocie and I are considering for our dining room. Thanks again for sharing this with all of us!
Habitat for Humanity Factoid
I’ve been reading through the Habitat World Blog recently, and I really enjoyed reading about “Warriors on the Worksite”. This short article shares how in Washington state, a local Habitat chapter partnered with the U.S. Army’s Warrior Transition Battalion. Both groups benefited as they worked on two houses for low-income families, and the soldiers connected with the local community. The read the article or view a photo slideshow, click here.
Where’s Your Before and After Story?
We hope you’ll consider submitting a Before & After story. Email your pictures and a “how to” description to beforeandafter@oneprojectcloser.com to join in.
Help Us Spread the Word
Are you a blogger? If you’d like to support us, please write an article on your blog about the contest, and consider adding one of our buttons to your sidebar. You can find the buttons and more information on our main Before and After article.

This is our last post in the three part series sponsored by SYLVANIA for their Room Makeover Challenge, and it’s time for the big reveal! You can also check us out on the SYLVANIA Facebook page today. While you’re there, enter to win a $1,000 gift card to Lowe’s!
If you’re planning a room makeover, consider how SYLVANIA lighting products can play a role. LED bulbs use about 80% less energy and lasts 25 times longer than traditional 60-watt incandescent, which can save you both time and money over the life of the bulb. With the phase out of traditional incandescent bulbs in motion, it’s important to be aware of energy efficient lighting alternatives. Take a look at the SYLVANIA A-line Ultra on their product page.
The before….

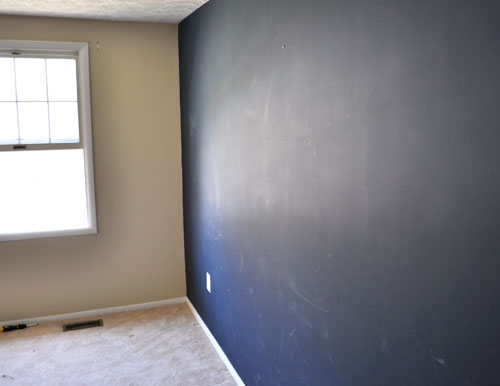
Last week I shared how SYLVANIA got in touch with us about participating in their Room Makeover Challenge. Today’s post will walk you through all the aspects of the bedroom remodel and how we tackled various challenges. To recap, we needed to address the stipple ceiling, paint every surface, install new outlets, light switch and black-out shades.
SYLVANIA sponsored the Room Makeover Challenge to remind everyone of how easy it can be to conduct a weekend room makeover, and consider how LED light bulbs can play a part. I can honestly recommend their A-line, 12watt LED as it puts out great light, has a tremendous lifespan and huge energy savings. LED’s are a significant investment, but, like one reader told me, you can slowly convert your house one bulb at a time. If you’d like to learn more about SYLVANIA, head over to their Facebook page. You can even enter to win great daily prizes, like a SYLVANIA LED Ultra light bulb. Entries also count towards the grand prize – a $1,000 gift card to Lowe’s!
Stipple Ceiling
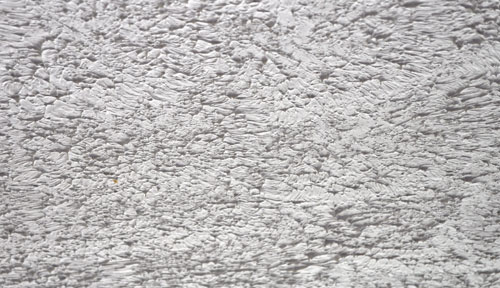
The first challenge we encountered was the stipple ceiling. Stipple ceiling is a textured ceiling resulting in a stalactite-like pattern. It’s common to find stipple ceilings in 30 year old houses as it was so easy for builders to apply. It made mudding over drywall very fast because you didn’t need to achieve a uniform, smooth finish before painting. While stipple is great for hiding defects, it also hides a lot of light. Removing a stipple ceiling eliminates the tiny shadows resulting in a room that feels bigger.
Not only is stipple ceiling not in vogue, there is a serious health concern. Many textured ceilings contain asbestos and it’s suggested that you can find it in homes built into the late 1980’s. Asbestos-based building products were banned in 1978, but contractors were allowed to exhaust their inventory before making the switch. If you plan on working on a stipple ceiling, take the time to send a sample to an asbestos testing lab. The risk is too great!
Fortunately, the stipple in this bedroom did not contain asbestos. Our method of removing a stipple ceiling is to sand down the stalactites. It doesn’t fully remove the texture but creates similar results. We used a Milwaukee random orbit sander to sand over the stipple. It creates a lot of dust and we made sure to use a mask and eye protection. Additionally, we setup a box-fan to pull air out the window. The sanding only took about 45 minutes and a handful of sanding pads.

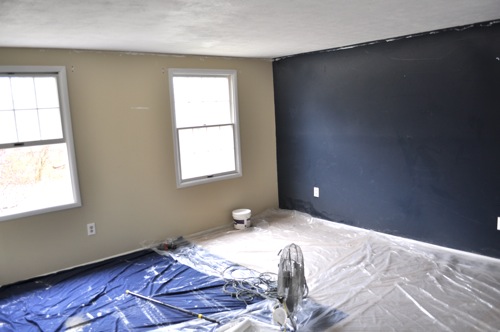
Painting the Ceiling and Walls
Next up we needed to paint the ceiling and walls. A fresh coat of paint is one of the easiest and cheapest ways to make a room look like new. I always encourage people to paint their ceilings white for two reasons- white ceilings make the room feel larger and it provides a baseline color for comparing the wall color. I also suggest painting the walls a neutral color as it’s much easier to swap out bold-colored accessories.
Before any paint job, you need to perform some prep. The right preparations will go a long way toward making sure you have a professional looking paint job. Many people have very strong feelings about the best brand of paint but I think a lot of problems can be avoided. Here are the steps you should take before starting to paint:
- Remove all the fixtures, wall-hangings and screws, outlet and switch covers from the walls
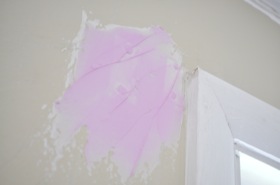
- Patch any holes, divots and rough patches on your walls.
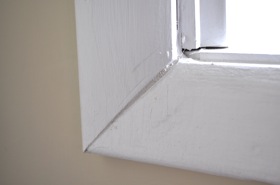
- Use wood filler on gaps in the trim work.
- Clean the walls to remove cobwebs and dust. This was especially important for our makeover as we had so much dust from sanding the ceiling. I used a sponge and two rinse buckets.
- Tape off areas like trim as needed.
- Prime over dark colors and drywall compound
We painted two coats of ceiling white to ensure very nook was covered. We painted the walls a khaki color and the trim white. I like to use an edger tool around the trim and ceiling. I know many people don’t like this method but it works well for me.
Replacing Outlets, Switches and Covers
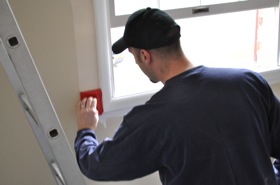
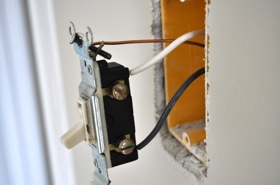
Another very easy and inexpensive way to freshen up a room is to swap in new outlets, switches and covers. Older homes often have off-white hardware and covers with rounded edges. We decided to install white receptacles, light switch and covers. Before performing any electrical work, flip the associated breaker and check to make sure outlets and switches are not powered. You can perform a simple test using a lamp.
You’ll often find push-in wire, electrical receptacles. These are very convenient and easy to install. There’s a small opening to release the wire and you simply push it into the new receptacle. Make sure you read the provided documents to understand the limitations on this type of outlet. For more information about home wiring, consider picking up a copy of Stanley Complete Wiring.
Installing Black-Out Shades
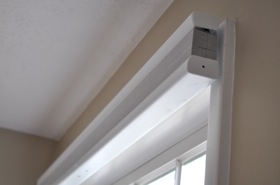
Room darkening shades are designed to block all or most outside light while light filtering shades permit a soft glow. We choose cellular, room-darkening shades that include a thin membrane inside each cell to block light. Lowes offers Levelor brand shades that can be trimmed to fit your windows but expect the trimmed edges to stick. Carefully expand each blind to prevent ripping. You can mount window treatments inside or outside the frame. With the older style of window, we needed an outside mount. Most manufacturers include a sort of universal mount so read the instructions carefully to ensure the proper orientation.
There you have our weekend makeover. All together, this project took about 25 man-hours to complete. It makes for long days, but you can complete everything in the course of a weekend.
This post is sponsored by SYLVANIA. We received a Lowes gift card for our participation, but the review and opinions are our own.

A few weeks ago, SYLVANIA asked us to participate in their Room Makeover Challenge, and we jumped at the opportunity. The goal was to remind everyone of how easy it can be to conduct a weekend room makeover, and to consider how LED light bulbs can play a part.
LED Light Bulbs
We’ve already covered some of the great benefits of LED lighting in the home even as they compare to CFL bulbs. LED’s use far less energy than incandescent bulbs and about half as much energy as CFL’s. LED bulbs feature an incredible lifespan, reaching into decades with average use. It’s a significant investment to convert your home to LED lighting, but these bulbs will save you money in the long run.
It’s important to consider LED’s for your home as Congress has already passed federal legislation that will require bulbs to be 30% more energy efficient than current incandescent bulbs by 2012 to 2014. CFL and LED bulbs are the response to more stringent standards set down by the The Energy Independence and Security Act of 2007, and you can expect LED’s to become common-place (and cheaper) as more manufacturers begin to offer them.
SYLVANIA has a good selection of LED options. I tested out their A-line, 12 watt bulb and was impressed by the light output and color temperature. It’s bigger than the Philips 8 watt version but should fit in most fixtures.
The Challenge
The challenge was to make over a space in the course of a weekend. SYLVANIA armed us with a $500 Lowe’s gift card to purchase supplies and materials for the makeover as well as a supply of SYLVANIA Ultra A-Line 12-watt LED light bulbs. Fred and Kim had a spare bedroom that desperately need some attension, and we decided to convert it into a kids bedroom. Here’s what we planned:
- Fred and Kim’s house has stipple ceilings in every room. Rather than replace their ceiling, they opted to sand down the stipple ceiling to reduce the stalactites. This is a great compromise as it’s easy to perform and effectively opens up the room by reducing shadows.
- A fresh coat of paint can go a long way in making a space look fresh and new. It’s one of the cheapest, easiest ways to makeover a room. We decided to paint every surface- ceiling, walls and trim.
- Pretty Handy Girl recently wrote about the importance of prep work before painting. She states that 80% of a successful paint job is the prep and I agree. This room needed primer, several holes patched, gaps in the window trim filled and a thorough cleaning.
- The window treatments were original to the house and needed to be replaced. Lowes offers Levelor brand blinds that can be cut to custom sizes to fit windows perfectly. We choose room-darkening, cellular style blinds for both windows.
- Replacing electrical outlets, light switches and covers is another inexpensive way to make a room look like new. Many older homes have off-white hardware and we decided to replace them with white fixtures and covers.
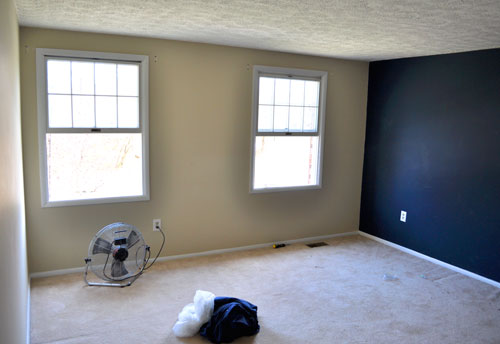
This was a lot of work to cram into one weekend but we were excited to join in the Room Makeover Challenge. Stay tuned as we share how the makeover went and the big reveal. If you want to win a Lowes gift card and SYLVANIA lighting products, head over to their facebook page to learn how.
This post is sponsored by SYLVANIA. I received a Lowes gift card for my participation, but the review and opinions are my own.

Today’s guest post comes to us from Lisa at The Pennington Point. We featured her last summer in our Before-and-After series (Enclosing a Porch Alcove). This busy home schooling mom of nine likes tweeking her place as much as we do ours, and this time she tasked herself with re-doing a bathroom for the cost of the one can of floor paint she already had to buy, since she had some emergency plumbing repair work done in there over the Thanksgiving holiday. We’re regularly impressed by Lisa’s resourcefulness (not to mention her energy level!), and we think you will be, too.
Without further ado, here’s her “No-Cost” Bathroom Remodel!
_______________________
When the leak in our bathroom led to a major plumbing fix which led to holes in the walls….I knew I needed to do something quick!
But our bank account said otherwise. There simply was no money in the budget to spend on home repairs. But you know what? We have all kinds of junk and stuff and useless things around here. So I decided to dig through it all and redo the bathroom for no money.
There was one problem, I needed a gallon of paint. I bought that and made a resolution not to spend another cent on the bathroom. It was an interesting project. There were a few times I didn’t think I could do it. Once I needed a curtain rod and we wracked our brains to figure out what to do. Another time I needed to cover a floor to ceiling opening. My older kids and I would wander around the house and yard until we came up with a solution.
Before:

And now….TA DA!

I promise you, I only bought the floor paint. I used paint leftover from my bedroom for the walls and white left from the kitchen for the trim.
My absolute favorite freebie is the use of the old doors on the walls of the tiny bathroom.

Those doors have been leaning against our garage for years.

They were just a little bit too big for the space, so we ripped them down with the table saw.
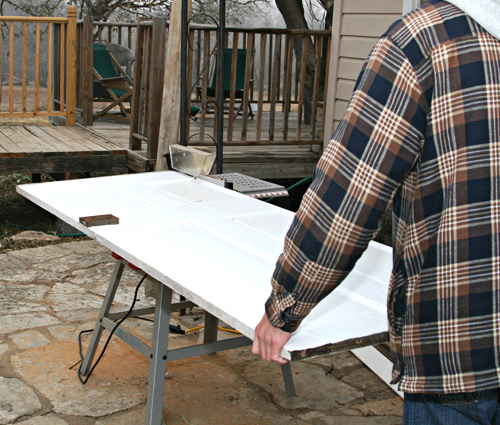
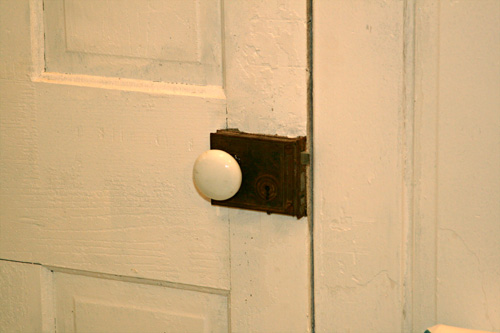
They make the whole room look bigger. I just love the old hardware. We used a hacksaw to cut off the spindle so I could keep the doorknob on the door. I glued it into place with E-6000. There are probably better glues for this purpose, but that’s what I had on hand.
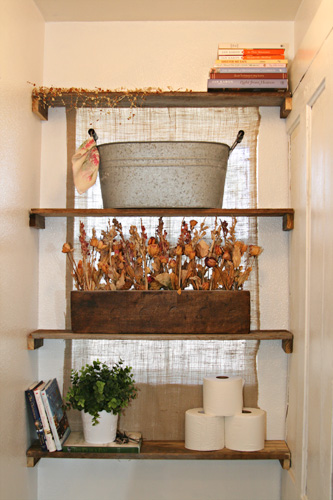
To build shelves over the toilet, we took apart an old pallet. I stapled burlap to the back of the shelves to cover the window. The whole thing was quick and easy. I love my little Craftsman stapler from Sears.
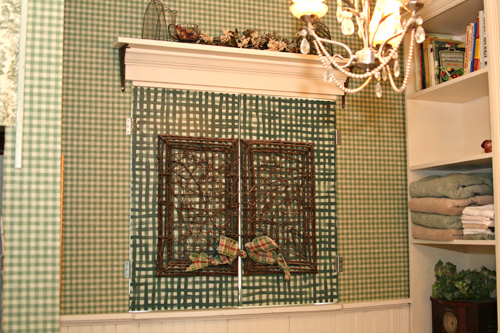
I wanted to do something fun with the shutters over the tub. I have never liked they way they looked, so now was my chance to change that.
Before they were dark and dreary:
And now they are fun and whimsical!
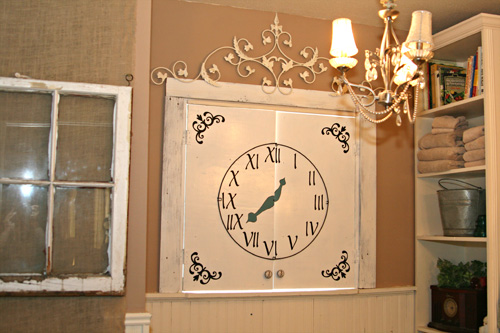
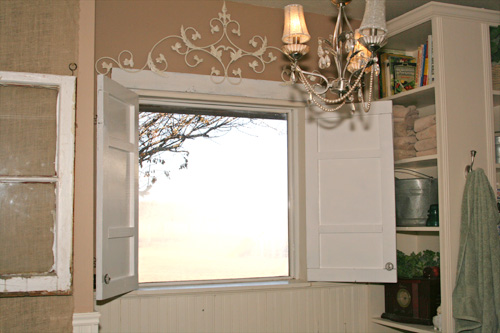
We used more pallet wood for the window trim. I decided to make a clock face, so we went on a hunt for a circle. We found a metal ring in the yard. It’s been out there and none of us knew what it was for. It’s funny living on a farm. There is so much junk. We cut the ring in half with heavy duty wire cutters and hung it with staples. The numbers are die cut vinyl and the hands are hand painted with the floor paint.
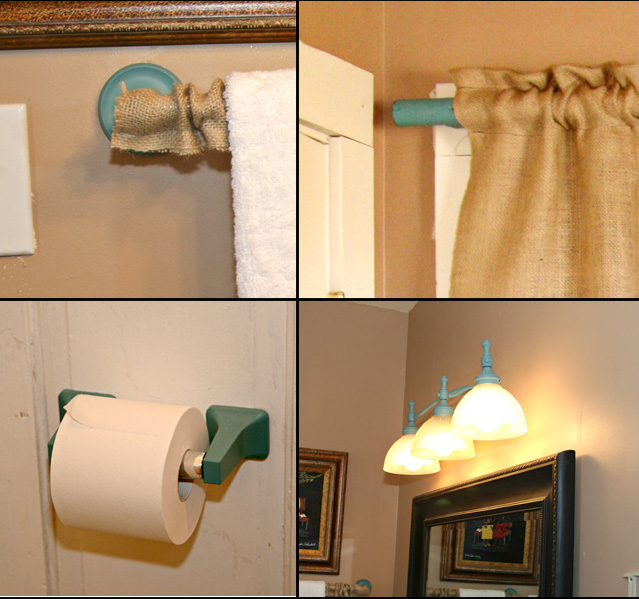
In fact, I used the floor paint for several things in the room. I wanted to bring the color up from the floor. Plus some of our things were looking pretty bad and needed refreshing. For the metal towel bar and toilet paper holder, I sprayed them first with another color spray paint made for metal. Then we added several coats of the floor paint followed by a clear spray.
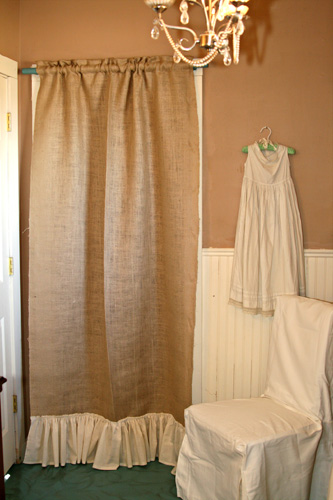
This is such a small space that I didn’t like having door on the closet, so I’ve always used curtains.
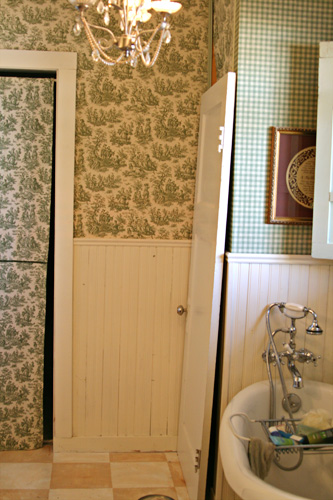
I just changed to burlap.
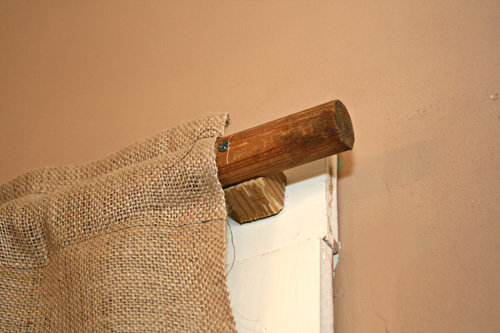
My son very cleverly made a curtain rod out of an old dowel and some wood blocks.
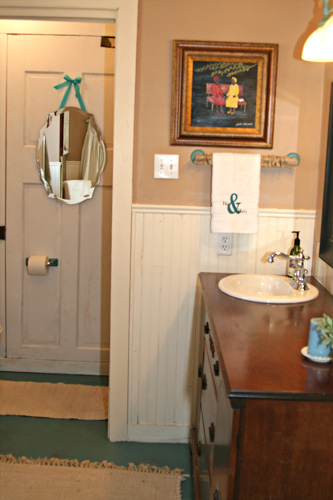
And there you have it. A new bathroom for the cost of one gallon of paint. Not too shabby I’d say.

If you’ve been following along with our kitchen remodel, you’ll remember that a few months back we needed to modify the existing soffits to accommodate the new cabinet layout. We hired one of our friends who doubles as a handyman to modify three drywall soffit sections.
One of the larger modifications to accommodate new floor-to-ceiling cabinets required extending a soffit 12 inches out from the original depth (which was already about 13 inches for the existing wall cabinets) and adding about 3 inches to the right side to accommodate the extra width. Everything went smooth and the soffit looked great, but it didn’t quite work with the cabinets.
The problem was that the original soffit wasn’t 100% square, and the floor beneath the soffit wasn’t either.
This normally isn’t a huge problem when installing regular hanging cabinets, as a slight error is hard to see, and the cabinets can easily follow the contour of the soffit. But with floor-to-ceiling cabinets, the error was very obvious. The gap on the left side of the cabinets was about 3/4 inches. On the right, it was about 1/4 inch, leaving a very visible 1/2-inch slope all around the upper edge of the cabinet.
Unfortunately, with this type of cabinet, no molding would fit at the top, and besides, molding might look downright ugly. We could have shimmed the bottom of the cabinets, but with a 1/2″ error to overcome, it seemed like this option would create a potentially non-square look between the two cabinets.
The only option that made sense was to re-form the soffit. Our original idea was to remove the whole soffit and put in a new one, but our handyman came up with a better solution: shim a 1/4″ piece of drywall under the existing soffit, set it at the slant of the cabinet, and re-mud the 1/4 inch piece in place. Here’s what it looked like, in pictures:
Drywall Soffit Fix for Floor to Ceiling Cabinets
Here’s a shot that shows the 1/4-inch drywall piece fit into place. You can see on the right that a bit of the existing mud had to be removed to get the 1/4-inch sheet in place. But the rest of the way, a few shims were required. This 1/4-inch piece of drywall is fastened all the way around the perimeter and in the field to the soffit above.
Here’s a close-up of the screws holding the drywall in place at the perimeter.
And here’s the right side of the cabinet before the shims were cut.
Here’s a shot after the corner bead was installed, and the first coat of mud is applied. Note that if you mud with the cabinets installed, you could be permanently affixing the cabinets to the wall.
And here’s what the soffit looks like today… Despite the fact that the wall oven is sitting in place, it actually isn’t installed yet.
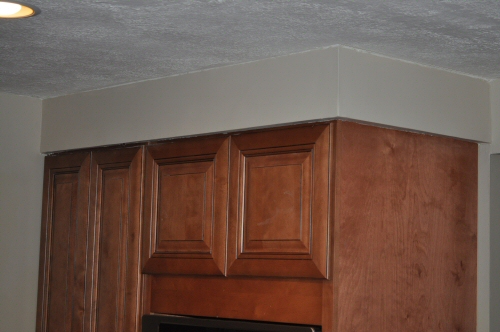
Overall, this solution worked better than a large molding, because the lines are crisper between the cabinet and the soffit. The best part is, we avoided removing and replacing the existing soffit, which would have been far more work.

Our guest bathroom was one of the only rooms we hadn’t updated or decorated since purchasing our home. With Izzie getting bigger and another one on the way, we knew it was time to make some improvements. We wanted to replace the vanity, paint the walls and lay new ceramic tile on the floor- all on a budget.
Jocie and I are writing this post to be an overall guide through our bathroom remodel. We will try and summarize the main points and provide links for more details.
Demolition
I started by removing all the floor tile. The tile was installed over an uneven subfloor so it was not a surprise that it was cracked and poorly bonded. My Dremel Multi-Max was really helpful with removing the tile and left-behind thinset.
The vanity, toilet and light fixture came of without incident but revealed that I had a broken toilet flange. Fortunately, repairing the toilet flange was a simple project.
Tile
It was a lot of fun to lay the new tile and see the floor come together. It’s important that ceramic tile be installed on a rigid, even subfloor. If the subfloor is uneven or flexes too much, the tile will crack before long. I installed concrete board but there are several other acceptable materials.
Before you get started, make sure you have the right tools to lay ceramic tile and that you plan a tile layout. It’s also important that you are comfortable cutting tile.
Once you’ve laid the tile, it’s time to grout the tile and the bullnose. It’s amazing how grout can make the tile look so good.
After the grout has set, take the time to seal the grout to help keep it clean.

Paint
We chose to try out a new paint with this home project – Glidden Interior Paint with a Satin finish. The color is an antique rose, chosen from another line of paint. I love the soft color and how the white fabric and satin nickel fixtures pop against it, creating a beautiful shabby-chic look that our girls can grow into. Even with priming the bathroom first, the Glidden paint did not cover well and needed lots of touch-ups. I would definitely choose Ralph Lauren or Behr paint in the future.
Fixtures & Furnishings
Tropic Vanity and Wall Mirror by American Standard
This is by far my favorite aspect of our new bathroom! It is a sturdy, yet beautiful vanity and mirror that adds so much style and interest to a fairly basic room and design. Its been several months since we installed the vanity and hung the mirror, and I have no regrets. In fact, the quality and beautiful design makes me wish we had used their products for our other bathroom.
American Standard Tropic Faucet in Satin Nickel finish
This faucet perfectly compliments the vanity and style of the room. I have been very pleased with the quality of this faucet – it never leaks, easily shuts on and off, and wipes clean without water spots.

Price Pfister Avalon Trim Tub and Shower Fixtures in Brushed Nickel Finish
We chose this set for its classic, clean look and it has not disappointed. I love the finish and overall design. While needing to be wiped down after use to reduce water spots, it is a quality set with a beautiful look.
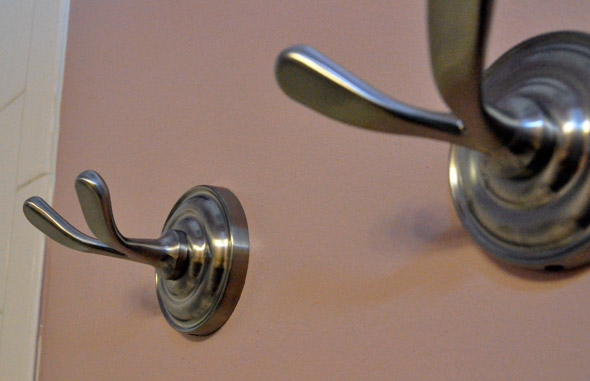
Price Pfister Redmond Robe Hooks and Hand-Towel Ring in Brushed Nickel Finish
Before we remodeled, the bathroom originally had a large towel bar and a smaller hand-towel bar, however they took up a lot of wall space and were not always utilized. So in choosing new fixtures, we decided on replacing them with a hand-towel ring and two robe hooks. I’m very happy with our choices, utilizing less wall space and easy use, even for small children (Izzie can hang her own towel on the robe hook!).
Target Ruffles Shower Curtain and Simply Shabby Chic Ruffles Hand Towels
I love this line from target. The shower curtain adds a soft delicate look against the antique pink walls. A word of caution, the shower curtain is very sheer, so I had to buy a white fabric liner to go behind it. The hand towels, while more expensive than the average, are absolutely worth the cost as added decor.
What do you think? Do you like the bathroom?

