
- Tile Subfloor, Thickness, Deflection
- Installing Electric Radiant Heat
- Pouring Self Leveling Mortar
- Leveling (Flattening) the Subfloor
- Installing Cement Board (CBU)
- Installing Schluter DITRA
- Marking Guidelines for Tile
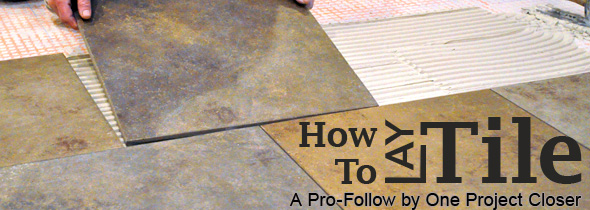
- How to Lay Tile
- How to Grout Tile Joints
Last weekend we finished pouring the fourth and final quadrant of self leveling underlayment over the radiant heating wires in the basement gameroom. The total floorspace in the area is about 1000 sq. ft. This pour constituted the last 250 sq. ft., and the second largest pour of the four we’ve made. When finished, we plan to install a ceramic or natural stone tile (e.g. slate) in the area.
For those of you considering pouring self leveling underlayment over large areas (75 sq. ft. or more), here’s an overview of the project and some tips to help you tackle this relatively easy-2-DIY job.
Why Large Areas Present a Challenge
- Most self-leveling underlayments are designed to dry quickly, especially the brands most commonly found in the big box home improvement stores. This is by far the most difficult challenge to surmount.
- Larger areas make it more difficult to get to the center, or wall-bound sections of the pour after the pour is underway. As you can see in the picture above, the studs on the back end of the basement are inaccessible during the pour.
- Despite the products’ names, most self-levelers are only partially self-leveling. They are most effective when a minimum thickness is maintained across the whole plain of the surface (about 1/2″). This problem is exacerbated over larger areas which tend to have more variations in surface height. Since self-leveler is expensive, you want to avoid pouring any more than necessary.

How to Prepare for Pouring a Large Area
Purchase a Self Leveler with a longer drying time. We used Custom Building Product’s Levelquik ES (extended setting) for the job. Levelquik ES boasts a 15 minute free flow time with an additional 15 minutes of “work” time. Note that Home Depot carries Levelquik RS (rapid setting), which only gives you 5 minutes of free flow and 5 minutes of work time — definitely not long enough for a large pour. You’ll likely need to get this product from a distributor.
Invite Friends to Help with the Job. For 225 square feet, we recommend 5 people for those who haven’t done this job before. With some practice, it can be done with 4, but no less. For very large areas, we recommend breaking up the job into multiple pours over several days.
Plan out the Pour in Advance and Prep all Materials. The key to a successful pour over a large area is planning as much as possible before you start mixing the leveler. Once mixing is underway, you have a finite amount of time to finish before part of the floor starts to dry.
Tools and Materials Needed
 Besides the self leveler, you’ll need:
- At least four 5-gallon buckets. The job will be easier with more buckets, and since we had 9, we used all of them in our recent pour.
- Two heavy duty drills and two heavy-duty 18″ drywall mixing blades. Do not use cordless drills or smaller mixing blades. You run the risk of not getting the SLU mixed properly or burning out a drill.
- A painter’s extension pole and a squeegee that mounts on the end. Modify the squeegee by cutting out slots for spreading over the underlayment.
Prep Work At Least 24 Hours in Advance of the Pour
- Ensure that the area to be poured has good, reasonably tight borders all the way around. You may need to lay temporary barriers for the pour, especially if you are breaking a very large room into smaller areas to make the pour easier.
- Prime the slab for the self leveler. Most SLUs will come with their own instructions. Levelquik ES recommends using their Levelquik Primer.
Prep Work on the Day of the Pour
 Fill each bucket with the amount of water specified for one bag of leveler. The easiest way to do this is to mark a bucket with the amount of water needed, and use that as your measuring device for the rest. If you’re working with a small number of buckets, find other containers that can be used to hold “preset” amounts of water. As you empty SLU on to the floor, you’ll refill the bucket with the water from your preset containers.
- Open all of the bags of self leveler prior to starting the pour. This way, during the fast-paced action of the pour you won’t be struggling to open the bags.
- Setup your drills and mixing blades and ensure they’re working properly and the cords do not obstruct the area to be poured.
Start Mixing, Pouring and Spreading
In this step, it can get a little chaotic. The key is to ensure everyone is working together to get the floor poured. Usually, there’s one person spreading, two mixing, and two people with two roles: pouring dry powder into buckets, and pouring mixed compound onto the floor for the spreader.
The spreader’s job is crucial to achieving level floors with self-leveling underlayments, since the name is somewhat misleading.
A Video to Help Out
The first video we made focuses on working with self-leveling underlayment. Take a look at that for some encouragement that you definitely can do this job.

This is definitely timely, since I’m considering putting something like this on my basement floor. Do you have any suggestions for the best way to work it around a sump well?
Hello, i install these floors for a living. I would definitely recommend you hiring someone to do this job but if you are doing it onyour own, get at least 3 people to help you mix, carry and pour. In regards to going around a sump well, you need some weather stripping with adhesive, you can pick em up at home depot. If the floor is rough, get some construction adhesive to put under the weather stripping. Dont get the round backer rod, get the squared weather strip with adhesive on the bottom designed to go under windows etc etc.
We are pouring self-leveling materials using a mixing pump. Holds up to 200 bags/hour
OH and just to clarify: Our tiny basement is strictly functional. I don’t plan on putting a finished floor on top of the new layer if I don’t have to, and if I do it will be something very basic and cheap.
Very Nice Presentation Fred!
Leslie – I would probably get some type of flexible barrier to put around the sump well, then caulk it in place. Could be as simple as something you would use in the garden. As soon as the floor is walkable, pull out the temporary barrier.
You can’t use Levelquik as a finished surface, it has to be covered with something else. I haven’t done much research on this, but my guess is you’ll want some time of sheet vinyl or ceramic tile on top. (Cheap ceramic is <$1 sq. ft.) Alan - Thanks for the encouragement.. I hope this helps some folks out.
how do i know how much to pour on an area
Tony, a full bad of self leveler will say how much coverage it provides in cubic feet. 1 cubic foot is 12″ by 12″ by 12″ … With that amount you could cover, for example, 12 square feet with 1 inch deep of SLU. Or you could cover 24 square feet with 1/2 deep of SLU. The answer is to estimate how much you will need in bags and then mix that amount on the spot.
I heard it is usually only good to 1/2 inch.
can i put flooring down on it after
Yes, but I wouldn’t put anything that drove nails through it. You could put a floating floor (pergo), ceramic tile, vynil, etc. It really depends on your existing foundation floor. I hope this helps. Provide some additional information on your desires/plans and we can provide more ideas/assistance.
Though Home Depot only stocks Level Quik RS, I was able to special order Level Quik ES from them. The product does not show up in Home Depot’s database, but have them check Custom Building Products website for confirmation of its existence. Once they had the model number (LQESL50), placing the order was simple and straight forward.
If you’re doing it on a second floor or need to dam around things like drains or doorways here’s a good video that shows how to do it. http://www.youtube.com/watch?v=M2omkHBswXU#!
I tried using thin strips of wood and caulk but had some leaks down to another floor. I had to work really fast to clean it up before it set up. It was a mess.
yup. I do over 100 floors a year with self leveler. got to caulk those edges really good, ive had that stuff come out of the front of the house before.
Hi Y’all!
I am close to tackling a relatively large pour of SLU in what used to be a carport. I have removed virtually all of the cutback that was under some old tile and gotten the surface relatively smooth. There are a few valleys and ridges across the floor but it is not terribly un-level as it sits now. The purpose of the pour is not so much a level surface but more a clean one as I want to stain or paint the new floor and the cutback has made the existing surface black. My question is: Is SLU stainable/paintable or does it have to be used as strictly an underlayment? Any tips or advice that you can offer will be greatly appreciated. I am a skilled DIYer but I’ve got tons to learn and can use all of the help I can get. Thanks in advance.
Bought bungalow with what turns out to be cowboy job sunroom attached, the floor of which, after removing carpet and underlay, is abysmal. Its 7ft by 12ft and has drain next to inner wall and manhole cover about third of way along. These had pieces of cardboard over them. The floor slopes here and there, one end is about 1inch lower than other end. What is the cheapest way to level it so I can put vinyl or carpet over it.
I want to use this self leveling product on my patio but I am concerned about it not holding up to the elements I live in south Louisiana with the heat and humidity and also can I dye or color the mixture somehow?
kris, did you get a response about using on your patio in south Louisiana? I would like to do the same
I want to pour self leveling concrete over existing slab with stones inserted picture # 1 is of one that I want to look like in picture # 2, any guidance will be appreciated! Thank you
Hi Guys.
I did my first pour ever today. levelquick RS says use just under 6 quarts of water per bag. My first bucket was a nightmare. Thick pancake batter is what I got. My second bucket I used 7 quarts of water. Happy days! It really needs help to “self level”. Self level, yeah… Uh huh, sure. I used cool water. Here is a tip I will share… I put the measured water in the buckets. I had 4 bottles of water, 16 oz. each that I froze in the freezer. I dropped 2 frozen bottles of water in each bucket. Like giant ice cubes. They cooled down the bucket water real good. Don’t uncap the frozen bottles of water. We don’t want the water that melts inside the bottle to go into the bucket. That would be bad. When are ready to mix the cement and the water, just remove the 2 frozen bottles from your bucket and mix away. And girls, unplug your phone before you start the mix/pour process. One of your girlfriends WILL call when you’re in the middle of things and you might have the whole project go south on you.
Hi Kris / Dwight,
I want to do that too. Haven’t got to it yet. Don’t know about the coloring of the cement mixture. Yet, I read about a guy who leveled a patio slab outside and after it all dried real good he painted the slab with epoxy paint and it was still going strong after 10 years he says. I guess the magic word is “epoxy”. The levelquick company says no warranty for using it outdoors. I want to try it someday.
Just finished using Levelquik ES (70 – 50 lb bags). on 950 sqft concrete floor with four people and two 5 gal buckets with mixers. One more person with mixer would have been better. With such a large area it was diffficult to judge the depth as it is being applied. As a result we ended up with one area that did not get enough leverler. I had marked the low areas but of course they were covered as the material was applied. On the second application I discovered a good method to know how judge depth as you apply material. Make a grid on the floor about 5-6 foot squares. Use a impack drill and put in concrete screws at each grid intersect. Starting at the high point on floor, use a straight edge 6-8 ft and set the depth of each screw so that they level with the high point. Of course leave screws in the floor when done.
Is is possible to pour this over the expansion joint between the footing and the slab,
Sure could use an answer to the above question, to help me plan how this job should be done
Did anyone provide you an answer? I’m doing 200 SF but now wondering if I need to build in expansion / movement joints
Great site! Any drawbacks to self leveling in large sections using previous section as screed edge? Would cold joints of slc need to be honored?
Thanks.
I like how you said that the spreader’s job is crucial to achieving level floors with self-leveling underlayments. I am getting my basement floor redone. Thanks for the tips on leveling concrete.
This sounds like a great idea! Especially since I have a large “L” shaped space and can’t see the high point from half of the room