
Keypad locks for homeowners are continuing to grow in popularity. Some of you may recall our first experience with the Kwikset SmartCode technology a few months back. If you read all the way through that post, you’ll see it didn’t all go according to plan. Well Schlage got in touch with me, and, after triple checking Kim and Fred’s door hole dimensions, I had them ship over a new keypad front entry set. Having installed and used both manufacturer’s keypads, I immediately noticed a few differences. Read on to learn what I think about the Schlage keypad entry set and how it compares to Kwikset.
Installing the New Handle
Fred and Kim’s door was looking a little worse for wear. At the beginning of my quest to replace the front door hardware, this is how everything looked.

I removed all the hardware including the deadbolt, handle and knocker. Next, Kim sanded the door and gave it a fresh coat of paint.

Fred and Kim selected the Schlage Camelot set in Aged Bronze. It includes a keyless door handle and lever and keypad deadbolt.

In my paranoia that the new set wouldn’t fit, I verified the door hole locations again. You can’t really tell but everything lined up perfectly.

I’ve had the joy of installing several door locks, and have become pretty good at swapping them out. I won’t go into detail about the handle installation other than to say that it was a typical install. The only unexpected step was needing to enlarge the hole for the bottom-most bolt.


Installing the Schlage Keypad Deadbolt
I was pleased to find that the Schlage deadbolt only had a few different pieces- the exterior keypad, interior throw plate, the deadbolt, and various faceplates and screws. I also like that Schlage included the necessary 9v battery.

After installing the deadbolt, I put the exterior keypad goes on next. The wiring snakes over the deadbolt and through the mounting plate on the opposite side.


I secured the mounting plate with the two big screws. At this point, I connected the two wires and install the 9v battery. Schlage includes a picture in the instructions for tucking the wires neatly along the side.

Lastly, I put the cover on overtop.


Programming
Installing the hardware is only half the battle with these new keypad locks. Next, I needed to program the keypad. Each Schlage keypad lock comes with a factory set, 6 digit programming code and two, 4 digit user codes. The programming code allows me to add or remove user codes, enable vacation mode, turn the beeping sound on or off, and disable user codes. Schlage can store many user codes, and they serve to operate the deadbolt.
I cleared out the factory set user codes and even changed the programming code. The included programming diagram is pretty easy to follow. It involves a lot of “enter programming code” + “press Schlage button” + “pick function” + “enter new stuff” + “verify new stuff”.
How to Operate the Lock
There’s a small learning curve with keypad locks, and it’s not always intuitive how they work.
Keyless Entry
To extend the deadbolt, you press the Schlage button and rotate the thumb-turn clockwise. When you do, the Schlage button flashes green, and while it’s flashing you can still unlock the deadbolt. This lasts for about 5 seconds. Additionally, you can change the settings so that you must enter a user code before extending the deadbolt.


To unlock the deabolt, you enter the 4 digit user code and rotate the thumb-turn counter-clockwise.


If you fail to enter a user code, the thumb-turn will spin, but nothing will happen.
Keyed Entry
You’d think keyed entry would be straightforward, but you’d be wrong. Here’s my only complaint about the Schlage setup. To use your key and “manually override” the keypad, first put the key into the lock.

Turn the key 90° counterclockwise.

Push the key further into the lock.

Now you can use the thumb-turn to lock or unlock the deadbolt.

I’m sure there’s a great reason for all these extra steps, but I wish I could just use my key like always.
How Does it Compare with Kwikset
I’ve hinted at a few differences between the Schlage and Kwikset keypads. Neither set is a clear standout winner over the other, but here’s what I noticed:
Schlage
- Has fewer parts making it easier to assemble
- Includes the 9v battery
- All metal covers suggest better durability
Kwikset
- Home Depot shows Kwikset has better prices
- Doesn’t include the 4 AA batteries
- Conceals mounting screws for a cleaner look
Overall, I liked the Schlage set better because I think they used better materials, and it feels more solidly made. Metal covers are important when you have to replace batteries. I can see accidentally stripping the plastic threads on the Kwikset set.
Quick Instructions for Installing an Outdoor Motion Sensing Light
November 2, 2011 | by Ethan (email) |I’ve mentioned my friend Bj before. He’s the same guy that shared his experience with the Stōk Quattro grill, and about a week ago he told me that he discovered some lurker in his backyard with a ladder! Initially BJ was stunned by the stranger who obviously intending on climbing up to the second story balcony. After recovering, BJ phoned the police as the intruder ran off with the ladder. BJ later found footprints on his balcony. How scary is that?! It turns out the local police have had lots of call about this guy as he attempts the same thing at other houses in the neighborhood.
BJ asked me to help install a new motion sensor light in his backyard, and I was glad to help out. I’ll walk you through a short recap of the installation, but first I wanted to poll you readers for additional backyard safety tips. What do you guys do to keep creepy-ladder-guys away from your house? Have you ever done a home security assessment? What further home safety advice can you offer?
Installing a Motion Sensor Flood Light
Motion sensor lights are a great crime deterrent because no one wants to do their burgling where people can see them.
Installing the new flood light was relatively easy because we replaced an existing fixture which means we didn’t need to run new electric or add a new electrical box. Keep in mind that you should flip the appropriate breaker before beginning any electrical work.
This is what the old light looked like.

Removing a couple screws revealed the mounting bracket and wiring.


We put up the new mounting bracket, a foam gasket for protection from the elements, and wired everything together.

Take care not to barehand the halogen light bulbs as the oils from your hand can cause them to burn out prematurely.

The only oddity to this project was the outdoor light was controlled by two different switches located about 5 feet apart. They were 3-way switches with 14/3 wire between them. As a work around, I removed one switch, hard-wired everything, and installed a 1 gang wall plate. For the other switch, I replaced the 3-way switch with a typical 15 amp switch. I left the spare wire between the two switches unconnected and capped with wire nuts.
A friend caught me the other day and asked if I knew anything about smoke detectors. He was curious why his smoke alarm was going off for no apparent reason and what he should do about it. I didn’t have an answer for him, and it actually reminded me that one of my smoke detectors may be on the fritz too. A while back, one of our smoke detectors started beeping every so often. No big deal right? Just change the battery backup, and you’re good to go. Wrong. I still don’t know what the problem was but I’ve been doing some investigating.
Smoke Detector False Alarms
Other than burning food on the stove, here are a handful of common causes for smoke detectors to false alarm.
- Dust buildup
- Spiders (or other creepy crawlers)
- Excessive humidity
- Dead battery backup
- Sensor failure (more on that below)
To make matters more complicated, if you’re smoke detectors are hard-wired (like mine), then they often work in series (called multi-station). That means that the false alarm in the hallway triggers all the other smoke detectors too.
I only have two suggestions for troubleshooting a smoke detector. First, replace the battery backup. This might not be possible for some older units. If that’s the case, it’s probably time to replace the detector anyway. Second, give it a blast of compressed air. That should remove any dirt, dust or spider webs.
According to the U.S. Fire Administration, most smoke alarms should be replaced every 8 – 10 years, and when you swap them out it’s good practice to write the date of purchase somewhere inside the alarm. I’d suggest the battery backup compartment as that’s usually easy to access.
Replacing Your Smoke Detectors
I don’t know the age of my smoke detectors, but they look old. Given that I don’t have much faith in them anyway, I decided to swap em out. I picked up some new smoke alarms and chose to install a dual carbon monoxide sensor in the basement since that is near our only fuel-burning appliances.
Here’s old alarm.

The old alarm had three wires coming into it. I used a simple volt tester until we switched off the appropriate breaker.

You can see the quick connect style wiring.

This picture shows the old mounting plate attached to the junction box and the three wires.

I took off the old plate and reused the screws for the new one.


The new alarm had an adapter that would plug into the backside. Here’s an interesting tidbit. If you wire the alarm wrong, it goes off none-stop until you fix it (or disconnect it).

And here’s everything cleaned up.


It’s important to install a UL listed alarm. Click here to learn more about their suggestions and some of the different types of smoke alarms available.
If you haven’t figured it out, birds and smoke detectors both chirp making them super-annoying when they wake you up in the night for no good reason.
How old are your alarms? Do you really replace the batteries every year? Who tests their alarms every month?
Kwikset SmartCode SmartKey Front Door Lock Installation & Review
September 1, 2011 | by Ethan (email) |I think it’s impressive that Kwikset is constantly trying to bring new products to market. Remember a couple years ago when they introduced the SmartKey technology? If you’re not familiar, they created a lock that any homeowner can re-key in about 30 seconds, and it works really well! I was excited when they offered up their latest innovation for review- the SmartCode lock.
The idea behind SmartCode is to provide a touchpad that homeowners can program themselves. This allows keyless access and the ability to lock your door with the push of a button. Some of the other perks include the SmartKey technology and an innocuous status light telling you whether the door is locked or not. Installing the lock was an easy process unless you fall into the same problem we had. Read on to learn what not to do.
P.S. If you’d like to learn more about the SmartKey lock, you can read our review here.

Removing the Old Lock
Fred and Kim have a two-hole door with some older hardware. To start this project we needed to remove the old handle and knob.

Removing a door knob can sometimes seem like a puzzle. Manufacturers want to provide a seamless solution, and so they hide things like set screws and catches where you can’t see them.

Once you get inside, most locks have two screws holding the inside and outside components together.


Installing the Kwikset SmartCode Lock
Note: Don’t be silly and use this walkthrough as a replacement for the directions. I’m wanted to share the installation process but did not include every step.
I unpacked all the parts and grabbed a screwdriver and tape measure.

The first step in the installation is to set the latch to the correct distance. Our door measured 2 3/4″ from the edge to the center of the hole.

Just slide that little pin to the correct setting.

Make sure you install the latch in the correct orientation with the angle facing the strike plate.

Next, grab the exterior keypad and snake the tether underneath the latch.


Kwikset provides a metal plate that mounts the internal portion. Line up the screw holes and tighten it down.

Find some tiny hands to press the electronic connection into the port.

There are two screws that hold the internal unit in place.

Now it’s time to attach the levers. The inside lever slides in place and there’s a little set screw that you tighten to keep it in place.

For the outside lever, start by inserting the lock cylinder.

Put the lever on and insert the key. Give it a quarter turn and the lever will slide on the rest of the way.

Tighten another set screw with the provided allen wrench.

At this point you’re almost done. Find four AA batteries and push them into the battery holder.

Just slide the battery holder in place, and the last step is to program the combination codes. Wait…. we have a problem.

No worries. That looks like a problem for Future Ethan. He’ll have to find a suitable work around. In the meantime, we’ll just slide the cover on top. Or not.

One Hole Doors Only
When we first received the SmartCode Lock we noticed a little graphic indicating that this lock should be installed on one-hole doors only. We were obviously concerned and asked Kwikset about it. To their credit, they didn’t actually tell us that the install would work. They didn’t answer the question, and I dropped the ball by not following up.

I got the OK to remove the deadbolt and completed the install. Programing the combinations was easy, and the one-button lock was really nice. Imagine not having to giving keys out to a realtor or neighbor. Lost your keys? No problem. It’s a great lock, and I recommend checking it out…. if your door only has one hole.
Now it’s time to replace the SmartCode lever with something that fits….
I am a member of the Kwikset-sponsored SmartSquad and occasionally receive incentives (like the SmartCode lock) to discuss issues related to home safety and security.
A good table saw is practically a necessity for lots jobs like installing hardwood floors. There’s been a lot of talk lately about table saw safety and whether or not the Consumer Product Safety Commission (CPSC) will mandate the use of a new technology called the SawStop. No matter what you think about the SawStop, the onus is still on the user to be safe. This post includes some of the safety guidelines suggested by the The California Polytechnic State University and other best practices.
SawStop
If you’ve never heard about the SawStop technology, it’s designed to immediately stop the blade when it comes in contact with skin. The saw blade will be shot but it’s a very effective safety mechanism. You can find lots of SawStop demonstrations on YouTube if you look around.
Table Saw Safety Procedures
Safety Equipment
Whether you’re using a table saw, miter saw or any other power tool, it’s important for the operator to wear safety glasses and, at times, a face shield. Skip the work-gloves as any good table saw will cut right through them and you’ll lose your sense of touch. You should also consider hearing protection, not just for a table saw but all power tools.

Checklist
You want to run through a short list of checks before using a table saw. It’s not a bad idea to print out this list and tape it down to the surface of your saw as a constant reminder. This can also be useful when teaching teenagers to work with the tool.
- Verify location of off switch and/or emergency power disconnect and ensure that the table saw is off before proceeding.
- Check blade for tightness and sharpness.
- Check the hood guard and anti-kickback devices for proper operation
- If used, check to ensure the fence is set properly and tight
- Ensure that the table is clear of materials, tools, and debris
Standing Position
Position yourself comfortably and well balanced but not directly in-line with the blade. Standing to the side of the wood minimizes the danger from kickback. Kickback occurs when, rather than cutting a board, the spinning saw blade grabs the board and throws it back at you.
If your stomach is in the way of the oncoming board when this happens, you could very well end up with a serious abdominal injury. The risk of this happening is increased when using a dull blade on the table saw, or when cutting hard lumber, such as jatoba, cumaru, or purple heart. Extra precaution is critical in this situation. We have found that this mistake is extremely common with new table saw users who may be careless in their standing position.
Cutting
Set the blade height so that the top of the teeth are no more than a 1/4″ above the wood. Check the blade guards, splitters and anti-kickback device before starting. Always use the fence or miter gauge, and never try to cut freehand. Use feather boards to hold the stock securely against the fence and push sticks to move stock through the saw. Always keep your hand 6″ or more away from the blade.
Try to keep the boards moving through the saw at a slow and steady pace. If you try to overcut the board (moving it too fast), the risk of kickback is greatly increased.
Maintenance
Disconnect the power before changing the blade or servicing the saw (and double check).
The Right Saw Blade
Choosing the right saw blade can go a long way in keeping an operator safe, and it can be a huge difference in how well your saw performs. For a quick blade comparison, read Todd’s Saw Blade Comparison over at Home Construction & Improvement. It’s one of the better quick overviews of the different types of saw blades available.
What do you think? What safety suggestions can you add?
Image courtesy of AMagill and Robbie1

 All modern American building codes requires fire stopping devices be incorporated in certain walls, floors, and attics. These fire stops prevent fire from moving too easily up a wall to the room above or into another area of the house. In modern residential home design, this is most commonly achieved in walls by continuous 2×4 or 2×6 top and bottom plates that separate studs from the joists above. In fact, it is so common, we rarely even think about the fire-stopping benefit of the design anymore. It seems like these top and bottom plates are there just to hold the wall in place.
This wasn’t always the case. In old balloon framed homes, the walls ran straight up from the basement to the top of the house (such that you could look all the way down the wall from the attic and theoretically see the basement foundation). This is a disaster waiting to happen in the event of a fire, as a fire that starts in the basement cane race through the whole house in a matter of just a few minutes. During a remodel of this type of house, it is wise to install fire blocking at the top and bottom of the stud walls. Since the space between the studs may vary, each reinforcing fire block may need to be individually cut.
Fire Blocking Between Studs
In the Habitat house we worked in Baltimore City two weekends ago, the project team installed additional fire blocking in the studs of the house, by nailing a 2×4 half way up on the wall. This provides some additional fire protection benefits and will slow the spread of a fire up a wall by limiting the amount of oxygen available to the fire and forcing the fire to burn through the stud first. As we understand it, this additional fire blocking is actually part of the code requirements for town home renovations in Baltimore City.
Installing this type of fire blocking is relatively simple. Simply snap a chalk line across the studs about 48″ off the ground, and install tight-fitting 2x4s in between these studs.

The 2x4s alternate above and below the chalk line to enable nailing.

And here’s what the finished product looks like:

Fire Blocking Code
The code requirements for fire blocking vary by locale, whether the house is stand-alone or attached to other houses, whether the property is residential or commercial, etc. You should check with your local building inspector to determine what code requirements are in effect for your area. Sometimes this can be achieved with a simple phone call to the office.
 Over the last two weeks we’ve told you how polarized outlets and grounded electrical circuits increase the safety of the electrical systems in our homes. This week we’re going to focus on a third electrical safety enhancement we enjoy: the ground fault circuit interrupt, or GFCI.
You’ll recall from both of the previous articles in our series that in the normal operation of electric devices, electricity flows from the hot side of the outlet, through the appliance, and back out the neutral (common) side. In this scenario, the amount of current flowing over the hot and neutral sides of the circuit are equal. GFCI protection takes advantage of this normal operating situation and uses precision circuits to measure the current flowing in and out of the appliance. If at any time the current measurements on either side of the circuit are mismatched, the GFCI trips and the flow of electricity is (nearly) instantly shut off.
GFCIs vs. Breakers & Fuses
You may be asking, so why are GFCIs required when we already have breakers? That’s a good question because the devices appear to function similarly. Breakers and fuses are designed to cut off a circuit only when an over-current state is reached. A standard 15 or 20 amp breaker trips only when the current rises over 15 or 20 amps. The goal is to prevent the wiring in your house from overheating and causing a fire when you plug in too many devices. GFCIs trip as soon as the current in does not equal the current out.
Consider this scenario: Let’s say you short circuit an appliance that has no GFCI protection. The current running through your body reaches 15 amps on a 20 amp circuit. The breaker in the box isn’t going to flip and you are going to get a very serious shock until you let go of the source. If instead this circuit were protected with a GFCI, as soon as you shorted the circuit, the GFCI would trip, leaving you with a much less serious shock. GFCIs trip within thousandths of a second, virtually eliminating current flowing across a short.
GFCI Limitations
It’s worth noting that GFCIs work only when you create a short circuit (or path to ground). If you complete the circuit and the electricity flows through your body (or hand, or foot) back to the neutral wire, the GFCI won’t help you. Only when an over-current situation is reached will the breaker trip. This is a very unusual scenario, however, because the odds of you perfectly bridging the circuit a relatively small.
Devices Offering GFCI Protection
Almost everyone has seen the typical GFCI receptacle somewhere in their home. It’s important to note that on a single electrical circuit only one GFCI outlet is required to protect the whole circuit. This outlet must be installed first in the line of circuits. It will have line and load terminals. The line terminals connect to the breaker or fuse box, and load terminals go to the branches further down the line. This way, the GFCI can measure current in and current out across the entire remainder of the circuit.
An alternative to a receptacle-based GFCI is a breaker-based GFCI. In this scenario, the GFCI circuitry is built right into the breaker. These breakers are more expensive, and since GFCI circuitry can go bad over time, they are fairly uncommon for 15 and 20 amp circuits. Replacing a failed GFCI receptacle requires that you turn off the associated breaker. Replacing a breaker, on the other hand, will require you to open the electrical panel and kill the main for the house (if you are going to do it safely!)
GFCI Placement Requirements
GFCI protection is required in circuits in kitchens, bathrooms, outside, and in several other locations. You can search for NEC GFCI requirements and find additional information. The general reasoning is that in locations where water is prevalent, short circuits are more likely and the cost/benefit trade for GFCI protection makes sense. GFCI protection isn’t required everywhere because the GFCI circuitry does go bad over time and must be replaced, and the technology required for GFCI protection is still significantly more expensive than non-GFCI protected circuits.
Testing GFCI Circuits
Because GFCI circuits can fail, they should be tested at least monthly (using the “test” button on the receptacle or the breaker). When the GFCI circuitry goes bad it no longer adds the additional protection. Consider adding it to your family calendar on a monthly (or at least quarterly) basis to help you remember to check it.
Installing New GFCI Protection
Here’s our instructions for installing and testing a GFCI. It’s very simple and the cost is around $15.00 for the receptacle.
![]()
Homeowners, professionals, and do-it-yourselfers all need to have underground utility lines located before you break ground. It could be something as simple as planting a tree or building a deck- either way you need to make the call. The depth of utility lines varies. For instance, communication lines like phone and cable service are usually found within 24″ of the surface. Water supply lines are typically buried 36-42″ deep, or deeper if you live in an extremely cold climate. Damaging underground lines can disrupt service for entire neighborhoods and result in fines and repair costs. There’s no reason not to call. It’s the law and a free service!
Who to Call
Around Maryland, Delaware and DC, Miss Utility is the company that will mark underground lines. In Massachusetts, New Hampshire and surrounding areas, Dig Safe Systems will handle your needs. If you’re not sure who to call, check out 811. They maintain a quick lookup by state or province.

Underground Utility Line Color Code
Different underground lines will be marked by different colors. Here’s the universal color code.
- Red – Electric power lines, distribution and cables
- Orange – Communication, telephone/CATV, etc.
- Blue – Potable water
- Green – Sewer and drainage
- Yellow – Gas, petroleum, oil and gaseous materials
- Purple – Reclaimed water, irrigation and slurry lines
- White – Proposed excavation site
Digging Guidelines
Things like how long the marks are good for, weekend availability, and necessary notice times vary by state and county. Here in Baltimore County, they need at least 48 business hours from the time of the request. Also, they require 18 inches of hand-digging to expose utility lines. Check local guidelines for your area.
Tip: When digging, orient your shovel along the buried line (rather than across) until it has been fully exposed. You’re much less likely to inadvertently cause damage.
 As part of our the recent remodel where we removed walls on the first floor of our house, we also sanded down the rest of the stipple ceiling on the first floor.
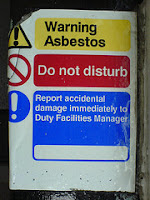
We had sanding the stipple ceiling in our dining room the year before, and as part of that project, decided to get the ceiling checked for asbestos.
Many popcorn and stipple ceilings built between 1950 and 1980 contain asbestos. Undisturbed, these ceiling textures are harmless. It’s only when the asbestos fibers become airborn that they represent a health hazard. We didn’t even think of this when we started sanding! (Incidentally, sanding is about the worst thing you can do to any hardened asbestos-containing product).
When Was Asbestos Eliminated From Building Materials?
Our Ryan Home was built in 1984. Since asbestos awareness hit its height in the 1970s, I thought for sure our house wouldn’t have any asbestos in it, and particularly not in a ceiling texture right above our heads! I scoured the web to confirm my opinion. Unfortunately, I couldn’t find any definitive information on when asbestos-based interior texturing products were outlawed. Several sites noted a ban on manufacturing in 1978. But, subsequent to the ban, builders and contractors were allowed to use whatever inventory they had in stock. Some sites suggested that interior finishing products could have been asbestos-based as late as the early 80s. I asked myself: What constitutes the early 80s? Is 1985 the early 80s?
The bottom line here is that if your house was built between 1978-1985, there is always some chance there will be asbestos in the ceiling texture. You can look elsewhere on the net, but trust me, no one will tell you that a ceiling put up in this timeframe won’t have asbestos in it.
Finding a Testing Lab And Sending a Sample
I couldn’t take a chance. I searched the net for an asbestos testing lab that could do a quick test to put me at ease. My search led me to Western Analytical. I followed their instructions for obtaining samples (essentially a careful removal of a small amount of the texture from the ceiling), and sent the samples to them.
Western provided detailed instructions on how to take a sample of the ceiling without potentially releasing asbestos into the air, and recommended taking 3 samples from different areas of the ceiling since I was testing more than 1000 sq. ft. They charged $20.00 to analyze each sample, for a total cost of $60.00, a relatively cheap price for peace of mind.
The Result
Three days after I mailed away the samples, I received a confirmation e-mail from Mike @ Western that all samples were negative. Whew. I was impressed with the timeliness of their response, and relieved that we didn’t just expose our kids to a huge amount of asbestos in the air.
So I ask myself after the fact: did I really need to send three samples? Or was that just something Western asks for to make more money? I get their reasoning here: a builder could have used more than one batch of materials on any given ceiling. I question the liklihood of this occurring, but I personally wasn’t willing to take the risk.
What do you think? Did you have a good experience with an asbestos testing lab? Do you have a popcorn or stipple ceiling that is suspect?
Photo courtesy of Dan Taylor
 I finally got around to installing a ground fault circuit interrupter (GFCI) on my deck. The prior owners had a regular receptacle which worked about 50% of the time. A soft kick usually got it working. This was obviously something that needed a little more attention.
How GFCI’s Work
A GFCI is a device used to protect against electrical current. It does this by measuring the imbalance of current between the hot and neutral conductors of a circuit. Typically, the two currents are about the same. When the difference becomes greater than 5mA, the circuit is de-energized. This can happen when, say, current passes through a person to the ground.
Wiring a GFCI
 GFCI’s are good safety devices but only if wired appropriately. When you examine a GFCI you will see at least one pair of terminals marked “Line” and another pair marked as “Load”. The Line terminals are for incoming power from the breaker. The Load terminals are for powering other receptacles downstream. Be sure to shut off power to the circuit before handling the wires.
I determined which wire was coming from the breaker in this fashion. After removing the old receptacle and separating the wires, I turned the breaker back on and carefully tested each pair to determine which wire was active. Then I turned the breaker off and continued.
Connect the incoming power, black wire to the hot Line terminal and connect the incoming power, white wire to the neutral Line terminal.
In a similar fashion, connect the downstream power, black wire to the hot Load terminal and downstream power, white wire to the neutral Load terminal.
Splice ground wires together and connect to the green screw on the GFCI.
Testing Your GFCI

You want to be sure that everything is working appropriately. Here are scenarios that I tested:
- With the breaker off, there should be no power
- With the breaker on, and the “reset” button pressed, your receptacle (and everything downstream) should have power
- With the breaker on, and the “test” button pressed, your receptacle (and everything downstream) should not have power
I’ve found a professional multimeter to be a must have for working with my home electric. A multimeter is the only reliable way I can know which wires are hot. I use it constantly.
If your interested in a more complete electric guide. Check out Freds review of Stanley’s Complete Wiring Manual.
What do you think? How often do you test your GFCI’s? Ever replaced one?
