Today we’re featuring a reader guest post from William. You’ll remember William from his article about restoring a scratch-and-dent Gladiator tool chest, and we’re really excited to share his fire hydrant table.
Pro-Follow Update: Look for a brand new Pro-Follow update on Monday. If you keep up with OPC on Facebook and Twitter, you’ll know that Steve recently replaced a patio door, and we bumped into some unexpected problems with the header. Stay tuned to see how he tackled this latest challenge. For now, here’s William.
I’m a fireman. I don’t wear silly firefighter shirts with slogans like, “We Fight What You Fear,” and I don’t have a bunch of stickers on my truck proclaiming the fact that I’m a fireman. I do have a bonus room that is firefighter-themed, but not in a cheesy way. For instance, I like normal household items made from re-purposed fire equipment like old breathing apparatus bottles or old soda-acid extinguishers. In my bonus room, I used old, worn out 1-3/4″ fire hose as crown molding. I’ve got a couple vintage reproduction Texaco Fire Chief metal signs, and a few black and white photos taken over the years at work. No flames on the walls or anything ridiculous like that.
To add to the theme, I wanted to make a table out of a fire hydrant.
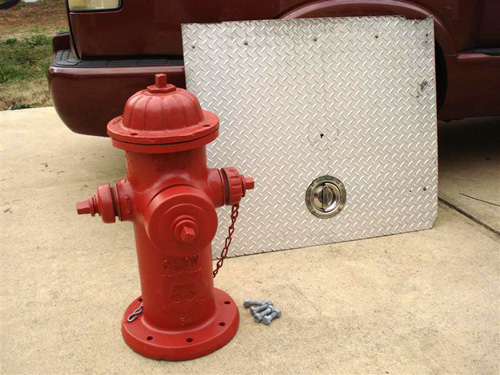
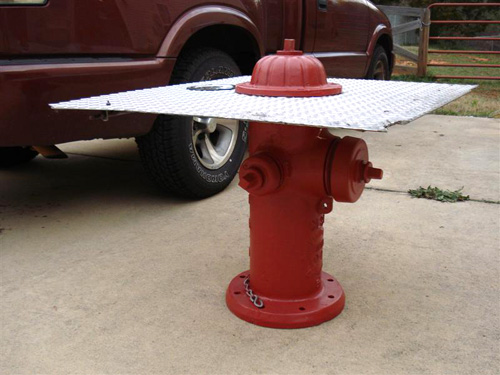
Initially, I had planned to have a glass tabletop cut, but that proved to be too expensive (and fragile) for this project. Luckily, more fitting materials popped up anyway. The design called for a fire hydrant with a tabletop sandwiched between the bonnet and the barrel. For those of you who aren’t intimate with typical fire hydrants and their anatomy, the barrel is the vertical, round part that sticks up out of the ground. The bonnet is the curved top that bolts down to the barrel. Through the bonnet runs a vertical stem that connects to a valve underground that allows water to enter the hydrant from the main. By turning the stem nut on top of the hydrant, the valve is opened or closed.
I started on this journey years ago, when I was still a rookie at my department. I made a trip to the county water department scrap yard, where all sorts of scrap water mains and hydrants were kept, in various states of brokenness. I had to search for a while to find a hydrant that wasn’t broken in half or missing pieces. It was also a hunt to find one that wasn’t bolted to a 12-foot or larger section of water main. I finally found one in good shape that was connected to a 6-foot section of 5-1/2″ steel pipe that would’ve connected to a main. I found someone to help me load this monstrosity into my truck, and I went home to apply heat to my back and Advil to my belly. Fire hydrants are heavy! They’re around 250 pounds of cast iron, and my suggestion to anyone following along is to bring a couple 18″ pipe wrenches for the bolts and a couple of friends. Friends with their own pipe wrenches are even better.
I took the hydrant and 6′ pipe to the fire station where I worked and unbolted the pipe section. It was fairly light for its size, and it fit in a large dumpster. If I had it to do over, I’d have unbolted it before leaving the scrapyard and left it there. If you can find a place that will give you a hydrant, you might NOT find a hydrant you can actually take without removing a water main so take tools with you. I’d recommend taking the caps off, and removing the bonnet before moving the hydrant. You want as much weight off that thing as possible when waddling around with it. Secure it very well in your vehicle because 250 lbs. of cast iron has a lot of concentrated inertia. Even if it moves a little, it can put a large dent or bend in the bed of a truck, and if it slides from one side to the other in a turn, you can feel it move the back tires around on you.
A coworker with a large sandblasting setup sandblasted the entire hydrant, inside and out, then primed it for me. My hydrant was covered in over a decade of rust, paint, more rust, and more paint. Hydrants where I work get painted once every year or two, and they never get stripped. The crud-crust just builds up, and the best way to remove that down to a paintable surface is sandblasting. I tried a wire brush and a wire wheel on a drill- no dice. A wire wheel or cup on a grinder would certainly get a good amount of work done, but there are too many tight spaces on a hydrant where a grinder wouldn’t reach like inside the 2-1/2″ discharges. There are plenty of steel, iron, machine, and sandblasting shops that have a large blasting chamber and will strip a fire hydrant for $50 or less. It’s worth it.
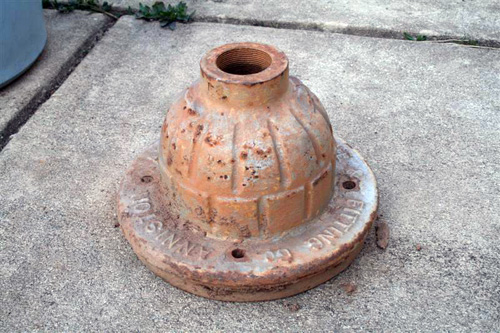
The condition of this bonnet is about how my entire hydrant looked before sandblasting
So, blasted and primed, I put some rust inhibitor paint on the hydrant and started thinking about a tabletop. While considering glass and wood options, I stumbled upon an old ladder truck compartment door. This was a giant piece of diamond plate aluminum that had just been lying around the fire station for years and no longer actually fit any apparatus still in service. The door was in rough shape, but it seemed to have the look and character I wanted for this project. Even better, it even still had the D-handle and locking mechanism on it. The challenge for using this sheet of diamond plate for this table was that the hydrant’s bonnet extended downward inside the barrel. This meant that anything used as a tabletop would have to have a hole in the middle to allow the bonnet and a piece of the stem to pass through.
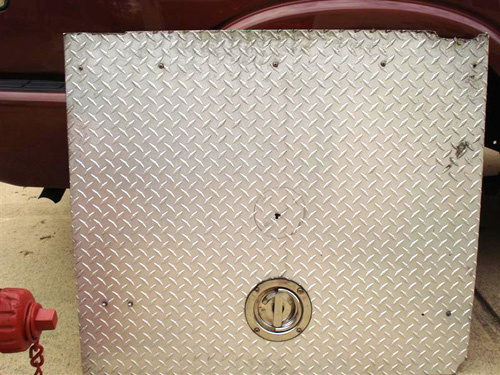
Old compartment door
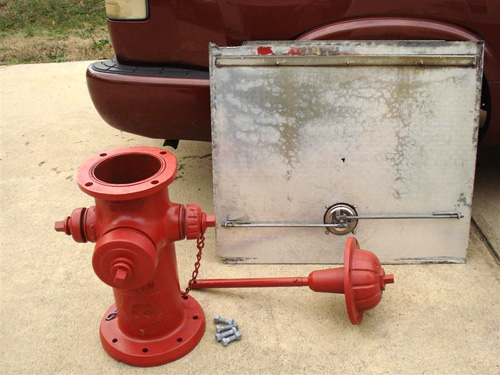
Note the underside of the bonnet is still cast iron, and projects downward into the barrel, and attaches to the shaft of the stem
I don’t have the kind of tools that would make this part super-easy. A Dremel or Rotozip type of tool with the right bit would make quick work of aluminum plate, but instead I used a reciprocating saw. I found the center of the tabletop and used that point to draw a circle large enough to fit the bonnet’s protrusion. Around the circle, I drilled a series of connecting holes that formed slots big enough through which to fit a metal-cutting blade for the reciprocating saw. Using a drill to make connecting holes in metal is harder than it sounds. The holes have to be far enough apart that the bit won’t just skip off into an existing hole, and the holes have to be close enough to use the bit to expand the holes until they connect into one long hole. Three connecting holes were big enough to fit the blade. After that, I just cut a square out of the center of the table top. When it’s all bolted up and finished, it won’t matter how ugly the center hole is; it’ll be covered by the bonnet. In the meantime, I had to work with and around that ugly, jagged hole, so I took a file to it and smoothed out all the burrs and edges until they were hand-safe. I did the same thing on the outside edges, only I spent a little more time rounding corners and eliminating jagged spots, because the thought of sutures and tetanus shots kind of ruin the appeal of a cool piece of furniture.
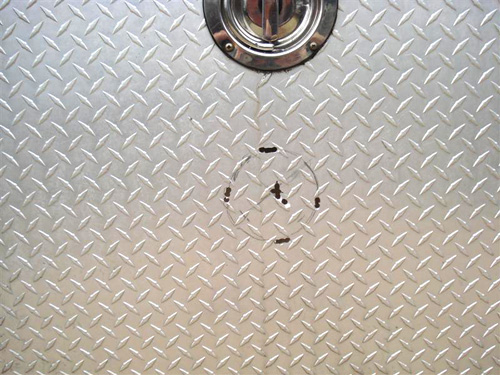
Center circle with connecting drilled holes
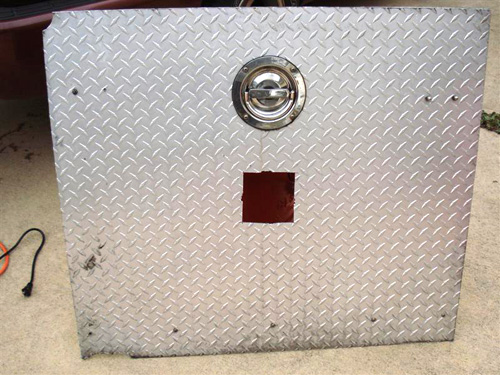
Center square cut out, jagged edges ready to be filed.
Finding a bit large enough to make the holes for the bonnet bolts may be tough. My bolts are 5/8″, which is close to the largest regular drill bit you’ll find for metal. A metal-cutting hole saw would be simpler, but it costs more. I’m a simple guy, but I’m a cheap simple guy, and cheap always wins that fight. So I just placed the tabletop on the hydrant, and centered the bonnet on top. I used the bolt holes in the bonnet to mark the locations for the holes in the tabletop.
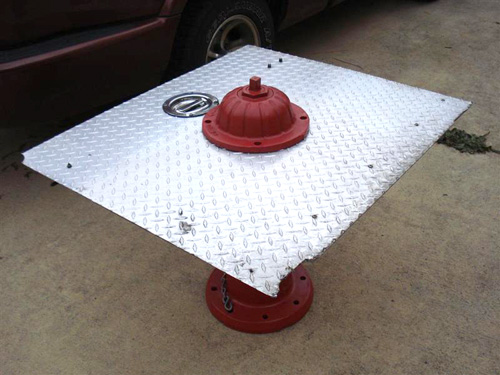
Centering and marking bolt holes
Drilling holes in diamond plate is more difficult than it sounds, especially with a very large bit. If you can find a metal-cutting bit with some sort of brad-type tip, you’ll help yourself a ton. Large drill bits have very flatly angled noses, and they walk a LOT on metal. It’s even worse on diamond plate, because of the raised texture that’s already trying to push the bit to a flat spot. Simply using a spring-loaded punch won’t give this kind of bit the purchase it needs to stay put and get started. What I had to do was center punch the hole locations five or six times each to get a nice, deep punch in the aluminum. Then I used a 5/16″ metal bit to make a pilot hole where the center was punched. The pilot hole was sufficiently large to keep the 5/8″ bit from walking until it made its own hole. When drilling metal with a large bit, it’s important to keep the RPM up on the drill. Don’t push too hard, as the friction will slow the bit down and make it bind, and every time the bit binds, it kicks the drill. Let the bit do the work. The larger bit takes longer to eat the same depth hole than the smaller pilot bit. When the large bit finally starts to break through, ease way off the pressure behind the drill, and hold on tight. I could not prevent the drill from binding on any of the four holes as it broke through the other side, but it got better as I learned to control the pressure applied.
After making the holes, I mocked up the whole deal and test-fit the bolts into the holes. Three of the four passed with ease. However, the fourth required a little touch with a rat-tail file on the diamond plate to open up the hole on one edge which took about 5 seconds.
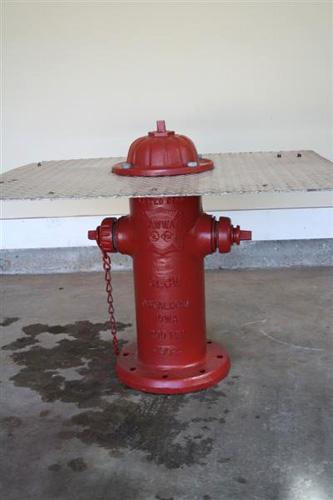
Mocked up
The only other steps are paint and assembly. If you do a project like this, you can paint the hydrant any way you like so get creative! I’ve seen hydrants done ornately where discharge caps and chains were actually chromed. You can paint it to match the room it’ll be in, or the outdoor space it’ll occupy. Consider painting it to match hydrants in your area. The hydrants where I work are all yellow, and I didn’t want a yellow hydrant in the bonus room so I picked red (RustOleum Professional High Performance Enamel in Safety Red, to be exact). I’ve used it before to paint fire apparatus wheels and leather fire helmets, and it’s a strong paint that holds up to heavy abuse. Take off the bonnet and discharge caps to paint them separately, and don’t forget to paint the bolts. Allow everything to cure for about a week before assembly, longer if it’s cold or humid. Any less than that, and if you bolt it all up, you could rough up the paint, or the paint could end up sticking severely if you ever go to take it apart again.
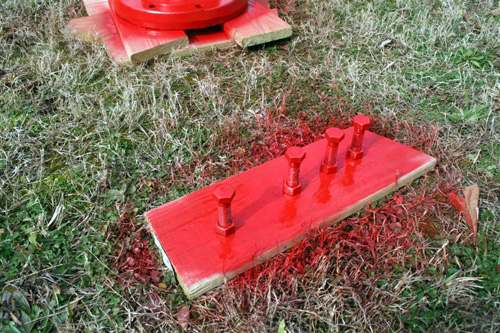
Painting bolts
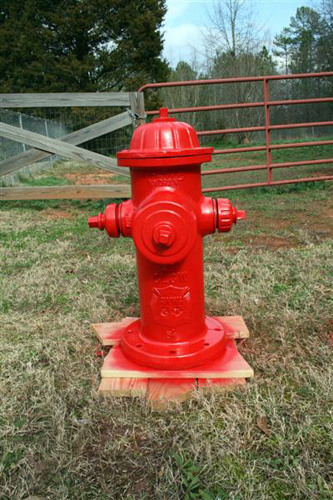
Safety Red
Carry your pieces to their final resting place, and start bolting things together with more excitement than when you got your first Erector Set.
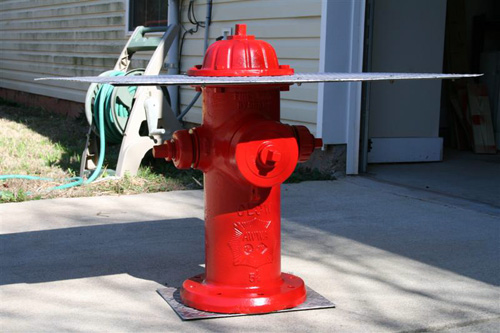
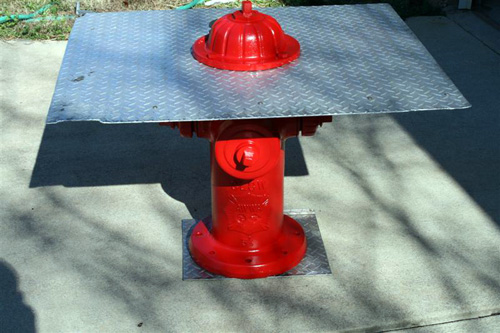
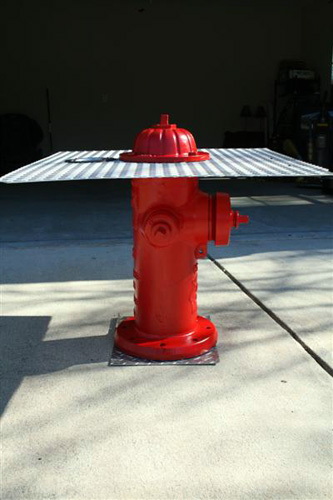
I still need to put another coat of paint on the hydrant, but it’s basically how it’ll look in my bonus room. I found a piece of diamond plate trim on which to sit the hydrant. This will keep any horrible impressions and future rust stains off the carpet. All the edges of the tabletop are smoothed, and the rough hardware that used to protrude from the top has been removed. The bolts are only hand tight, and the table top is solidly secure. It’s got some flex in it, but it’ll hold drinks, food, or propped up feet for entertaining. The table could be braced in many different ways to make it stiffer, but it’ll work just like this for a bonus room. If it were going in the day room at a fire station, I’d brace it like I expected someone to jump on it, because eventually someone would. The only other thing I MIGHT change is going over the lettering on the front and rear of the hydrant with some gold paint. Gold accents on Safety Red paint just bring up the image of hand-laid gold leaf on a classic fire truck. So, we’ll see.
Some tips if you want to tackle a project like this for your home or fire station:
- Safety first. If you’re the one sandblasting, take all the standard precautions for doing so. If you work with metal like this, even on something unrelated to this project, wear eye protection and gloves. It’s a nice day out today, and I want you to be able to see all the pretty days after this one. Wear gloves because aluminum is TERRIBLE about making razor-sharp ribbons when drilled, and angry filings when filed. If you’re like me and Charlie Sheen, you’ve got tiger blood coursing through your veins, and you want it to stay there so wear gloves and shoes. I’m a country boy at heart, and I have a terrible habit of not putting on shoes until AFTER I step on something sharp.
- Fire hydrants are all over the place. Mine was free from the water department so check there first. Craigslist, eBay, and plenty of other places have listings. Find one in your area, because shipping a 200-lb chunk of iron won’t be cheap, and lots of people have fire hydrants with which they, too, intended to do something cool, but never did.
- Table top options are limitless. The big home improvement stores actually sell hardwood tabletops, round and square. They’re thick, which might require you to purchase longer bolts to assemble everything, but the tabletops are sanded and just about ready to paint or stain.
- If you have the hydrant sandblasted, ask them if they’re able to prime it there, too. That’ll keep it from beginning to rust between the blasting and whenever you get around to painting it. For me, that time frame was over a year.
- When you paint the nuts and bolts, prime the entire things. Final paint, however, needn’t cover areas that won’t be seen like the surfaces underneath the bolt heads and the nuts. Thread the bolts just into the nuts so that they stand up like pictured above. You can paint all the visible surfaces, then flip the nuts over for assembly so the painted side is out. You may need to paint the tips of the bolts if they stick out when assembled.
- I’ll reiterate that fire hydrants are heavy (even small ones). This one, with two 2.5″ discharges and one 5″ discharge, is about as big as normal hydrants get. There are smaller ones out there, skinny ones with single discharges and whatnot. If you wanted a smaller table, like an end table or night stand, look for those.
- An angle grinder with a medium grit flap disc would’ve made extremely quick work of smoothing the edges of this tabletop. Unfortunately, I don’t have a grinder. I used a flat cross-cut file to get the big stuff evened out, and a single cut file to smooth it all down. It took a while, and working from the tailgate of a truck isn’t the easiest platform. Do yourself a favor and build the workbench that OPC built for their shop.

Our oldest daughter, Izzie is almost three and I wanted to make Christmas more than just one day for her. I am hoping to teach her the story of Jesus’ birth and have fun in the process. So I decided to make an advent calendar. As I was looking around on the internet and Pinterest, I saw lots of really cute ones made of all different types of material – wood, fabric, match boxes, paper, and much more. I decided to make one of paper because it was handy and cheap. Maybe as my sewing skills progress, I may re-do my advent calendar. Here are the directions of how I made the calendar so that you can follow along and maybe make one of your own. In the comments, please add your own ideas of materials, types of calendars, and activities that you have done so that I can take them into account next time around!

Find a backdrop. I originally was going to have Ethan cut a piece of plywood and them paint it, but he was busy and I was eager to get started. Instead, since it was recycling night, under the cloak of night, I dug through a neighbors recycling (on the curb) and found a very large piece of cardboard. Cut it to your desired size. I wanted a tall, thin calendar that I could lean against the wall. I then covered it with gold wrapping paper.
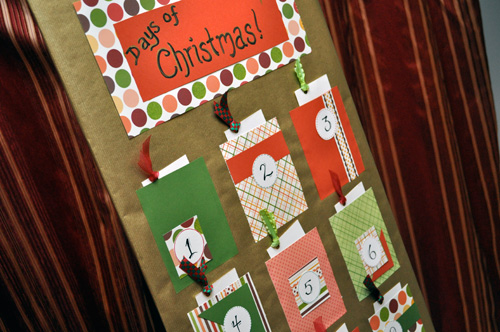
Then cut out 24 paper pockets using colorful scrapbook card stock. Add your own style but using different colors, patterns, and paper sheen.
Using a ruler or yard stick, determine the layout of your pockets. I recommend starting from the bottom and working your way up. Use pencil so that you can go back an erase any markings.
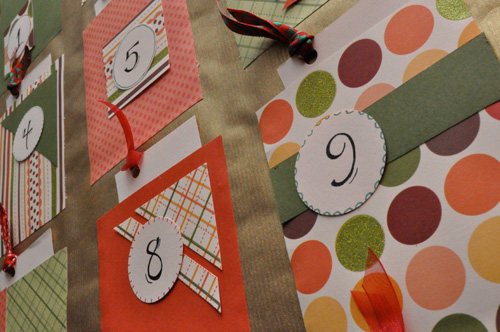
Affix pockets using a very fine line of glue or glue dots on the two vertical edges and the bottom edge. Do this for all 24 pockets.
Add adornments. You can go to Michaels or your local craft store and buy paper dye-cuts and decorative stickers, or you can cut out your own designs using the scraps of the paper used for the pockets. I chose the latter because it was cheaper and I was eager to complete the project without going to the store.

Number the pockets.
Cut 24 inserts for the pockets, punching a hole in the top corner and attaching a ribbon. The ribbon is important so that the insert does not fall into the pocket.
Write an activity on each insert and your calendar is complete.

Here are some ideas that you can include on your advent calendar:
- Decorate the Christmas tree
- Go to a Christmas party
- Make Christmas cookies
- Make and deliver Christmas cards
- Go caroling (around your neighborhood or local senior center)
- Make a gingerbread house
- Travel to “Bethlehem” (walk around the block)
- Drive and see Christmas lights
- Learn and sing a Christmas song
- Make an ornament
- Collect cans for the homeless
- Watch a Christmas movie with popcorn
- Deliver gifts
- Drink hot chocolate and stir with candy canes
- Dress up and put on a Christmas play
- Have a picnic in front of the Christmas tree
- Read the Christmas story every day
- Wrap gifts
- Make a treat and take it to a friend
- Call grandparents and sing a Christmas song
- Count the stars
- Make a holiday craft with Mom
- Go sledding with Dad
- Make characters from the Christmas story with play dough
- Make a list of the gifts God gives us
- Wear a fancy dress to dinner
- Have a dance party to Christmas music
- Camp out around the Christmas tree
- Decorate the house
- Blind fold kids and have them guess the holiday scents (cinnamon, pine, gingerbread, etc.)
- Donate toys to Goodwill
- Cut out paper snowflakes
- String Christmas lights in the kid’s rooms
- Collect pines cones and dip in paint for decorations
- Make a Christmas tree out of paint and hand prints
- Make cold weather packs for the homeless (water, granola bars, McDonald’s gift cards, Hot Hands, etc. to give to homeless instead of money)

When Ethan and I went to the Urban Oasis tour in Chicago, we saw some amazing inspirational art and decor. So I wanted to make wall hangings for our bedroom makeover with flavors and elements pulled from the real style makers. I thought they turned out pretty incredible and only cost about $6!
When envisioning the room, I wanted a neutral palate, using grays and whites while adding fresh green accents through out the room. The letters on the wall art match the green in the DIY lampshade and our window panels. The idea ended up morphing into very pretty His and Hers artwork, which I love. If you love the His and Hers concept, be sure to check out Dreamsicle Sisters for more canvas ideas with a His and Hers theme.
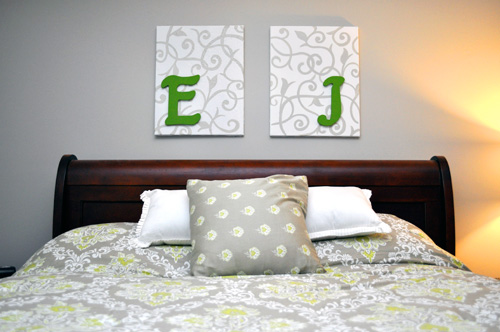
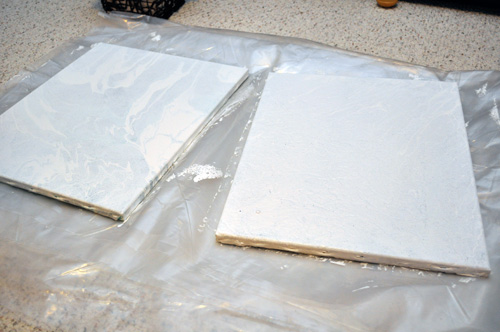
Local thrift stores are a great resource for crafty projects, and I shopped a nearby Goodwill to find a pair of old canvases. It would have been more ideal to find artwork that didn’t have much texture because the texture “showed” through. I was hoping to remove the canvas from the frame, flip it, and use the other side; however, the paint was so thick and plastic-like I could not remove the staples. Perhaps, in the future, I’ll find another canvas to re-do the more textured canvas of the two. The canvases I purchased are 16″ x 20″.
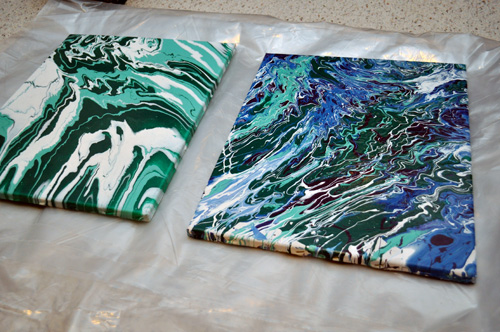
I painted over the old artwork with some spare ceiling paint. I chose a flat paint to provide contrast between the wall paint (eggshell finish) and the paint accent swirls on the canvas (semi-gloss finish). Multiple coats were needed on these because of the dark colors and deep texture.
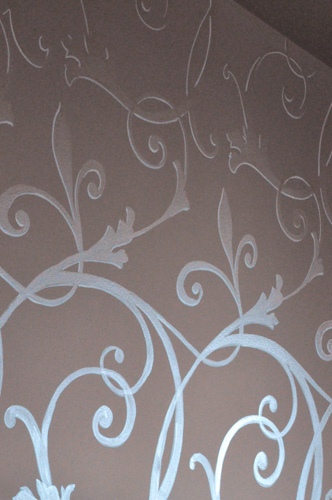
The letters came from Jo-Anne Fabrics and are stuck to the canvas with hot glue. The letters came in black and I used previously purchased craft paint, mixed to match the room. For the swirls, I used leftover Ben Moore semi-gloss paint, the same color as the walls, but a different finish. If you didn’t notice, they were inspired by the hand-painted walls in the Urban Oasis bedroom.
As an added bonus, I used Command Damage-Free Hanging strips which allowed me to hang the canvases without damaging the walls, especially since it took a few tries to get the positioning the way I wanted.
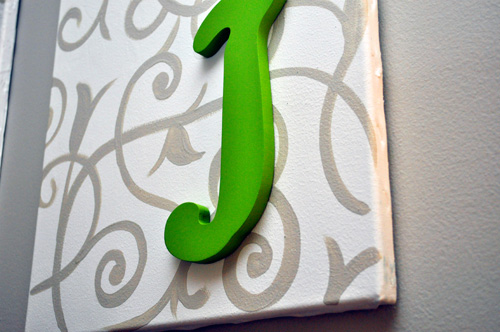
The canvases cost $2 a piece and the letters were $1 each (after sale and coupon). If you don’t have spare paint, that’ll up the price a little. Even so, this is an easy, inexpensive idea for artwork in the bedroom.

I told you that working on our front door provided a stark comparison for the storm door, and sure enough when I got home two days ago, Jocie had already taped off the glass and started preparing to paint the storm door. Just like painting the front door, I’m really pleased with the results and would encourage anyone to tackle this project if your looking to make a change. This is a cheap, easy DIY project with immediate rewards.
Painting Our Storm Door
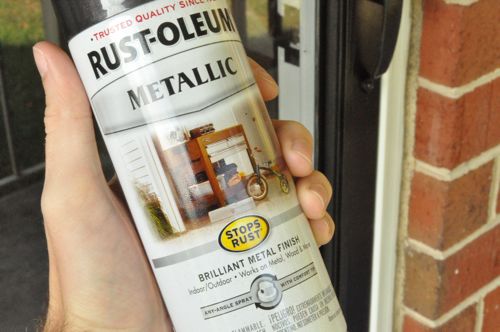
Unlike the front door, we disassembled the storm door because we wanted to use the same Rustoleum spray paint we used on the door hardware. It also allowed us to be more thorough with the paint since we could hit it from all sides. Oh, and I found out the name of the paint for everyone that was asking. It’s called Metallic.
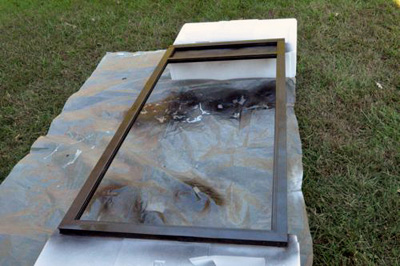
We unscrewed the door from its hinges and setup a tarp and styrofoam painting area.
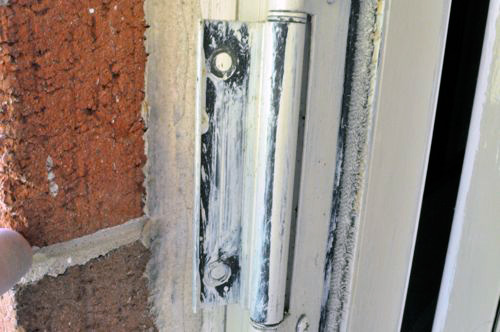
Before we started spraying, I grabbed my grinder and a sanding pad. I used it to smooth out some of the imperfections- mostly dried paint drips. Again, a big thanks to whoever did such a sloppy paint job. The sanding pad did the trick.

You can see Jocie going to town with the spray paint.

One nice thing about using styrofoam is that we could jab stuff into it (like screws) before painting. Here’s a shot of the screws and painted door latch.


After two coats, the door looked really good.
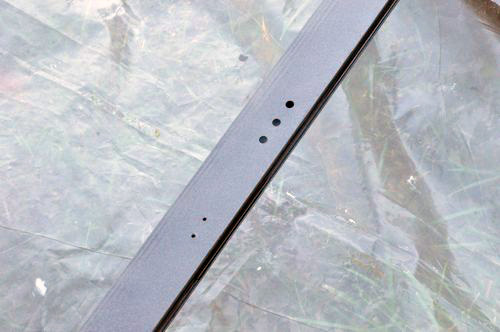
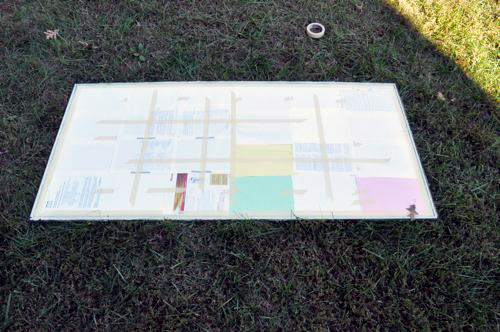
As Jocie painted, I was taping off the glass on the door insert. In my experience with spray paint, if I don’t cover it, I’ll accidentally paint it. You can see I was very thorough.
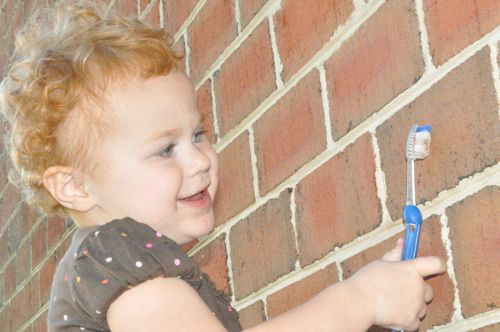
While the door was off, we painted the trim white. Izzie wanted to help so we let her “paint” some of the brick.
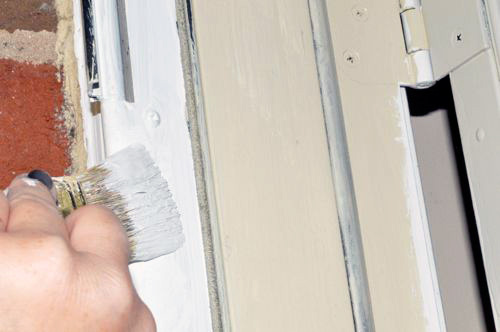
With the past two posts about painting my front door and fixing the door jamb with plastic wood, I’m sure you’ve had enough. Here are a couple more after shots (because I’m really excited with how everything turned out).
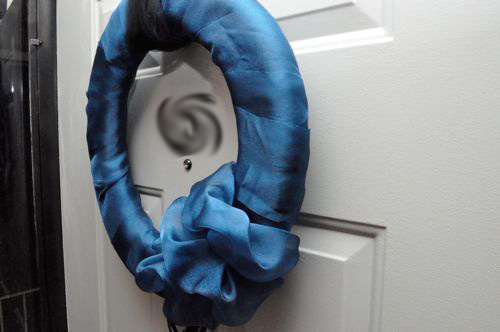

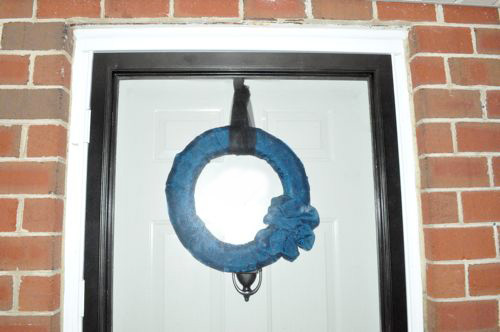

In the words of Captain Obvious, “The way into a home is through the front door,” and everyday Jocie and I were greeted by a dinged up, ugly yellow front door. To top it off, whoever painted the door didn’t put in much effort and it shows. While we’d love to replace our front door, the storm door, and everything else with a sloppy paint job, we’re not prepared to shell out the money for that. So we decided to take our lemons and make our front door look like new again.
I offer exhibit A. Disregard the fake, dress-up pearls in the background. Oh, and we’re teaching Izzie how to spell so that’s why our last name is on the front door in bright letters.
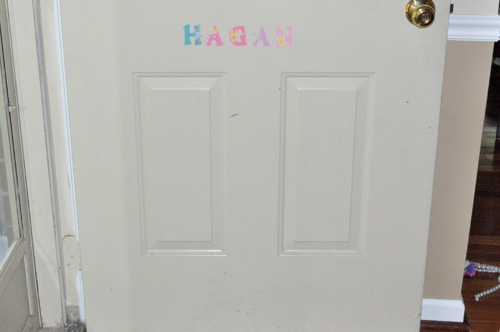
Here’s exhibit B. Notice the junky paint job.
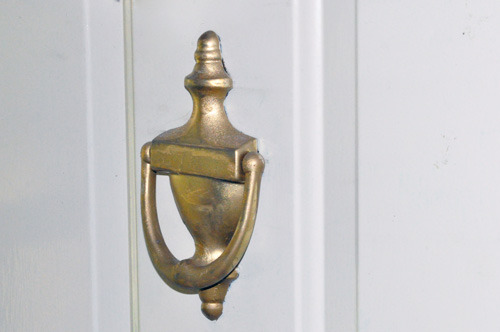
Repainting the Front Door
This project only took a few hours to complete, and that includes drying time. Jocie and I started by removing all the current hardware- the deadbolt, door knob, knocker, house numbers and peephole. If you’re following along, keep everything well organized and grouped together. We reused most of the hardware, and it would have been impossible if we’d have just tossed everything in a bag.
Everything came off as expected. Sometimes deadbolts can be tricky because you need the key to access the screws. The peephole had a pair of grooves for unscrewing it and I found that my pry bar worked well.
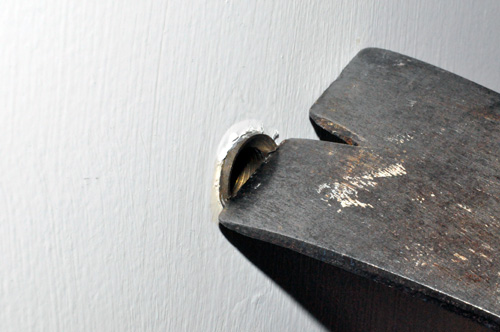
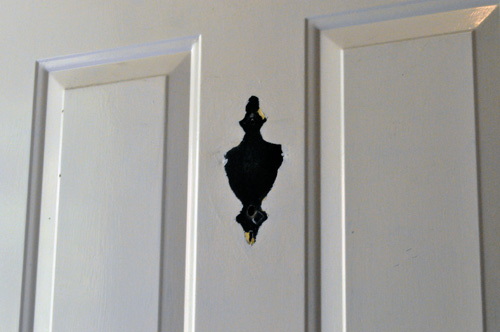
Here’s a picture with the knocker removed.
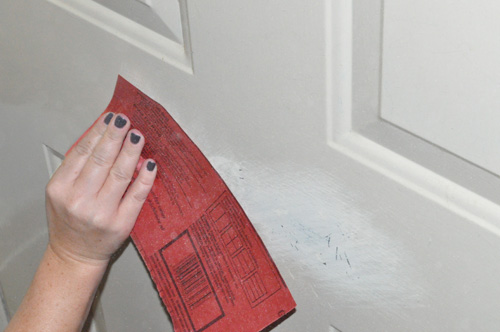
Next, we spent some time sanding everything to smooth out imperfections and clean up the old hardware.
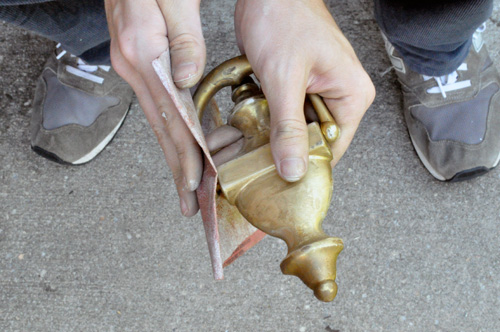
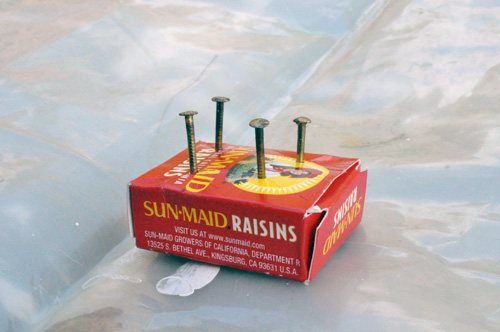
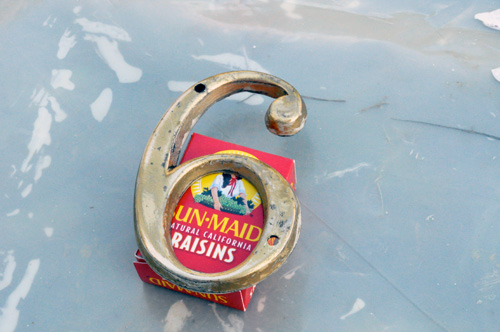
We’ve had a great experience with Kwikset SmartKey, and we decided to buy a new Kwikset deadbolt and door knob with that feature. We chose to reuse the old knocker, peephole and house numbers to save a few bucks. I’m glad we did because after a quick paint job those items look fantastic! You like how we used raison boxes for painting everything?
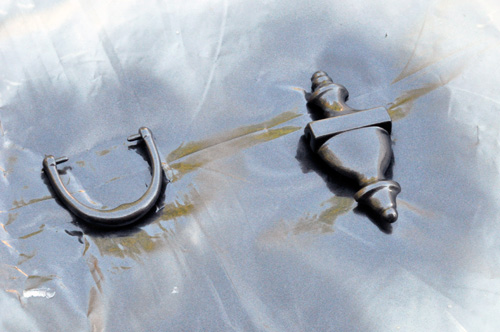
Here’s how things looked after Jocie put on a few coats of spray paint.
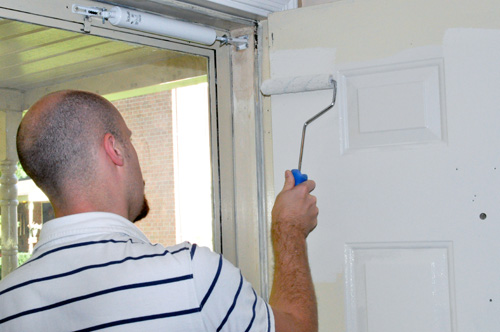
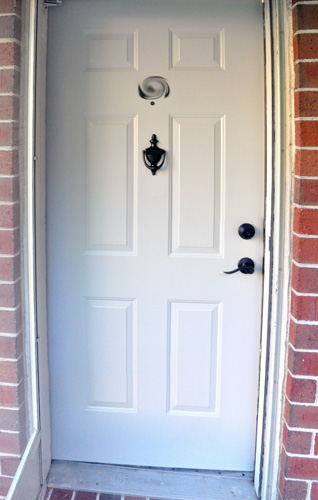
We painted the door a light gray color. It’s nothing dramatic, but it looks fresh and clean.
Lastly, we installed the newly painted hardware and the new deadbolt and lever.
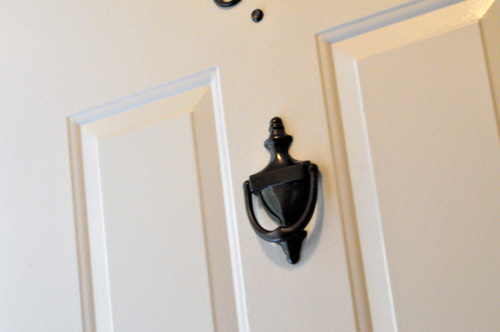
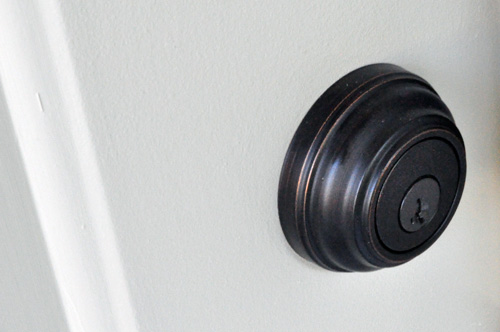
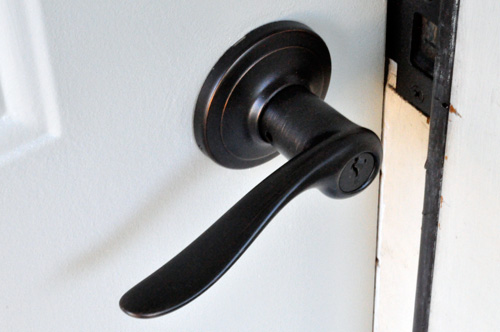
I think it looks really good. In fact, it looks so good that repainting the storm door and door frame may be next on the list. That swirl is our house numbers. I just don’t think we’re at the point in our relationship where I’m ready to share that.

About a month ago I asked all you awesome readers to check out the Shaw Floors facebook page and help me out by voting for the room that Carmen (Decorating Diva) and I created. Well the votes have been tallied, and we won! I’d like to extend a huge thank you to everyone who voted- muchas gracias! Our reward was a three day trip to Chicago to see the Urban Oasis condo, and I’ve actually just arrived back home. It was awesome! And to show some appreciation, I took a bunch of pictures to share the experience with you.
This is the second year that HGTV has offered one lucky winner the chance to win the Urban Oasis. Situated on the 35th floor of the Trump International Hotel & Tower and custom designed by Vern Yip, the Urban Oasis is an amazing 1,000 sq ft residence that includes a master bedroom, master bathroom, main living space, kitchen, powder room, and breath-taking views.
We had a private tour of the Urban Oasis with the HGTV house planner, Jack Thomasson.

The walls are painted with Sherwin-Williams paint from the HGTV Home Global Spice color collection. The green is called Edamame (SW7729) and the tan is called Cardboard (SW6124). The floors are engineered hardwoods from the Epic Hardwood Flooring collection by Shaw Floors.
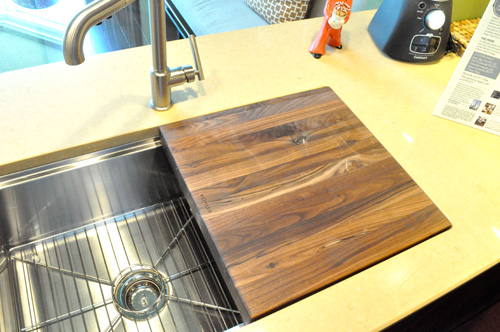
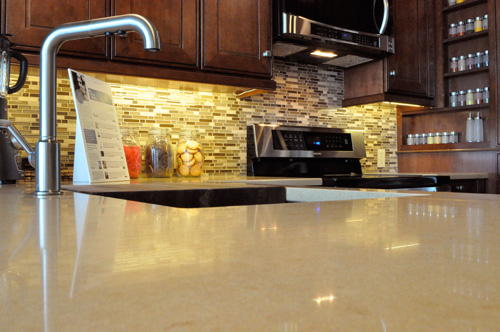
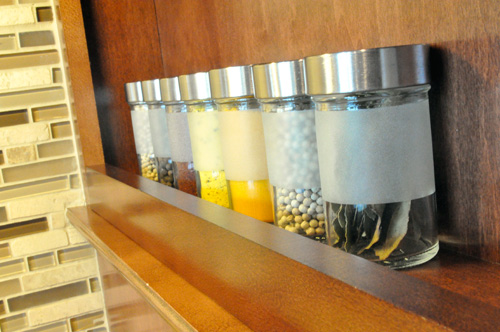
The kitchen is furnished with Cuisinart small appliances, KraftMaid solid maple cabinetry, and a Kohler 33″ stainless steel sink (with butcher’s block) and Purist faucet. I really liked the glass cabinet fronts and open shelf spice rack that provides so much visual interest rather than a wall of storage.

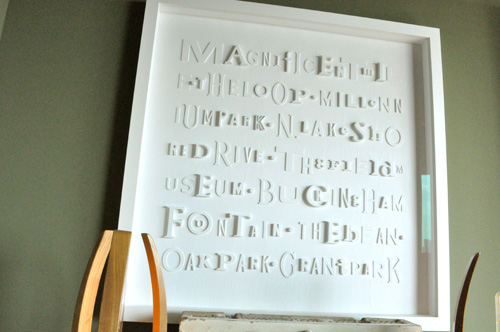
The main living area had a beautiful piece of art called Magnificent Marquee by Todd Mack (Jocie’s favorite that she hopes to DIY) and an awesome “Monorail Lighting Fixture.”

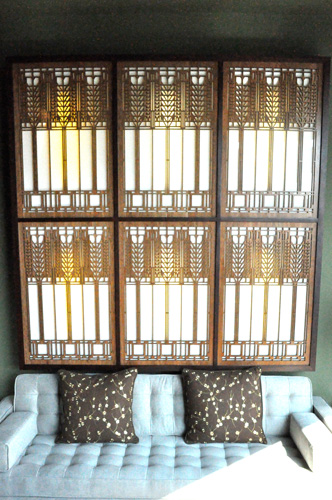
This is a custom mahogany framed sconce created with six “Tree of Life” panels designed by Frank Lloyd Wright.
Here’s a picture of the dining table with a Chrome Schoom Bowl. You can sort of see the reflection of a very cool salvaged terra-cotta eagle and shield from the now demolished Charles Brewer building.

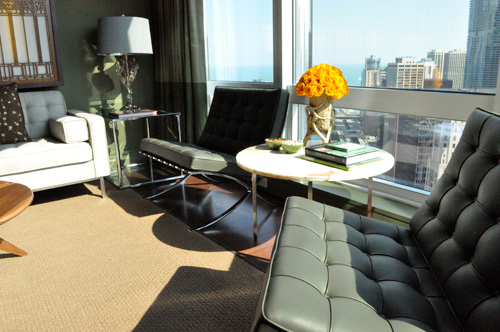
I really liked the small sitting area and how they used the flowers to introduce some bright color.


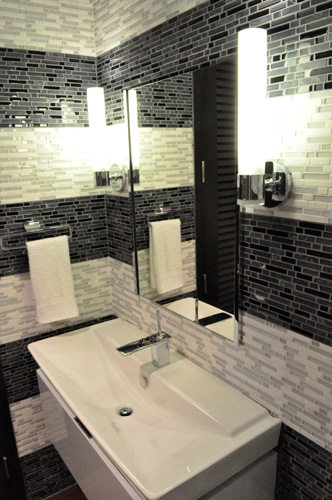
This is the guest bathroom, and tucked behind some louvered doors you’d find a stacked washer- dryer.
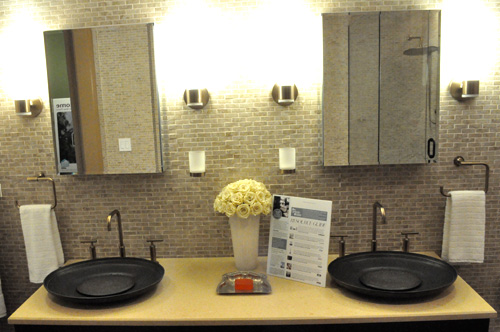
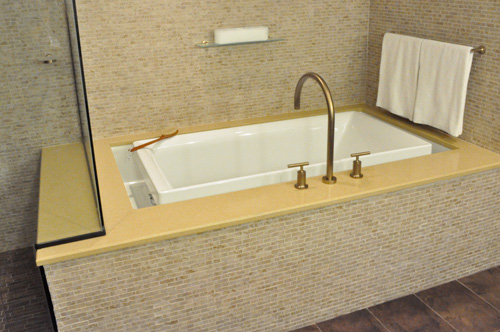
Trump had received a lot of feedback that people wanted a larger master bathroom, and he responded with a disproportionally large space. Check out the Kohler overflowing bath, Saile toilet with dual flush technology, and black walnut wall-mount cabinet.


The bedroom featured beautiful free-hand artisan wall painting by Michael Boudreault. You’ll also see pictures of the canopy bed, a 1940’s sewing desk, and clock.

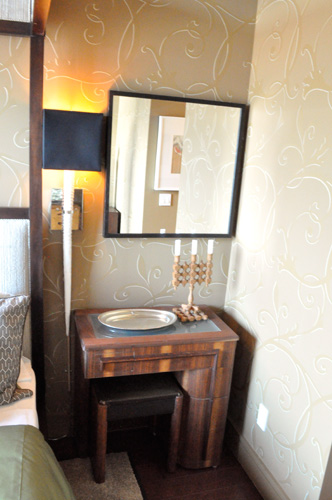


Vern did a wonderful job decorating the space, providing a beautiful integration of modern and vintage while also incorporating the city of Chicago. Vern is known for bringing the outdoors in, and that is really seen in this condo through the use of color but also using decorative pieces that reflect city surrounding. With floor to ceiling windows, the city is naturally a part of the the design but there are also some amazing small touches that really tie the Chicago theme together, like the eagle that came off a Chicago building or the use of tile imitating the brick work found in Chicago architecture. It is evident that every aspect of the design was well thought out, creating a really unique and beautiful space.

This week we are happy to present a bathroom makeover from Carrie at Dream Green DIY. For her hard work, Carrie wins a $50 gift card and the chance to win the grand prize- an additional $150 gift card to the home improvement store of her choice. With this weeks winner, we only have one more before and after story to feature before we open up the voting. Stay tuned for details.

A Swanky Bathroom
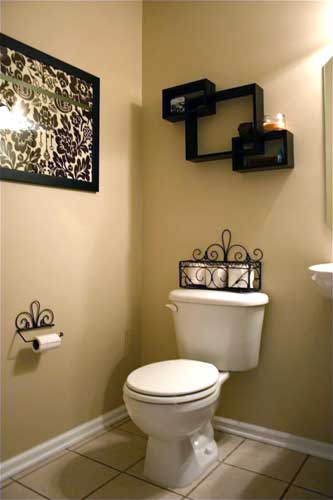
As you may know, we have a half bathroom on the main floor of the house that was in need of some love and some updating. Before, it had plain tan walls and country accents that just weren’t doing it for our style.
So it was “out with the old and in with the new” as they say!
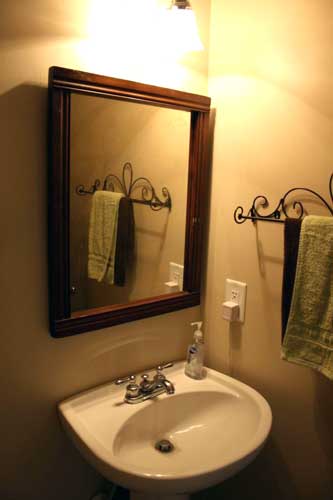
First, the original mirror got kicked to the curb taken down and put in the basement, to be replaced by our newly thrifted one.
We wanted to try to get the rest of the room flipped and completed by Saturday night since we were having some people over for a double birthday party (I share my birthday and age with one of my best friends!). So we hit the ground running Friday night by getting one coat up on the wall of the light grey satin-finish paint we had picked up last week.
It was already MUCH airier and modern!!! It’s amazing what paint can do…
We put on a second coat Saturday morning and took care of some trim issues from when the half bath used to serve as Rocky’s dog crate of sorts (he’s an excitable dog…)
Before:
And now after:
Thank goodness the last owners left behind some trim paint! Admittedly, we tried one can only to have the color turn out a bit “off” (it read more “cream” than “crisp white”)…But John did a second search and came up the with right can – Crisis averted!
Once the second coat of the grey on the walls had dried, it was time to put the room back together!
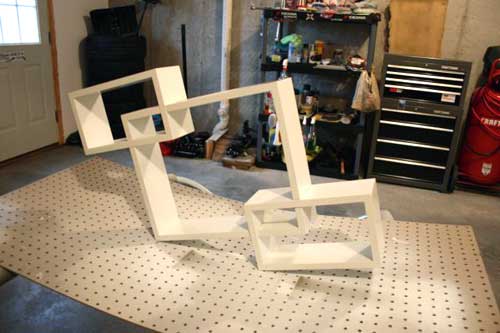
While I was doing wall-painting-duty the night before, John had taken care of some spray painting – We DID decide to paint the thrifted mirror a bright white afterall (along with the square shelves that are in the original “before” pictures of the bathroom).
Here they are dried and ready to be put back up on the wall!
We also needed some art, accessories and new silver fixtures (toilet paper holder and towel ring – Since we got rid of the country-fied, swirly ones).
The art ended up coming from Target – We randomly found the perfect set of three in our color scheme for $10 a piece! I think we can consider this our first “Big Box Store SCORE!”
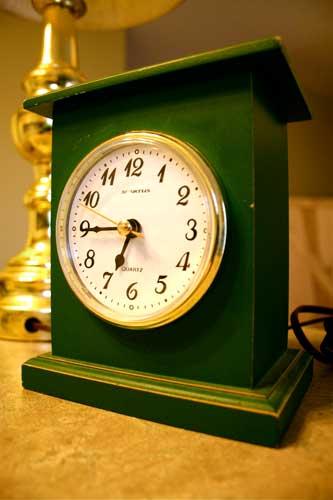
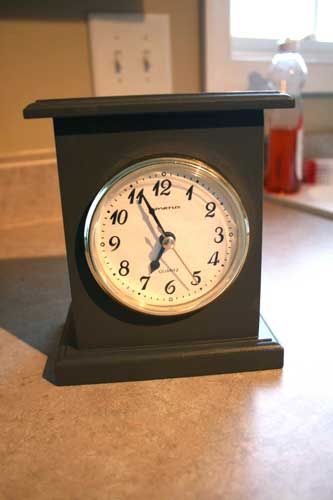
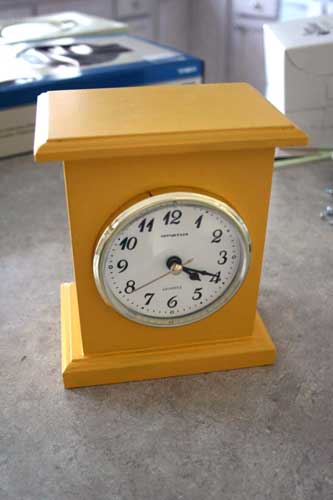
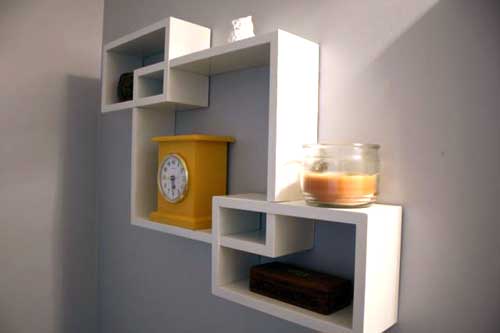
And the accessories were pulled from throughout the house – A couple of owls, a hand carved box John had and a candle. We also gave the thrifted clock I bought a few weeks back a facelift – I know I said that I wasn’t going to touch it, but I couldn’t help it…I actually repainted it TWICE!
Here it is in its original green color:
And then its second life – dark grey:
And now (hopefully) its final life in yellow:
Here are a couple of details once everything made it back into the finished room:
And the final reveal of the room as a whole!!!
It feels slightly hotel-like to us, which makes us feel all swanky…
Thanks Carrie!
I really like the yellow clock and how the bright color draws your eye. Very nice!
Habitat for Humanity Factoid
Habitat does more than just rehabilitate old houses. For instance, they also provide services to ensure families live in a safe, and well-maintained home. The A Brush With Kindness program is just one more way Habitat works to revitalize the appearance of neighborhoods. Here’s more information:
Habitat for Humanity’s A Brush with Kindness is an exterior home preservation service that offers painting, landscaping, weather stripping and minor repair services for homeowners in need. ABWK helps low-income homeowners impacted by age, disability and family circumstances, who struggle to maintain the exterior of their homes, reclaim their homes with pride and dignity.
ABWK serves as a companion to local affiliates’ core building services, enabling them to serve more families and increase opportunities for volunteers and sponsors.
Where’s Your Before and After Story?
We hope you’ll consider submitting a Before & After story. Email your pictures and a “how to” description to beforeandafter@oneprojectcloser.com to join in.
Help Us Spread the Word
Are you a blogger? If you’d like to support us, please write an article on your blog about the contest, and consider adding one of our buttons to your sidebar. You can find the buttons and more information on our main Before and After article.

We’re a little over half way through this year’s Before & After event, and if you haven’t sent in your project, now is the time to do it. The competition is only getting tighter, and time is starting to run out. For your chance to win up to $200 in gift cards, check out the link above and submit your story! If that’s not enough motivation for you, consider that this series benefits Habitat for Humanity.

I’m excited to share today’s Before and After by Shannon from Burlap and Lace. You’ll see that Shannon was able to create a light, fresh dining room on a very limited budget. It’s amazing what a little paint and some inexpensive decor can achieve! As always, we’re happy to reward Shannon with a $50 gift card, and we’ll make a $100 donation to Habitat for Humanity in her honor.
Dining Room Refresh
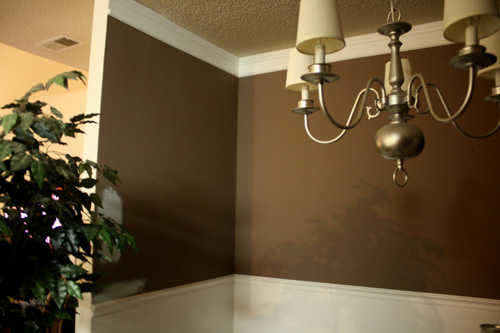
Here are some before pictures…nothing wrong with the room (I actually really liked the brown color), but it was a tad too dark, and not really my style. So, I changed the paint AGAIN, and ended up with a color that I really liked!
Take a look at some “befores”:
Too dark.
Aaaaaannnndddd…..
AFTER!
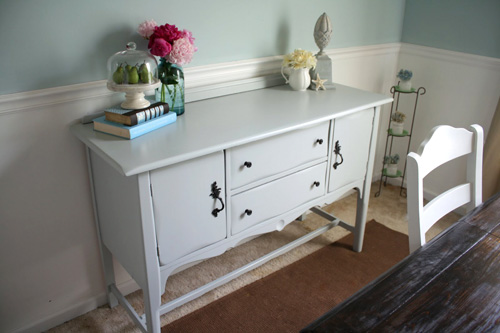
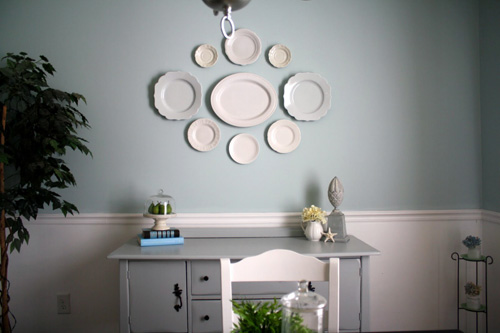
See how much brighter it is?! I got the table and the buffet for a GREAT price!
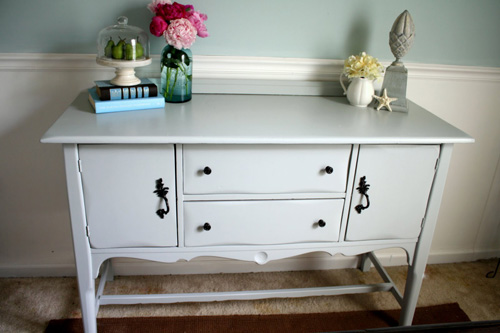
I found the buffet on Craigslist (of course), and talked the man down to $65. I sanded it an painted it a gray/ blue color that I mixed myself (I’ll share the before pics in another post).
I have always wanted one, and after getting a shorter table and rearranging the layout of the room, I realized that I could fit one! So, I hunted for MONTHS until I found one that I could afford (I’ve only found them for around $300+).
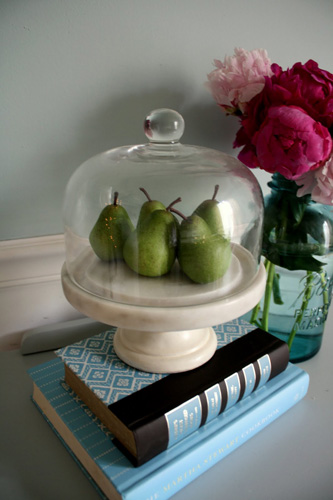
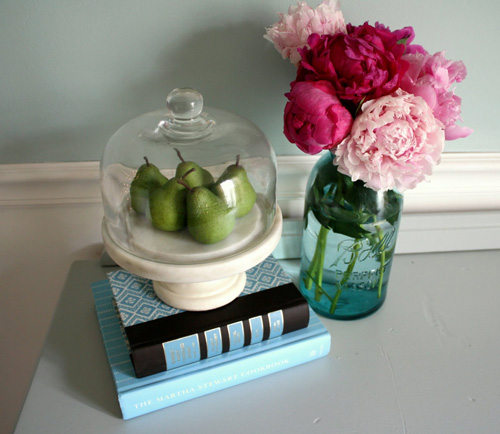
I made this cheese dome cloche just like Alison at House of Hepworths. I found the marble base and the cloche at a thrift store for $3, and the candle stick was a .69 cent Goodwill find that I sprayed with some Heirloom White!
Husband brought home these peonies (my favorite!) for me from work last night, so I just HAD to stick them in a mason jar, duh.
Drawing a little inspiration from good ‘ol Martha!
I found this mini pitcher at Ross for $1.99, and the finial is a Goodwill find from this post.
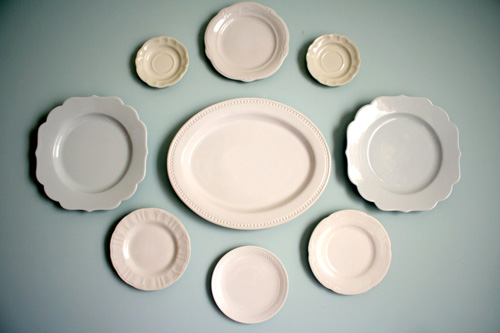
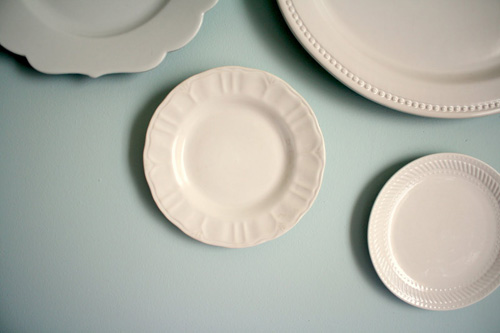
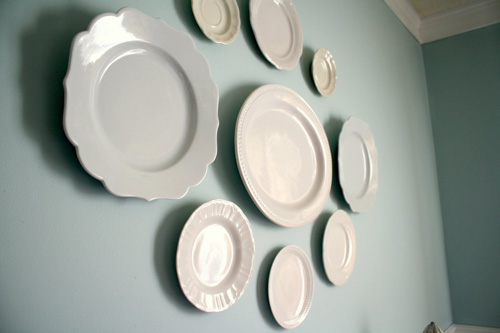
I have ALWAYS wanted to do a plate wall, so I’ve been gathering white plates from yard sales and Goodwills. I found most of these from Goodwill; the platter in the middle was a wedding gift, and the two matching scalloped chargers on either side of it were a Z Gallerie clearance find.
The hanging of the plates went a little something like this:
It was a dark and stormy night. The young blonde girl stared at the blank wall in despair. The clock clicked over to midnight. Where was this DIY-er going to find plate hangers at this hour?! “Aha!” she exclaimed, as she pulled out the glue gun. With twine cut to its appropriate length, the young girl then proceeded to glue, and glue, and glue until she could glue no more (literally, she ran out of glue sticks). Finally, all of the plates looked like this from the back:
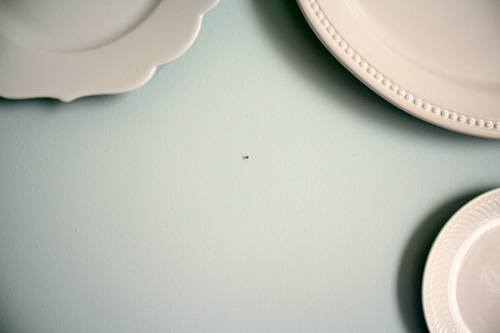
The girl then (ever so gently, so as not to wake the neighbors or the sleeping husband) hammered finishing nails into the wall, eyeballing as she went. “This is going to be a hot mess!” she exclaimed, but stupidly continued hammering anyway.
After the last nail was hammered and the last plate was hung, the young girl held her breath…
…and is still holding it, two weeks later.
THE END.
Ok, so that was a bit dramatic, but it’s exactly sort of how it happened.
I spotted this tree at someone’s curb, and after screaming “PULL OVER!” and nearly yanking the steering wheel out of husband’s hands while he was driving, we loaded it up in our car and didn’t look back.
I added fresh moss to the bottom, some dollar store christmas lights to the top, and spray painted the basket ORB.
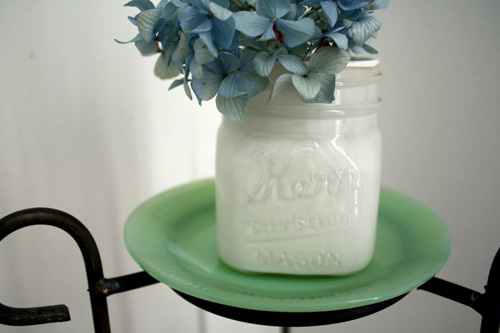
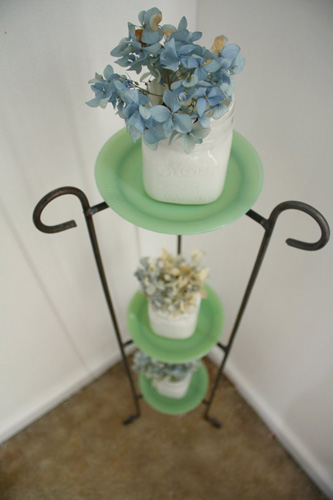
My painted mason jars from this post!
The plate stand was a Goodwill find for one dollar, and the Jade plates were from a thrift store.
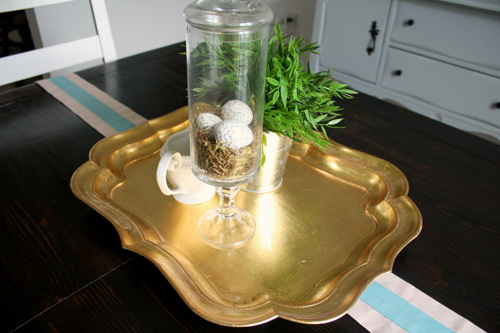
My .30 cent gold tray from Hob Lob, and my dollar store vase turned hurricane glass!
I Mod Podge’d the eggs with strips of pages from a book, and filled the vase with moss.
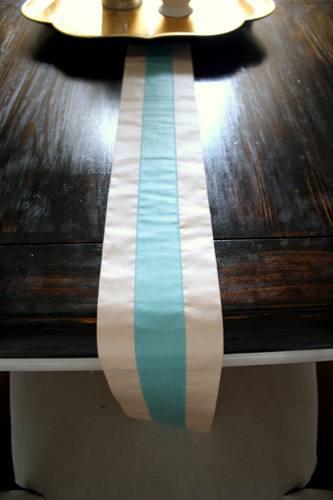
The runner was a Goodwill find in the linens sections. It’s about 10 feet long, and I have no idea what it is, I just liked it. I shortened it to the length of the table, and it looks great!
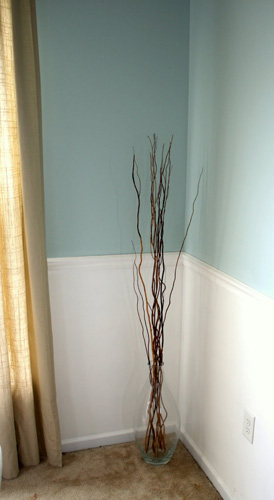
This lonely corner got a glass vase and some sticks. I’m still on the hunt for a small half-moon occasional table for that wall.
So, there ya have it! Lighter and brighter!
Here’s the cost breakdown:
- Table and four chairs: $25 (husband bought it at an auction for me!)
- Buffet: $65
- Paint for walls: already had
- Paint for table: $12
- Stain and Poly for table: $10
- Drop Cloth for recovering chairs: $11
- Decor: already had lying around
- Curtains: $3.99 a panel in the Ikea “As-Is” section ($8 total)
- Rug: switched from the living room
- Total: $131 for the makeover!
I’m planning on selling the other furniture that was in this room the re-coup (or make more than) the money I spent in this room.
Dontcha love a good deal?!
Thanks Shannon!
This is a great B/A, and I really liked the mason jars. That seems like a uber-simple, quick project. Maybe I’ll look for some at my local Goodwill store.
Habitat for Humanity Factoid
If you want to read a true Habitat success story, check out this article about Jed Hefner and family. In 1990, when Jed was 7 years old, he and his family moved into a Habitat house. They mark that moment as a turning point in their lives, pulling Jed, his sister and mother out of a desperate situation. But the story doesn’t stop there. In 2008, Jed’s mother passed away, and he and his sister decided to donate the house back to Habitat! That house has since been re-dedicated to a new family, and hopefully it has the same amazing impact that Jed and his family experienced.
Where’s Your Before and After Story?
We hope you’ll consider submitting a Before & After story. Email your pictures and a “how to” description to beforeandafter@oneprojectcloser.com to join in.
Help Us Spread the Word
Are you a blogger? If you’d like to support us, please write an article on your blog about the contest, and consider adding one of our buttons to your sidebar. You can find the buttons and more information on our main Before and After article.

This morning I shared how I was recently invited to beautiful Ashville, North Carolina to learn about the new HGTV line of flooring by Shaw. It was a ton of fun, and I really enjoyed connecting with other bloggers that I had not met in person. But this post is about contraband, not hanging out with other bloggers.
While in North Carolina, we took a tour of the Biltmore Estate, a lavish home built by George Vanderbilt in 1889. We saw tons of bedrooms, bathrooms, fireplaces, an indoor swimming pool, gymnasium, bowling alley, and more. Unfortunately, they don’t allow you to take pictures inside the house. Well darn! This is where HGTV / Shaw employees should stop reading.
Here are some innocuous shots of the building and front entrance.

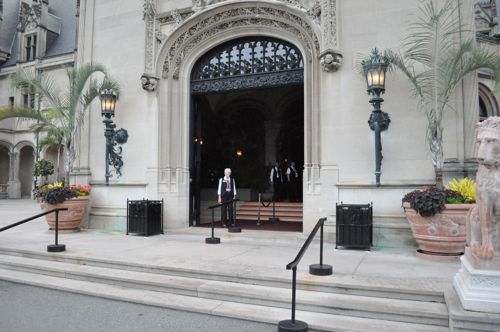


Does anyone else think this lion looks sad?

If I built a giant house, I’d have gargoyles too.


Inside, I stowed the SLR camera and broke out the iPhone. It was tough to be all ninja and still get good photos, but I think I did alright.
We started out in a garden area. The plants weren’t exciting but check out that glass roof!

In fact, I saw several intricate ceilings like this one:

Here’s a look at a true man-cave complete with a couple billiard tables, and secret doors to the gun room and smoking room.

And check out the ceiling in here! Don’t worry. Not all of my secret photos are of the ceiling.

Next, we saw the dinning area, and what dinner isn’t complete without organ music….

and tapestries.

This was one of the many room for entertaining. I wasn’t able to get a photo but Mr. Vanderbilt owned Napoleon’s chess set. I wonder if Napoleon was any good…

And again, check out this ceiling. It’s frickin amazing.

I couldn’t resist getting a shot of the bowling alley.

Mr. Vanderbilt married Edith Stuyvesant Dresser in 1898 and this was her room.

Can you spot me in the mirror?

These photos only represent a small portion of the house. It really was a magnificent building, and I was struck by how forward thinking Mr. Vanderbilt was for his time. The house included things like electricity, indoor plumbing, and other cool facts that I can’t remember.

Last week I attended a media event sponsored by Shaw Floors to announce a new line a flooring. Shaw and HGTV are pairing up to bring you the new HGTV Home line complete with laminate, hardwood flooring, carpet and area rugs. To celebrate the kickoff, Shaw had several bloggers down to Ashville, North Carolina, and we got to create an entire room from scratch! You might think that isn’t very interesting, but imagine walls moving at your whim, light fixtures appearing as if from magic, and all the home furnishings you could ever want.
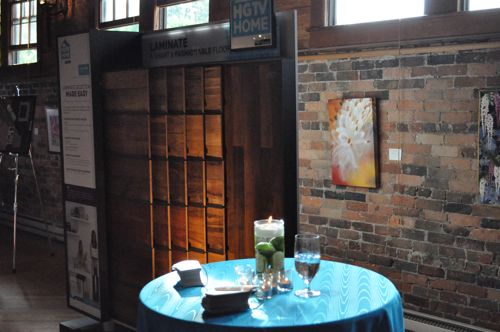
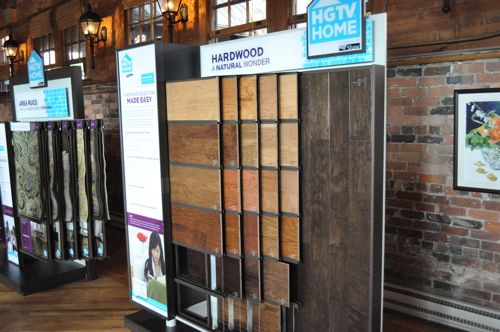
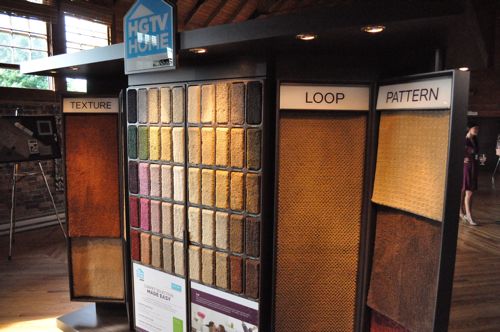
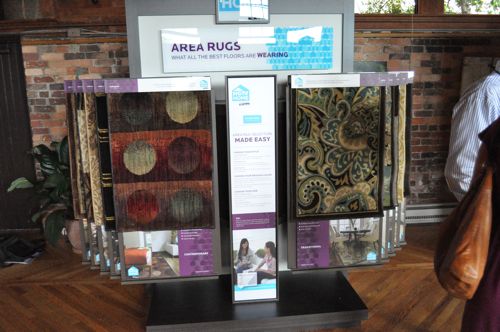
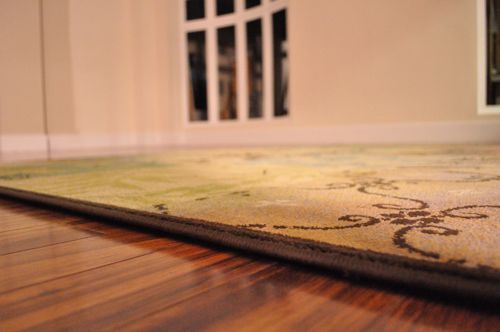
They partnered us up and I had the luck of working with Carmen from The Decorating Diva. We started by selecting a floor, and I was fortunate enough to draw the laminate / area rug card. Choosing a laminate was difficult because they had a lot of great options. They looked just like wood, and you couldn’t tell the difference until you walked on them. After much deliberation, I selected the Chrystalline laminate in Oregon Trail Ash and Orleander breeze area rug.
Here’s a teaser photo of my choices:
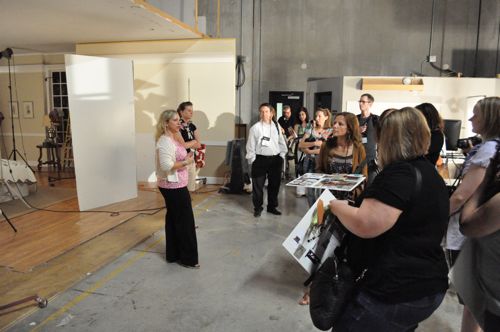
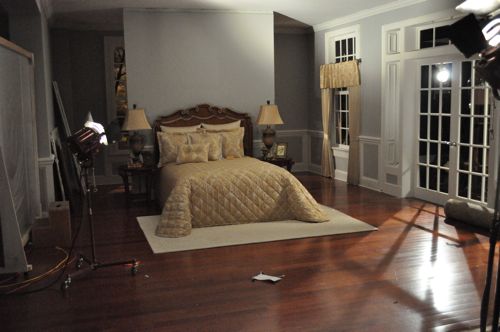
We got a brief tour of the Tribuzio Hilliard Studio and even saw a few bays already set up for the photo shoot. I’ll never look at a magazine spread the same. It’s crazy how they are able to manipulate light, hide defects and make everything seem so real.
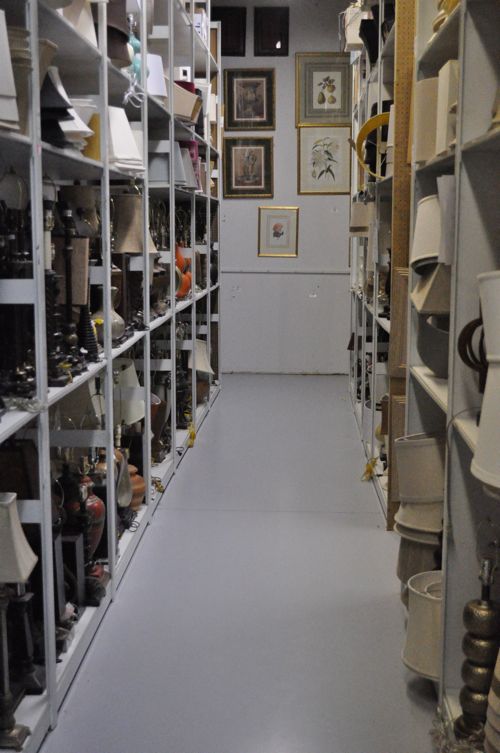
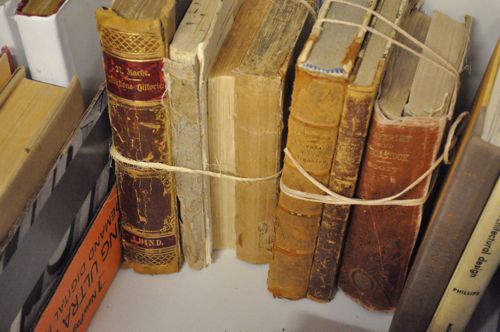
They had so many different pieces of home decor. It was like a cross between BJ’s and Home Goods.

On a bus ride, Carmen and I worked through our vision for the room. We wanted a living room that was young, trendy and welcoming. It was important for everything to not only be sophisticated, but also functional. Working with Loura Lockwood, a senior designer at the Tribuzio Hilliard Studio, we went about making that a reality.
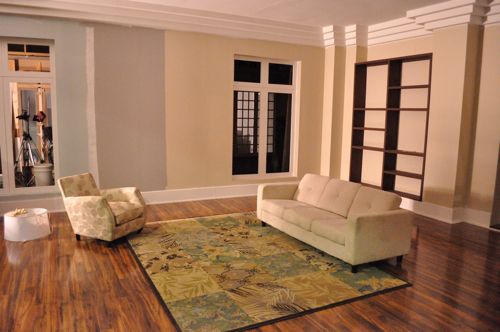
Here’s our area, with the laminate installed (overnight) and the 8×10 area rug. You can see we’ve already started moving in the bigger pieces of furniture.
We wanted a fireplace, so they brought one out.
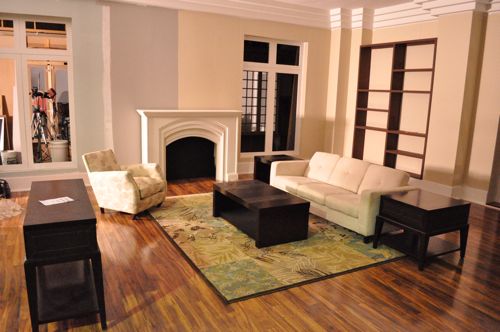
And we grabbed some of the bigger accent pieces. Notice the wall that appeared out of nowhere?
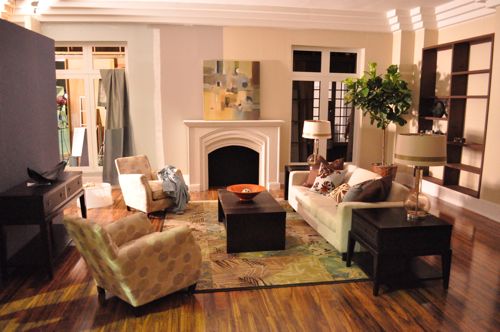
That night, they painted the room for us. We chose a neutral beige for the walls and a pale greenish- yellow for an accent.
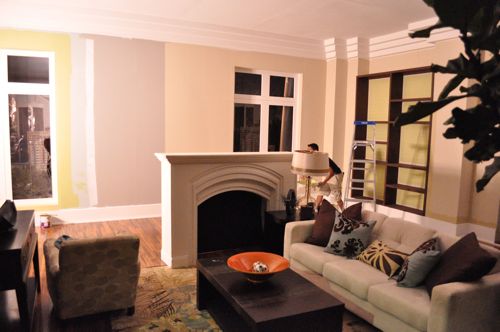
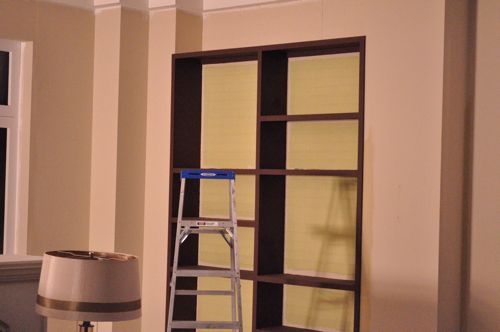
From there, it was a lot of running back and forth to grab things like paintings, place settings, vases, clocks, lamps, mirrors, and more. They even provided fresh flowers.
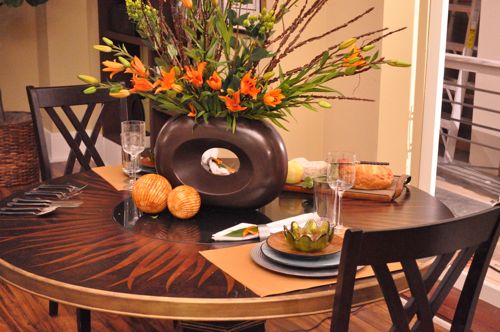
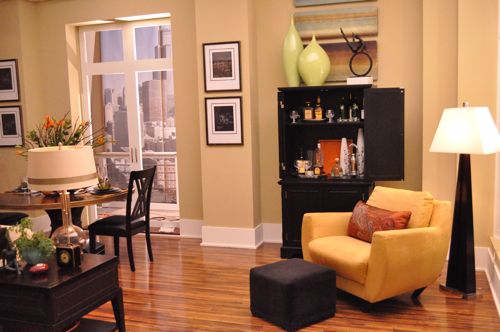
See that chandelier? It’s actually two different light fixtures with an extension cord just off-camera, and it wasn’t there five minutes ago.
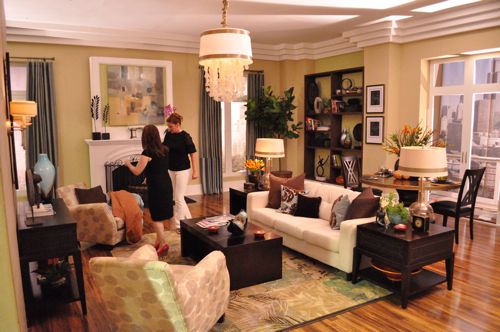
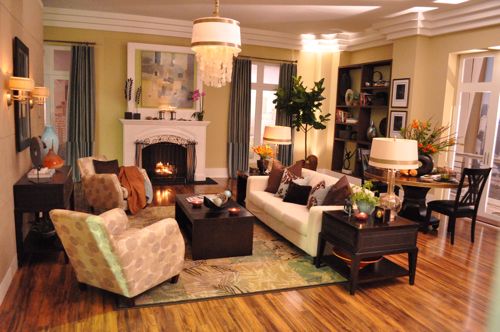
I was really proud of the finished product. Check out the faux fireplace. That’s real flame created with a little lighter fluid- perfect for two minutes of ambiance.
The fun doesn’t stop here. Shaw will be providing professional photographs of our room along with the other blogger-inspired spaces. When they do, readers will vote for their favorite and have a chance to win an area rug for themselves. More details to come!

