
I’m back with another Pro-Follow update, and today’s article focuses on waterproofing a leaky deck ledger board. A few years ago, Fred and Kim had their small deck replaced with a much larger one. It’s a beautiful deck. Unfortunately, the contractor did not properly flash the ledger board, and Fred discovered a leak in the basement. If you’re a regular reader, you know that Fred and Kim have hired Joe Bianco to remodel the basement, and part of that remodel is to permanently address the leaky ledger board.
When the deck was built the contractor should have at least installed metal flashing above the ledger board (not to mention a waterproof membrane behind the ledger and silicone on the bolt heads). This didn’t take place, and Fred found a leak where the old deck was situated. As a temporary fix, he loaded the area with silicone to divert water away from the house, and it worked. Now Joe is providing a more permanent solution.
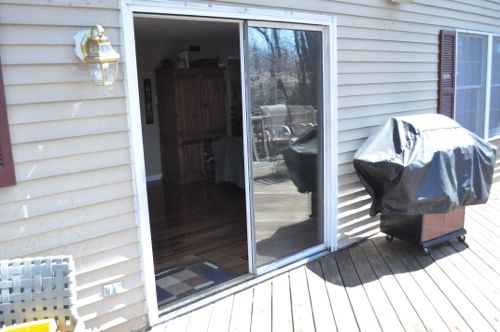
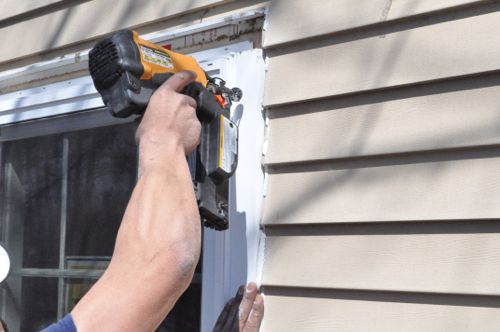
Step 1: Replace Old Sliding Glass Door
Fred and Kim are having the old sliding glass door replaced as well. It’s not part of the problem, but this was an ideal time to remove the old slider and install a new one. If you’re considering replacing a patio door, click that link for a detailed tutorial.
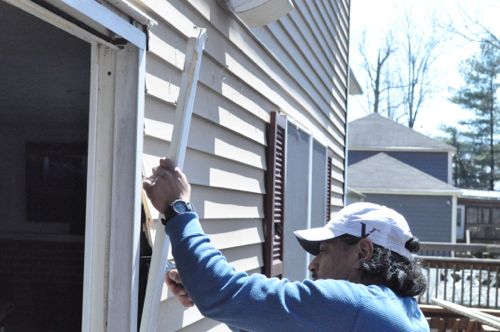
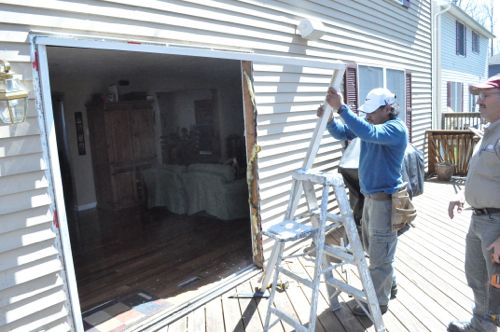
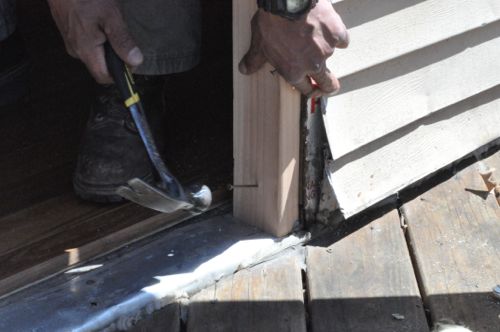
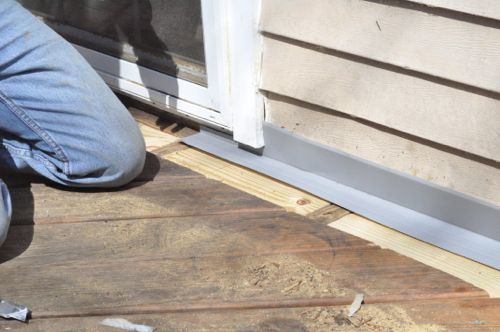
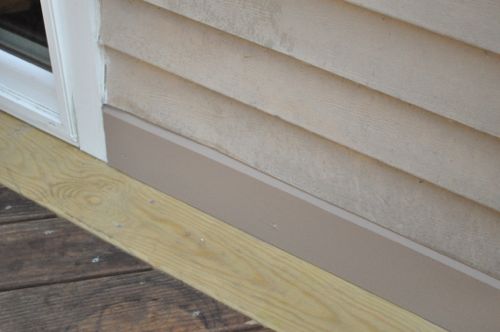
Joe and Frank removed the old door, frame and sill plate.
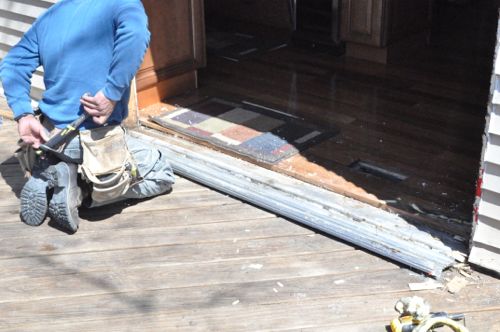
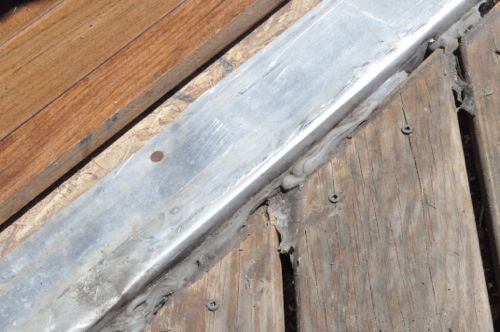
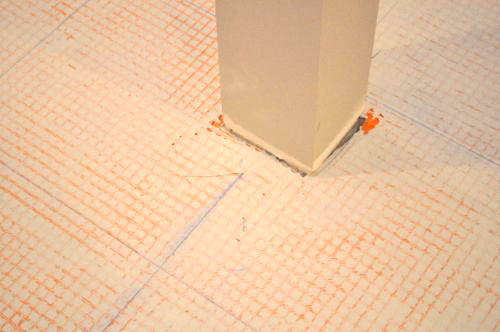
You can see the door was flashed so that was not the source of the leak. This picture also shows the silicone Fred used to seal the top of the ledger board.
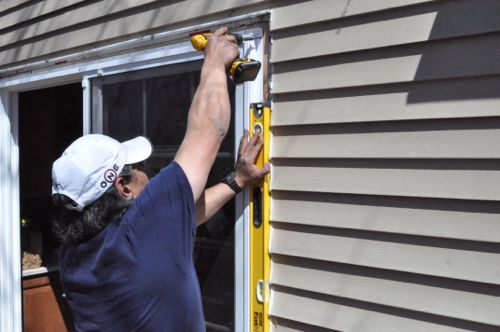
Joe and Frank framed out the rough opening, sealed the sill plate with waterproof adhesive moved the new door into position.
They leveled the door and screwed it into the rough framing.
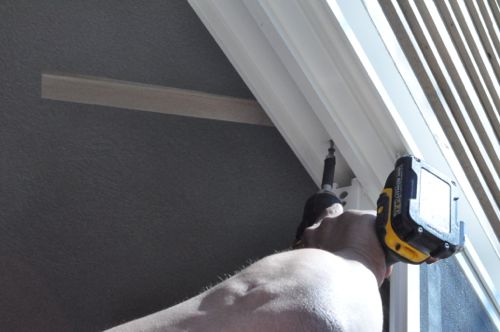
Next, the guys trimmed the door opening with PVC boards.
With the door (mostly) finished, the guys moved on to address the deck.
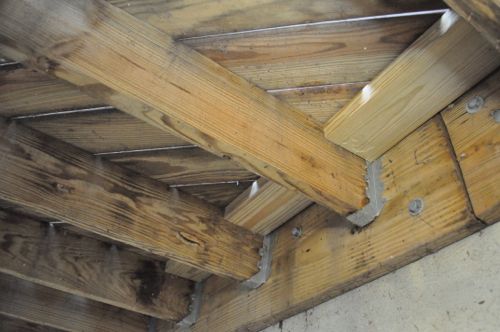
Step 2: Block Underside of Deck
When Joe’s crew did a little framing inside the basement, he also had them add blocking between all the deck joists.
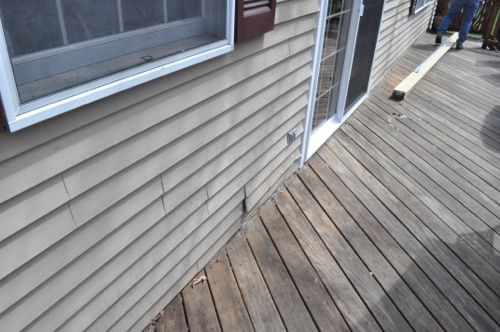
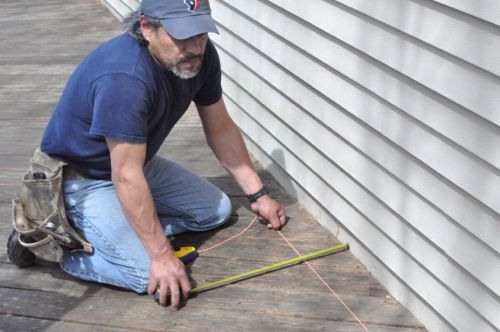
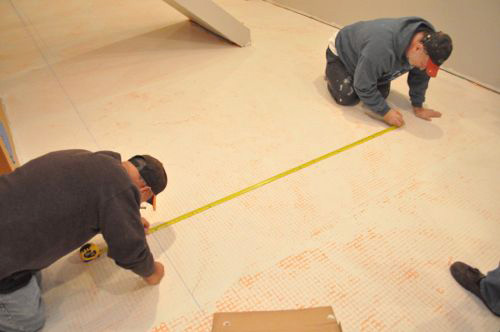
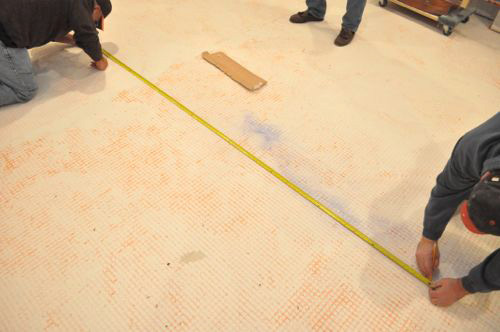
Step 3: Measure Board Width Off Siding
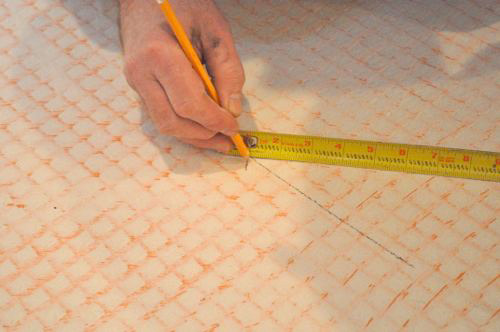
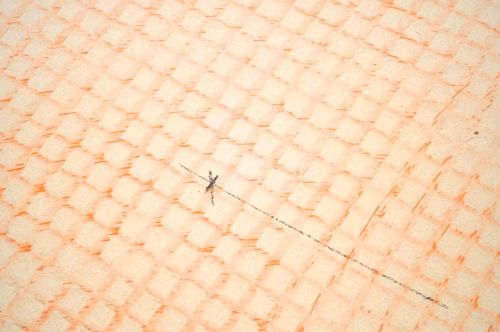
Next, Joe and Frank measured off a board width from the house and snapped chalk lines.
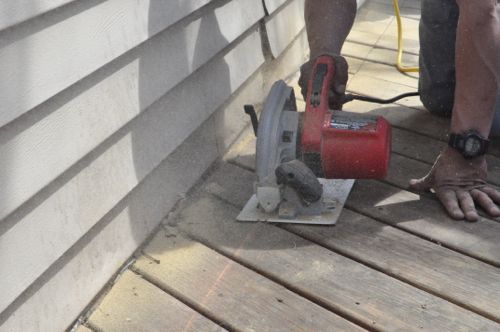
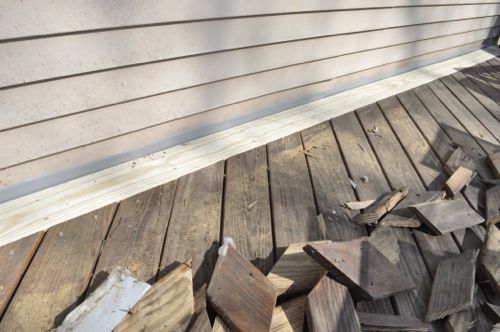
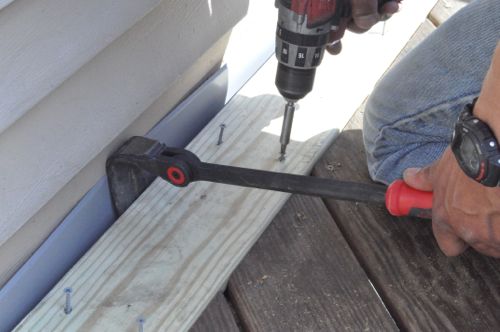
Step 4: Cut and Remove Deck Boards
Frank set his circular saw just deep enough to cut through the deck boards, and he made the cut along the entire length of the deck.
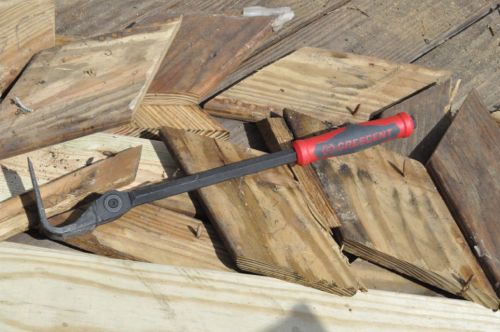
The guys used this Crescent 18″ indexing pry-bar to pull up all the pieces, and it was perfect for this.
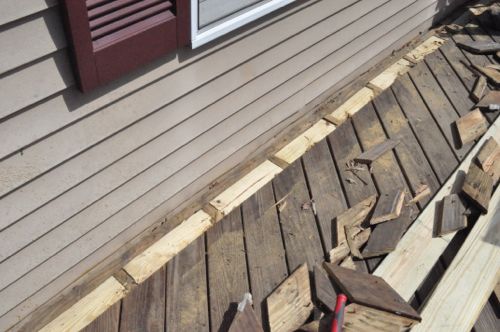
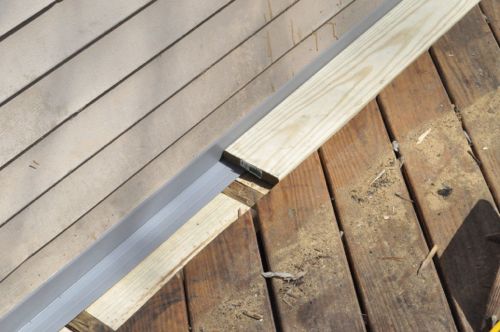
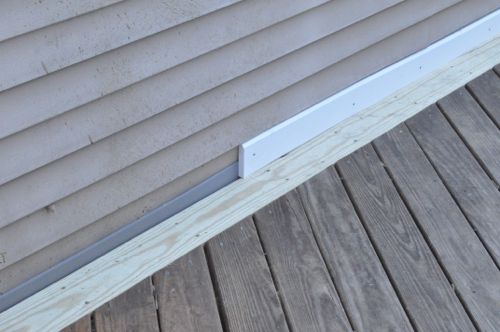
Step 5: Fit New Flashing
Next, Joe and Frank fit new flashing along the house, overlapping with the door flashing.
They also put the new deck boards in place.
Step 6: Screw New Deck Board
Joe and Frank screwed the new deck board and the old deck boards to the blocking underneath.
Pro-Tip: All the fasteners are rated for exterior use.
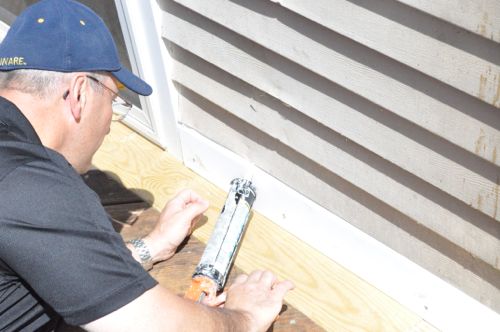
Step 7: Cut and Screw PVC Board
Next, the guys cut a chamfer on some PVC board and ripped it to fit just underneath the previous course of siding.
They screwed the PVC in place.

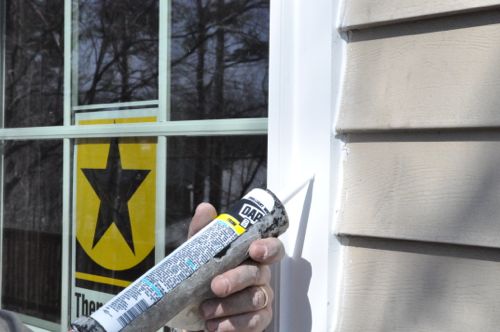
Step 8: Seal Edge
After that, the guys sealed the upper edge of the PVC board with silicone.
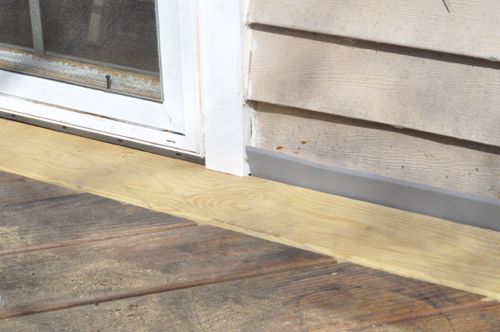
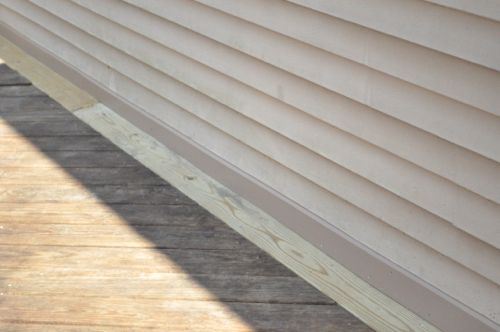
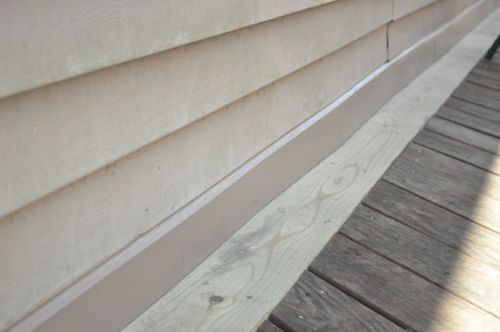
Step 9: Prime and Paint
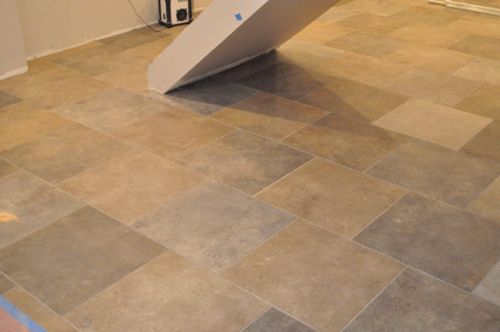
After priming and painting the PVC board, it blends in well with the siding. The new deck boards stand out now, but that’ll change after they weather some.
Grouting tile joints is last step for installing a tile floor, and what better way to learn than from two seasoned, professional tile installers. Jim and Rich are the guys from Diamond Tile located here in Maryland, and each of them have over 27 years of experience laying tile. Last week they finished the floor in Fred & Kim’s basement. They shared the details with me for grouting tile and achieving a beautiful tile floor. In today’s Pro-Follow you’ll learn about the tools and products they recommend, mixing grout, spreading grout and finishing the tile.
Already laid your tile and now need to clean those grout lines? Practically Functional has some great tips on how to clean grout with her homemade cleaner!
Tools & Materials
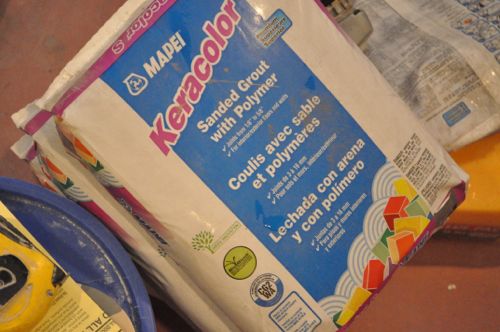
Rich is using Mapei Keracolor S which is a cementitious grout with a polymer additive. The additive helps the grout dry harder and resist stains. This is a sanded grout, and Fred & Kim selected a grayish color.
Pro-Tip: Sanded grout is appropriate for tile joints 1/8″ to 1/2″ wide. Smaller joints should be grouted with un-sanded grout.
Pro-Tip: Mistakes are more noticeable with darker grout while lighter colored grout will blend and hide imperfections.
Grouting tile only requires a few tools, and Rich is using a small trowel, grout float, sponge and a bucket of clean water. He also used a drill and paddle mixer to mix the grout.
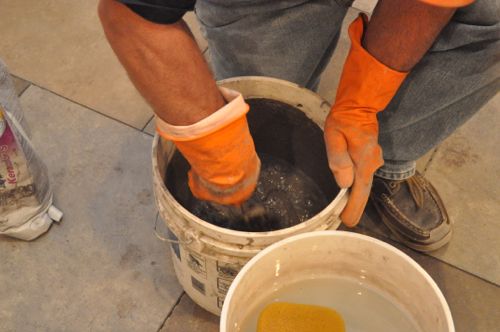
Pro-Tip: Wear gloves when applying grout because the sand and lye can cause skin irritation.
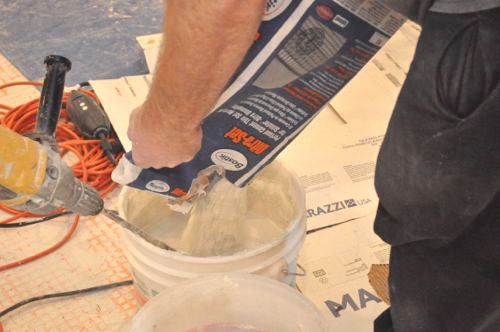
Step 1: Mix the Grout
The most common mistake when grouting tile is failing to properly mix the grout and water. If the grout is too thick, it will be extremely difficult to work, and if the grout is too thin, it will not adhere to the tile and easily chip away.

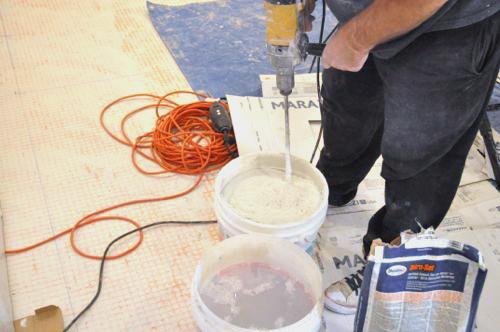
Rich thoroughly mixes the grout with a paddle mixer, and he targets a creamy paste consistency and uniform color. After the initial mix, he lets the grout slake for about 5 minutes, and then he remixes everything to eliminate any air bubbles. Also, while Rich is working he will periodically remix the grout; however, he does not add any more water.
Pro-Tip: Well-water can cause grout to effloresce resulting in a white haze.
Pro-Talk: Slaking is the process of leaving the grout undisturbed to allow the water to completely penetrate the dry ingredients.
Pro-Tip: It’s important that the grout be mixed completely through. Otherwise, there may be some color variation. Mix separate batches with the same proportions to help achieve consistent color throughout.
Pro-Tip: Depending on the room temperature, most grout has a 30 minute window of work time. Mix as much grout as you can spread in that time period.
Pro-Tip: Black and gray colored grout will permanently stain paint and the grout float used to apply it. Lighter colored grout can be wiped away.
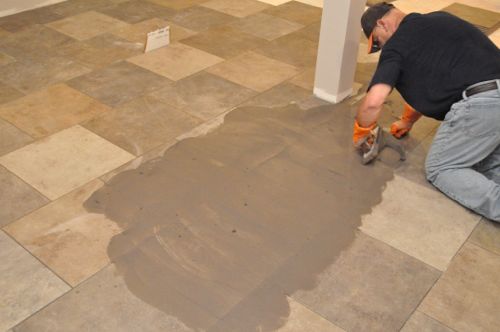
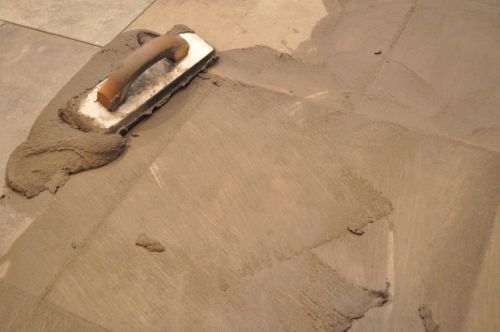
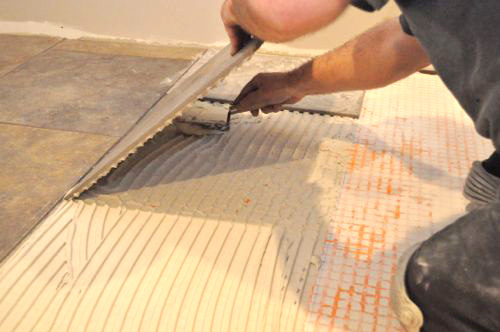
Step 2: Spread Grout
Rich started on one side, spreading the grout with a grout float.
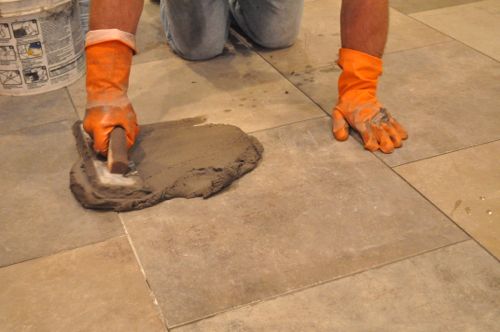
Pro-Tip: Slightly moisten the tile before grouting to make it easier to spread.
He spread the grout across a section of tile and forced the grout into the joints.
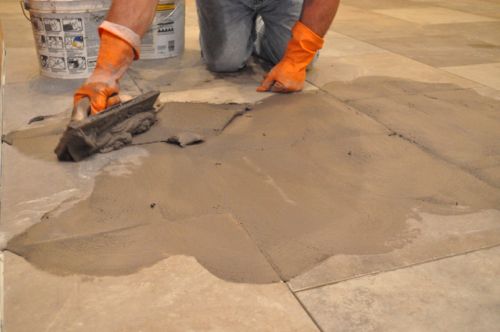
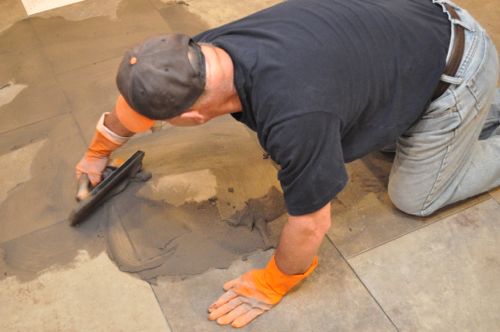
Rich used the grout float to pack the joints tight and eliminate voids, and after that he used the float to remove excess grout.
Rich held the float at about a 45°, sweeping the grout up and down in short passes.
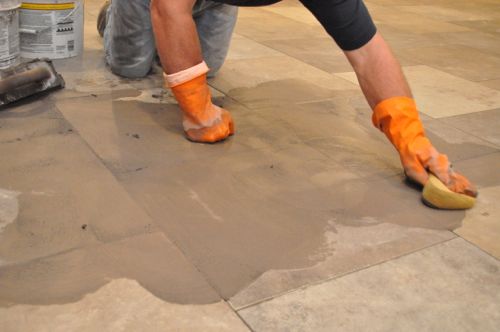
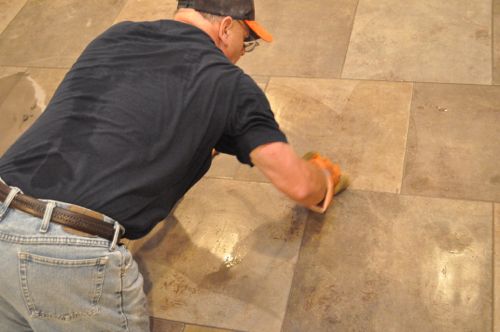
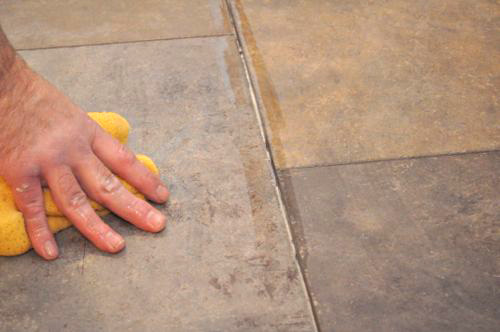
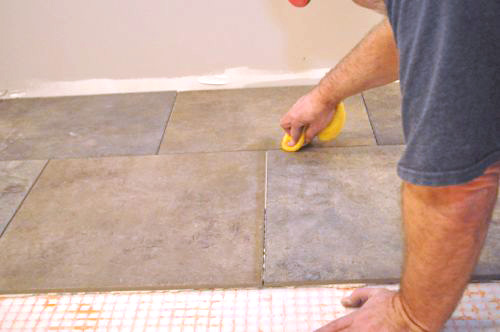
Step 3: Sponge Joints Clean
Using a damp (not soaking) sponge, Rich cleaned the face of the tiles with a circular motion.
Pro-Tip: Wait about 15 minutes for the grout to firm up before sponging clean. Otherwise, it’ll pull the grout out of the joint.
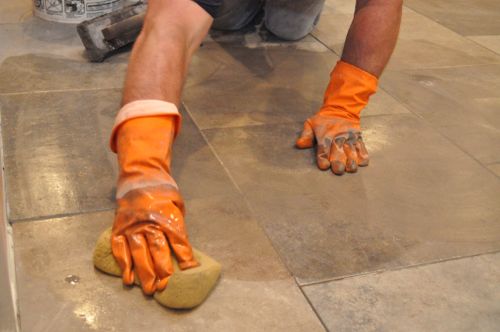
After the first pass with the sponge, Rich went back and cleaned the tile and joints a second time, wiping at a slightly diagonal angle to the joint.
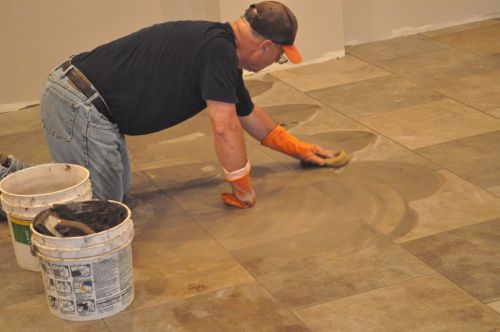
Step 4: Repeat Spreading Grout and Sponging Clean
Working in these small sections, Rich finished off the floor.
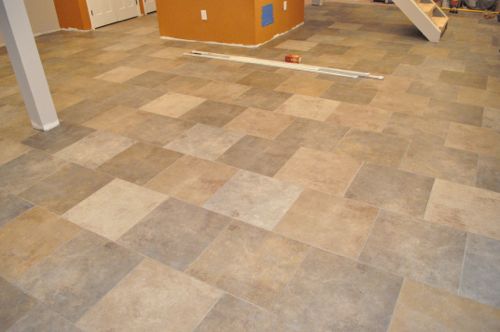
Step 5: Let Dry
The grout will need about 24 hours to dry and harden before the floor is ready for foot traffic. Jim and Rich feel that sealing the grout is usually unnecessary because the protection is short-lived, and the grout will still need to be cleaned periodically. They advise sealing the grout only in areas that will be prone to stains.
Pro-Tip: If after a few hours a slight haze appears on the face of the tiles, it can be buffed off with a dry towel or cheesecloth.
Pro-Tip: Mapei recommends waiting 21 days for grout to fully cure before regular cleaning.
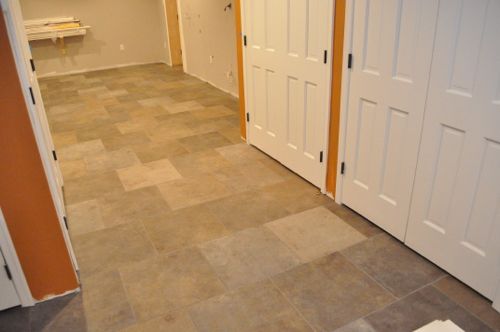
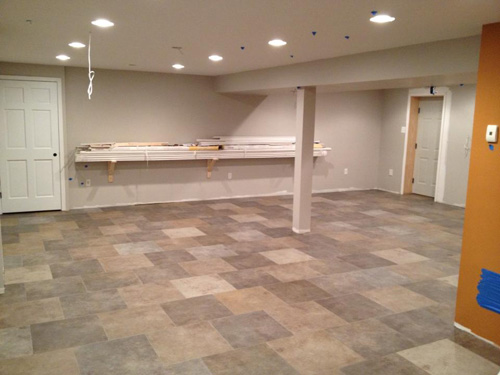
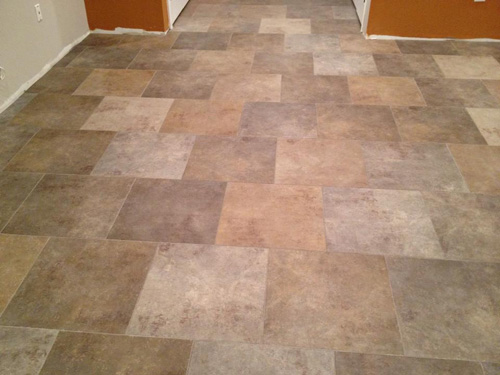
Finished

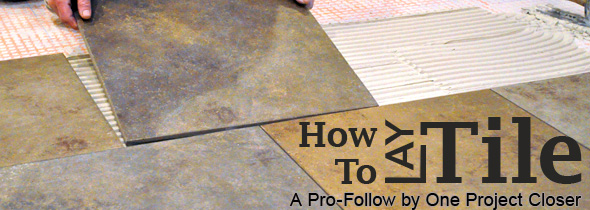
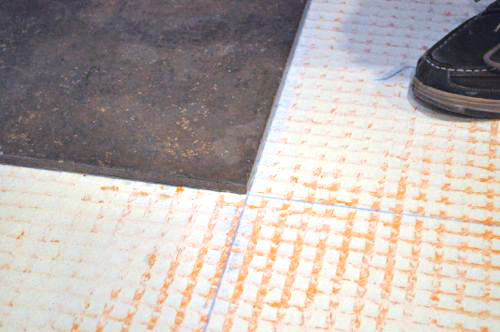
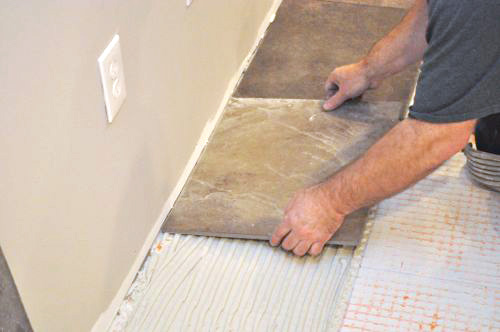
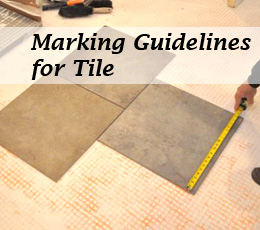
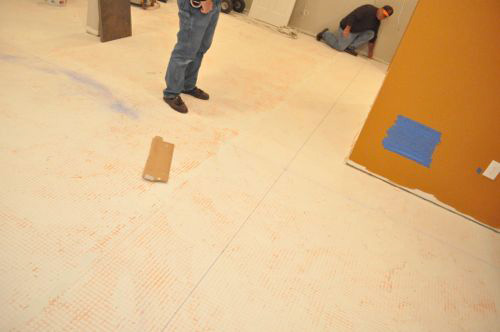
If you’re just joining us, we’ve been working through a series of articles all about installing a tile floor, and I’ve partnered Jim and Rich from Diamond Tile here in Maryland. Jim and Rich are expert tile contractors, and at this point the floor has been “leveled”, DITRA installed, and guidelines marked. Today’s article will showcase how they laid the tile and offer some tips for success.
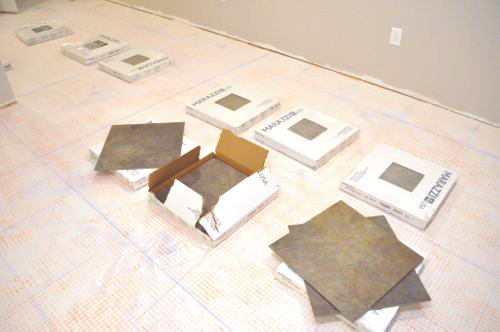
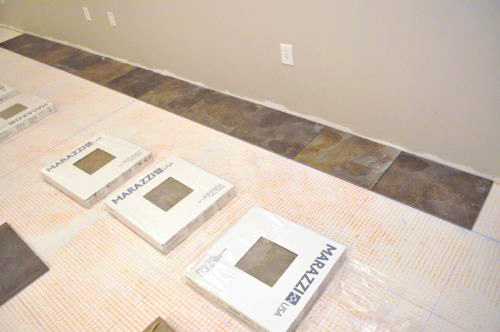
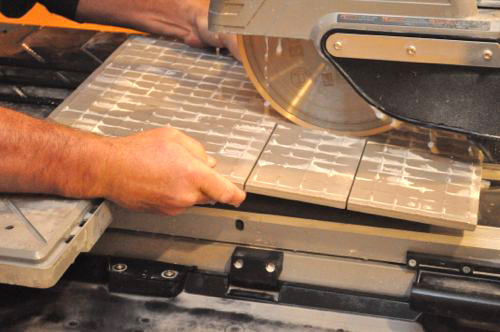
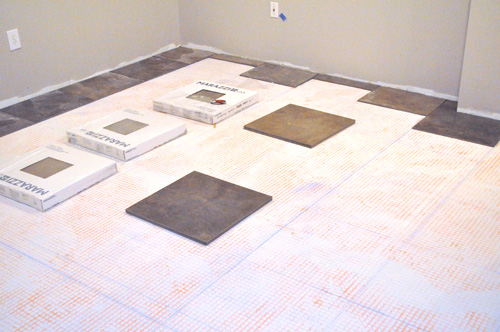
Step 1: Pre-Cut Tiles
The precise guidelines enabled Jim and Rich to pre-cut all the tile beforehand. This was important because they could work faster, and they could address any difficult areas before laying tile. Otherwise, they’d have a time constraint as Ditra-Set has an open time of about 20 – 30 minutes.
Pro-Tip: Use a grease pencil (a.k.a. wax pencil, china marker) to scribe lines on tile.
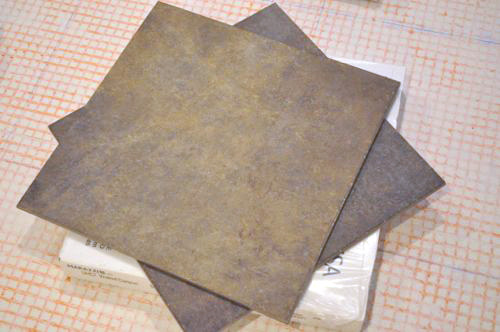
Pro-Tip: Always examine the tile for a pattern and orient the tile accordingly.
Pro-Talk: The pattern on a tile is sometimes referred to as the “grain” of the tile.
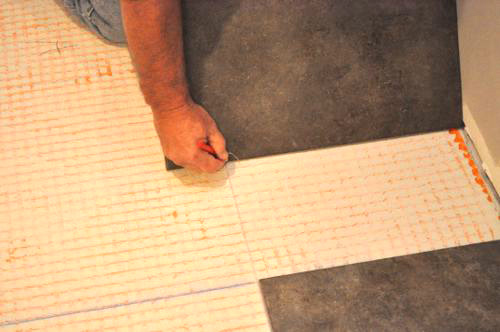
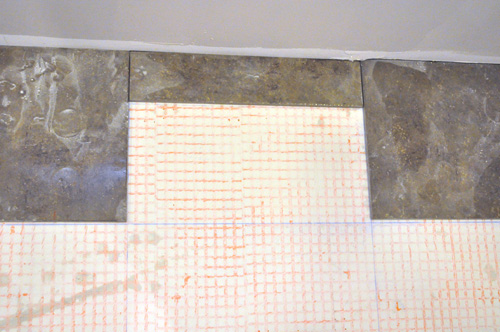
The guys cut all the tile adjacent to a wall with about 1/16 – 1/8″ gap.
If you read yesterdays article about marking guidelines for the tile, you know that the spacing includes a grout joint in both directions. That means that any given tile is tight against the lines on two sides (first picture below), and the other two sides have an 1/8″ gap (second picture below). Understanding the spacing is second nature for Jim and Rich, but it may be difficult to remember at first.
The guys also cut tiles around the stairs, posts and door threshold.
Pro-Tip: Flattening the floor and keeping cuts tight eliminates the need for shoe molding after the baseboards are installed.
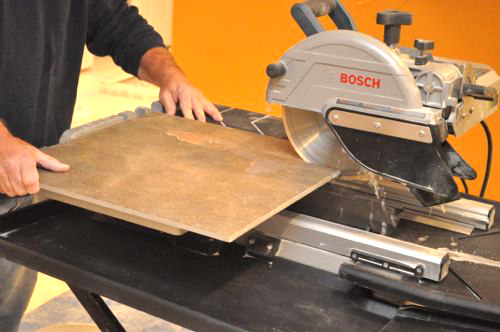
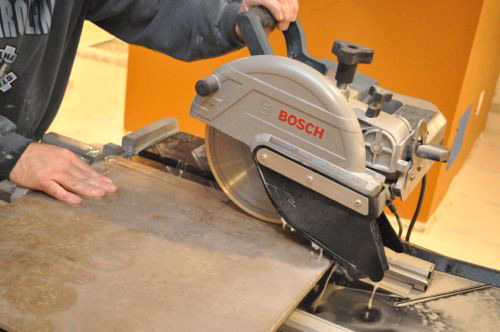
There’s a number of tools for cutting tile like nippers, a grinder or a tile cutter. The guys are still enjoying the Bosch TC10 wet saw (review), especially being able to make plunge cuts. Most of the cuts were straight across. Some of the cuts were L-shaped to go around a corner or U-shaped to fit underneath a door jamb or around a post.
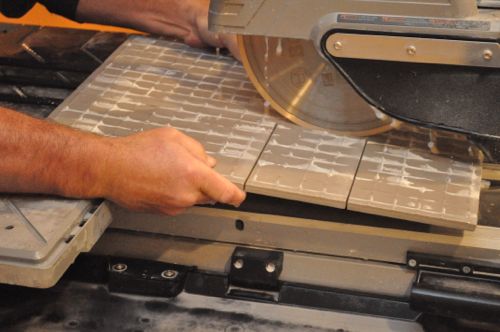
Inside corner cuts are difficult because the cut actually needs to extend slightly past the corner to go through the full thickness of the tile. For these cuts, the guys would start the cut on the face of the tile, then flip it over and complete the cut on the backside of the tile. That way the face of the tile stays intact.
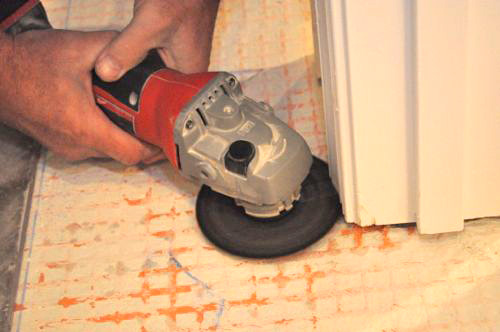
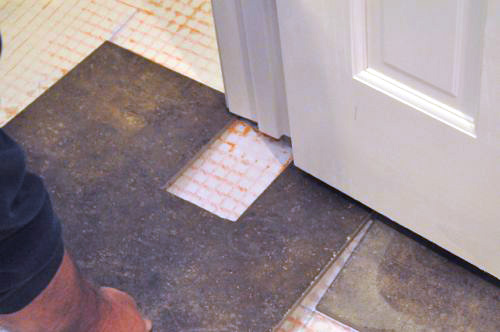
Step 2: Cut Door Jambs
Often door jambs need to be trimmed so that tile can fit underneath. Jim and Rich lay a tile next to the jamb and scribe a line. Next, they usually make the cut with a grinder. However, you can use a flush-cut saw, OMT or a handsaw to achieve the same results.
Pro-Tip: The tile must fit underneath the jamb with a bed of mortar underneath.
Pro-Tip: Jim and Rich sometimes remove the doors to make it easier to work.
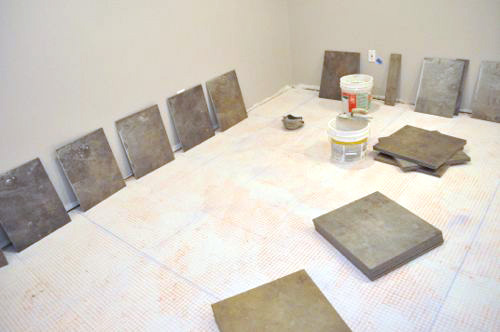
Step 3: Mix Mortar
With all the cuts made, Jim and Rich got started on laying the tile, and they began by mixing up some Ditra-Set mortar according to the instructions.
If you’re following along, don’t forget to let the mortar slake for about 15 minutes before remixing.
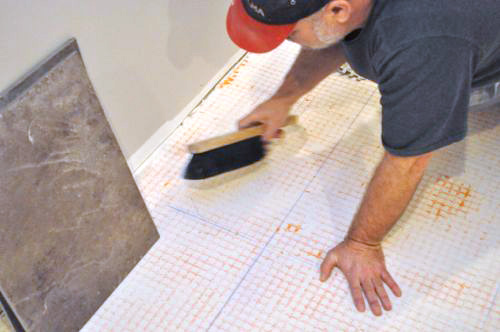
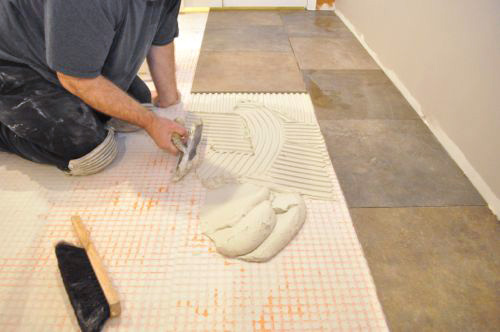
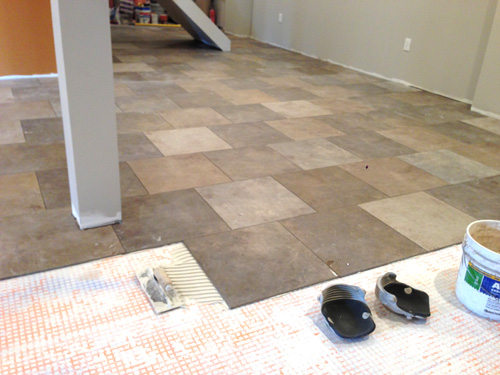
Step 4: Brush Clean
Jim laid the tile, working in small section, and he brushed each section clean before spreading mortar.
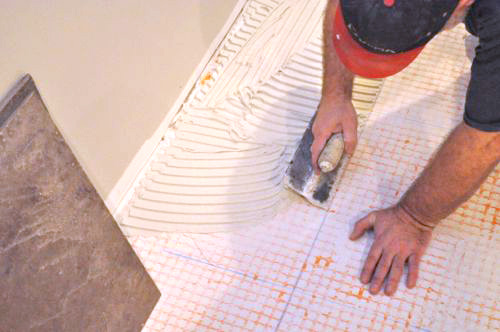
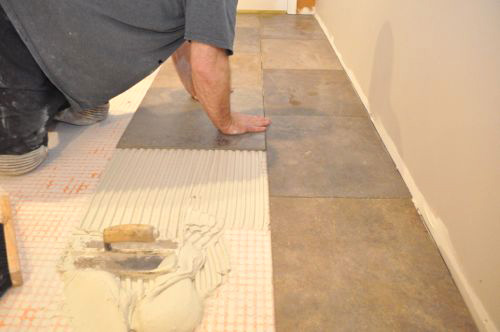
Step 5: Comb Mortar
Jim used a 1/2″ square-notched trowel to comb out an even bed of mortar. He spread the mortar right up to the guidelines, taking care not to obscure the lines.
Pro-Tip: Typically, the guys specify a 1/4″ square notch for 6 x 6 tile, a 3/8″ square notch for 12 x 12 and smaller, and 1/2″ square notch for anything bigger.

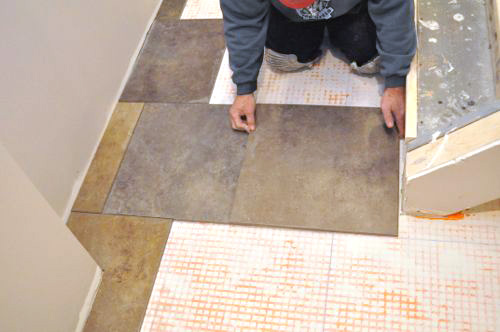
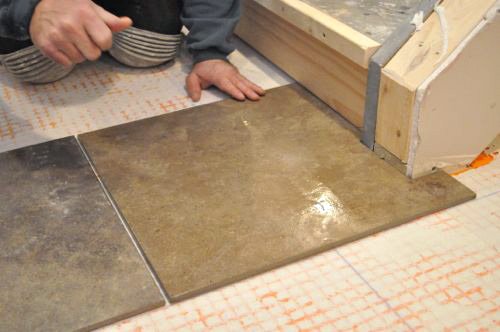
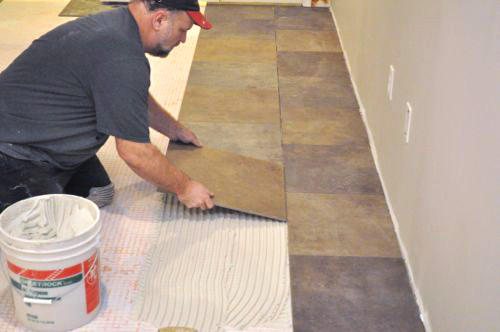
Step 6: Set Tile
Next, Jim would lay the tile on the mortar, pressing down firmly to ensure good coverage. At the same time, he was making sure the tile lined up with his guides, and making sure the tile was even with any neighboring tiles.
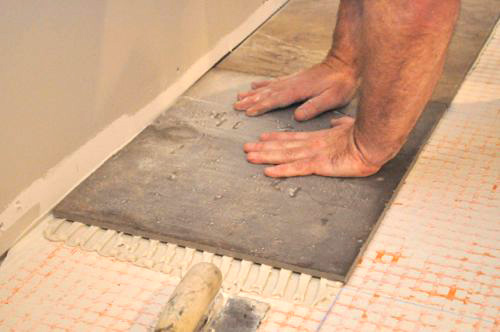
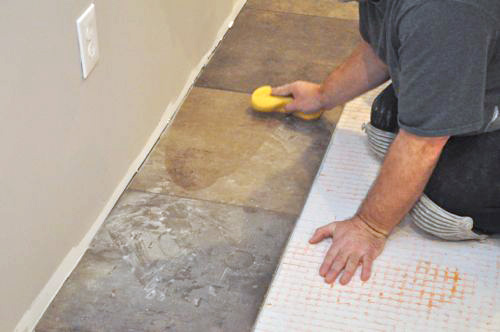
Step 7: Sponge Clean
After Jim was satisfied, he sponged the face and joints clean, and moved on to the next piece.
Too Much Mortar in the Joints
A common DIYer mistake when laying tile is leaving excess mortar in the joints, and this is a problem because it can show through the grout. Jim has a great trick for removing excess mortar. First, he pushes the tiles together, causing mortar to ooze up out of the joint. Next, he wipes the joint clean and moves the tiles apart. As Jim separates the tiles, the mortar is pulled back down. After one final wipe, the joint is clear and ready for grout.
Uneven Tiles
Every so often Jim wouldn’t be satisfied that a tile was even with adjacent pieces. In these instances, he would use a small, flat trowel to pull the tile up and spread additional mortar along the low side.
Pro-Tip: If you have to stop part way through laying tile, clean up any unused mortar. Otherwise, you’ll have to chip away the hardened mortar when you start again.
Allow to Dry
Give the mortar at least 24 hours (depending on conditions) before walking on the tile.
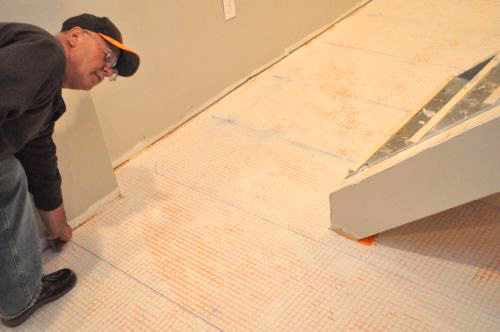
Welcome back to another Pro-Follow. I’ve been working with Jim and Rich from Diamond Tile as they tile Fred & Kim’s basement floor, and it’s been great to see how professional tile contractors tackle this job. The guys have finished installing DITRA, and you can read about that process at the link below. Now it’s time to set up guides. This was particularly fascinating because Jim and Rich create a very precise grid-work that enables them to eliminate the need for spacers, make all the necessary cuts beforehand and lay the tile in perfectly even rows.
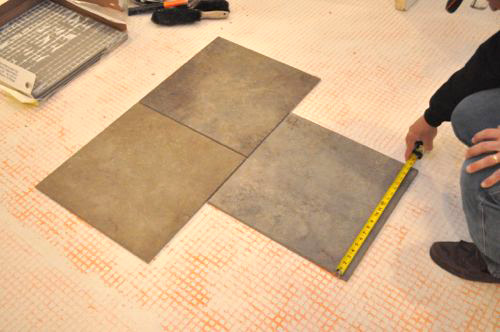
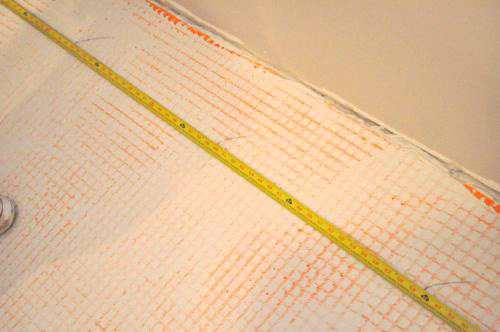
Step 1: Measure Tile Including Joint
Jim and Rich start by setting out a few tiles with space for the joint. This enables them to get a true measurement along each dimension. For instance, the guys are installing 20″ x 20″ porcelain tile. In reality, these tiles measure 19-3/4″ plus 1/8″ grout joint. With these measurements, the grid spacing is 19-7/8″.
Pro-Tip: Always measure dimensions using tiles from the same batch as the rest of the floor. Don’t use sample tiles or a tile from a different batch number as actual dimension will vary.
Step 2: Measure First Guide
The first two guide lines are the most important because the rest of the grid is based on them. For the first guide, the guys select an exterior wall and measure an equal distance off the wall. Usually, this line is centered on the room. In this case, the guys shifted it (by a factor of 19-7/8″)Â so that it would span the entire length of the room.
Pro-Tip:Â Exterior walls are usually more square than interior walls.
Pro-Tip: Shift guide line so that perimeter tiles (cut tiles) aren’t too small and unsightly.
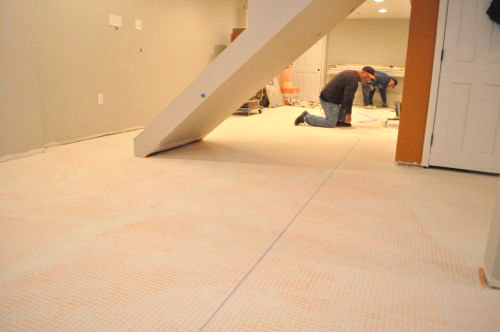
Step 3: Check Distance to Wall
After the guys snapped a chalk line, they checked the opposing wall to see if the two were parallel. It turns out the walls were off by about 3/8″ over the entire length, and that’s pretty good. Small, gradual variations like that won’t be noticeable to the naked eye.
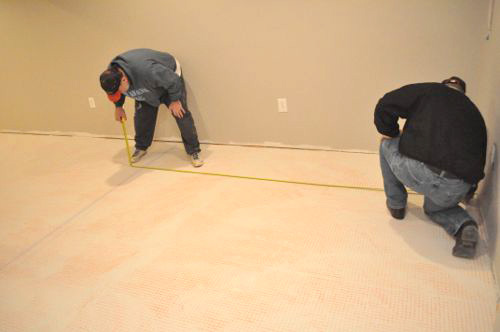
Step 4: Setup Right Triangle
The second guide is perpendicular to the first, and the guys used right triangles to ensure it was perfectly 90° from the first guide.
If you’re not familiar, a right triangle has specific dimensions, and that enables the guys to mark an exact point based off where two lines intersect.

Pro-Tip: The guys often offset measurements by 1″ to avoid using the end of the tape measure.
Step 5: Mark Second Guide
After marking two points, the guys snapped a chalk line, and again, they checked the opposing walls for square / parallel. The guys also checked how the tiles would meet the two support posts. This was important because if a post was completely encompassed by a single tile, it would require an irregular cut. Fortunately, that was not the case, and the guys didn’t need to shift any guides.
Pro-Tip: Chalk lines can easily be erased using a damp sponge.
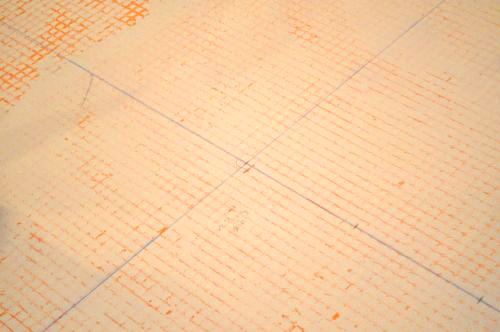
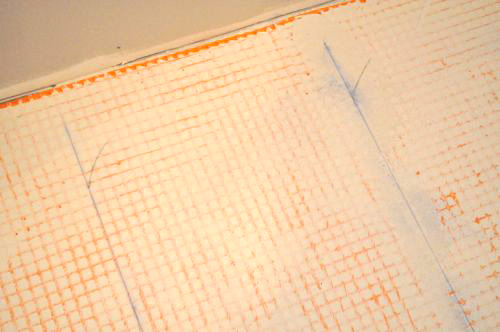
Step 6: Mark Tile Intervals
The guys based all subsequent guides off the first two, and they marked off points every 19-7/8″.
Pro-Tip: For smaller tile, the guys usually snap a line for every 2 or 3 tiles. These tiles are big enough that they won’t be able to reach more than one tile at a time.
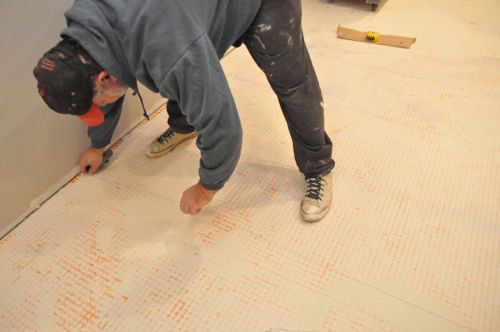
Step 7: Mark Perpendicular Intervals
Jim and Rich repeated the process for the perpendicular guides, marking lines every 19-7/8″.
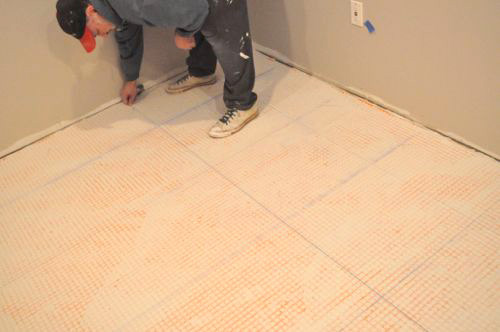
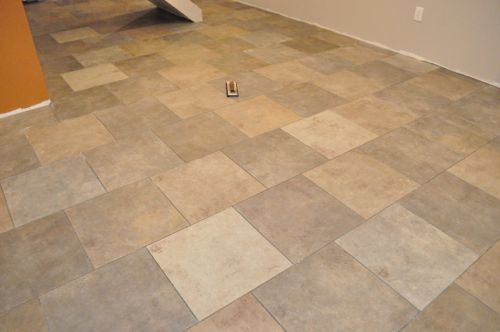
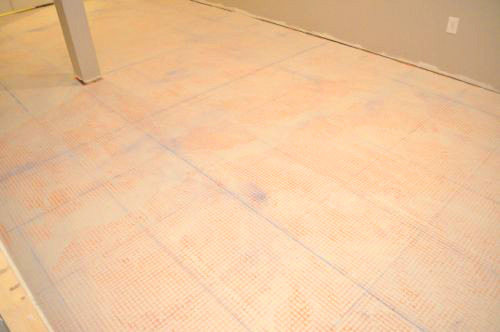
Finished
In the end, the floor was a grid-work showing each and every tile, and these marks are precise enough that Jim and Rich can precut all the tile.
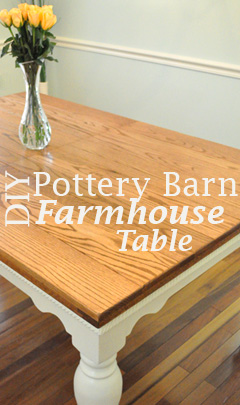
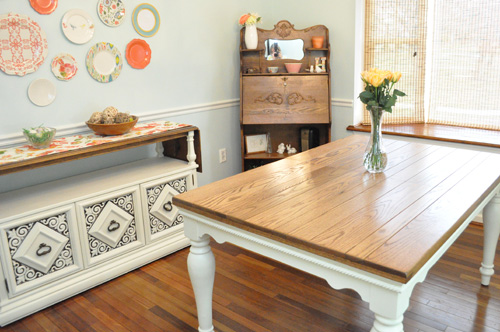
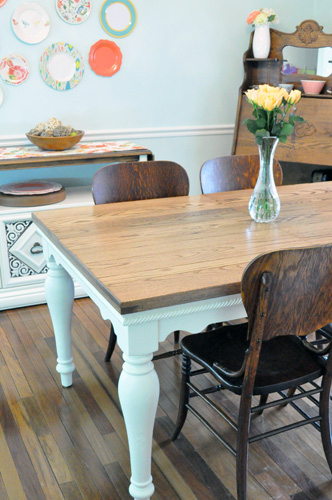
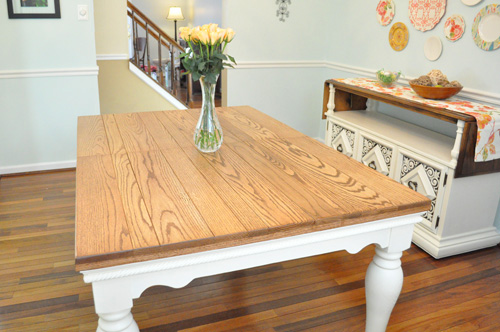
If you keep up with Jocie and The Better Half, you know that she’s been busy giving our dining room a makeover. She has done a great job, and so far Jocie has painted the walls, refinished an old buffet, created a very cool plate wall, and incorporated some furniture we just inherited. Well Jocie has been pining for a farmhouse table to go with the new decor, and she really liked the Keaton Dining Table from Pottery Barn. Don’t bother clicking on that link. The PB table costs $1,600 + $100 delivery! That’s a bit out of our price range, and instead I built a Pottery Barn farmhouse table knockoff for about $400.
The secret behind this DIY farmhouse table is that I purchased a table on Craigslist and built a new tabletop. How else could I have gotten table legs, latches, extension rails, screws and all the other hardware for only $60?!
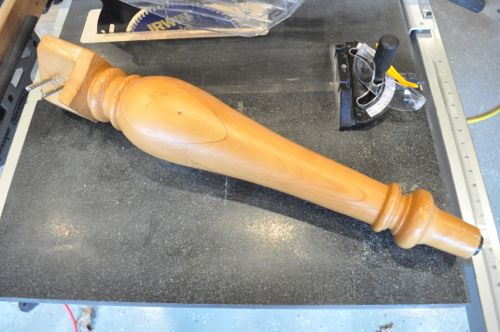
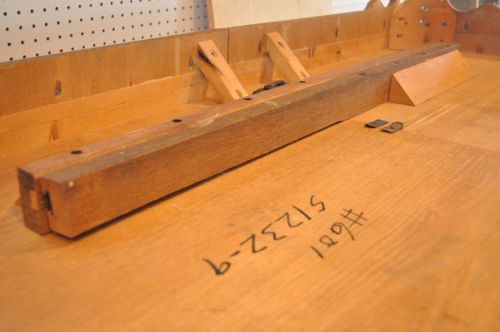
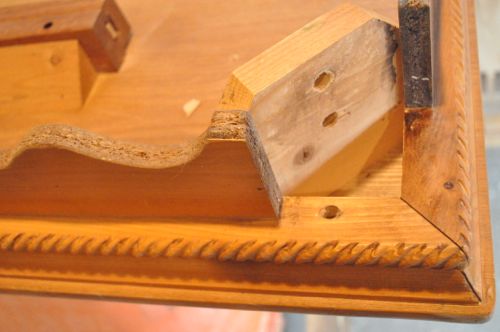
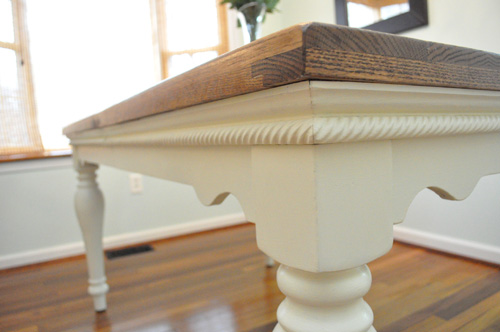
The legs and most of the molding were solid wood, and everything was a little worn. The damage was nothing that a little wood filler and sanding couldn’t resolve.
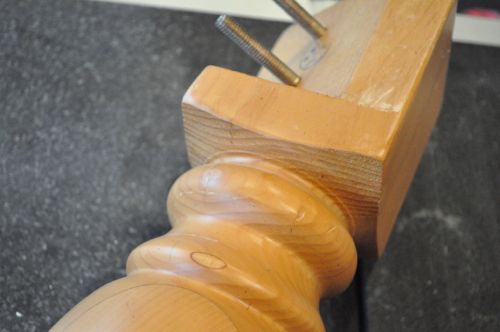
I carefully labeled all the supports, extension rails and pieces of the table apron. I also took a few pictures to refer back to when it came time to reassemble everything.
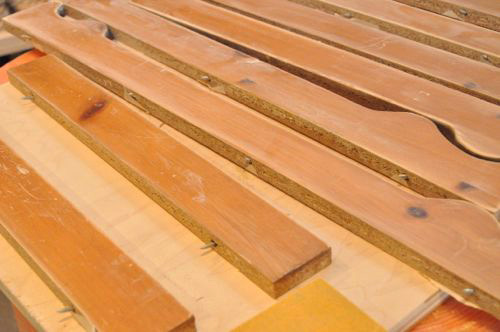
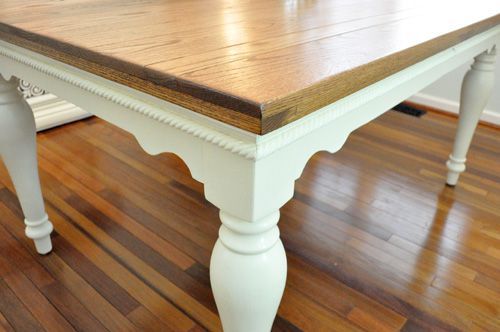
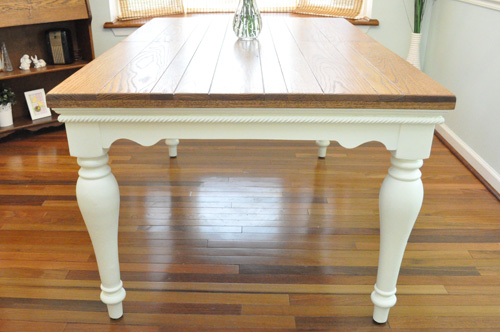
After I cleaned up the rope molding and the rest of the apron, I gave the pieces to Jocie for her to paint. She’s been really pleased with Old White Annie Sloan Chalk Paint, and Jocie painted the pieces to match the buffet.
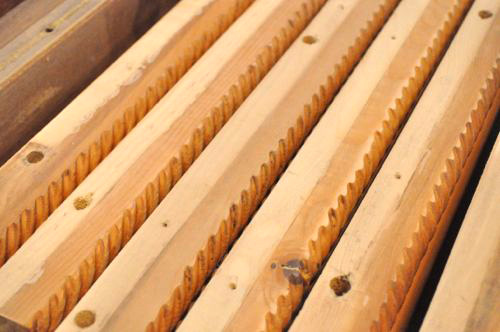
Surprisingly, the PB table has a pine top which is a relatively soft wood. I wanted something more durable, and most of the cost for this knockoff is due to the fact that I opted for an oak table top. If I’d gone with pine, it would have probably cost closer to $300.
I purchased a variety of 1x oak boards at my local HD, and I started by jointing the boards at my shop. When Joe offered to help me joint the wood at his shop (on a jointer), I couldn’t refuse.
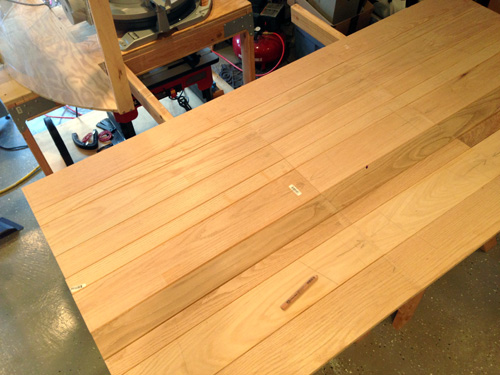
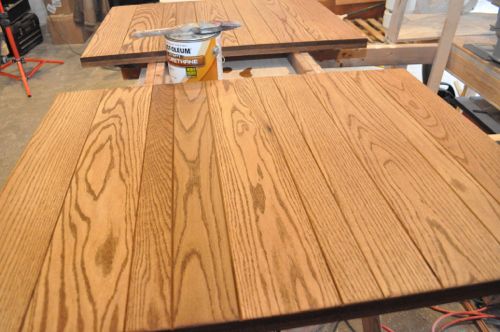
I ordered the boards with alternating wood grain patterns. That was another tip Joe gave me, and the argument is that it helps cancel out seasonal cupping. Here’s a look after jointing and cutting one side of the table to approximate length.
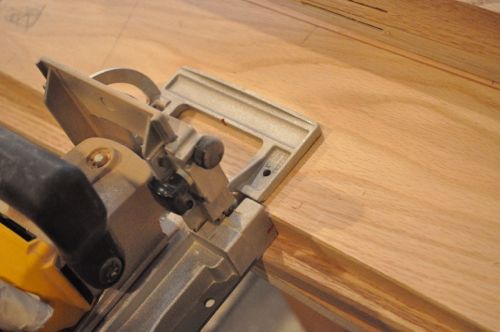
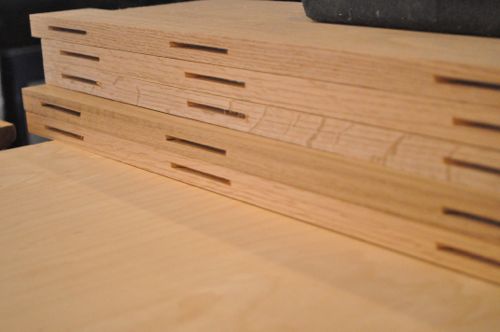
Next, I used a biscuit jointer to cut slots for about 100 biscuits. All the table joints have four biscuits and the leaf joints have three biscuits.
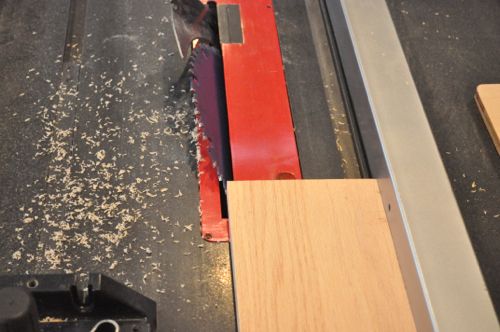
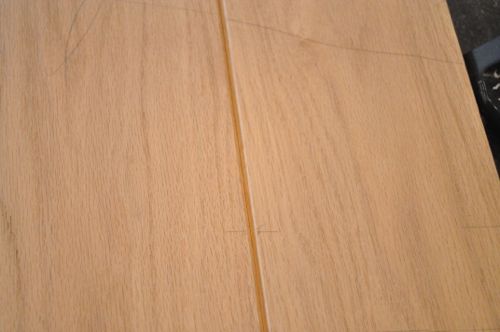
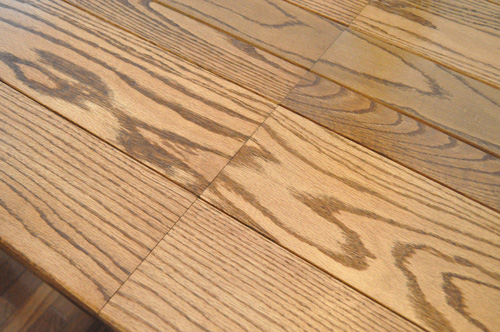
Jocie wanted a small chamfered edge at all the joints so I ran the boards through my table saw.
Glue up was a slow process because I didn’t want to glue too many boards at the same time. I used Titebond II which is a water-resistant glue. Hopefully, water never makes it into any of the joints, but I didn’t want to take any chances.
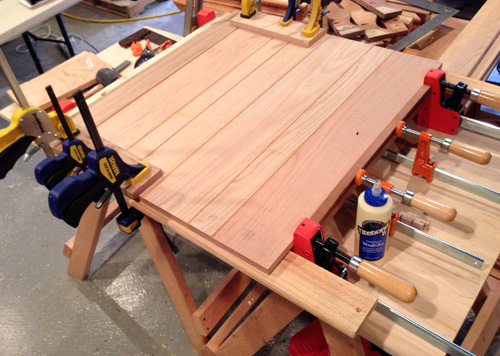
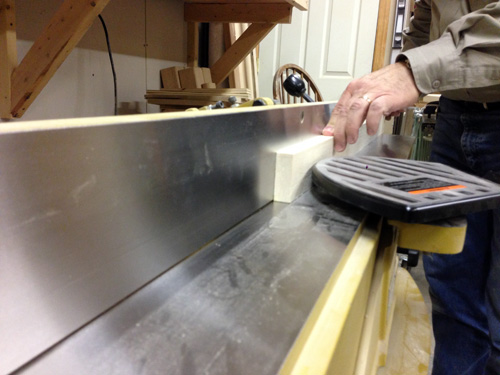
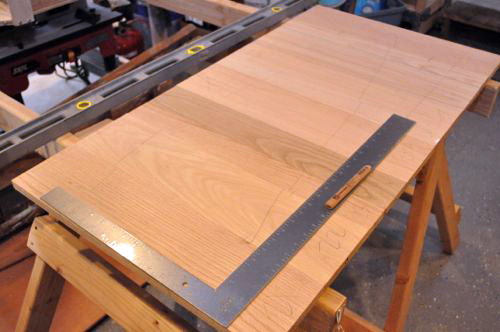
Here’s a look at the two table sides and the leaf in the middle after glue up. If you remember my article about building a sled for my table saw, this was why. I needed to be able to trim the 30″ x 40″ sections after gluing.
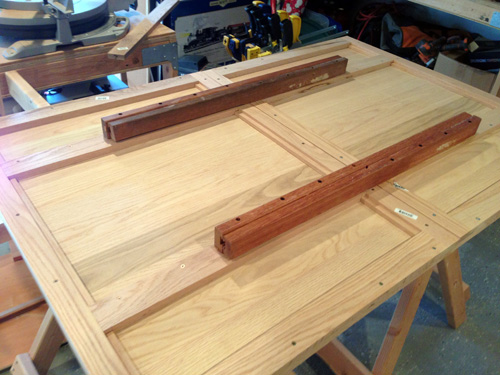
Even though these are all 1x boards, there was quite a bit of variation, and I used a belt sander to even out the underside. Next, I cut lap-joints and glued and screwed a frame which gives the table top a thicker appearance, and it helps support all the glued joints.
Here you can see I’ve attached the extension rails. After that, I sanded the top of the table with a random orbital sander, progressing from 60 to 100, 120, 150, and 220 grit sandpaper.
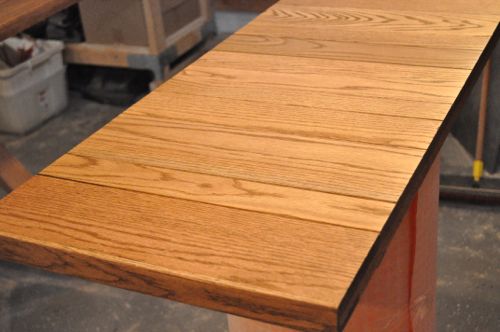
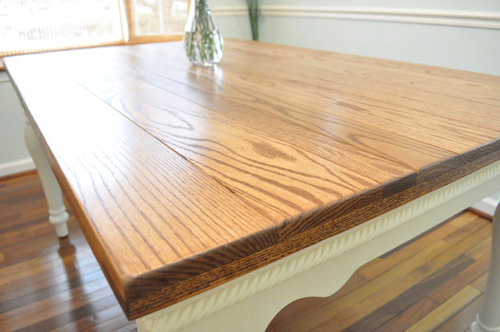
Next, I stained everything with Rust-oleum Early American wood stain. The best part about this stain is that my tabletop was ready for poly in only 1 hour!
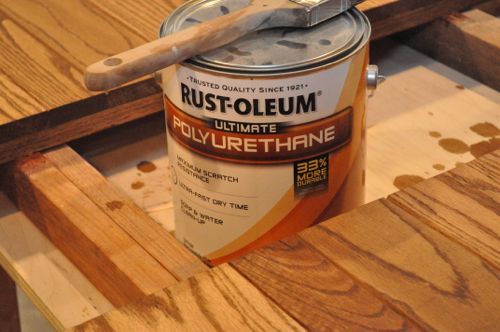
I applied three coats of Rust-oleum satin polyurethane to protect everything. I expect this table will get lots of use so eventually I’ll need to reapply.
After finishing the wood, I glued and screwed the apron back in place and attached the legs. Jocie gave everything one last coat of paint, and the table was done! Now I just have to come to grips with the fact that the table is going to be used… by small children… sometimes with crayons.

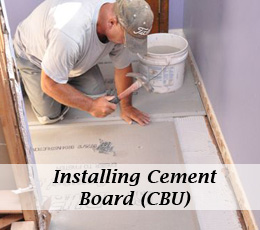
Cement board replaces the old plaster and lathe underlayment for tile. It’s a lot easier to work with preformed cement board rather than laying a bed of mortar on the job site, and it still carries the same great qualities. Cement board is moisture and mold resistant, and it doesn’t deteriorate or warp in the presence of water. For these reasons, and because it bonds so well with mortar, cement board is the preferred underlayment for tile.

I’ve been working with Jim and Rich from Diamond Tile here in Maryland to produce this series of articles. Jim and Rich have been installing tile for nearly three decades, and they are very knowledgable. It’s been great to learn the tricks of the trade from them.
Tools & Materials
- Cement board – usually 1/2″
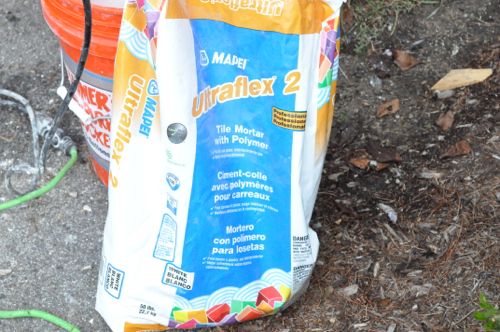
- Mapei Ultraflex 2 – a polymer modified thinset
- 1/4″ square-notched trowel
- Galvanized roofing nails or cement board screws
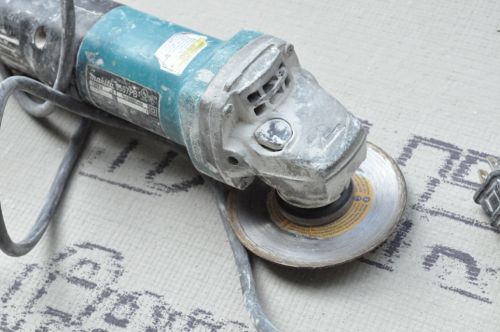
- Grinder with diamond blade
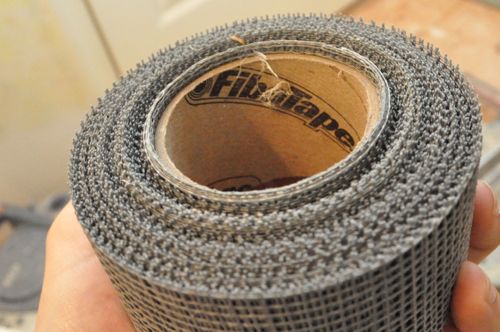
- Alkali-resistent mesh tape

Step 1: Plan Layout
There are a few requirements to keep in mind when installing cement board so Jim and Rich always plan the layout a bit. They staggered joints so that four corners never meet, and panels were offset about 8″ from the subfloor joints. Also, the guys maintained a 1/4″ gap around the perimeter walls.
Pro-Tip: Cement board features a smooth side and a textured side, and the textured side provides a better surface for bonding tile.
Step 2: Clean Subfloor
Jim and Rich always clean the subfloor with a foxtail brush. As they cleaned, they inspected the subfloor looking for signs of damage especially around toilet flanges. If the OSB or plywood was flaking, they cut away any loose pieces.
Step 3: Dry Fit
The guys dry fit each piece of cement board before installing, and they placed cut edges around the perimeter, butting factory edges together. Each panel had about 1/16″ gap between adjacent pieces. To cut panels to size or create cutouts for pipes, toilet flanges, etc., the guys used a grinder with a diamond blade. However, a circular saw, jig saw or even a utility knife can be used as well.
Pro-Tip:Â Cutting cement board with power tools creates a lot of silica dust so make cuts outside if possible.

 Step 4: Mix Mortar
Rich mixed up a 5 gallon bucket of mortar. As usual, he let the mortar slake before re-mixing and taking it inside.

Step 5: Spread Mortar
It’s a common mistake to install cement board and skip over laying a bed of mortar. Jim used a 1/4″ square-notched trowel to comb out the mortar, and he spread just enough to lay one row of cement board at a time.

Step 6: Fasten Cement Board
With the mortar in place, the cement board goes down overtop, and it’s fine to immediately walk on it. Rich hammers galvanized roofing nails every 6″ around the perimeter of the panel and throughout the field. The nails ensure good adhesion between the cement board and the mortar. However, the mortar is what holds the cement board in place long-term.


Step 7: Tape Joints
Lastly, the guys use an alkali-resistent mesh tape and mortar to cover all the joints. This locks all the cement panels together, and they act as one, large sheet.
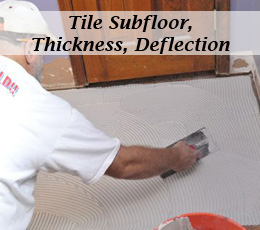
There’s a lot of information (and mis-information) online about what constitutes a suitable subfloor for tile, and it’s tough to find a clear answer. The difficulty is that tile can be installed over a number of substrates, and each requires specific preparations to ensure a long-lasting tile floor. To determine the requirements for a tile subfloor, I partnered with Jim and Rich from Diamond Tile located here in Maryland. Jim and Rich are professional tile installers with over 27 years of experience and have worked with a variety of tile substrates.
Deflection
Deflection, or bounciness, can cause tiles and grout to crack or come loose, and the tolerance depends on what type of tile is being installed. For instance, ceramic tile can withstand more deflection than natural stone.
Calculating Deflection
Many tile contractors can judge a floor’s deflection by walking around. To calculate a specific value, the Tile Council of North America (TCNA) offers a standard formula.
Divide the total span of the floor joists (in inches) by 360 to determine the maximum amount the floor can give in the middle under a live load of 40 lb./sq. ft., plus any long-term deflection due to the weight of the floor. For example, the maximum deflection for a joist span of 15′ is [15 * 12] / 360 = 1/2″. The L/360 formula is useful for most ceramic, porcelain, and hard stone. For soft-stone tile, such as limestone or light marble, the L/720 formula applies (cutting the maximum allowable deflection in half).
John Bridge Forum also offers this helpful deflection calculator.
Reducing Deflection
According to TCNA, there are several factors that affect deflection including condition of the subfloor and joists, joist size, type and spacing, and how the subfloor was fastened.
Adding another layer of plywood can reduce deflection and curvature of the sheathing between joists. In the past Jim and Rich have glued and screwed plywood, taking care to stagger the joints and gap the panels 1/8″ on each edge. Schluter recommends using ring shank nails or screws, turning panels perpendicular to joists and not aligning joints with joists (pg. 23 of DITRA Handbook). In extreme cases Jim and Rich have advised additional joists be put in place.
Tile over Wood Subfloor
Plywood and OSB are the two most common materials used for floor decking, and typically they are 5/8″ or 3/4″ thick. In this scenario, Jim and Rich install 1/2″ cementious backer unit (CBU) resulting in at least an 1-1/8″ thick subfloor. If they install a second layer of wood underlayment (3/8″ plywood or thicker), the guys would use 1/4″ CBU on top.
Older homes may have a structural plank subfloor, and these can be problematic because they move so much with changes in humidity. In this case, the guys usually install 1/2″ plywood overtop and 1/4″ CBU or DITRA.
Installers sometimes use fir plywood in lieu of CBU. While acceptable, Jim and Rich prefer concrete board because plywood can contain voids, and in rare cases the plywood may delaminate. Also, mortar creates a stronger bond with a concrete board.
Tile over Concrete Subfloor
It’s also common to see tile installed over a concrete subfloor, and the big concern is movement from cracks, or expansion / contraction. Jim and Rich often flash the floor to create a flat surface, and they always recommend installing an uncoupling membrane like DITRA overtop concrete.

Tile over Tile or Resilient Flooring
Tile can be installed directly over existing tile given that it is free of cracks and there are no loose tiles. Jim and Rich advise using a bond-promoting primer to enable the mortar to better adhere to the existing floor, and to set the floor with a specialty polymer modified mortar. If the floor is uneven, it can be flattened just like a wood or concrete subfloor.
Jim and Rich don’t advise tiling over resilient flooring. It’s too risky not knowing the condition and materials of the subfloor, and so they always remove resilient flooring.

Even a perfectly level subfloor won’t guarantee a beautiful, long-lasting tile floor. Stresses between the concrete or wood subfloor can still cause tiles to crack and delaminate and for grout joints to crumble. For example, wood expands and contracts with seasonal changes. The tile assembly needs to be able to handle that which is why it’s important to incorporate an uncoupling membrane that allows for in-plane movement.
What is DITRA?
Schluter DITRA underlayment is an uncoupling membrane that allows the tile floor to move (in-plane) relative to the substrate, eliminating the major causes for cracked and delaminated tile. DITRA is composed of a polyethylene (plastic) grid of square cavities, each with angled, dovetail cut-backs, and an anchoring mesh laminated to the backside. It comes in long rolls (i.e. 1 m x 30 m), and it’s lightweight and easy to cut.

DITRA is approved for use with ceramic, porcelain, and natural stone tile. It can be installed over a variety of substrates including plywood, OSB, existing vinyl, structural planks, and concrete. For this project, the DITRA is being installed over radiant-heating element embedded in self-leveling mortar.
DITRA is a versatile product and can do more than just provide an uncoupling membrane. DITRA can be used as a waterproofing membrane for vapor and moisture management, and to support / distribute heavy loads. Check out the installation handbook for even more information and certifications.

This article was produced with the help of Jim and Rich from Diamond Tile located here in Baltimore, Maryland. Jim and Rich are professional tile contractors with decades of experience. They’ve used DITRA extensively on many jobs and highly recommend it, especially over cracked concrete.
Note: Schluter and Bostik generously donated the DITRA and the Ditra-Set Mortar for this project, enabling the development of this Pro-Follow guide.
Tools & Materials
Here are the tools and materials needed to complete this phase of the project. Look for more details in the Related Content section at the end of this article.
- Schluter DITRA or DITRA-XL
- Ditra-Set Mortar
The type of thin-set mortar (modified vs. unmodified) used to install DITRA depends on the substrate. For instance, to install DITRA over plywood, a modified thinset mortar should be used. However, over concrete Schluter recommends an unmodified thinset mortar like the Ditra-Set shown here.

- Foxtail brush
- Utility knife
- Chalk line
- 1/8″ notched trowel
- Flat trowel
- Grout float
- Buckets (for mortar)
- Corded drill & mixing paddle
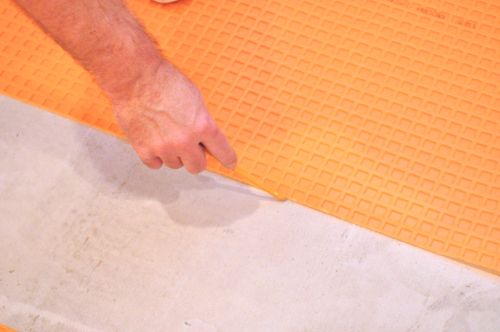
How to Install DITRA
At this point, the subfloor has been flashed (flattened) to eliminate any high or low places, and Jim and Rich are ready to install the DITRA.
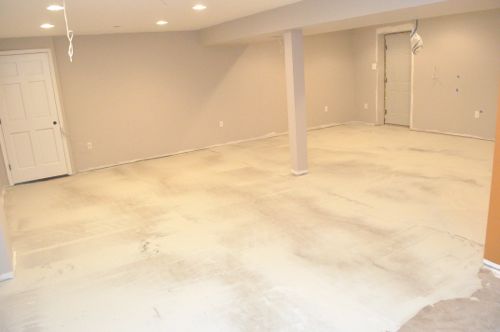
Step 1: Check and Clean Floor
The guys got started by sweeping the floor with foxtail brushes to ensure a clean surface. They also scraped away excess mortar that oozed underneath the drywall.
Step 2: Layout DITRA
Jim and Rich unrolled sections of DITRA, cutting it to length with a utility knife. They laid it out keeping about 1/2″ margin around the perimeter.
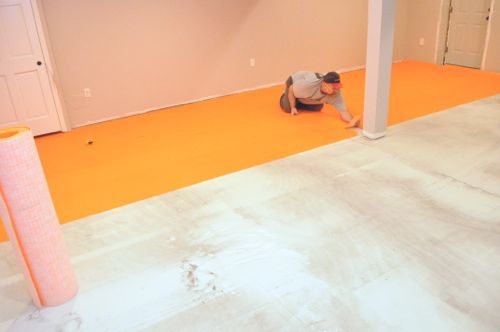
Pro-Tip:Â Precutting and laying out all the DITRA gives it a chance to flatten out.
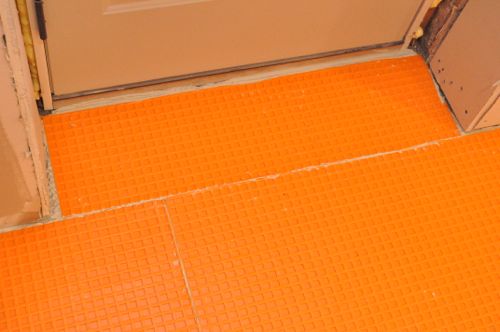
The guys also cut around the support posts, door jambs and threshold.
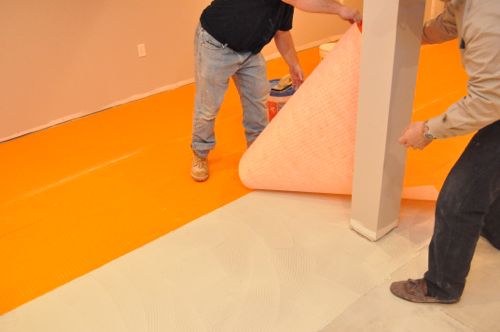
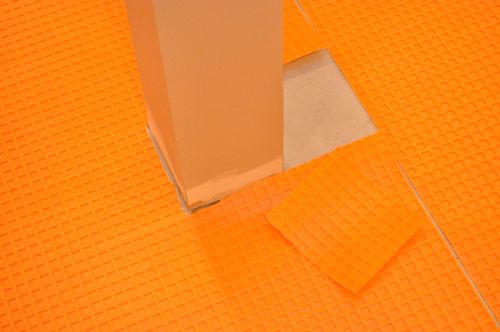
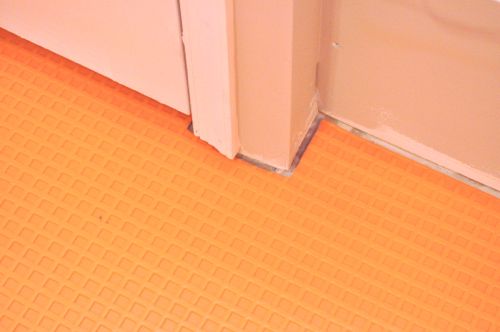
Part of the beauty of DITRA is that it’s easy to cut, and there’s no minimum size requirement.
Pro-Tip:Â It’s easier to cut DITRA from the backside.
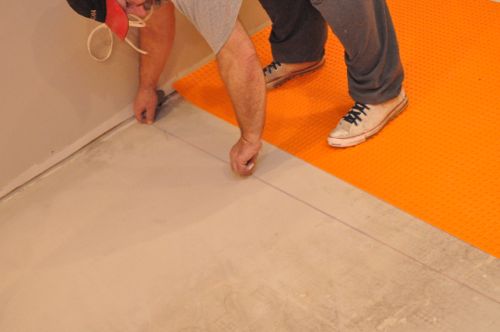
Step 3: Mark Spread Lines
After the guys had laid out the DITRA, they used pencils and chalk to mark spread lines along each joint.
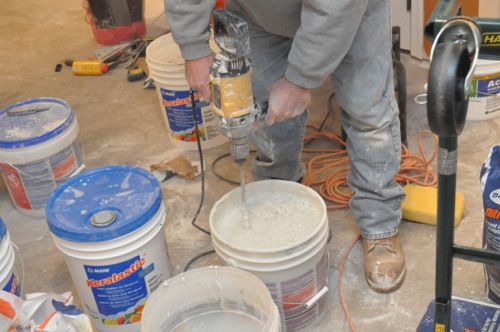
Step 4: Mix Ditra-Set
Rich mixed the Ditra-Set with water using a mixing paddle, and he let it slake for 15 minutes before remixing. Schluter recommends mixing the thinset to a “fairly fluid consistency (but still able to hold a notch).”
Pro-Talk: Slaking is the process of leaving the thinset undisturbed to allow the water to completely penetrate the dry ingredients.
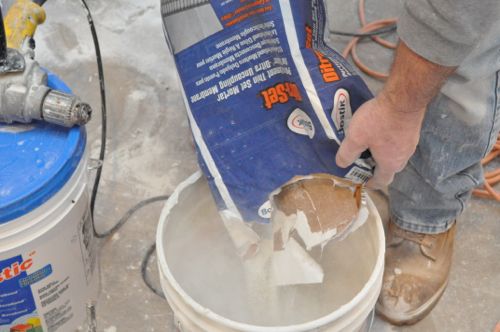
Open time for Ditra-Set is about 20-30 min so the guys only mixed what they could use in that timeframe.

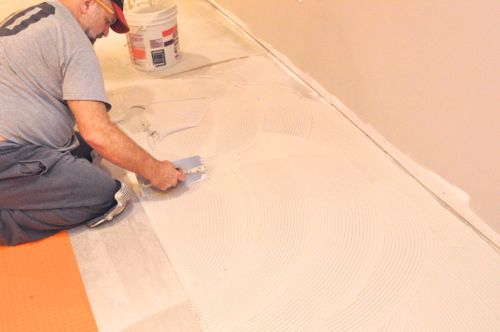
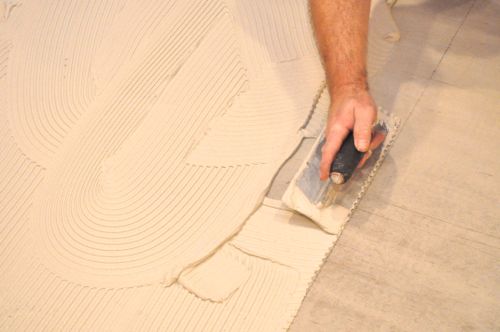
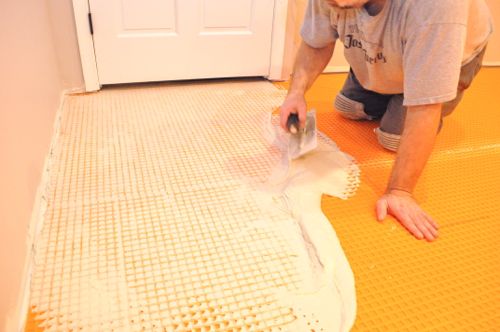
Step 5: Spread Ditra-Set
Using the spread lines, Jim troweled the Ditra-Set over half a section. Jim and Rich advise against spreading too much Ditra-Set at one time to prevent it from drying too quickly and because it’s easier to keep the DITRA lined up.
Pro-Tip:Â Ensure the Ditra-Set is spread evenly to avoid lumps.
Pro-Tip:Â A small v-notch trowel is also acceptable.
Pro-Tip: Expect to use one 50 lb. bag of mortar per 150 – 200 sq. ft. of substrate.
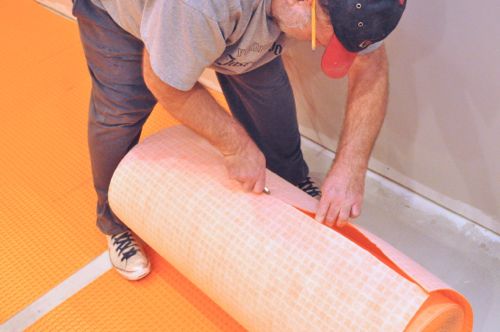
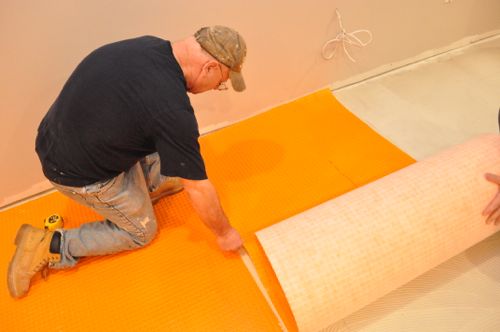
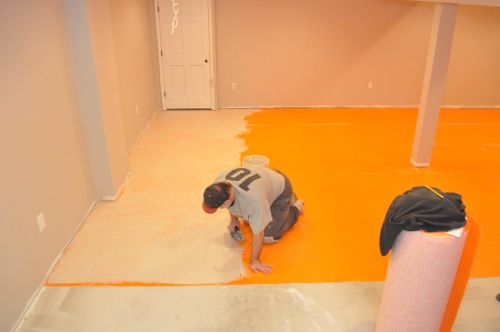
Step 6: Unroll DITRA
Next, the guys would unroll the DITRA over the Ditra-Set. Adjacent pieces of DITRA were butted against each other, and Jim and Rich were careful to avoid overlap (thereby creating a height difference).
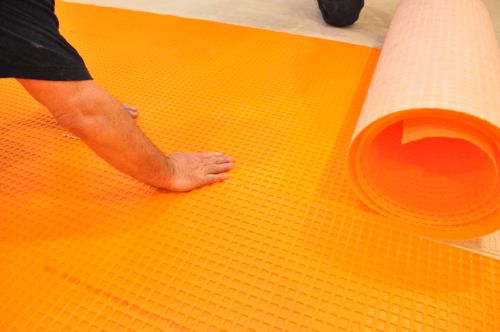
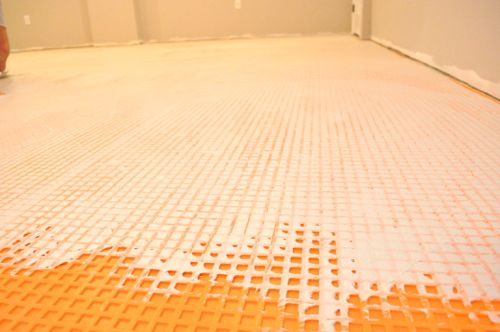
Step 7: Embed DITRA
After the DITRA was in place, Rich used a grout float to firmly press the DITRA into the mortar, and the guys paid special attention to the  edges. The goal was to make full contact between the fleece matting and the mortar.
Pro-Tip:Â Rich always began working the grout float in the middle of a section to stretch and press wrinkles outward.
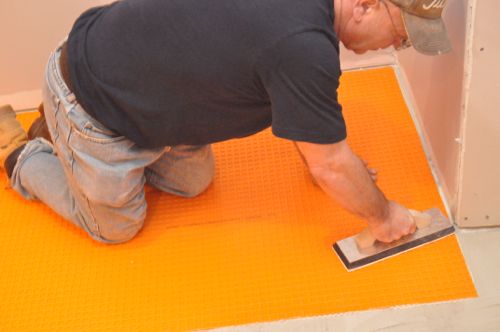
Pro-Tip: The guys say that the most likely mistake when installing DITRA is failing to fully seat the matting in the mortar.
Pro-Tip:Â DITRA can be walked on immediately after; there’s no need to wait for the mortar to cure.
Step 8: Mix More Ditra-Set
After the DITRA was laid out, the guys mixed more Ditra-Set, and again, they let the mortar slake for about 15 minutes.
What about using a latex-modified thinset?
Schluter does not recommend using a latex-modified thinset for the next steps because it cures differently than unmodified thinset. Modified thinset must air-dry, and that can be a lengthy time-period because the mortar is sandwiched between impervious materials (the DITRA and the tile). Subsequently, drying takes place only through the tile joints. Unmodified thinset is a mixture of Portland cement which actually requires moisture to form a strong bond and achieves final set usually within 24 hours.
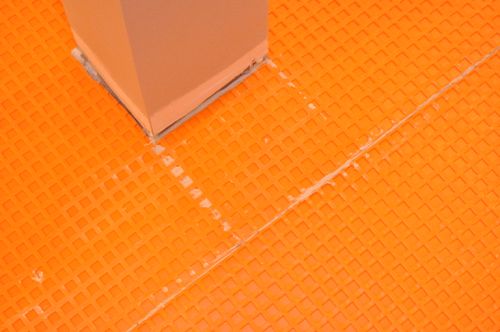
Step 9: Fill DITRA Cavities
Using a flat trowel, Jim and Rich filled all the cut-back cavities with Ditra-Set. They worked carefully to completely fill all the space and avoid leaving ridges on the surface.
Schluter advises that at this point it’s perfectly acceptable to begin laying tile with an unmodified thinset. However, Jim and Rich opted to fill the cavities, let it dry, and begin laying tile another day. They do this because it’s difficult to snap chalk lines over DITRA even though it takes longer to complete the job.
If they had begun laying tile, Jim and Rich would have filled a small section of cut-back cavities and then combed additional mortar over the DITRA. Next, they would have set the tile in the typical manner.
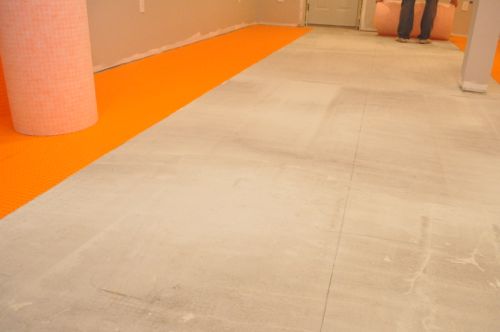
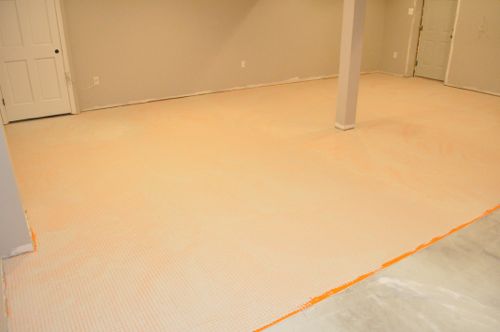
Finished
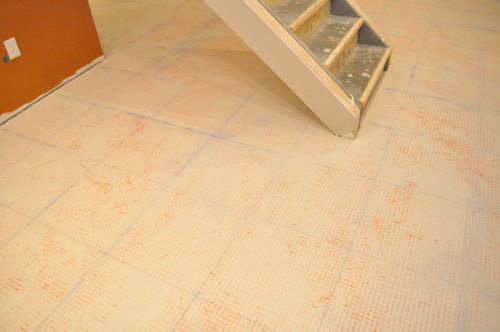
Here’s a look at half the basement covered in DITRA. After about 24 hours, it’ll be ready for tile, and meanwhile Jim and Rich are getting started on the over half.
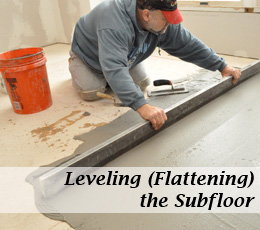
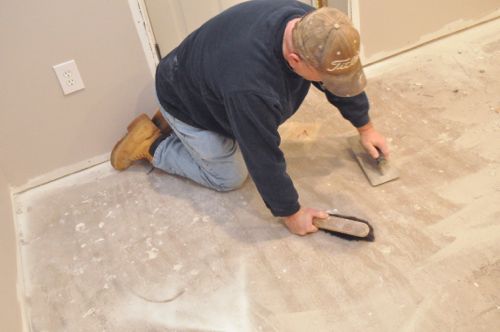
Before laying tile or installing a tile underlayment like Schluter DITRA, it’s important to check the subfloor to ensure a flat, even surface. At its worst, a very uneven floor will result in broken or loose tiles and cracked grout joints. Slightly uneven floors can cause tile corners to protrude, especially on larger sized tiles (18″ x 18″ or larger). Professional installers with whom I’ve spoken estimate that 90% of all remodel projects require evening out a subfloor. They stress that failing to properly prepare a subfloor is the most common mistake beginners make when laying tile.
Keep in mind that the goal is not a perfectly level floor. Instead, the goal is to eliminate peaks and valleys (called “evening” or “flattening”, or commonly “leveling”, although the latter term isn’t 100% right). This is achieved by spreading a thin layer of mortar over the floor to fill in the valleys. In the pictures below you’ll see this project is taking place in a basement. However, the method I describe here is suitable for any level of a house and over a variety of subfloors including concrete slab, gypsum, plywood and oriented strand board (OSB).
Pro-Talk:Â Among tile contractors, “flashing the floor” means to flatten the floor by filling in valleys with a leveling compound.
This article was produced with the help of Jim and Rich from Diamond Tile located here in Baltimore, Maryland. Jim and Rich are professional tile installers with decades of experience. They take a lot of pride in a job well done.
Tools and Materials to Level a Concrete Slab
You won’t find these materials at your local DIY center. Instead, head to a local tile supply shop. If you’re not a contractor, call to make sure that they will sell to directly to consumers before making the trip. You can find links for product info and availability in the Related Content section at the end of this article.
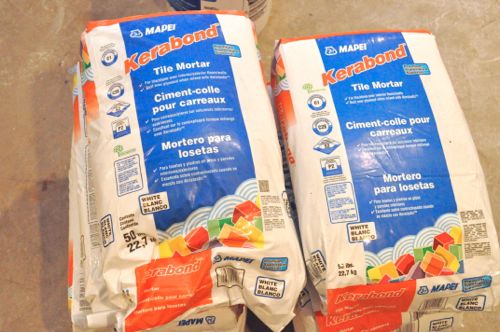
- Mapei Kerabond mortar
- Mapei Keralastic latex additive
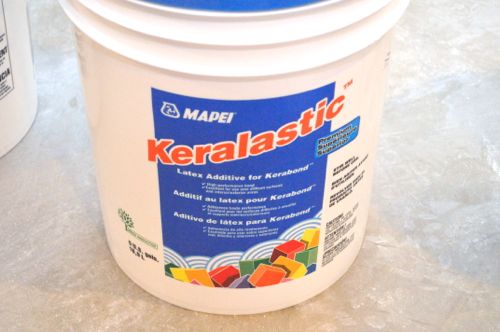
Pro-Talk: Latex additive is often called “milk” because that’s what it looks like.
- Contractor line or chalk line
- Scraper
- Foxtail brush
- Sponge
- Buckets (for water and mortar)
- Corded drill & mixing paddle
- Square notched trowel (1/8″)
- Screed
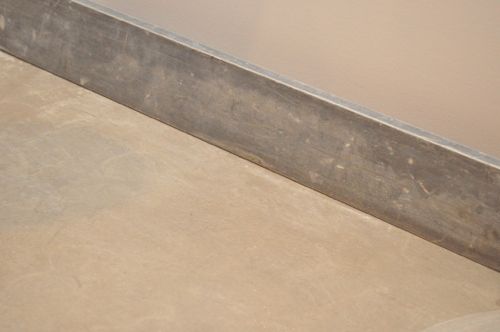
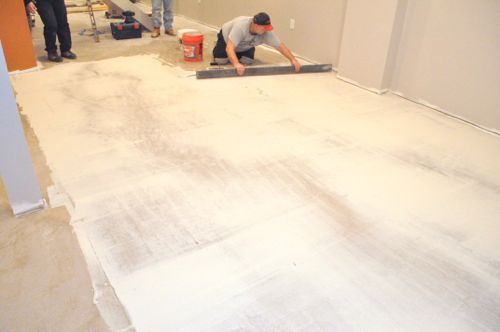
Step 1: Check Floor for Flatness
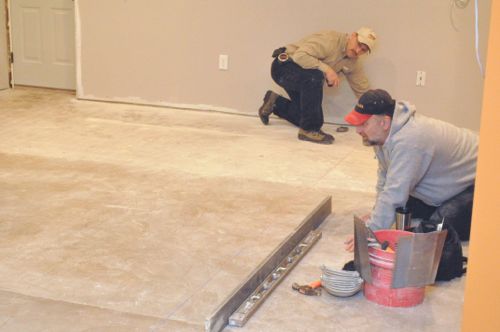
With over 27 years of experience each, Jim and Rich can often walk a floor and feel high or low places. To know where to expect problems, they assessed the floor in a few different ways.
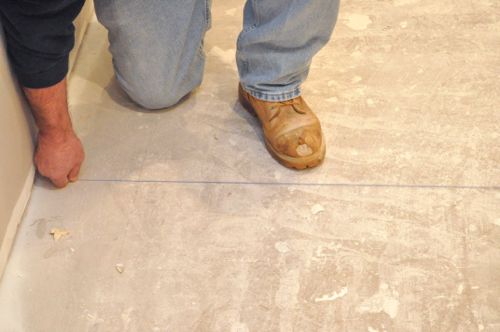
For smaller jobs, the guys will often setup a straight edge (i.e. screed or level) in various locations. If the straight edge rocks back and forth, that indicates a peak in the floor. If there’s any gap underneath, that indicates a valley. Pictured below is a simple iron straight edge.
For larger jobs the guys run a taut string or chalk line across the floor and look for variations in floor height.
Pro-Tip: Sometimes it’s useful to hold a spacer (like a contractor pencil) between the floor and the line on both sides so that peaks don’t interfere.
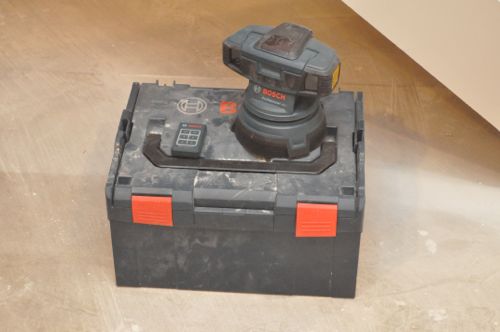
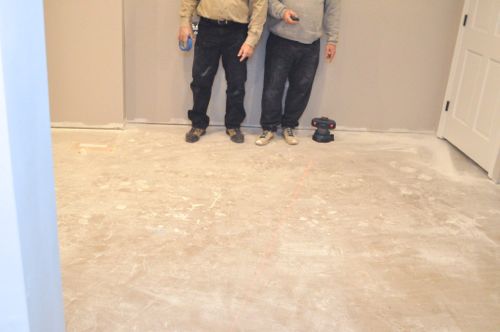
The Bosch GSL-2 Surface Laser is a handy tool for scanning a floor. The GSL-2 emits two lasers and where they overlap, the floor is level and even (relative to where the GSL-2 is set up). If the lasers diverge, the floor is uneven.
Step 2: Scrape Away Dirt, Debris
It’s important that the subfloor is free of dirt, debris, paint, drywall compound, etc. Jim and Rich meticulously went over the floor with a scraper and brush. If this had been a plywood or OSB subfloor, the guys would have been on the lookout for protruding screws, nails or staples too.
Pro-Tip:Â The guys recommend using a foxtail brush to sweep fine particles that would escape a push-broom.
Pro-Tip:Â Paint must be removed from the floor because it can prevent the mortar from creating a strong bond with the subfloor. Paint can be scraped or ground away, or it can be removed with chemicals. Scraping paint off a floor is labor intensive. However, paint should be tested for lead before grinding and chemicals often require a cleaning solution afterward.
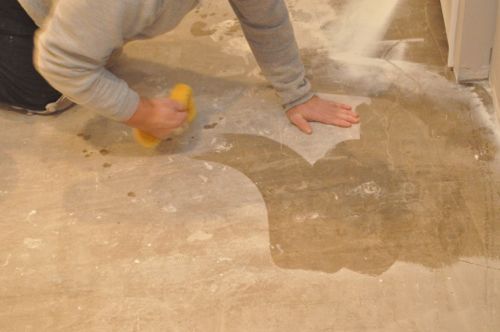
Step 3: Sponge Clean
Next, the guys sponged the entire floor to further eliminate any dust!
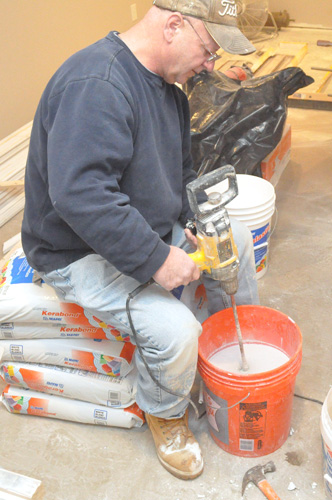
Step 4: Mix Mortar
To flash the floor, the guys are using Kerabond mortar with Keralastic latex additive because it bonds so well. The mortar has an open time (work-able time) of about 1 hour.
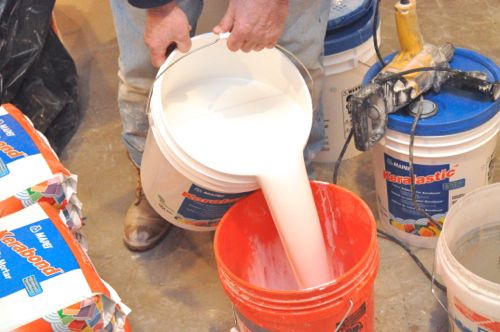
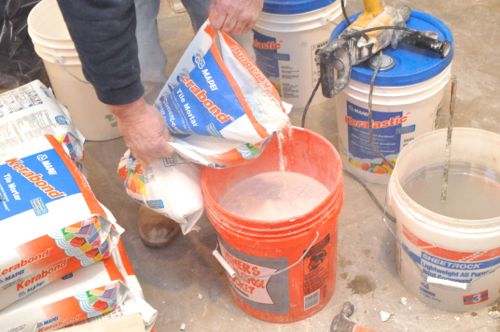
Rich mixed up a 5 gallon bucket according to the directions and let it slake for 5 minutes before mixing it again.
Pro-Talk: Slaking is the process of leaving the mortar undisturbed to allow the latex to completely penetrate the dry ingredients.
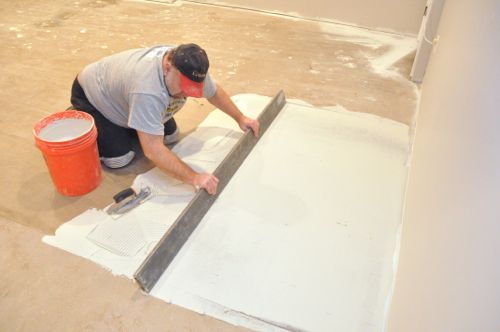
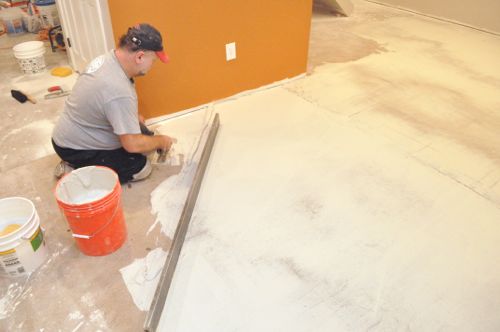
Step 5: Spread Mortar
Jim used a 6′ screed board so he divided up the room into 6′ (or less) sections. Starting in the middle of the room, he quickly rechecked the floor to be sure where the peaks and valleys were located.
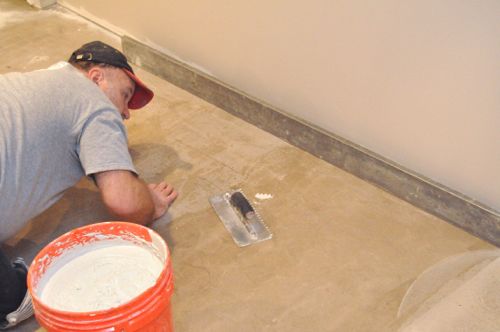
Jim spread a small portion of mortar over the floor using a small notched (1/8″) trowel.
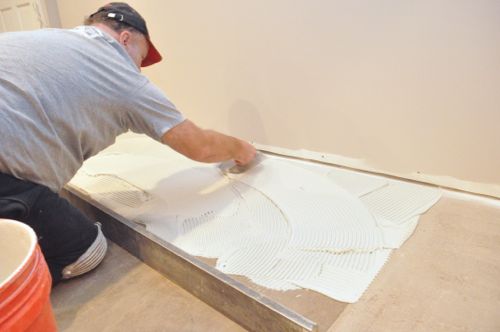
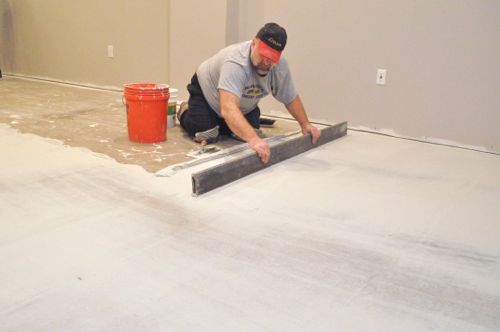
Step 6: Screed Floor
Next, Jim moved the screed over the floor, often making more than one pass. If there was an area the screed didn’t touch (meaning the mortar wasn’t high enough), Jim would go back and add more mortar and repeat the process.
Jim and Rich advised that the mortar can only be applied about 3/8″ thick. If an area needed to be built up more than that, the guys flashed the area, let it dry overnight and then re-flashed the area again.
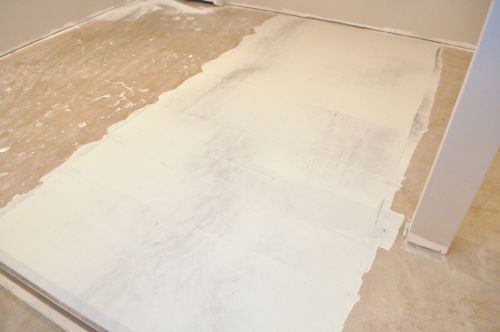
Jim overlapped adjacent areas, and you can see where the mortar was thicker or thinner depending on the contours of the floor.
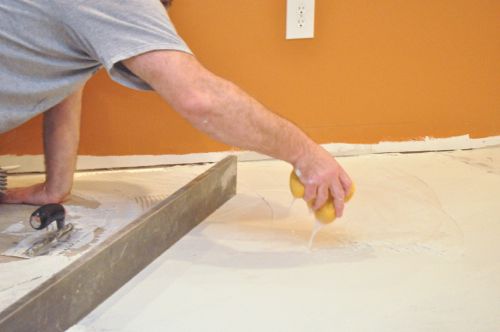
Step 7: Clean and Repeat
Periodically Jim would clean off the screed, and that little bit of water made it easier to achieve a smooth finish.
The main area of the basement was flashed in four, parallel runs.
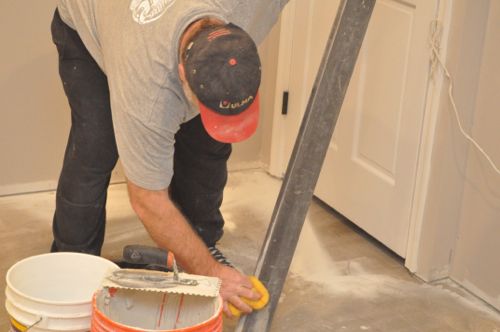
Step 8: End of Run / Tight Corners
At the end of a run or in tight spaces, it was difficult to maneuver the screed. In these areas, Jim would use a flat trowel to smooth the mortar.
He would often add a little extra water to make it easier to trowel the mortar.
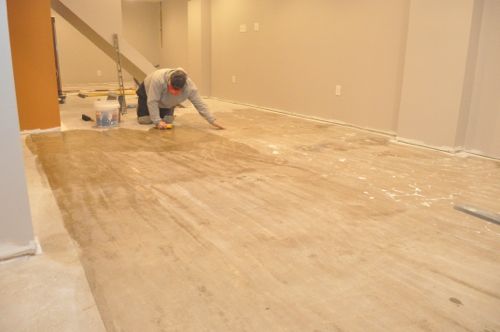
Finished
Jim and Rich completed the flashing in two days, and you could walk on the floor after about 24 hours (depending on temperature and humidity). When everything was dry, they setup the Bosch laser and rechecked the floor, and everything looked good.
What About Self-Leveling Mortar (SLM)?
SLM is a viable option for leveling a floor. In fact, this basement floor has radiant heating element embedded in self-leveler, and you can see how to pour self-leveling mortar at that link. However, self-leveler is most effective when the entire floor is covered with at least 1/2″ of product, and that can be expensive for a large area like this basement. The method described in this article is much more cost effective for flattening a floor in preparation for tile.
I’ve decided to build a few accessories to better utilize my table saw, and my first add-on is a table saw sled. With a sled, making cross cuts is fast, safe and very accurate. Sleds are useful for trimming sheet goods, mitering small pieces, making repetitive cuts and more. I know this sled will come in handy for a lot of projects including one that I’ve recently started (but haven’t written about just yet).
I made my sled in about four hours, and that includes time to “dial in” the sled fence. It slides very smoothly, and I expect to get many good years out of this sled before I need to replace it.

Tools & Materials
Fred & Kim had some leftover materials from when they redid their kitchen including a panel that would normally be used alongside a refrigerator. The veneer makes for a nice, smooth surface so I used that and some scrap plywood to build my table saw sled. Here’s the full list:
- 1/2″ plywood (base)
- 3/4″ plywood (fence and stiffener)
- Solid maple (runners)
- 3/4″ wood screws
- 1-1/4″ wood screws
Here are the tools you need for this project:
- Table saw
- Jigsaw
- Clamps
- Straight-edge
- Drill/driver
- Countersink bit
- Framing square
- Precision shims (from dado set)
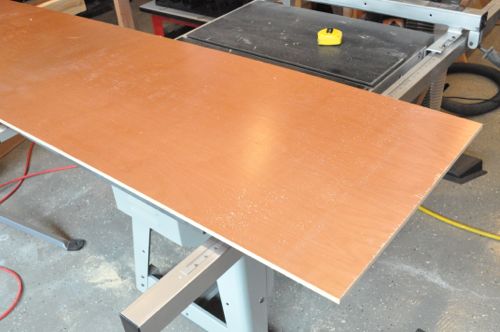
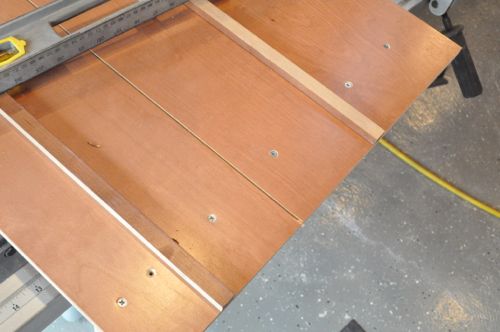
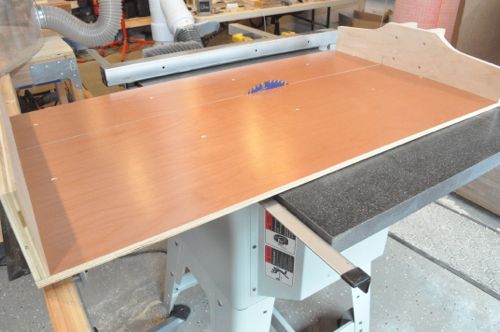
Step 1: Cut Base to Size
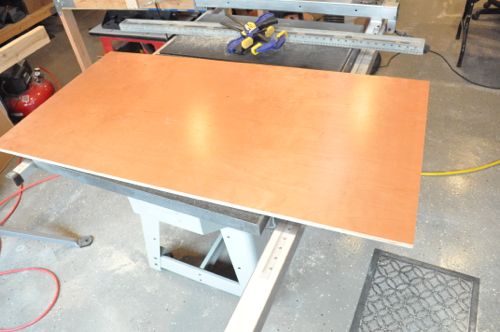
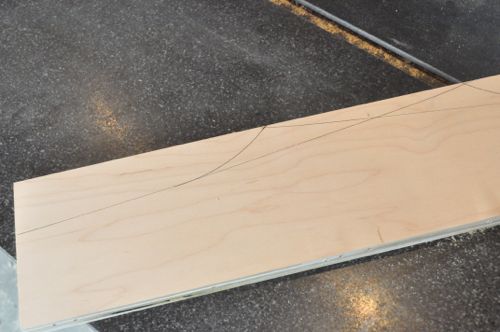
I started by cutting the plywood panel to size for my base. I cut mine pretty big, and that’s because I need it to handle a 40″ board (for the mystery project). It’s easy to shorten a sled, and I may do that eventually. For now, the base measures 45″ long and 24″ wide.
Step 2: Cut Runners
Runners are the thin boards that slide through the miter gauge slots. Sometimes you’ll see sleds with only one runner, and they’re easier to make because you don’t have to worry about the sled binding up. However, sleds with only one runner aren’t as steady so I recommend two runners.
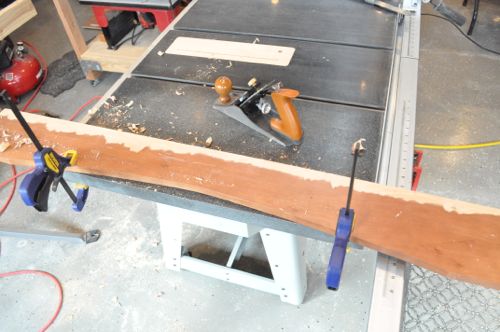
Maple is a relatively hard wood which makes it a good choice for the runners. Another remnant from the kitchen remodel was a solid piece of maple, and I used a hand planer to fine tune the thickness. I wanted both runners to be snug but still allow the sled to move freely.
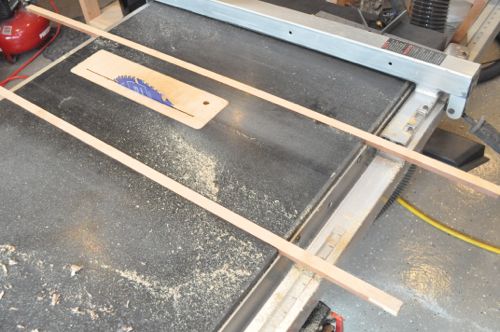
After I was satisfied with the thickness, I ran the board through my table saw to make the runners.
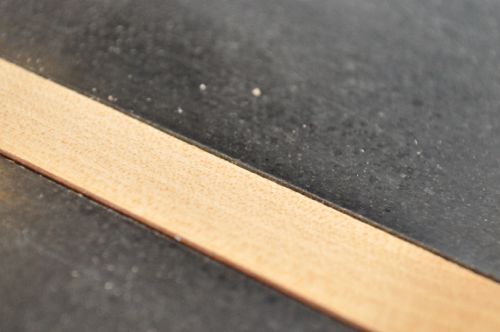
Don’t assume your miter slots are perfectly identical. Measure and cut the runners independently, and label the them after you finish. The goal is for each runner to be flush with the table top and able to slide but without wiggle room.
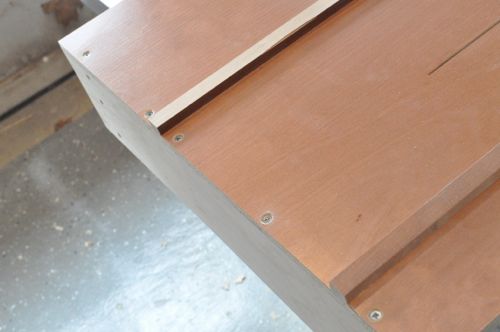
Step 3: Attach Runners
I set my runners in the miter slots and positioned the plywood base overtop. I used the table saw fence to keep everything aligned. Using a straight edge, I marked lines for drilling holes.
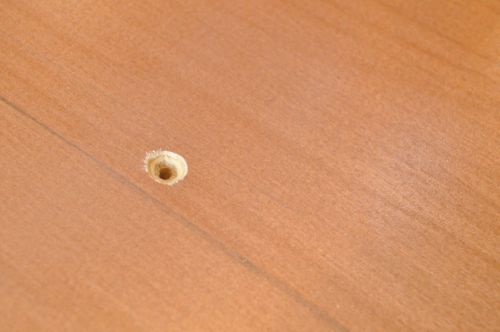
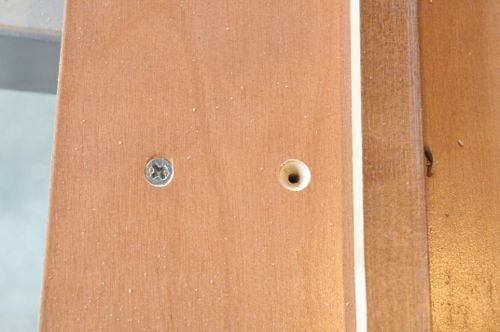
I predrilled five holes for each runner and used a countersink bit so the screw heads would be below the surface.
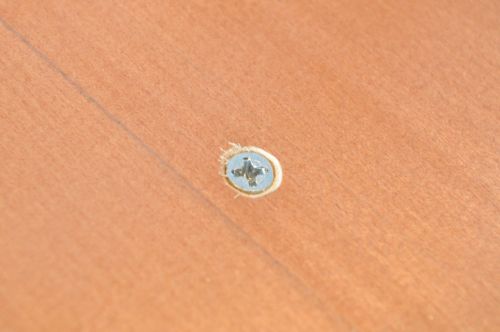
To attach the runners, I used 3/4″ wood screws. At this point I checked the sled to see how easily it moved, and I was pleased to find a smooth motion without any wobbling.
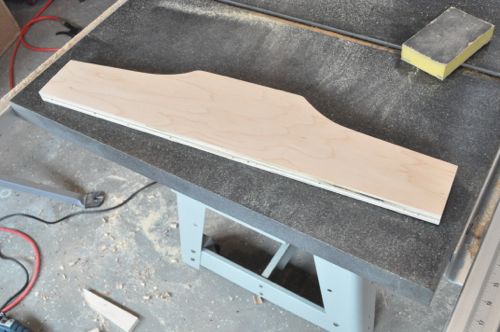
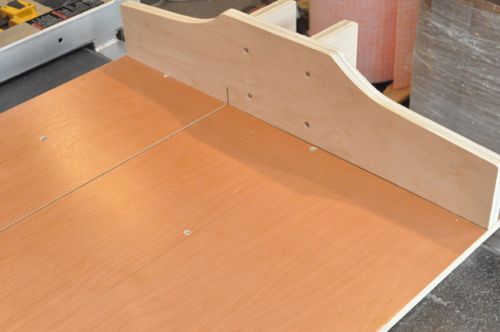
Step 4: Build the Fence
I made the fence from 3/4″ plywood, and it measures 5″ tall at the middle. I cut a gentle slope which makes it easier to clamp stop-blocks or the workpiece.
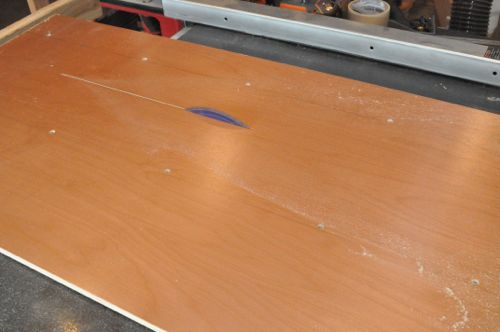
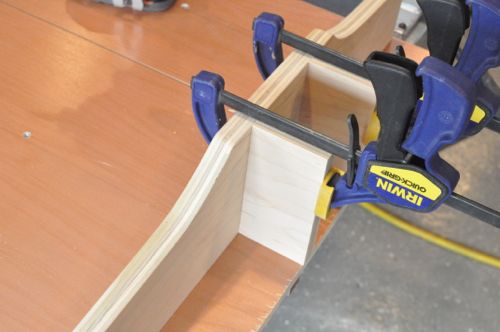
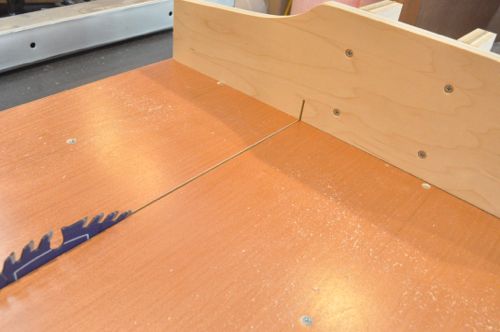
Step 5: Attach Fence
Before attaching the fence, I set the runners in position and made a kerf cut almost the entire length of the sled.
Using a framing square, I set my fence perpendicular to the cut and held it in place with two clamps. Next, I drill and countersink two 1-1/4″ screws, one at each end.
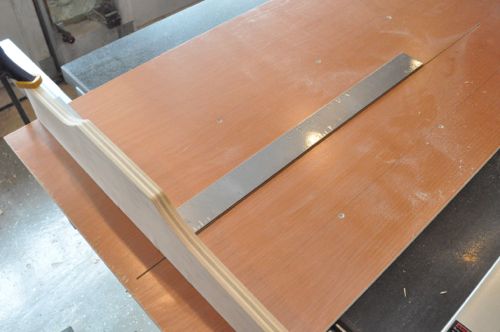
Step 6: Calibrate the Fence
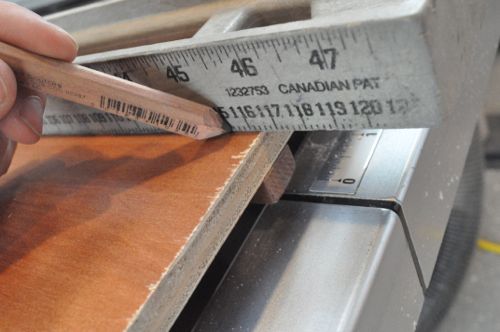
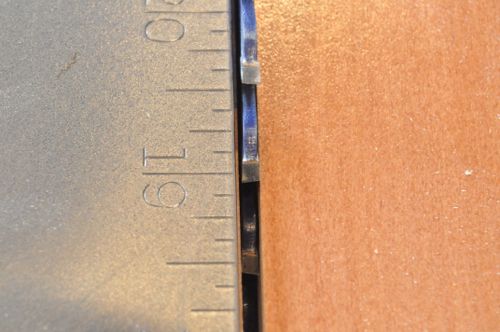
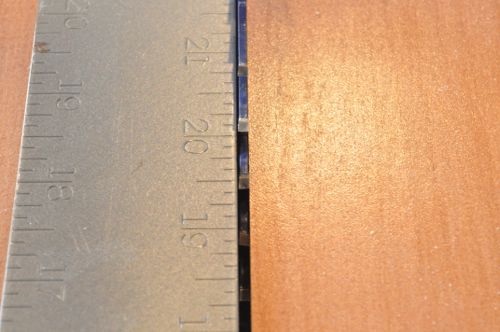
To fine tune the sled fence, I grabbed my framing square again and set it against the fence alongside the blade. Right next to the fence, you can see everything looks good.
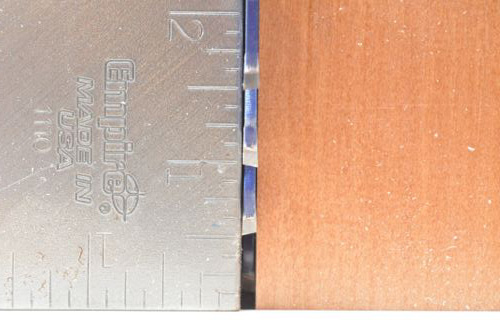
However, at the other end of the square, it looks like the fence is off by about 1/16″.
To fix that, I started by clamping a block to the base of the sled right up against the fence. Next, I removed the screw holding that side of the fence so that it would pivot. The shims from my dado stack are super thin (0.004″), and I shimmed the fence until it was aligned along the entire length of the square.
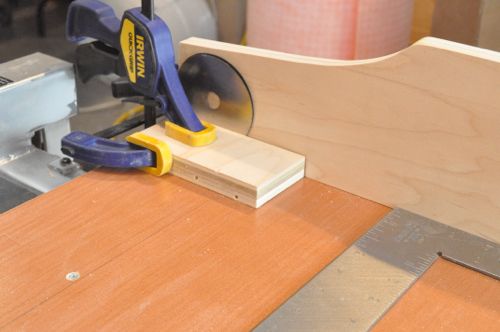
When I was satisfied, I clamped the fence tight to the block and drilled a new screw hole.
After another quick check, I add three more screws to lock the fence in place.
Step 7: Add Fence Supports
With a sled, you’re pushing and pulling on the fence all the time. To make sure it didn’t move, I added a couple of support blocks.
Step 8: Attach Stiffener
The stiffener board spans the kerf cut and holds the sled together. It doesn’t need to be perpendicular to the blade so I just mounted it flush with the edge of the base.
Step 9: Complete Kerf Cut and Test
I set my table saw blade to about 1-1/2″ above the sled and completed the kerf cut. As before, the sled moved well so I didn’t need to make any adjustments to the runners, and I haven’t even waxed the sled yet.
If there was any problem, I would have scribed a thick line on each side of the runners. Moving the sled back and forth through the miter slots would reveal where it was rubbing, and scraping the runner with a chisel would have eliminated the problem areas.
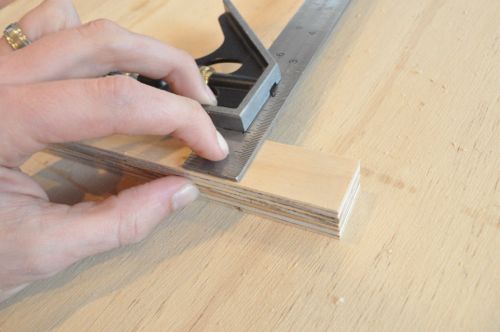
To be absolutely certain the fence was properly aligned, I used the 5-cut squaring method. I first read about this method on The Wood Whisperer, and he references a helpful flash animation showing how it’s done. In short, this method involved a sequence of cuts that will magnify any error so the fence can be dialed in to a thousandth of an inch.
My only limitation is that I don’t own a digital caliper so I had to make do with a combination square. Even so, I estimate my sled is accurate up to 0.0039″ per foot, and that’s just fine by me.
I’m excited to put the sled to use, and you’ll be hearing more about it when I unveil my most recent woodworking project.
