
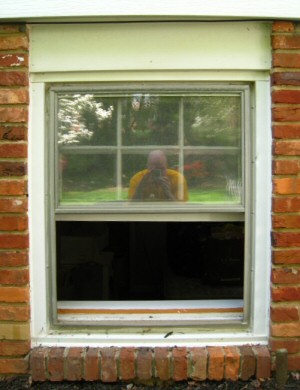
 Last weekend Ethan, Kim and I worked with a team of five other volunteers to install six replacement windows in a 1950s split level home.
The original windows in the house were constructed of solid wood. They were likely beautiful in their time, but years of weather and several coats of paint had not been kind to them. Their energy inefficiency was also an issue, with cold drafts leaking through in the winter and no Low-E glass to block UV penetration in the Summer. As with many homes from this era, the windows were protected on the outside with storm windows, hiding all the charm of the wooden originals.
Our focus this weekend was to get the new windows installed and weather tight. The inside trimming work will be handled by one of the volunteers over the course of the next few weeks. We’re going to ask him to document the process to share as Part 2 of this series.
To tackle the job, we divided up into two-person teams and worked the windows one by one. Kim and I took one of the windows on the lower level, and photo-documented the replacement to share with you.
We hope this simple how-to guide will be inspiration for those of you out there looking to tackle a job like this in your own home. Windows can be tricky subjects, but the fundamentals of most replacements are similar.
Use this guide along with other resources on the net (including our guide to new window features, or these instructions for making your own wooden windows), and your job will turn out great.
Measuring for Replacement Windows
The replacement windows we installed were well matched to the rough-in openings of the original windows, leaving enough room to shim them square. This was a testament to one of the most important aspects of a window installation: proper measurement.
We’re not going to go into the extensive details of measuring for replacements. Todd wrote a good article that explains how to measure for replacement windows that goes into this in some depth. There are several variables involved here, and most window manufacturers will provide instructions for how to measure your existing windows to determine new window sizes. For the curious among us, here’s the basics:
You need to take three vertical measurements (left, right, and center), from the top of the sill to the bottom of the header. The smallest vertical measurement is the new window’s height. Then, take three horizontal measurements (top, bottom, and middle) from the inside of the left and right rough framing members. The smallest horizontal measurement is the new window’s width. So long as the rough opening is more or less square, you’re all set. If it deviates by more than 1/2 inch, you may need to adjust your measurements to compensate.
It’s important to follow the window manufacturer’s instructions and work to get the bext approximation of the rough opening of your windows. If you measure too small, you’ll require larger trim pieces and potentially additional drywall work. If you measure to large, well… the windows just aren’t going to fit.
Steps to Install Replacement Windows
Step 1: Remove the interior window trim.
This usually can be accomplished with a pry bar, wedge, and/or hammer. Be careful not to damage the drywall. Work the trim carefully to remove the boards without putting stress on the window. Be careful not to over-swing as glass breakage can be a mess and dangerous.
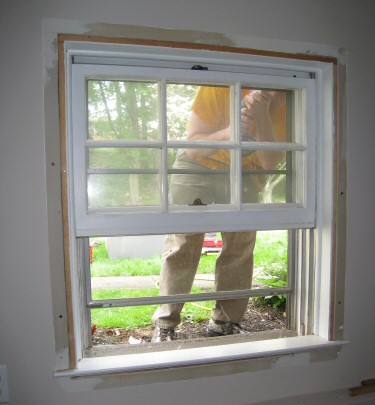
This picture shows the trim removed, with the exception of the sill.
Step 2: Remove any storm windows & panes.
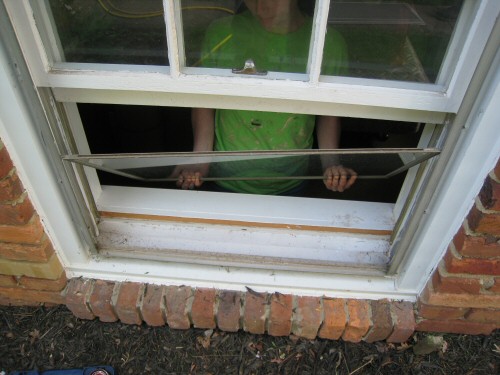
In this installation, storm windows had been screwed into the rough frame and caulked in place. We removed the storm window panes first (they snapped out for easy removal).
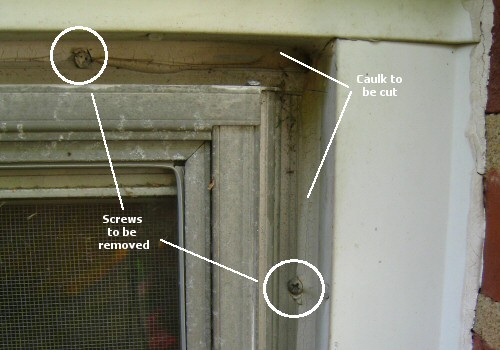
Then we unscrewed and cut the caulk to remove the storm window frame.
Step 3: Remove the window panes.
To remove the bottom sash, you’ll need to remove the stop holding it in. We had no interest in preserving the original window components so we cut and pried the stops until we could remove the panes. After some tugging and pulling we ended up removing the jamb liners and the window sashes together.
It is actually possible to preserve the stops if you’re careful. It’s probably unnecessary if you’re doing a replacement job like this one.
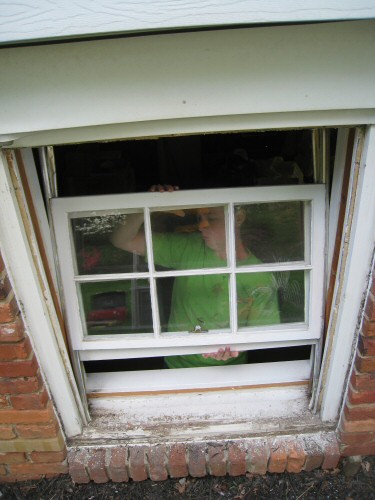
Step 4: Remove other original components, and any unnecessary excess trim or spacing boards.
Again, this step can be accomplished with a pry bar, hammer, or whatever other demolition tools you prefer. The key is to only break or destroy the pieces we don’t need to preserve for the new installation.
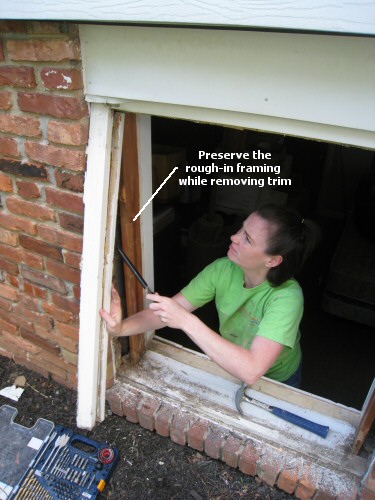
Tip: Be careful to preserve the rough-in wood opening if you will be reusing the opening for the new windows. Replacing the rough-in opening can be a tedious process, especially if it involves fastening to masonry.
Step 5: Measure the window and add any extra spacing boards. If there is more than 3/4″ available space at any side of the window, you can add 1x lumber to the existing frame.
Fortunately, in our installation the original frame provided about 1/2″ space around the replacement window – tight enough to avoid any additional lumber. We like this because it maximizes the glass space and avoids any unnecessarily large trim pieces or additional interior drywall work.
We did, however, need to replace the sill because it was sloped significantly away from the house. We didn’t want to need to shim the window onto such a sloped sill, so we replaced it with pressure treated 2×4 lumber. Note that the placement of this lumber was key, as the bottom of the window is designed to rest squarely on a 2×4, so setting the proper depth is important.
We used our Rigid reciprocating saw and Rockwell Sonicrafter to remove the original sill being careful not to damage the interior drywall.
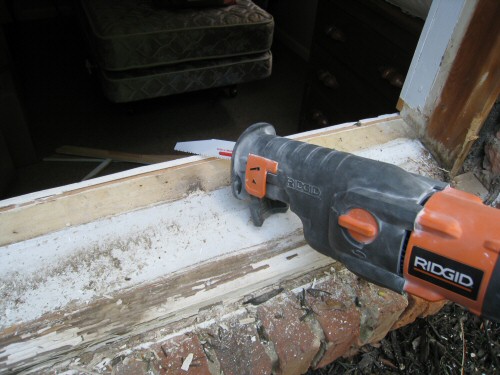
With the sill cut in half, we are ready to remove it completely.
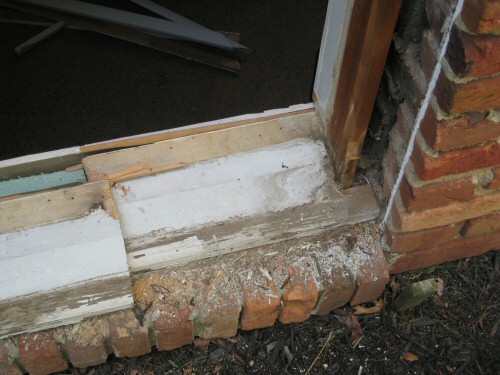
Then, we used our Porter Cable hammer drill to pre-drill holes in the masonry. Next, we measured, cut, and installed the new 2×4 sill, fastening it to the masonry with our Porter Cable impact driver while using shims to level it against the brick.
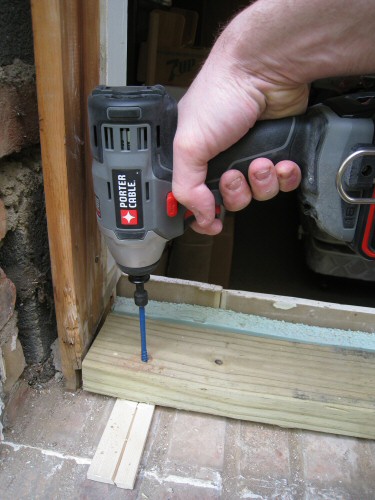
Step 6: Fill all gaps around the sill with expanding polyurethane foam.
Tip: Be sure to use minimally-expanding foam. Regular expansion foam can move a vinyl or wood frame and make it difficult to raise or lower the sashes.
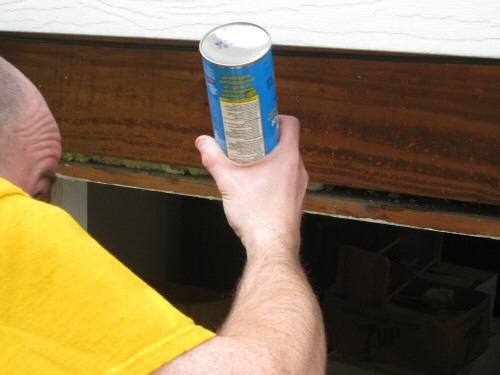
In our installation, there was enough empty space to warrant two full cans of minimally-expanding spray foam.
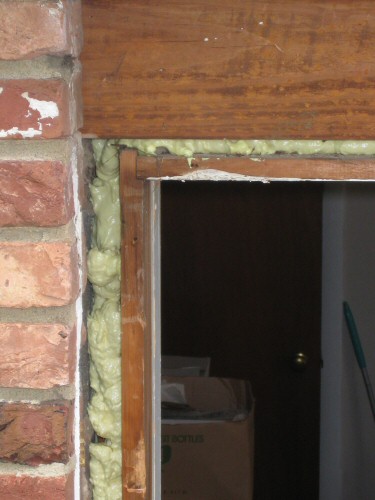
Step 7: Set the new window in place.
This is a task for two people, and will require one person to continue holding the window while the other works. The general goal is to get the window in place without glass breakage, positioning the footer of the window onto the right spot in the bottom of the frame opening.
Tip: Some installation manuals will encourage you to loosely fasten the window at this step, and then shim to get a tight finish. This is up to the installer. We prefer to belay fastening at all until we’re confident that the window is shimmed properly.
Step 8: Shim the bottom and bottom sides of the window and screw the window into place.
There are three goals when shimming the bottom that all must be addressed in concert:
- (a) ensure the window is level;
- (b) ensure the window is centered in the opening;
- (c) ensure the window is at the right depth in the rough-in.
To ensure the window is level, simply place a level across the bottom of the window. The depth you select for the window should take into account the depth of any jamb extensions you want to install, whether you want a large or small window sill, and what the exterior of the house can accommodate in terms of depth. If you replaced the sill as we did, we think its easier to level the sill than to shim a window level. Just our opinion, the pros shim windows level all the time.
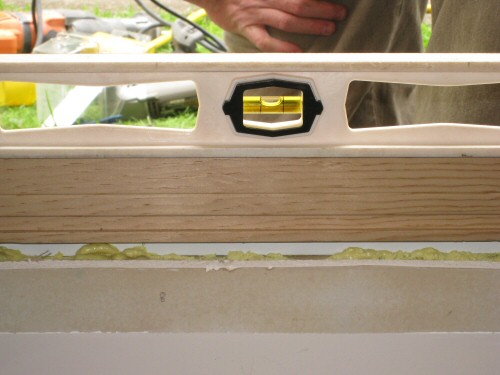
Once the window has met criteria (a), (b), and (c) above, you can fasten the window into the rough-in.
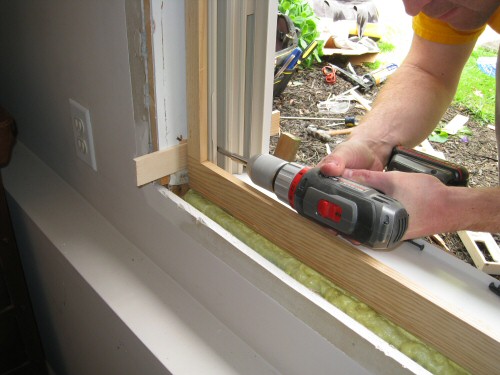
Tip: for steps 8, 9, and 10, its a good idea to regularly move the sashes up and down to ensure the window stays flexible. If your shims or screws apply excessive pressure to the frame, the sash may become difficult or impossible to move.
Step 9: Shim the top and top sides of the window and screw the window into place.
There are two goals when shimming the top of the window that all must be addressed in concert:
- (d) ensure the window is vertical (e.g. not leaning in or out);
- (e) ensure the window is square (e.g., not leaning left or right)
You can ensure the window is vertical by placing a level on the left and right sides of the window. To ensure the window is square, measure across the diagonals. A square window will have the same measurements on the diagonals.
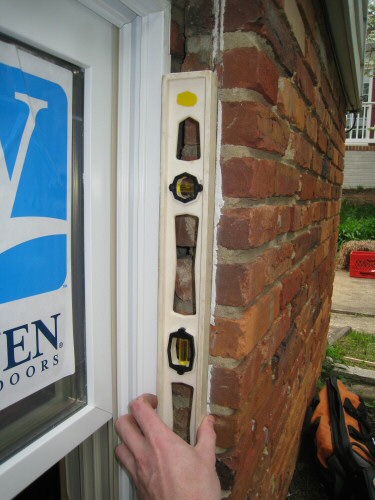
Step 10: Shim the middle of the window and screw the window into place.
There is only one goal when shimming the sides of the window:
- (f) ensure that the window is not bent in or out.
You can use a variety of methods to ensure the window isn’t bowing in on the sides. Visual inspection is a good start. You can also hold a level on the inside of the window and ensure it stays flat throughout the whole vertical span. If the window is bent in, you’ll have trouble moving the sashes. If it’s bent out, you may be creating an air gap that will precipitate a draft.
Step 11: Cut the shims flush with the window.
This can be accomplished by scoring the shims with a utility knife and breaking them off. We’ve found that method tedious and chose to use our Rockwell SoniCrafter and Dremel MultiMax for the task (just one of a number of great uses for multi-tools).
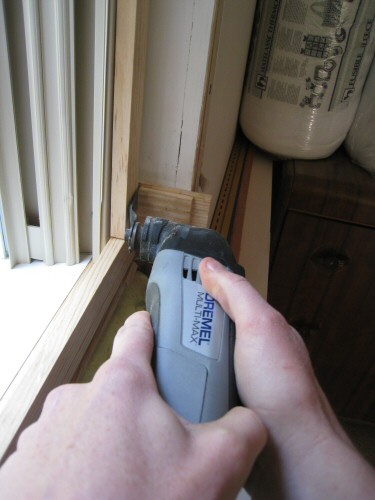
Step 12: Install any final spray foam.
At this point, the window is in place. Spray foam can be installed in any gaps between the window frame and the rough-in opening. Remember to use low-expansion foam or the window may bow and be difficult to open.
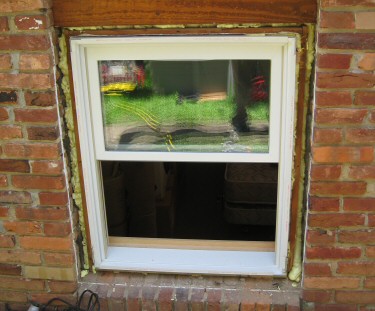
Step 13: Measure and cut the exterior PVC trim boards and fit them into place, fastening with a ring shank nailer or with exterior screws to the rough opening.
We prefer to dry-fit the PVC boards in place before nailing. Any configuration of PVC trim boards will do. We chose to make the top and bottom cap the side rails, so we worked on the side rails first.
Note: there are alternatives to rot-free PVC for trim. You could use pressure treated wood that is caulk-sealed and painted. We prefer PVC even with the higher cost for its maintenance-free quality.
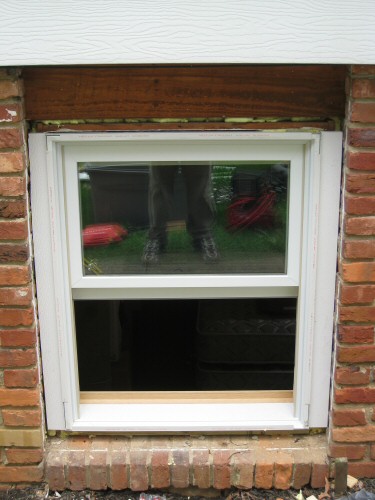
Step 14: Caulk all joints.
To completely weather seal the window, we applied elastomeric sealant to all joints–between the window and the PVC trim and between the trim and the house’s masonry woodwork. In some cases, where the masonry is chipped away, we had to apply additional caulk in a second bead.
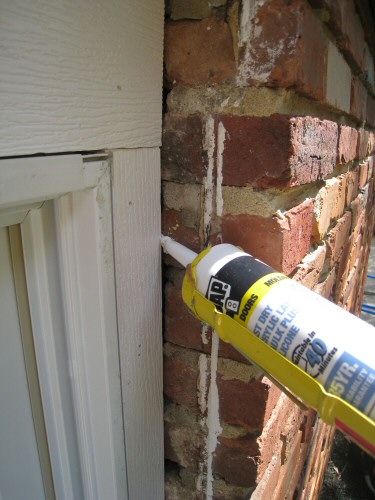
Step 15: Remove all stickers from the windows and protective plastic parts.
Our windows came with protective plastic components and a healthy amount of window stickers that required removal. Fortunately, no solvents are needed for this and some simple window cleaner works just great. Here’s a picture of the final product.
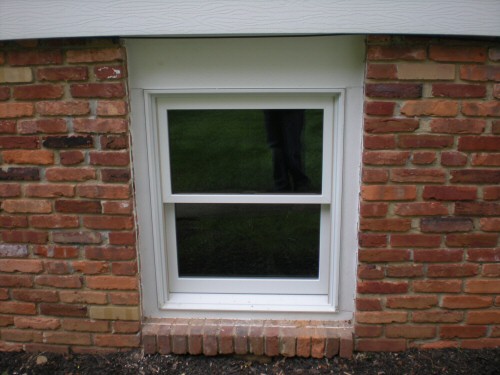
You can see some excess caulk in the facing of the masonry. This can be cleaned with a putty knife, grinder, and potentially some heavy cleaning solutions. Even with this caulk, the improvement is pretty dramatic.
Time Required to Install Replacement Windows
This window took two of us about 4.5 hours to complete, and that was without completing the interior trim. We think this is pretty typical for novice window installers.
Expect another 2-4 hours to complete interior trim. Time could be longer depending on the shape of the jamb extensions to be installed and dependent on any additional drywalling required.


Great job Fred. Replacement windows really aren’t that difficult to install if you take your time. The average DIY’er can save $300 to $500 per window installing the windows themselves.
BTW….I’ve got an article about how to measure for them if any of your readers are interested.
I understand about measuring correctly etc… but what do you do after you have already measured incorrectly and the replacement windows ordered arrive 1.75 inches too large? Length and width.
Well, if you’re me, you probably lose it a little bit and say some curse words. Then you deal with the reality: These windows aren’t going to work. They have to be sent back and re-manufactured at the proper width. And unfortunately, if they’re custom, they probably can’t be returned…. Sorry to hear!
I could’ve used this tutorial back in January, when we paid a company to replace our big living room windows. We replaced our original wood windows (that were damaged) with Marvin Wood windows and had to pay a healthy amount for both the wood windows (vs vinyl) and the installation. This looks like something I could maybe do myself, thank you!
Fred,
One more comment. Most replacement windows are manufactured in such as way that the sloping sill is not a problem. Check out my previous article which has a picture of an adjustable sill expander to handle that situation. The sloped sill is actually a good thing as it helps direct water away from the window. Sills also look more traditional although they are becoming a lost architectural feature.
Fred,
On removing the trim on the inside.
The first tool you should use is a utility knife. Gently and carefully cut along the outside edge of the trims as well as the inside where the trims meet the old window frame. This will help break the bond between the old paint and the drywall.
Next use a putty/drywall knife to gently lift the trims from the wall and window. you will encounter resistance by the nails and tough/multiple coats of paint. The putty/drywall knife works great for breaking the paint bond.
The prybar is the last tool you should use as it will leave a lot of damage, especially if you are going to reuse or salvage the trims.
If you are using a prybar for lifting the trims, use a shim on the wall so you do not damage the drywall.
Try to lift the trims from the inside out. This will minimize the damage to the trims and the miters if used.
Removing the nails that are left in the wall and window casing are best removed using a shim and a tile nipper or similar tool as the shape of the tool provides a great fulcrum for removing the nails with the smallest amount of damage.
I wasnt going to tackel the replacment of bathroom window myself, after reading your article I replaced that window and 2 others thanks again
Looks good. What’s the rule of thumb for when it’s time to replace a window?
Your entire post, “How to Install a Replacement Window – One Project Closer” ended up being very well worth commenting down here in
the comment section! Just desired to state you did a very good job.
Many thanks -Arnold
My standard size replacement window will fit into the rough opening but it won’t fit past the brick. What’s my solution? Thanks
I have aluminum windows with no wood around the framing of the window except for about 2 inches of wood trim at the top of the window. I think I can deal with that easily enough taking the old windows out and putting in a new double hung vinyl window. However, the current aluminum windows sit on the brick sill that has a bit of a slope to it… my question is… are the tops of those sloped bricks (the parts that are currently covered by the bottom of the aluminum windows) are they flat or does the slope begin under there? If that’s the case, will a vinyl leave little enough gap that I can use a metal trim to cover or am I looking some other type of process? I am a fairly handy diy type and really want to tackle this project myself since it will save me thousands of dollars… I am just nervous about the first try… any tips?
I’m still a little bit fuzzy on this installation. How much space do you leave around the replacement window and the existing frame. Is it a 1/2 inch around all sides?And do we screw in the window when only the bottom is shimmed. I followed the retailer’s recommendation by leaving only about a 1/4 inch around and had a devil of a time to find a window foam with a small enough nozzle so I had to jam in fiberglas insulation.