
Crabgrass is one of the most common annual grass weeds in North America–and one that is particularly common here in our little subdivision of Baltimore County, MD. Crabgrass grows from a single seed and shoots out wide blades of grass in the shape of a star. The plant grows very rapidly, moving from seedling to full plant in 14 days. OK State University has a great picture of crabgrass here if you’re looking to identify it.
The term annual grass weeds refers to the whole set of weeds that occur annually in lawns. These weeds germinate in the soil in early Spring/Summer, grow, spread, and drop seeds during hot Summer weather, and die off in the frosts of early Winter. Each year, no living crabgrass remains in the lawn, only ungerminated seeds lying on the surface and just beneath the surface of the soil.
How to Control Crabgrass
Nature gives us a short window to stop crabgrass before it starts. In early Spring, before the new seeds germinate, a preemergent herbicide can be applied to the soil. Preemergent herbicides (called preemergents for short) prevent crabgrass seeds from germinating into the full plants. The result: less crabgrass grows during the season. And, since less crabgrass grows, there are fewer plants dropping seeds for the next cycle. With consistent application of preemergents, along with other grass care, crabgrass can be virtually eliminated from a lawn. This gives way for the healthy, rich turf we all dream of.
 and Spreader")
When to Apply Crabgrass Preventer
Crabgrass seeds germinate in the early Spring when the temperature of the surface soil rises into the 50s and 60s. Once the seeds germinate, the opportunity for prevention is passed. So, applying the preemergent early is key. Scotts Turfbuilder with Halts Crabgrass Preventer (our preemergent of choice this year because that’s what was available at the big box) recommends spreading the preemergent before the days are regularly in the 80s. We think that’s much too late. Once the days are regularly in the 60s and 70s, the seeds will be germinating and sprouting small plants. Instead, apply preemergents very early in the season, while the temperatures are still in the 50s. In Baltimore County, MD, this means spreading the preventer before April 1.
Scotts crabgrass preventer can be applied only twice per year, once in the early Spring and again in the late Summer if desired. The limitation has more to do with the Turfbuilder nutrients in the product rather than the crabgrass preventer. A product that only contains the herbicide could be applied more frequently. That said, we think it makes sense to spread preemergent only in the early Spring, while focusing on building up the cultured turf for the rest of the year.
Don’t Plant Grass Seed | Avoid Garden Areas
Because preemergents prevent seed germination, they should be carefully applied so as to avoid garden and other new growth areas. You should also avoid planting any type of grass seed within 3-6 months after applying preemergent. In other words, plan to plant new turf only in the Autumn.
Other Considerations / Instructions
- Always follow instructions on the crabgrass preventer you choose.
- Watering your lawn after applying crabgrass preventer will help form a protective barrier.
- Don’t aerate or heavily rake the lawn after applying pre-emergent. (This will degrade the barrier). Wait for the Fall to aerate your lawn and to spread seed.
- Wait 2 months before applying other chemicals like weed and feed unless you are following instructions or consulting with a professional.
More Info
This article covers the application of preemergent herbicide. If you’d like to learn more about lawn care, consider further reading like our review of Scott’s Turfbuilder with PLUS 2 Weed Control, and this detailed guide about weed control and how to target specific weeds.
What do you think? Do you spread crabgrass preemergent each year? Tell us about your results in the comments…
It was murderously hot here in the Charm City suburbs last weekend. The heat index topped a full 115 degrees on Saturday! But fear not, the heat didn’t deter us from tackling our long-awaited shed storage shelves project. We’re excited about this project because we’ve been looking forward to sharing a plywood shelving article for some time now, and this article gives us the perfect avenue for that.

In case you’ve forgotten (or more likely if you’ve just started reading here), here’s the new shed. It looks great on the outside, but without some shelving and storage hooks for tools inside, most of the interior space would go to waste.
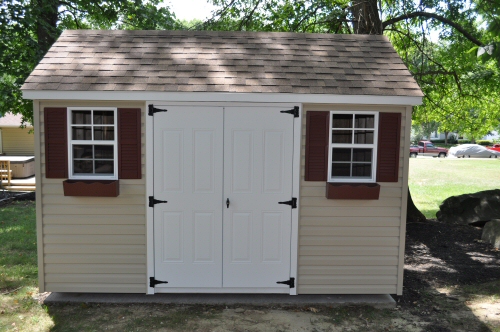
This shed is a high-quality build, with 2×4 studs 16″ on center, 3/4″ pressure-treated plywood subfloor, and 1/2″ plywood walls.


Our goal for this project is to build three sturdy plywood shelves. The bottom shelf will be a large 24″ deep work surface; the middle an 8″ deep storage shelf that won’t obscure the work surface of the bottom shelf; and the top, a 14″ overhead storage shelf. We chose these shelf sizes to provide adequate work and storage area without interfering with the person standing in front of the shelf working.
Ultimately, we’ll build a similar set-up on both sides of the shed, but for this article, we’ll focus only on the left side.
![]()
In hopeful preparation for these shelves, we’ve filled the yard with tools from the shed that we’ll need to store in this space. This helped us try out different articles to make sure the shelving heights worked for our storage goals.


The five largest yard tools we need to store are all lined up and ready for action. Hopefully when we’re done, these will all fit neatly in their own place in the new design.

How to Build Shed Storage Shelves
We started our shelving project with the middle shelf – an 8″ shelf that will rest about 55.5″ off the shed floor.
Step 1: Measure, mark, and install side rail supports.
We mark both sides of the shed wall at 49″. We leave a 6.5″ gap to account for the support 2×4 (3.5″ high), and the shelf itself (4″ high completely built). We use 3.25″ #10 decking screws to fasten the 2×4 supports to the stud walls. These screws are more than sufficient for the weight loads we’ll be putting on these shelves.


Step 2: Cut Front and Back Rails to Length
We’re going to use 2x4s for the front and back of the shelf. The 2x4s will rest on the supports we’ve just installed. These rails must be cut to the width of the shed. We used our Kobalt mitre saw for this task. For a deep shelf, a third 2×4 could be placed at the middle of the shelf spanning side-to-side parallel to the front and back.

Step 3: Cut Plywood to Fit the Shelf Surface
We use our Bosch job site table saw and a Craftsman circular saw to make the two cuts for our plywood surface. The table saw makes quick work of the rip cut, but the circular saw is a little easier to manage for the shorter cross-cut.


Step 4: Layout the Shelf Components and Confirm Fit
We dry-fit the components of our shelf to ensure a very tight fit. We want the shelf to have a nice fit and finish, and getting the cuts right is essential for this.

Step 6: Assemble the 2×4 Frame
We use 3.25″ #10 decking screws, the same as those used to attach the side rails to the shed.


Step 7: (Optional) Confirm the Frame Fits
Given that wood is a fickle material, it’s never a bad idea to check twice for fit. We check the frame to ensure a tight fit on the rails.

Step 8: Attach the Plywood Surface
We attach the plywood surface with 1.5″ #6 all purpose wood screws. One optional step here would be to also use construction adhesive to attach the plywood tops.


Step 8: Install the Shelf on the Rails


Step 9: Fasten the Shelf to the Studs
Fastening the shelf at every stud provides significant additional weight-holding capability, especially towards the back of the shelf. On deeper shelves, more 2x4s must be run side-to-side to increase shelf strength. On deeper shelves where weight isn’t a major concern, 2x4s can be run front-to-back to avoid plywood sag. Front-to-back 2x4s do not add a significant amount of overall strength to the shelves.

Step 10: (Optional) Test Your Shelf’s Strength
Our new shelf has no trouble holding Ethan and barely flexes under his weight.

Step 11: Repeat as Necessary
With the middle shelf fastened, we construct and install the bottom shelf using the same technique. This shelf has several horizontal cross members to keep the plywood from sagging in the center.


Installing the Overhead Shelf
The top plate of the wall is exposed in this style shed, and we decided we wanted our plywood shelf to cover it. We also decided that this shelf would be easier to install in place, rather than building it outside. We measure below the surface of the top plate to find the right spot for the support 2×4.

We install both 2×4 supports, just like for the other two shelves.

Then, we install the cross members, cut the plywood, and install everything in place.

The Finished Product
Here’s the finished product for this article. We should’ve snapped a pic before piling everything in the shed, but with the heat still beating down on us, we rushed the completion. Still, the pictures show just how much space these shelves add.

And just as we had hoped, our five largest yard tools now fit neatly beneath our large work shelf.

Stay tuned in the next few weeks for the shelving on the other side of the shed, and some nifty latching hooks we’ll be installing on the back of the shed to hang our shovels, rakes, and other gardening and lawn tools.
Tools Required to Build Shed Shelves
- Mitre Saw / Chop Saw – For cutting 2x4s. We didn’t snap a pic of it for this tutorial, but we used our Kobalt Compound Mitre saw for all 2×4 cuts.
- Table Saw and/or Circular Saw – Either work for cutting plywood. If you need a 24″ shelf, the rip capacity of most table saws will be exceeded.
- Drill Driver and/or Impact Driver – We found an impact driver to be much better for driving long 3.25″ screws through the 2x4s. Stay tuned tomorrow for an article on the impact driver that made a difference.
- Tape Measure
Materials
- 2×4 dimensional lumber for shelf supports
- 1/2 inch sanded plywood for shelf surface
- 3.25″ #10 or #12 screws for fastening 2×4 components
- 1.5″ #8 screws for fastening plywood to the shelf base
Tips and Tricks
- You can strengthen the shelf by installing diagonal braces (available at the big box stores) from the studs to the shelf base.
- You can also strengthen the shelf by adding more length-wise 2x4s. Depth-wise 2x4s will help avoid plywood sag on the shelf, but do not add strength.
- If you want a backsplash, you might consider installing peg board on the back wall before installing the shelves.
Editors Note: This article is from 2009 when Fred & Kim were getting ready to insulate their basement, and it’s a great review of the options they considered. If you’re thinking about insulating your basement, it’s important to make an informed decision about installing a vapor barrier, and there’s a lot of misinformation out there. After you finish reading this article about insulation options, be sure to check out the Related Content section to learn more about vapor barriers.
We’re just about ready to insulate an unfinished basement game room and this post reviews a number of options for achieving maximum efficiency in basement insulation installations. The article begins with an overview of the basement area and then provides a summary of insulation options.
Basement Wall Construction & 2×4 Wall Studs
The basement walls are constructed of stacked cinder block. The front half of the house is completely underground, while the back of the house is mostly at ground level, with a small area about 2-3 feet underground. The house has decent grading that keeps water away from the foundation, but moisture was still a problem in a few sections.
We used a combination of Super Thoroseal and SunnyDry foundation waterproofers to seal out the remaining moisture, and regraded the gardens in the front of the house. Together, the results have yielded good results, we haven’t had any moisture problems since.

While we’ve taken precaution to ensure the wall seal is tight and that no water is leaking, we still want an insulation product that is mold resistant, since I have a lingering fear that moisture could seep back in at some point in the future (say, due to settling of the foundation and a break in the seal).
We framed the basement walls using traditional 2×4 stud walls fastened to a pressure treated 2×4 bottom board. We briefly considered metal stud framing, but still like the solidity and rigidity of wood, so we stuck with what we knew. The walls are not fastened to the cinder block (as that would penetrate the water tight seal). Instead, the walls are fastened to the joists above, and we used powder charge nailer to fasten the bottom board in place.
We left about a 1 inch gap between the cinder block and the stud wall to provide extra space for wall insulation, figuring we’d need that to get maximum efficiency.
R-13 Fiberglass Basement Wall Insulation
 The first option up for consideration is fiberglass batting: the traditional R13 pink fiberglass available at the big box store.
Fiberglass Pros: Fiberglass is good because it’s relatively cheap; it doesn’t require any special installation tools; it can be brought to the house using a standard pickup truck; and, it can be installed by hand in a single day.
Fiberglass Cons: The drawback of fiberglass is that it doesn’t provide great R-value (about R3 / inch), and it can be susceptible to mold with unfavorable moisture conditions. Fiberglass is considered a mold resistant product; however we’ve seen several instances of molding fiberglass batting, including the fiberglass we removed from this basement when we started working it. Fiberglass also doesn’t fill every nook and cranny of the walls, leaving gaps for air to circulate, which ultimately contributes to energy loss. These air gaps are not considered in the reported R value of the insulation, making the effective R value much lower.
We ultimately decided against fiberglass because we’ve had a pretty significant draft in the basement and even with fiberglass installed, this draft will still be leaching energy from the room.
Wet Cellulose Wall Insulation
 The second option up for consideration is wet cellulose insulation. We looked at products like NuWool Wall Seal Insulation, a sprayed-in wet cellulose insulation.
Wet Cellulose Pros: Wet cellulose is a sticky cellulose product sprayed into the stud walls. The R-value is slightly higher than fiberglass at about R4 / inch. The main advantage of wet cellulose over fiberglass is it’s ability to fill the cracks and voids that fiberglass batting leaves open, providing a much tighter building envelope. It has a number of other advantages including being highly fire resistant and eco-friendly. It Provides a slightly more cost-effective solution than spray foam products, but does not offer as tight a seal.
Wet Cellulose Cons: Higher cost than fiberglass (but worth it considering the added insulation value and energy savings); requires special installation tools and entails a somewhat “messy” installation. Would be best performed by a contractor, although DIY kits are available and we considered these. Cellulose is mold resistant but still susceptible to mold in the least ideal environments.
We decided against wet cellulose insulation because spray foam offered a better alternative. If you’re looking for cellulose installation instructions, Todd provides them at that link.
Spray Foam Insulation: Open Cell Insulation
 The third and fourth options up for consideration are spray foam insulation products. I’m starting with open cell insulation because it’s less expensive and not the option we ultimately chose. That said, open cell insulation is a good product that can be very cost efficient for many installations.
Open cell spray foam insulation is a chemical product that is sprayed onto the wall and then expands to fill the space. The term Open Cell refers to the cell structure of the resulting foam, which cures to a sponge-like material with millions of tiny open bubbles. The consistency is similar to angel food cake. The chemicals are mixed on site using a special compressor and gun system. The compressor may heat the foam to a required temperature. When sprayed on the walls, the foam sticks and expands in place.
Open Cell Foam Pros: Open cell foam is sprayed in place and expands to fill the space. It creates a better seal that spray cellulose and provides a comparable R-value in most installations (about R4, slightly higher than fiberglass). Spray foam is nice because it can be sprayed blindly into a cavity and will fill the space of that cavity.
Open cell foam expands to 100 times its spray-on size, making it extremely good for filling voids and relatively cost efficient. It is also nice because it stays somewhat flexible, which is good for ensuring flat drywall installation.
Open Cell Foam Cons: Open cell foam does not provide as tight a seal as closed sell foam because the bubbles are broken and it is easier for air to flow between the cells. Unlike closed cell foam products, open-cell foam products are generally filled with air. Closed cell products can be filled with a chemical that is much less efficient at transferring heat that air, leading to greater energy efficiency. Also, closed cell products can nearly double the insulation performance of open cell products.
Closed Cell Spray Foam Insulation (Selected Option)
Closed cell spray foam is very similar to its open cell counterpart, with the exception that the bubbles in closed cell foam are ‘closed’ and so do not permit any air flow. You can think of closed cell foam as a very tight honeycomb of closed cells that are waterproof and air tight.
Closed cell foam can come in a range of different cured hardnesses, all the way up to foam that can support human weight. Closed cell spray foams can also be designed so that they cure with bubbles filled with non-air chemicals that improve energy efficiency.
Closed Cell Foam Pros: Closed cell foams offer very high R-values (R7.5 per inch!). Closed cell foam completes the building envelope and tightly seals gaps to prevent air flow. Closed cell foam is highly mold resistant and also provides a vapor barrier for the installation.
Closed Cell Foam Cons: Best performed by a professional installer, although DIY kits do exist. Significantly higher price than fiberglass, but offers a superior seal.
Recommended Method
While closed cell spray foam is slightly more expensive than other methods, it offers high R-value with the best mold resistance. Given that we’ve invested thousands of dollars in radiant floor heating, we believe that the higher cost is justified and would recommend this method.
We’re currently working with a contractor to price the job, and to share all the details with you!
Alternative Insulation Methods
There are more insulation options than what we’ve listed here, including hybrid installations (e.g., closed cell foam topped with fiberglass), and installations of rigid foam board, etc. We’ve covered all the common options here; and hope you find it a good reference.
What do you think? Got a question? Leave it in the comments… or tell us what insulation you choose for your house…
(photo credits: fiberglass insulation by ann-dabney; wet cellulose by todd; spray foam insulation by el diablo robotico)

It’s been quiet around OPC, and that’s because I’ve been away at the annual Milwaukee & Bosch media events. It just so happened that these two competitors scheduled their events back-to-back, and that kept me busy all last week. If you missed it, here are some of the new (and soon to be released) products from Milwaukee. Today I’m going to show you some of the cool, new tools from Bosch.
GSL-2 Surface Laser
Bosch has just introduce a surface laser that scans a floor for level and flatness, and you can imagine the impact a tool like this will have for tile, hardwood and other flooring installers. The GSL-2 (which reminds me of Wall-E) scans a radius of up to 60 feet, features remote control and a target plate to determine height deviation. It includes four AA batteries, and can be powered by the Bosch 12v battery pack (not included).


CM12 Job Site Miter Saw
Job site portability is a key factor for most contractors, and it was a major focus when Bosch introduced their GTS1031 table saw (review) last year. This year, Bosch follows up with the new CM12 compound miter saw. Engineered for one-handed carry and weighing only 43 lbs., the CM12 is easy to maneuver and setup. Furthermore, you don’t need to sacrifice cutting capacity with 8″ cross cuts and 6″ miter cuts at 45°.


Speed for Metal Jig Saw Blades
Cutting through metal is slow, and it’s an easy way to burn through blades. Bosch had that in mind when they developed their Speed for Metal t-shank blades that deliver 2x the speed and 4x the life when compared to conventional metal-cutting jig saw blades. Another cool feature is the tapered back which (slightly) pivots the blade as it moves against the alignment wheel for a sort of “orbital” action.


23 Ga. Pin Nailer
There’s nothing more frustrating than when I realize my nail gun is empty and the past five nails didn’t actually fire. Aside from being a great pin nailer, the FNS-138 features a “low nail indicator” and dry fire lock-out when the clip is empty.


October of last year Genie Garage Door Opener had me out to tour their facilities in Ohio. They also hooked me up with a garage door opener (even though I don’t actually own a garage). Fortunately, the OPC workshop is a converted garage, and that gave me the perfect opportunity to install the Genie PowerMax 1500. This article is an overview of the installation process.
A Quick Note: OPC just sponsored a giveaway over on Young House Love. Sorry, entries are closed, but I wanted to take a moment and welcome any new readers! If you’re new to OPC, learn more about us here including details about our Project Rewards program where you can get free stuff like this. If you’re more interested in crafts, decor and style, be sure to check out OPC’s Better Half.
Pro-Follow Update: Here at OPC, Pro-Follows are the “meat-and-potatoes” of our content, and I’m excited to get started on a bathroom remodel with Steve Wartman and his crew next week. Stay tuned for details!

How to Install the Genie PowerMax 1500
The PowerMax 1500 is a screw-drive garage door opener, and that’s good because there are no belts, chains or gears that wear out. Screw-drive openers are also very strong, and almost maintenance free (lubricating the drive-screw and double-checking the Safe-T-Beam system). The PowerMax 1500 has a direct current (DC) motor, and that enables variable speed control for things like the “soft close” feature.

The project started by taking down this Craftsman opener. Swapping in a new opener is much easier because if you’re lucky, you can reuse some of the mounting hardware and wiring. Plus, you don’t have to worry about running a power supply.


Before you purchase an opener, you need to measure the garage door and make sure that the rails can accommodate the door height. Most household garage doors are 7′ tall.
The segments of this rail system are joined together with these rail connectors. After installing this opener, I’d actually prefer bolting the rails together (like some of the other Genie models) because the connectors can create noise as the door opener is running.

After joining the rails, you need to connect the segments of the screw, and Genie did a great job keeping this simple. All you have to do is slide a collar on, and then snap a spacer in place behind it.


The shuttle (pictured) slides along the rails and attaches to the carriage (the part that actually moves along the screw).

With the rails in place, the whole assembly attaches to the power head.


Mounting all this on the ceiling was kinda tricky because I was working alone. In the end, I used the garage door to support the rail, and I carefully attached the power head to the bracket.


Here’s a shot of the header bracket that holds the opposite end of the rails above the garage door.

And this is the door bracket which connects to the shuttle via the door arms.


Positioning the Safe-T-Beams was really easy. I don’t know if I just got lucky or if it’s always this simple. I just mounted the beams to the wall framing, and that was it! There was no need to adjust their positions.


Like I mentioned, it’s great to reuse the old wiring. Each Safe-T-Beam has two wires, and the wall-mount button also has two wires. Everything slides into the convenient push-in connector.


One of the nice things about the wiring on the sensors and the wall mount is that the wires are interchangeable.


With everything wired up, all that’s left is installing a couple of light bulbs and the lens. If you look closely in this picture, you’ll notice that I taped over the motion sensor. Unfortunately, there’s no way to turn that off! Other than that, the opener works well.


This how-to guide is a compilation of several articles from 2010 when we were going through the process of removing a load bearing wall. It was a big project that took place over the course of several days and required the help of professional contractors and engineers. This article will walk you through the process, step-by-step so you can see how the pros completed the job.
For any of you who weren’t with us in January 2010, this was the last wall to be removed in the conversion to an open floor plan in our home, as indicated by the blue box in the floor plan below. We removed the non-load bearing walls identified in red at the very end of 2009.
In addition to the removal of the wall (blue box), we also removed the pantry (green box below), faux-paneling in the family room, and took care of a couple of other small items to make this job big enough to dignify a bid from each of our general contractors.

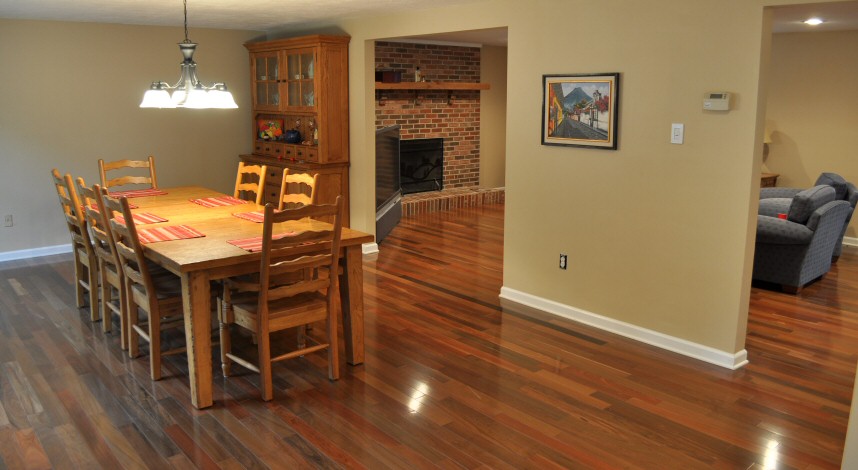
Here’s a picture of how the family room looked before work began (which you can identify on the floor plan above).

This is a picture of the other side of the same wall, in the living room. (Actually, this became the dining room after the conversion).

The drywall work shown in the picture is from the non-load bearing wall removal project in December 2009. We never got around to patching the drywall so this was one of the small projects we added to the contractor’s scope in 2010.
The first step in this job was for our carpenter to open up the wall for the engineer to inspect the job, and then give his stamp of approval on the plans and materials (including which kind of lumber to buy for the header).

What we also learned:
- That the location of our ductwork was going to mean that our opening needed to be smaller than our original 8′ plan and also will be a little right-of-center on the wall. We could have shrunk it further to keep it totally centered on the wall, but we’re talking inches. I’d rather have the space, so I asked our contractor to frame it from the far left stud to the far right in the above picture (you can see where he drew the original opening lines there too).
- We have 14′ joists supporting the 2nd floor of the house, so temporary walls were built on BOTH sides of the wall before the removal happened. If we’d had 16′ joists, they would’ve built the temporary wall on one side only because there would’ve been a greater overlap area under which to support the whole weight of both sides of the house.

Removing Part of a Load Bearing Wall
In a single day, the contractors removed the drywall section, framed out the doorway, and also partially removed our pantry. Here’s the step-by-step on the load bearing wall removal.
Step 1: Remove Drywall and Molding
The contractor removed the baseboard on both sides of the wall, the sections of paneling in the family room that overlapped the opening, and the remainder of the drywall on the Dining Room side (where they’d cut the exploratory hole).


Step 2: Construct Temporary Walls
They constructed temporary walls on both sides of the area to be opened, in order to support the joists holding up the the second floor of the house. Like I mentioned, we needed two temporary walls because we have 14′ joists. Had we had 16′ joists, we would have only needed one temporary wall on one side of the opening.


Step 3: Replace Framing with LVL Header
Next, the contractor removed the original studs and added a new laminated veneer lumber (LVL) header and jack studs supports. One of the guys mentioned that their 3-stud-width support structure is actually more than required, but we support over-engineering when it’s this inexpensive! The studs are sitting on blocks which sit on the steel I-beam down in the basement.


Step 4: Nail Jack Studs
With the new header in place, they cut away the drywall from the other room and nailed the jack studs together.


Step 5: Deconstruct Temporary Walls
At this point, the guys took down the temporary support walls. The drywall people came later, since we also had lighting we decided to install at the last minute in the Family Room, and we were mid-project on the pantry removal.


Electric
Before they closed up the walls, there were a few electrical details that needed finishing up. We mentioned that we decided to add recessed lighting in the Family Room ceiling while the walls were opened up. We had that done, added a junction box for our chandelier in the Dining Room, and the electrician even mounted our thermostat in its new location. The latter had been sitting on the floor ever since we removed the wall on which it had been hanging in December.
If you’d like to learn more about recessed lighting, check out our walk-through for wiring recessed lighting.


Step 6: Add Support Strapping
To keep our tripled-up support studs on the right side of the new opening from twisting in the future, our carpenter fastened a strap between them and the header. Had there been a longer “king” stud there, as there is on the left, strapping would not be necessary.


Step 7: Hang and Finish New Drywall
This picture shows the drywall progress before they started finishing. If you’d like to learn more, check out our complete guide for finishing drywall.

Finished Pictures
After our wall was finished, it took several more projects to get this room into it’s finished shape. But it was all worth it, because in the end, it looks like this.
Here’s a link to more pictures of this space after we finished the hardwood flooring.
Hey everyone. Before we get rolling with today’s article, I wanted to share a quick Pro-Follow update. I’m spending the day at a new basement remodel project with general contractor Joe Bianco and his team. The framers have finished, and the plumbing is underway. I’m really excited for the articles that will come out of this, so stay tuned for the full details. Connect with me through Facebook or Twitter for all the latest updates. Today, we’re bringing you a guest post by JB Bartkowiak, Editor and MC @ BuildingMoxie.com.
Here in Maryland, this winter has been extremely mild. Temperatures are in the mid 50º’s more often than not, and it seems like weeks since it has felt anything like the winters growing up. I miss snow, snow tubing (or ice skating), and chestnuts roasting on an open fire. OK, maybe I don’t actually roast chestnuts, but these, plus a good (romantic) fire or two, are just some the promises I expect of winter.

source Barry Morgan
Winter also means heating bills, and if you’re like me, the current climate (economic) has you looking for ways to save a little on those heating bills. Using your fireplace to heat your home can be a cost effective solution. Before you run off and start setting things aflame, let me share some tips for making the most of your fireplace by picking the right wood.
Burn Hot and Clean
Simply put, we want fires to burn hot, and the hottest burning woods are dense hardwoods. We also want fires to burn clean because clean burning fires produce less smoke and creosote, hence reducing the frequency at which you must clean your fireplace and chimney.
The cleanest burning woods are those that are dried (aka seasoned) properly. The presence of excess moisture in firewood forces the fire to work harder (for the same BTU output), and generally makes the resulting smoke heavier. Too much moisture allows the smoke to linger, producing more creosote within the chimney’s flue liner. This is especially dangerous when the chimney throat is constructed of metals that are at risk of rust.
“Seasoned” is just another word for dried and refers to the moisture content of the wood. Unseasoned or “green” firewood can have a moisture content as high as 60 to 80%, but the moisture content of a seasoned firewood is usually closer to 20%. There is such a thing as wood that is too dry. Woods with 10% or less moisture content will end up burning too quickly for any sort of optimal heat output.

source www.BuildingMoxie.com
What’s a Cord?
There are two different types of cords; one is a full cord and the other is called a face cord. It is helpful to know that a face cord is approximately 1/3 of a full cord. Neither measurement is governed by a count of individual pieces. Rather a cord is a dimensional measurement (much like a yard of stone).
One cord of wood measures 4′ x 4′ x 8′, and it’s a lot of wood. To put this into context, it’s approximately equal to two, full-sized (Chevy or Ford) pick-up truck loads of roughly-tossed wood.

source John Bartkowiak, Jr
What is the Best Type of Firewood
When I asked chimney and fireplace contractor Cullen Davis at Clean Sweep Maryland, he says, “For larger quantities, I usually recommend Red Oak because it is affordable and easy to come by no matter where you live. I also recommended buying from someone local, a farm perhaps – someone you can trust.” For smaller quantities, a garden or home center usually does just fine; though note, these locations often offer kiln-dried wood at a slight premium.
From an impromptu panel, Ash, Hickory and even Black Locust were suggested types of firewood. Here is a very informative table from About.com that offers some more details about the best burning firewood species:
- Hickory – 25 to 28 million BTUs/cord – density 37 to 58 lbs./cu.ft.
- Oak – 24 to 28 million BTUs/cord – density 37 to 58 lbs./cu.ft.
- Black Locust – 27 million BTUs/cord – density 43 lbs./cu.ft.
- Beech – 24 to 27 million BTUs/cord – density 32 to 56 lbs./cu.ft.
- White Ash – 24 million BTUs/cord – density 43 lbs./cu.ft.
Jason Whipple, a friend who used to burn wood at his Vermont home as the primary heat source says, “Any seasoned hardwood works fine. I’ve paid a premium for fresh cut Ash in the past because it tends to cure quickly and burn well with just a month or so of drying after being cut and split.”
How to Identify Seasoned Wood & How to Season Firewood?
Properly seasoned firewood should feel relatively light, include checks (or cracks) in the ends, have almost a bleached wood color and should have an apparent lack of smell. If you bang two pieces together, they should generally produce a loud clang kinda like a baseball bat.

source Barry Morgan
Comparatively speaking, signs of unseasoned firewood include pieces that are relatively heavy, have a very tight end grain, a uniform wood color and a strong smell. Sap is a sure sign that a wood is green. When banging two pieces together (end to end) they create a dull thud.

source Barry Morgan
The length of time it takes to season wood depends on the species of wood and how it’s seasoned, and seasoning falls into two categories: air-dried or kiln-dried. Each is a viable option and both offer different benefits.
If air-drying, it’s a good idea to remove the bark as it will trap the moisture. Drying times vary between woods, but for most species expect a period of 9 – 12 months. Stack the wood, ideally under cover, in a spot where the pile gets some sun and is open to the wind. In a best case scenario, you have some sort of wood shed.
While air-drying of course is the more economically of the two options, you may consider kiln-dried wood, and especially if you do not have a broad home heating need. It is said that kiln-dried wood (wood that is essentially baked at temperatures for 2-3 days) produces no creosote and generates less ash than air-dried woods.
If you order wood, don’t be shy about asking when it was cut and how long it’s been split. Jason Whipple shares, “One thing that always bugged me about some seasoned wood- they would cut the trees down in spring but wouldn’t split until it was ordered. This isn’t seasoned at all if it sits in the yard in log form. It needs to be split so it can dry out.”

source www.BuildingMoxie.com
*******
Thanks to Britt@CalFinder, Cullen Davis, Barry Morgan, Joseph Perrone, Ryan McCracken, Jason Whipple, Jane Griswold Radocchia, David M Lyons, Joan Worthington & my Dad John Bartkowiak, Jr for help on compiling the information and images for this article.
Happy fires. ~jb @BuildingMoxie.com
*******
Today we’re featuring a guest post from Joe, a regular reader and commenter. If you’ve got your own project or story to share, check out our ProjectPub page or shoot us an email. We’d love to send you a reward!
If you are able to plan ahead for your Christmas gifts you could think about making Rumtopf to give away. Rumtopf is a German dessert which is traditionally eaten around Christmas. Rumtopf literally means rum pot, and that’s basically what it is, Rum, fruit, and sugar in a big earthenware pot. In the days before refrigeration fresh fruit could only be enjoyed while it was in season. By soaking it in sugar and rum, the fruit could be preserved until the next year. The traditional way to make Rumtopf is to start when the first fruits comes into season in the spring/early summer, but with the wonders of the modern supermarket you can get everything to make the Rumtopf in one trip. I still recommend doing it throughout the year because fruit is almost always better when it is in season, and it’s usually cheaper too.

Ingredients
With all of this background, lets start with the ingredient list.
- Dark (not spiced) Rum, 108 proof recommended
- Fruit
- Sugar
You will also need a large pot to make it in, small jars for gifts, and a kitchen scale for measuring out the sugar.
Step 1: Find the Right Jar
The Pot/Jar you use to make the Rumtopf can either be pottery or glass. The traditional German Rumtopf is a tall straight sided pottery jar. I used a glass jar because I didn’t have a traditional pot when I started my batch. I hear Pickle jars work very well because they have weights that can be used to hold the fruit under the rum, and the lid sits in a deep groove that can be filled with water to ensure an airtight seal.
Step 2: Mix The Rum
Germans make Rumtopf with 108 proof rum, but your average rum will be 80 proof. I’ve heard rumors that higher proof rum preserves the fruit better with the higher alcohol content so I figured I would try that. After a bit of searching for 108 proof rum in the US, I realized it’s really hard to find. I guess it’s common in Germany though. Even so, it’s really easy to get very close to 108 proof with a little mixing. Add 2 parts 80 proof to 1 part 151 proof to make 103.6 proof. Good enough!

I just poured all of the rum into a big pitcher to mix it up, then poured it back into the bottles. If you use Bacardi 151 for this, it comes with a flame arrester on the cap, I ripped it off (you can see it on the counter) because it took FOREVER to pour, and I needed to pour the rum back into the bottle.

Step 3: Add Fruit and Sugar
For the fruit, I used strawberries, cherries, raspberries, peaches, pears, and pineapple. You can add other fruit like nectarines, apricots, plums, grapes, gooseberries, and red currants. Try to stay away from melons, apples, rhubarb, bananas, or anything that could discolor the mix too much (like blueberries). You really should have the cherries and strawberries in there because they give it the wonderful red color.
The process is the same for each of the fruits. Clean the fruit, and cut it down to bite sized pieces. Weigh the fruit and add half as much sugar. Let this mixture sit for a couple of hours to give the sugar time to pull the juices out of the fruit.

Here you can see the cherries and sugar. I pitted the cherries using chopsticks, and it was actually a lot of fun. You can also see in the picture that I added a bit too much sugar. Some of the recipes I read said equal parts by weight, but I found that to be too much sugar.
Step 4: Combine in the Rum Pot
Once the fruit has set in the sugar for long enough, it gets added to the rum pot and covered with about an inch of rum.

Here are the strawberries and cherries in the pot. They went in together, and took almost a whole bottle of rum. That’s fine as it wont take too much more rum when the rest of the fruit gets added. You can also see a bunch of sugar on the bottom of the pot. If this happens, try to stir it in gently. You might have to let it sit for a while (a few days) and try stirring it in again. You should really try to keep the fruit completely submerged in the rum. You can use a plate to do this. Just make sure that the jar is completely sealed. I covered the lid with plastic wrap and put a rubber band around the neck of the jar. Then the jar should be stored in a cool dark place. A basement is great for this, but a fridge will do.

Step 5: Add More Fruit
Later in the season I had added raspberries, peaches (pitted, skins on) and pears (peeled and cored).

Pineapple was the last thing I added to my batch (so I sampled a little bit). I did this in October and left it to sit until I was ready to package it up for gifting. Traditionally you would start sampling the Rumtopf at the start of Advent and it would be served for the first time on Christmas.
If you decide to make the whole batch at once, I suggest you start in October. It really needs to sit for a couple of months for all of the flavors to come together. Instead of making one big jar and splitting it up, you could also start with a bunch of individual jars.

Step 6: Make Gifts
Here you can see the little Christmas tree jars that we gave as gifts. A canning funnel is a key piece of equipment for this operation. I took all of the fruit out of the big jar and tried to layer them in the little ones to make sure everyone got a bit of each of the fruits. Next, I topped each jar off with the liquid, and made sure they were sealed properly.
Enjoy the Extra
If you are not giving this away (or have extra… which you will), you can put the fruit on cake or ice cream, or use it to spike punches. I have plans to make a cheesecake and use it for the topping. I haven’t done it yet because I can’t bring myself to eat half a cheesecake by myself. The fruit stores well in the freezer, and the liquid can be strained and put into a decanter. Then you can drink it like a cordial.

The batch I made had a lot of the liquid left over, and I think it was because of how I packed the jars to give them away. It took a lot of fruit and not much liquid. This was how much liquid I had leftover, and thankfully I had the decanters to store it in.
I hope everyone has enjoyed this how-to, maybe some of you will get adventurous and try making some for next Christmas.

This year my creative juices have been flowing and I have wanted to come up with more interesting holiday gifts that are thoughtful, cute, and inexpensive. Some I have made in previous years, others I discovered on Pinterest. Here is my list of easy Holiday gifts.
Disclaimer: To any of my friends and family reading this – do not be shocked if you get any of these gifts for Christmas. Do not read ahead if you want your gift (and its cost) to be a surprise! Heehee.
Twelve isn’t enough last minute gift ideas for you? Well, I also love this easy and beautiful monogrammed jewelry box (and it only cost $1!) from The DIY Village!
1. Candy Cane Infused Vodka

This is probably the quickest and easiest idea, but slightly more expensive because of the cost of the vodka. We had a bottle of untouched Smirnoff Vodka that someone had given us and a bunch of mini candy canes that bought for our Advent calendar but found that most were broken when we got home. I dumped a bunch of broken candy canes into the vodka and let it sit overnight. The candy canes immediately began to dissolve and tinted the vodka red. I kept adding candy canes until the vodka looked more red than pink. Unlike the Skittle infused vodka you may see on the web, you do NOT need to strain the infused vodka because the candy canes completely dissolve. You will want to infuse the vodka in an air tight container. I used the original bottle and made sure the cap was on very tight. Once all the candy is dissolved, I put it in a Ball glass jar and made a label to add an extra special personal touch.
2. Home-made Hot Chocolate

I had never made this before but had often seen it floating around the schools as teacher gifts from crafty moms – very cute and always appreciated. This year, I decided to make homemade hot chocolate because it goes great with the Candy cane vodka (1 ounce of vodka per cup of cocoa) and I plan to give the pair to my cousin! I used Alton Brown’s recipe from the Food network (shown below) because I thought the cayenne pepper added a unique twist. You can reduce the recipe and layer the mix in a jar, topping with marshmallows for a more creative look.
Ingredients:
- 2 cups powdered sugar
- 1 cup cocoa (Dutch-process preferred)
- 2 1/2 cups powdered milk
- 1 teaspoon salt
- 2 teaspoons cornstarch
- 1 pinch cayenne pepper, or more to taste
- Hot water
Directions:
Combine all ingredients in a mixing bowl and incorporate evenly. In a small pot, heat 4 to 6 cups of water.
Fill your mug half full with the mixture and pour in hot water. Stir to combine. Seal the rest in an airtight container, keeps indefinitely in the pantry. This also works great with warm milk.
3. Home Made Cookies or Cookie Dough

Last year I made cookies and bread and gave them to neighbors. This year, while perusing Pinterest, I saw a tip to make your own cookie dough ahead of time, roll in plastic wrap, and freeze. What a great idea rather than using store bought refrigerated dough! This year, I have made Reindeer Peanut butter, Chocolate Mint, and Sugar cookie pinwheel cookies.
Check out my earlier post on making and freezing cookie dough, wrapping cookies using old Pringles cans, and my mother’s secret Chocolate mint cookies!
4. Reindeer Beer, aka Rein-beer

So easy and a great guy gift! Buy your favorite beer, add pipe cleaners, eyes, a red pom pom and DONE! Thanks to Interior Design Musings via Pinterest for the idea!
5. Hand-Made Bottle Opener

Not long ago, Ethan wrote a post on making a rugged bottle opener and it was very impressive. This is probably one of the more difficult gifts to make and includes more than just your hot glue gun, but it is by far my favorite guy gift! Check out his post for detailed instructions to make your own.
6. Homemade Sock Monkey

This is a great gift idea for kids not only for the holidays but a wonderful baby shower gift. Overall, it was simple, even for a novice sewer like me, but a bigger time commitment than some of the other gift ideas. One sock monkey cost about $3 – 4, mainly depending on the cost of the socks. Check out how to make one of you own!
7. Decorative Peg board

This is another very simple idea and so unique – a great gift idea for your fellow crafter. It’s a great way to organize your crafting tools while improving the look of your space. Take an old frame or find one at the local GoodWill and remove the backing and glass. Feel free to spray paint the frame to make it more colorful or exciting depending on your gift recipient, maybe kelly green or silver. Take the glass out of the frame and use it to trace an outline on the peg board. Use a jig saw (or get creative) to cut the outline. You can leave the peg board as is, or you can paint it to match the frame or a complimentary color. Put the peg board into your frame and affix hooks. Might be fun to add a few crafting tools to bulk up the gift.
8. Framed Earring Holder

This is a very similar idea to the Decorative Peg board but instead of peg board use chicken wire. My cousin, Naomi made one of these and it is super cute! You can use varying size, color, and type of ornamentation for the frame depending on the recipient. This also does not require power tools, just wire cutters to cut the chicken wire.
9. Chalkboard Mug or Wine Glass

This is a cheap and easy gift to give along with your homemade hot chocolate or candy cane infused vodka! You can buy chalk board paint at your local craft store or Lowes for about $10/pint, or you can make your own. A big bonus to making your own paint is that you can make your chalk board any color you want, not just black! I got this recipe from The Idea Room – all you need is 1 cup of latex paint and 2 tablespoons of unsanded grout.

I used leftover paint and grout from previous home projects, and bought a mug from Walmart for $1.48. Keep in mind, if the grout you are using is colored it may slightly affect the color of your paint, so for best results use white unsanded grout.
When mixing the paint with the unsanded grout use a whisk to unsure that it is fully mixed. I would recommend using a sifter to make sure your grout is a fine powder and will therefore not leave lumps of grout on your project. You will likely need multiple cots of paint but make sure each coat is completely dry before applying another coat or the paint may peel.
10. Jezebel Sauce

This is another one of my cousin, Naomi’s favorite holiday gifts to give. She was given this recipe by a friend, and we are unsure of the origin, but it is called Jezebel sauce because it’s just so enticing (wink, wink). It is a sweet sauce with a little kick and spice that goes great with ham, turkey, pork, and cheese. It is also relatively inexpensive to make depending on the brand of ingredients you buy. You used mostly store brands, so one batch (about 4-6 gifts jars) cost around $4.
Ingredients:
16 oz. pineapple preserves
16 oz. apple jelly
3 oz. horseradish sauce
3.5 oz. prepared mustard (not dry mustard)
Directions:
Mix all ingredients together using hand mixer or Kitchen Aide. Let sit overnight in fridge, covered. Mix once more then put into decorative jars. Refrigerate unless using canning method. If you do not have decorative jars, you can use the jelly and preserves jars but since these are larger cans, your sauce will not go as far. Also, when buying your ingredients, you may not be able to find 16 oz. jars of apple jelly and pineapple preserves so feel free to adjust the proportions as needed.
11. Beer Bread

When I told my sister, Erin I was writing this post, she was delighted to share with me her special recipe for Beer Bread. She has bought Tastefully Simple beer bread several times and loved it, but at $6 per loaf it was more money than she wanted to spend. So, she attempted to re-create the bread from home and after a couple attempts her bread exceeds Tastefully Simple! She made it for Thanksgiving and stole all the leftovers for myself.
If giving the bread prepared as gifts, it is a great idea to use mini-loaf pans (I love the Pampered Chef Mini Loaf Pan) and Holiday gift bags that you can buy a Target or Walmart for a dollar or two. Also, you can use ginger ale instead of beer if you want it to be more kid-friendly. Or you can give the bread mix as a gift, using jars or decorative bags.
Erin’s Beer Bread

Dry Mix ingredients:
- 3 cups all purpose flour
- 4.5 tsp baking powder
- 1.5 tsp salt
- 1/3 cup brown sugar
- 1/2 tsp onion powder
- 1 tsp garlic powder
- 1 tsp italian seasoning
Wet ingredients:
- 12oz beer or ginger ale
- 1/4 cup melted butter (not margarine)
Directions:
Preheat oven to 375 degrees F (190 degrees C). Lightly grease a 9×5 inch baking pan. In a bowl, mix all dry ingredients. package for gifting or to prepare. Pour in the beer, and mix just until moistened. Transfer to the prepared baking pan. Top with the melted butter. Bake 45 to 55 minutes in the preheated oven, until a toothpick inserted in the center comes out clean. Cool on a wire rack.
12. Oven-baked Clay Ornaments

Oven-baked ornaments and gifts tags are a way to personalize and dress up your presents for your loved ones. We made them this year and it was fun for the little kids too! I bought White oven-bake clay at Walmart for about $6 for a good sized amount. Check out my earlier post on how to make your own clay ornaments and gift tags.
What are your favorite homemade holiday gifts?
About a month ago, I did a circ saw blade comparison, and it caused a little bit of a stir. DeWalt immediately arranged for a phone call to discuss their latest modifications and Bosch eagerly jumped into the ring with their Daredevil blade. Now that I’ve covered myself in sawdust twice, here’s how things stack up.

DeWalt Framing Blade
On my phone call with DeWalt they walked me through several features that they think makes their blade the best available. We talked about tooth geometry, proprietary carbide, vibration dampening resin, and more. Out of all the new changes, DeWalt is most excited about the new plate design.
When you cut with a circular saw, the friction creates a lot of heat and the blade actually expands. This can cause the blade to become warped. To counteract this, manufacturers often include expansion slots to dissipate the heat. Some manufacturers even work to raise the melting point of the metal so the blade remains flat and cuts true. If you’ve ever used a saw and feel like the blade is wobbling, odds are the blade has become warped. DeWalt is so energized because they boast their plate design can handle the heat better than anyone else resulting in a better feel of cut for the user.
DeWalt shared another interesting piece of information during our phone call. They revealed that the initial manufacturer sample lot (MSL) showed problems with the resin. I noted in my first comparison that the resin didn’t last long, and that’s because I reviewed a blade from the MSL. The resin on new blades is expected to last around a 100 cuts.

The Results

What does DeWalt mean when they their blade provides a better feel of cut? They’re basically saying that it takes less force to go through a material. Since that’s where DeWalt hangs their hat, that’s where I focused this second round of blade comparisons.
I grabbed a Marathon Weldtec (Irwin’s newest blade), a Freud Diablo, Bosch’s Daredevil and DeWalt’s new framing blade. Each is a 7-1/4″, 24T blade and I started cross cutting a 2 x 10. All together I estimate cutting about 25′ with each blade. Once I was finished, I was covered in sawdust, had a huge mess to clean up, and knew that the DeWalt outperformed the competition for the best feel of cut. I have no problem bashing DeWalt’s blade so you should know that I’m not BS’ing here. There really was a noticeable difference. Second place was a close tie between Bosch and Freud while Irwin brought up the rear.
Again, this second round of testing only measured feel of cut, however there are lots of characteristic to consider when purchasing a blade like staying sharp, longer life, clean cuts, and price tag. There was a brief discussion about re-sharpening carbide tips in the other blade comparison. It’s a valid point, but no one I’ve spoken to has actually ever taken the time.
A few weeks ago, Pop Sci compared the same Bosch and DeWalt circ saw blades to see which one could go longer. Their test involved asphalt shingle sandwiches. Check out their top pick here.
